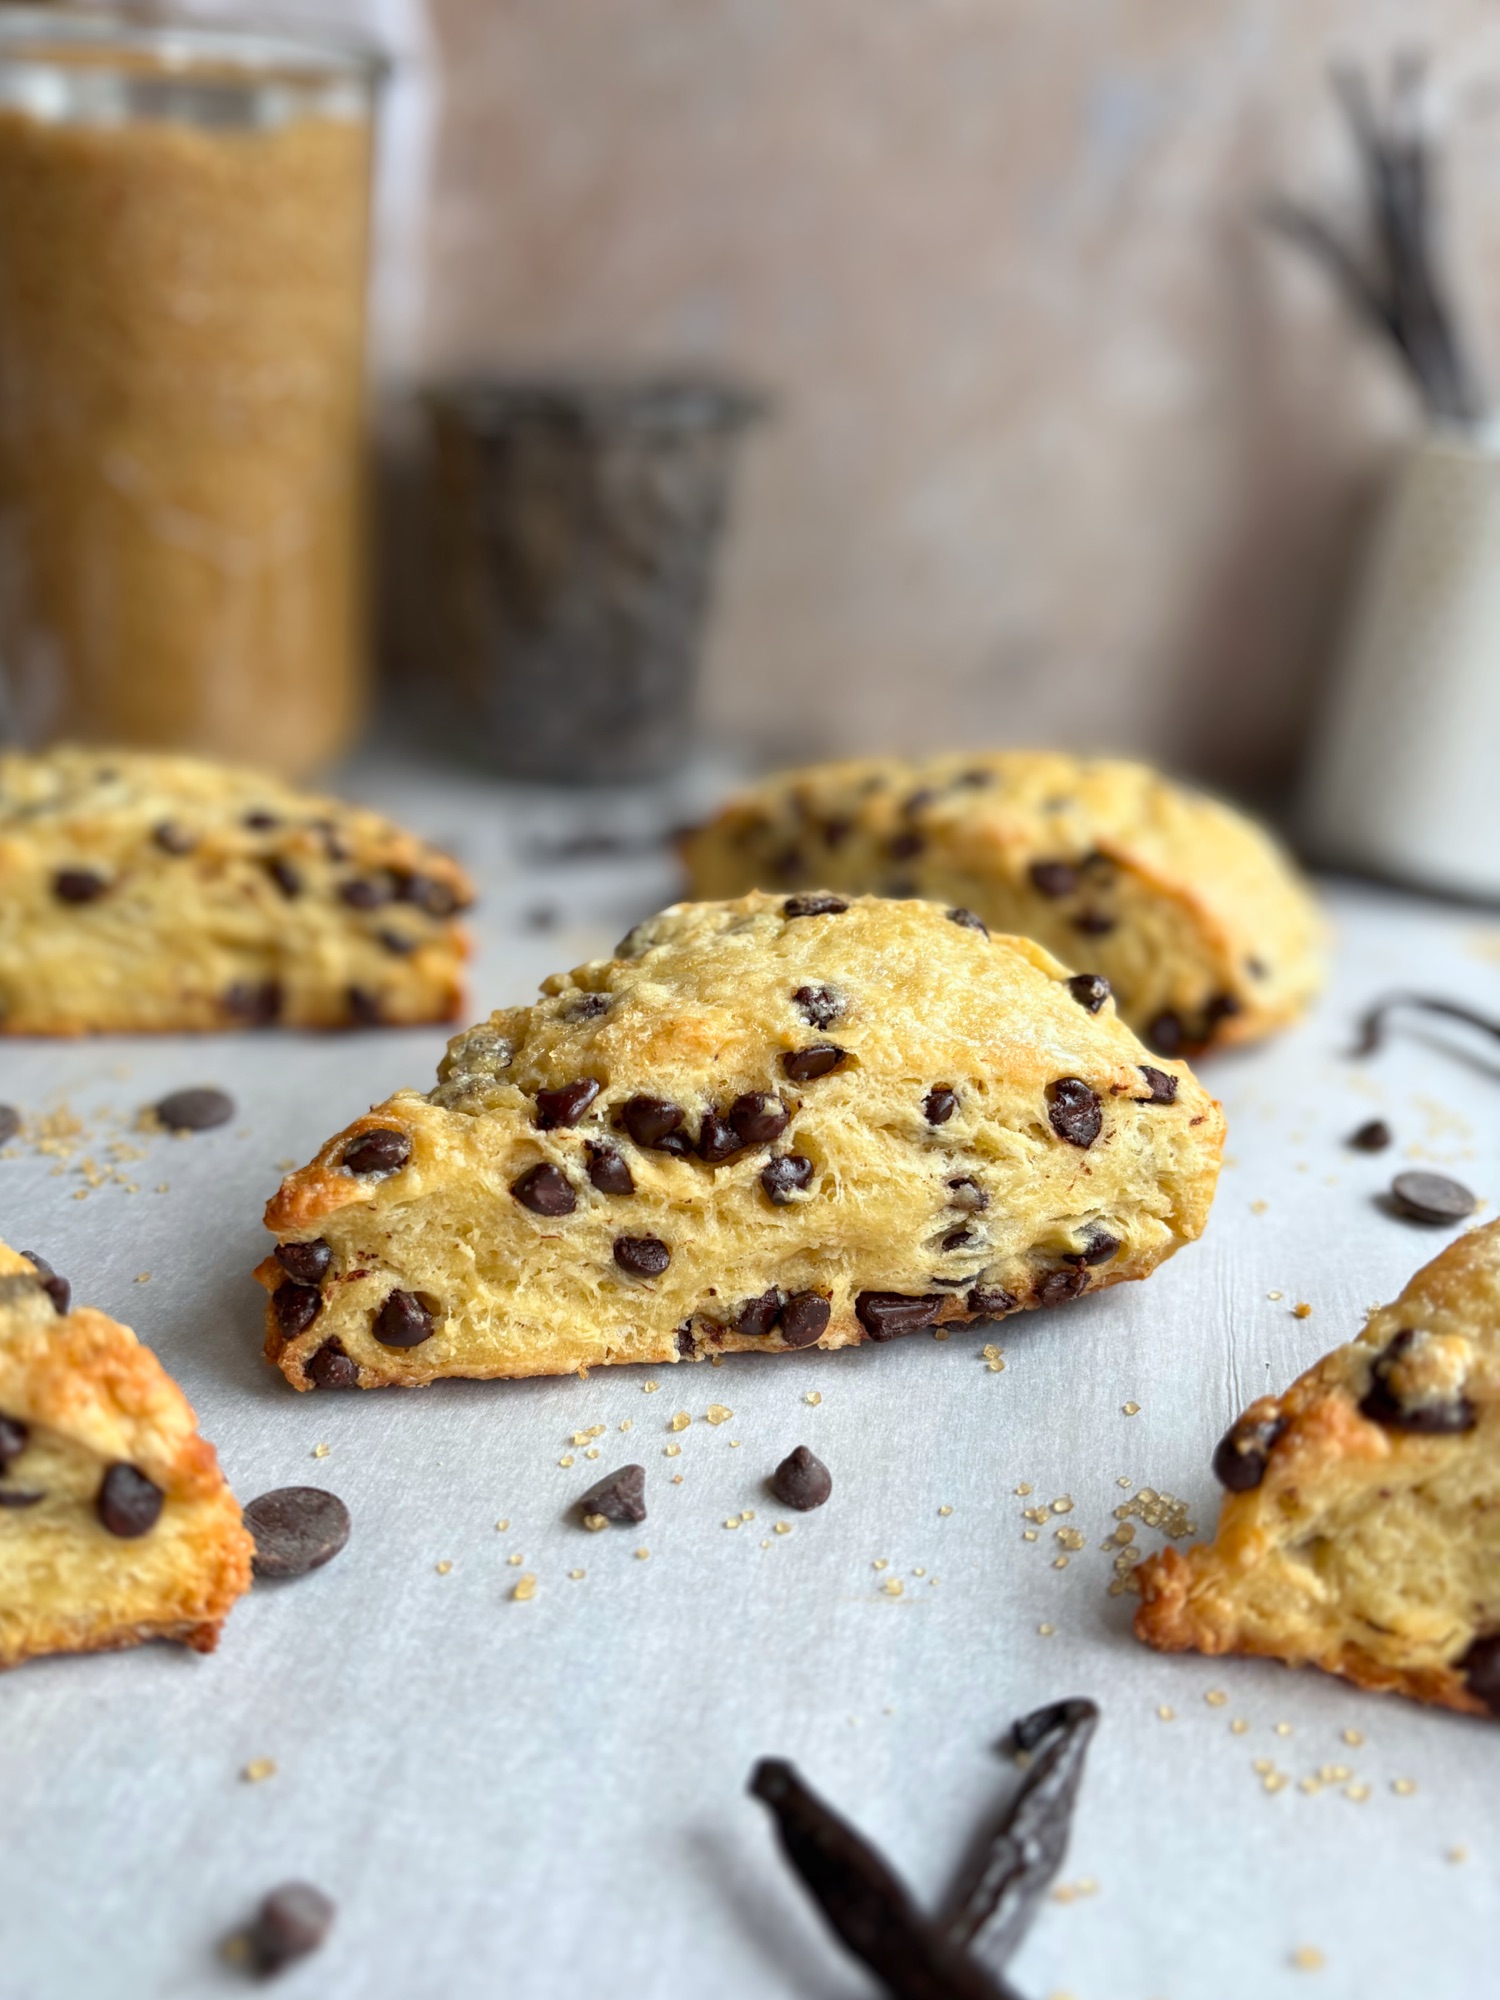
These high protein chocolate chip scones deliver everything you crave about a bakery style scone (flaky layers, tender crumb, pockets of melty chocolate) with 9 to 12 grams of protein per scone and way less sugar and fat than traditional recipes. The secret ingredient? Cottage cheese. And no, you cannot taste it. At all.
Each scone tastes like biting into a chocolate chip cookie but with the satisfying texture of a proper scone. The cottage cheese keeps them incredibly moist and adds serious protein without any weird texture or funky flavor. Meanwhile, the overnight cold fermentation develops complex flavor that makes these taste gourmet.
This is the kind of breakfast (or afternoon snack, let’s be real) that actually keeps you full until lunch. No 10am snack attacks. No regrets. Just really good scones that happen to be better for you.
Jump to Section
- Why Cottage Cheese Works in Scones
- The Protein Advantage
- Why Cold Ferment These Scones
- Which Cottage Cheese Brand to Use
- Mini Chocolate Chips vs Regular
- I Don’t Have Sourdough, What Do I Use?
- How to Store and Reheat
- Can You Freeze These Scones?
- Tips for Perfect Scones Every Time
- Frequently Asked Questions
- Can You Skip Pureeing the Cottage Cheese?
- More High Protein Scone Recipes

High-Protein Chocolate Chip Scones | Cottage Cheese Recipe
Equipment
- Blender or food processor
- Large mixing bowl
- medium mixing bowl
- Box Grater
- Whisk
- Rubber spatula
- Baking sheet
- Parchment paper
- Sharp knife or bench scraper
- plastic wrap
- Instant-read thermometer (optional but recommended)
Ingredients
WET INGREDIENTS (prepare first)
- 200 grams cottage cheese about 3/4 cup, full fat, high protein, pureed optional (see notes)
- 100 grams sourdough discard or active sourdough starter 1/3 cup plus 1 tablespoon, cold from refrigerator
- 1 large egg cold
- 5 grams vanilla extract 1 teaspoon
DRY INGREDIENTS
- 300 grams all purpose flour 2 and 1/2 cups, spooned and leveled
- 60 grams granulated sugar 1/3 cup
- 10 grams baking powder 2 teaspoons
- 3 grams baking soda 1/2 teaspoon
- 3 grams salt 1/2 teaspoon
FAT
- 56 grams unsalted butter 4 tablespoons or 1/2 stick, very cold, frozen for 15 minutes before grating
ADD-INS
- 130 grams mini chocolate chips about 3/4 cup
OPTIONAL TOPPINGS
- 30 grams heavy cream 2 tablespoons, for brushing
- 15 grams turbinado sugar or coarse sugar 1 tablespoon, for sprinkling
Instructions
DAY 1 EVENING OR MORNING (mixing and shaping)
- In a large mixing bowl, whisk together the flour, sugar, baking powder, baking soda, and salt until thoroughly combined.
- Using a box grater, grate the cold butter (straight from the refrigerator) directly into the dry ingredients using the large holes of the grater. Toss the grated butter with the flour mixture using your hands or a fork until all the butter pieces are coated with flour.
- Place the entire bowl with the flour and butter mixture into the freezer for 10 to 15 minutes.
- While the bowl is in the freezer, prepare your wet ingredients using ONE of the two methods below:
- METHOD 1 PUREED (guaranteed smooth, no cottage cheese visible): Add cottage cheese to blender or food processor. Blend for 30 to 60 seconds until completely smooth with no lumps remaining. Add the cold egg, sourdough starter, and vanilla extract to the blended cottage cheese. Pulse briefly for 10 to 20 seconds just until combined. Do not over-process the egg. Set aside.
- METHOD 2 WHISKED (you will see cottage cheese chunks in the raw dough): In a medium bowl, whisk together the cottage cheese, cold egg, sourdough starter, and vanilla extract until combined. You WILL see visible cottage cheese chunks in the raw dough. With small curd brands like Nancy’s or Good Culture, these chunks melt completely during baking and disappear. With larger curd brands like Daisy or Organic Valley, some chunks may remain visible after baking. Set aside.
- Remove the bowl from the freezer. Pour the wet ingredients (prepared by either method) over the cold flour and butter mixture. Using a rubber spatula, begin folding gently. When the dough is about halfway mixed together, add the mini chocolate chips and continue folding until a shaggy, wet looking dough forms. The dough will look very wet and clumpy. Do not add more flour. Resist the urge to overmix. If the dough feels too dry and is not coming together, you may add 1 tablespoon of heavy cream or milk at a time until it comes together.
- Turn the dough onto a lightly floured surface. Pat the dough into a rough rectangle, then fold it in thirds like a letter. Rotate the dough 90 degrees and repeat. Continue this pat-and-fold process 4 to 6 times total. The dough will become more cohesive with each fold but will still look wetter than traditional scone dough.
- Shape the dough into a ball, then pat or press into an 8 inch round disc about 1 inch thick.
- My favorite shaping method: Line a round 8 inch cake pan with plastic wrap. Press the dough into the lined pan to form an even 8 inch disc about 1 inch thick.

- Wrap the disc well in plastic wrap and place in the refrigerator for 8 to 14 hours to cold ferment. This develops complex sourdough flavor and improves digestibility.
DAY 2 MORNING OR AFTERNOON (cutting, freezing, and baking)
- Remove the wrapped dough disc from the refrigerator and unwrap. Place on a cutting board.
- Using a sharp knife, cut the disc in half, then cut each half in half again to create 4 wedges. For 8 smaller scones (9g protein each), cut each of those wedges in half to create 8 total wedges. For 6 larger scones (12g protein each), leave as 4 wedges then cut 2 of the wedges in half to create 6 total. Use straight up and down cuts without twisting the knife. A sharp knife is preferred over a bench scraper as it does not compress the sides.

- Transfer the cut scones to a parchment lined tray or, arranging them close together but not touching. Wrap with plastic wrap or cover with a lid. Place the baking sheet in the freezer for a minimum of 30 minutes. One hour is preferred. This step is critical for preventing spread and creating flaky layers.
- Alternatively, at this point you can freeze the cut scones solid (about 2 to 3 hours), then transfer to an airtight freezer bag and store for 3 to 4 weeks. Bake directly from frozen when ready.
- When ready to bake, preheat the oven to 425 degrees Fahrenheit. Position the oven rack in the center position.
- Optional: Brush the tops of the frozen scones with heavy cream and sprinkle with turbinado sugar for a bakery-style finish.

- Place the scones on a parchment lined baking sheet.
- Bake the scones directly from freezer (do not thaw). Bake at 425 degrees Fahrenheit for 5 minutes to set the exterior and prevent spreading.
- After 5 minutes, reduce the oven temperature to 375 degrees Fahrenheit without opening the oven door. Continue baking for an additional 15 to 20 minutes for 8 smaller scones, or 18 to 23 minutes for 6 larger scones, until the scones are deeply golden brown on top and bottom and the internal temperature reaches 200 degrees Fahrenheit when tested with an instant read thermometer.
- Remove from the oven and let cool on the baking sheet for 5 minutes before transferring to a wire rack. The scones will firm up as they cool slightly.
- Serve warm or at room temperature. The scones are delicious plain or with butter. The chocolate chips will be melty if served warm.
ALTERNATIVE SINGLE-TEMPERATURE BAKING METHOD
- If you prefer to use a single oven temperature instead of the two-temperature method, bake at 400 degrees Fahrenheit for 22 to 25 minutes for 8 smaller scones, or 25 to 28 minutes for 6 larger scones. This will result in slightly less dramatic rise and may increase spreading slightly, but will still produce excellent scones. The higher initial temperature of 425 degrees Fahrenheit sets the exterior faster and creates maximum rise, which is why it is the recommended method for high-hydration doughs.
Notes
Why Cottage Cheese Works in Scones
Traditional scones rely heavily on butter and cream for moisture and richness. A typical coffee shop scone clocks in at 400+ calories with 20+ grams of fat and maybe 4 grams of protein if you’re lucky.
Cottage cheese flips that ratio. When blended smooth and mixed into scone dough, it provides moisture, fat, and protein in one ingredient. The result is a scone that is tender, not dense. Moist, not dry. And protein-packed without tasting “healthy.”
The cottage cheese melts seamlessly into the dough during baking. You will not taste cottage cheese in the finished scone. What you will taste is a buttery, chocolatey scone with an incredibly tender crumb that stays fresh longer than butter-only scones.
Each scone delivers 9 to 12 grams of protein (depending on whether you cut 6 or 8 scones) from the cottage cheese, egg, and flour combined. Compare that to most protein bars (which taste like cardboard) and you’ll understand why these scones are about to become your new breakfast staple.

The Protein Advantage
Let’s talk numbers. A standard bakery scone has about 4 to 6 grams of protein. These cottage cheese scones pack 9 to 12 grams of protein per scone depending on how you cut them (more than double what you’d get from a traditional recipe).
That protein comes from real food sources, not protein powder or weird additives. The cottage cheese provides the bulk of it, with additional protein from the egg and flour. If you use a high-protein cottage cheese brand like Good Culture or Nancy’s, you’ll hit the higher end of that range. Cut the dough into 6 larger scones instead of 8 and you’ll get a full 12 grams of protein per scone.
Why does protein matter? It keeps you satisfied longer. Protein slows digestion, which means you’ll feel full through mid-morning instead of hunting for snacks an hour after breakfast. For anyone trying to eat healthier in the new year without giving up the foods they actually enjoy, these scones are the perfect solution.
Plus, starting your day with protein helps stabilize blood sugar levels. No more mid-morning energy crashes or brain fog. Just steady energy to power through your morning.

Why Cold Ferment These Scones
The overnight cold fermentation is what takes these scones from good to exceptional. Here’s what happens during those 12 to 24 hours in the refrigerator.
First, the sourdough starter (or discard) works its magic. The natural cultures develop complex flavor notes that you simply cannot get from a quick-mix scone. The result is a more nuanced, interesting flavor profile that tastes professional.
Second, the gluten relaxes. This makes the dough easier to handle and contributes to a more tender final texture. Cold fermentation breaks down some of the grain structure, which also improves digestibility. Anyone who feels bloated after eating bread products will appreciate this benefit.
Third, flavor concentrates. Time allows all the ingredients to meld together. The vanilla becomes more pronounced. The chocolate flavor deepens. Everything just tastes better.
The best part? Cold fermentation is completely hands-off. You mix the dough one evening, shape it, pop it in the fridge, and forget about it until morning. When you wake up, you’re 30 minutes away from fresh-baked scones. That’s what I call meal prep.

Which Cottage Cheese Brand to Use
Not all cottage cheese is created equal. The brand you choose significantly impacts the final texture of your scones. Here’s what you need to know.
Thicker cottage cheese brands (Good Culture, Nancy’s): These are ideal. They have less excess liquid and higher protein content (13 to 14 grams per half cup). With these brands, you can simply pour off any pooled liquid on top and you’re good to go. No need to drain for 15 minutes.
Wetter cottage cheese brands (Daisy, Organic Valley): These contain more whey and less structural protein. They’re perfectly fine to use, but you must drain them for 15 minutes in a fine-mesh strainer before using. This removes the excess liquid that would otherwise make your dough too wet and sticky.
How to tell if yours needs draining: Open the container and look. If there’s a lot of visible liquid pooling on top, or if the curds look very loose and soupy, drain it. If the cottage cheese looks thick and holds together, just pour off any liquid on top.
Fat content matters less than you’d think. Both full-fat and 2% cottage cheese work in this recipe. The protein content is more important than the fat percentage. Always check the nutrition label and aim for 13 to 14 grams of protein per half cup.
The bottom line is simple. Use high protein cottage cheese for best results. If your cottage cheese seems watery, drain it. If it’s thick, you’re golden.

Mini Chocolate Chips vs Regular
I strongly recommend mini chocolate chips for this recipe. Here’s why.
Mini chips distribute more evenly throughout the dough. Every bite gets chocolate, not just the bites where a big chip happened to land. This creates a more consistent chocolate chip cookie experience in every single scone.
Mini chips also sink less in high-moisture doughs. Regular chocolate chips are heavier and have a tendency to sink toward the bottom as the scones bake. Mini chips stay suspended better, which means you get chocolate throughout the scone instead of just on the bottom.
That said, you can absolutely use regular chocolate chips if that’s what you have. The scones will still be delicious. You’ll just want to increase the amount to 150 to 170 grams to compensate for fewer chips per bite. And be prepared for slightly less even distribution.

I Don’t Have Sourdough, What Do I Use?
This recipe is designed to use sourdough starter or discard, but I understand not everyone keeps a starter. Here’s how to adapt the recipe if you don’t have sourdough on hand.
The substitution: Replace the 100 grams of sourdough discard with 50 grams of buttermilk plus 50 grams of additional all-purpose flour. (Greek yogurt also works as an alternative to buttermilk.)
Why this works: Sourdough discard is approximately 50% flour and 50% water (if you maintain a 100% hydration starter). By adding 50 grams of buttermilk and 50 grams of flour, you’re replacing both the flour component and the liquid component while maintaining similar acidity.
Leavening adjustment: Without sourdough, you’ll need slightly more chemical leavening. Use 2.5 teaspoons of baking powder instead of 2 teaspoons. Keep the half teaspoon of baking soda, as the buttermilk provides enough acidity to activate it.
What changes: You’ll lose the complex flavor development from overnight fermentation since buttermilk doesn’t contain the same active cultures. The scones will still be delicious, but they’ll taste more straightforward.
Fermentation note: If using the buttermilk substitution, you can skip the overnight cold fermentation and bake the scones the same day. Or you can still refrigerate overnight for easier handling and slightly better texture.
Results may vary. I haven’t personally tested every possible substitution, so consider this a starting point. The ratios should work based on standard baking principles, but your mileage may vary depending on your specific buttermilk or yogurt brand and flour.
How to Store and Reheat
Fresh baked scones are always best, but these store remarkably well thanks to the moisture from cottage cheese.
Room temperature storage: Keep baked scones in an airtight container at room temperature for up to 2 days. They’ll stay surprisingly moist. For the first 24 hours, you can even store them under a clean kitchen towel instead of a sealed container, which helps maintain the crisp exterior.
Refrigerator storage: Scones will keep in the fridge for up to 5 days in an airtight container. The cold can dry them out slightly, but a quick reheat brings them back to life.
How to reheat: The best method is a 350°F oven for 5 to 7 minutes. This refreshes the texture and makes them taste freshly baked. You can also use the microwave for 15 to 20 seconds if you’re in a hurry, though the texture won’t be quite as good. An air fryer works great too at 350°F for about 3 minutes.
Serving suggestion: These scones are delicious at room temperature, but warming them slightly makes the chocolate chips melty and brings out all the flavors. If you’re meal prepping breakfast for the week, just grab one from the fridge each morning and pop it in the toaster oven while you make coffee.

Can You Freeze These Scones?
Absolutely, and freezing actually works incredibly well for these scones. You have two options.
Option 1: Freeze unbaked scones. This is my preferred method. After shaping and cutting the scones, place them on a baking sheet and freeze until solid (about 2 hours). Then transfer to an airtight freezer bag or container. They’ll keep for 3 to 4 weeks for best quality. You can freeze them for up to 5 weeks, but after that point the rise and moisture start to decline noticeably.
To bake from frozen, do not thaw. Place frozen scones directly on a parchment lined baking sheet and bake as directed, adding 2 to 5 minutes to the baking time. The frozen butter creates even more steam in the oven, which actually improves the flaky texture. It’s a win-win.
Option 2: Freeze baked scones. Let scones cool completely, then store in a freezer safe container for up to 3 months. To serve, thaw overnight in the refrigerator, then reheat in a 350°F oven for 5 to 7 minutes.
Batch baking strategy: Make a double batch, freeze half unbaked, and you’ll have fresh scones ready to bake whenever you want them. It’s like having a bakery in your freezer.
Tips for Perfect Scones Every Time
After testing this recipe multiple times, here are the non-negotiable tips that make the difference between good scones and incredible scones.
Keep everything cold. Your butter should be cold from the refrigerator, your cottage cheese should come straight from the fridge, and your egg should be cold. After grating the cold butter and tossing it with the dry ingredients, freeze the entire bowl for 15 minutes before adding the wet ingredients. This ensures the butter stays cold throughout mixing. Cold ingredients are the secret to flaky scones. When cold butter hits a hot oven, it creates steam pockets that produce those gorgeous layers. (Note: Some bakers prefer to freeze the butter solid before grating, but I find grating cold butter easier on the hands and just as effective when you freeze the flour-butter mixture afterward.)
Don’t skip the freeze before baking. This is absolutely critical. After shaping your scones, they must go in the freezer for at least 30 minutes to 1 hour before baking. This firms up the butter and relaxes the gluten. Scones baked without this step will spread more and won’t rise as tall.
Use a scale for accuracy. Baking is chemistry. A kitchen scale eliminates variables and ensures consistent results every time. Measuring flour by volume can vary by 20 to 30 grams depending on how you scoop, which significantly impacts hydration.
Handle the dough gently. Overworking scone dough develops too much gluten, which makes tough, dense scones. Mix just until combined, pat gently, and resist the urge to keep kneading.
Cut straight down, don’t twist. When cutting your scones into wedges, use a sharp knife and cut straight down with one decisive motion. Twisting or sawing seals the edges and prevents proper rise.
Bake until deeply golden. Pale scones are underbaked scones. You want a rich golden brown color on top and bottom. This ensures the interior is fully cooked and develops the best flavor.
Let them cool slightly before serving. I know it’s tempting to dig in immediately, but give the scones 5 minutes on a wire rack. This allows the structure to set and prevents them from falling apart when you break them open.
Frequently Asked Questions
Can I taste the cottage cheese in these scones?
No. When cottage cheese is blended smooth and baked into the dough, it completely disappears flavor wise. What you’ll taste is a buttery, slightly sweet scone with chocolate chips. The cottage cheese contributes moisture and protein, but no cottage cheese flavor.
Can I use active sourdough starter instead of discard?
Yes, absolutely. In fact, active starter is preferred for this recipe because it provides better rise and more predictable fermentation. Use the same amount (100 grams) whether you’re using active starter or discard.
Why do these need to ferment overnight?
The cold fermentation develops complex flavor that you cannot get from quick mix scones. It also improves digestibility and creates a more tender texture. That said, if you’re in a rush, you can skip the overnight rest and bake the same day. The scones will still be good.
My dough seems really wet. Is that normal?
This is a high hydration dough compared to traditional scones, so it will look slightly wetter and shaggier than you might expect. The pat and fold technique helps bring it together, and the cottage cheese thickens significantly after mixing and blending everything together. The dough should be workable and shapeable. If your dough feels too dry, add a tablespoon of heavy cream. If it feels too wet and sticky, add a tablespoon of flour. However, in my testing, the recipe is properly balanced and you likely won’t need to adjust.
Can I make these dairy-free?
The cottage cheese is pretty essential to this recipe. You could experiment with non-dairy cottage cheese alternatives (they do exist now), but I haven’t tested it personally so I can’t guarantee results. The butter should be able to be replaced with vegan butter. But I haven’t tested it.
Can I add other mix-ins besides chocolate chips?
Definitely. Dried cranberries, chopped nuts, or other chocolate types (white chocolate, dark chocolate) would all work. Just keep the total amount of mix-ins to about 130 to 150 grams so they don’t weigh down the dough.
Why do the scones spread when I bake them?
This usually means your butter got too warm, you didn’t freeze the scones long enough before baking, or your oven temperature is too low. Make sure you’re following the freeze step and baking at 425°F initially to set the exterior quickly.
Can I double this recipe?
Absolutely. Just mix in two separate batches rather than trying to double everything in one giant bowl. Scone dough doesn’t scale up well in a single batch because it’s harder to keep everything cold while mixing.
Why 60 grams of sugar instead of more?
This recipe is designed to be a healthier option. At 60 grams of sugar for the whole batch (about 7.5 grams per scone), these have significantly less sugar than traditional scones while still tasting sweet enough thanks to the chocolate chips. If you want sweeter scones, you can increase to 75 grams, but know that extra sugar will affect the texture slightly.
Can You Skip Pureeing the Cottage Cheese?
Yes! If you’re using a thick, small curd cottage cheese like Nancy’s or Good Culture, you can absolutely skip the pureeing step.
I’ve made these scones multiple times without blending the cottage cheese at all. Just scoop the cottage cheese directly into your wet ingredients after pouring off any excess liquid, and mix it in with the egg, sourdough discard, and vanilla. The small curds stay visible in the dough until baked and then melt and disappear and bake up beautifully.
When you should still puree:
- If you’re using a brand with larger curds (like Daisy or Organic Valley or some store brands)
- If you prefer a completely smooth, uniform texture throughout
The bottom line: Pureeing makes the texture more uniform and helps ensure even distribution, but it’s completely optional if you’re working with small curd, thick cottage cheese. Both methods work beautifully, it just comes down to your personal preference!

More High Protein Scone Recipes
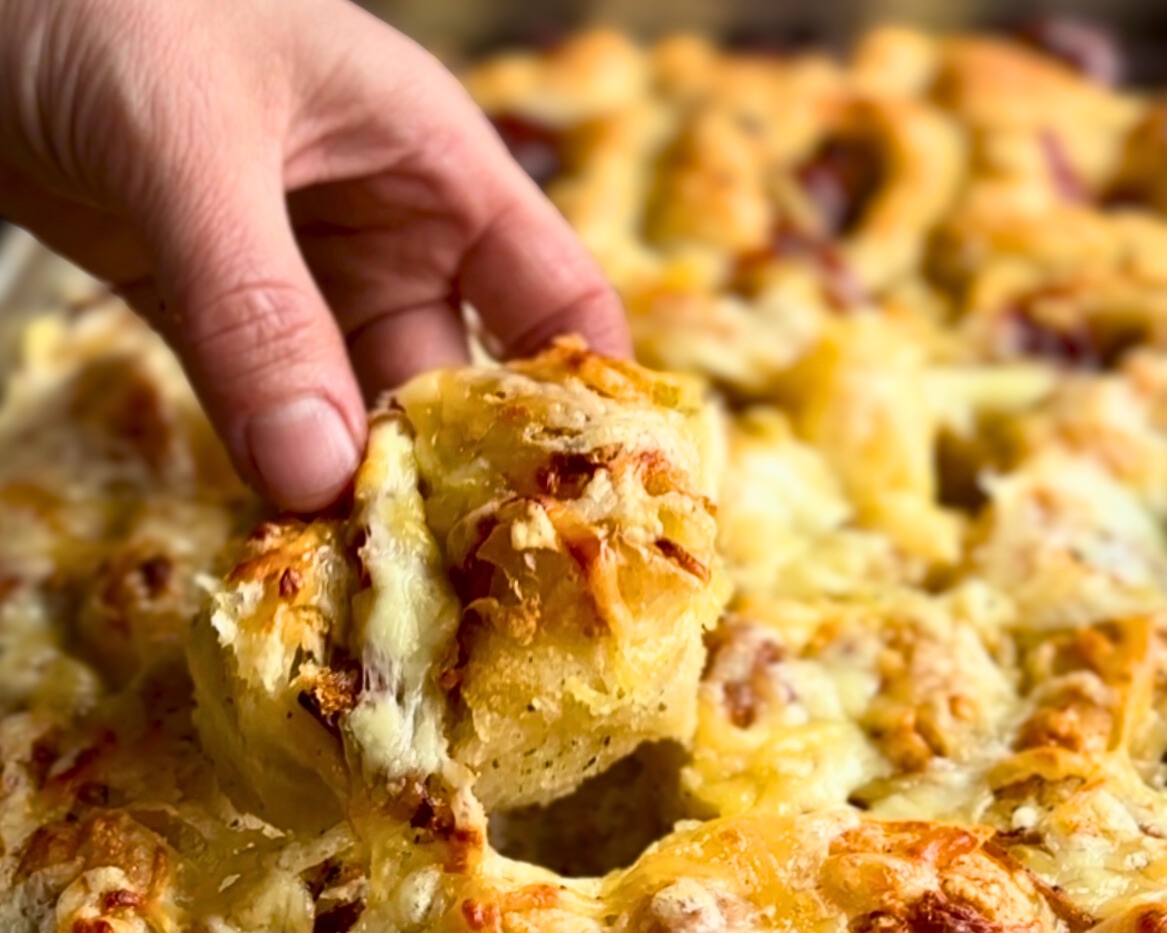
If you love these sweet chocolate chip scones, you have to try my friend Samantha’s Savory Rosemary Cheddar Scones (Greek Yogurt) over at Healing Slice! She’s using Greek yogurt as her high protein base and taking it in a completely different savory direction with sharp cheddar and fresh rosemary. They’re perfect for breakfast sandwiches, alongside soup, or really anytime you are craving a savory scone.
We had so much fun doing an Instagram Reel together and talking about how delicious these high-protein scones are!
– Samantha’s Rosemary Cheddar Greek Yogurt Scones
–My Savory Cottage Cheese Scone Recipe
Final Thoughts
These high protein chocolate chip cottage cheese scones are exactly what baking should look like. Healthier without tasting like a compromise. Satisfying without the guilt. Delicious without the crash an hour later.
The cottage cheese trick is a game changer. Once you see how well it works in scones, you’ll start experimenting with it in other baked goods. The cold fermentation adds complexity that makes these taste professional. And the chocolate chips? Well, chocolate chips make everything better.
Make a batch this weekend. Your future self (and your protein goals) will thank you.


Leave a Reply