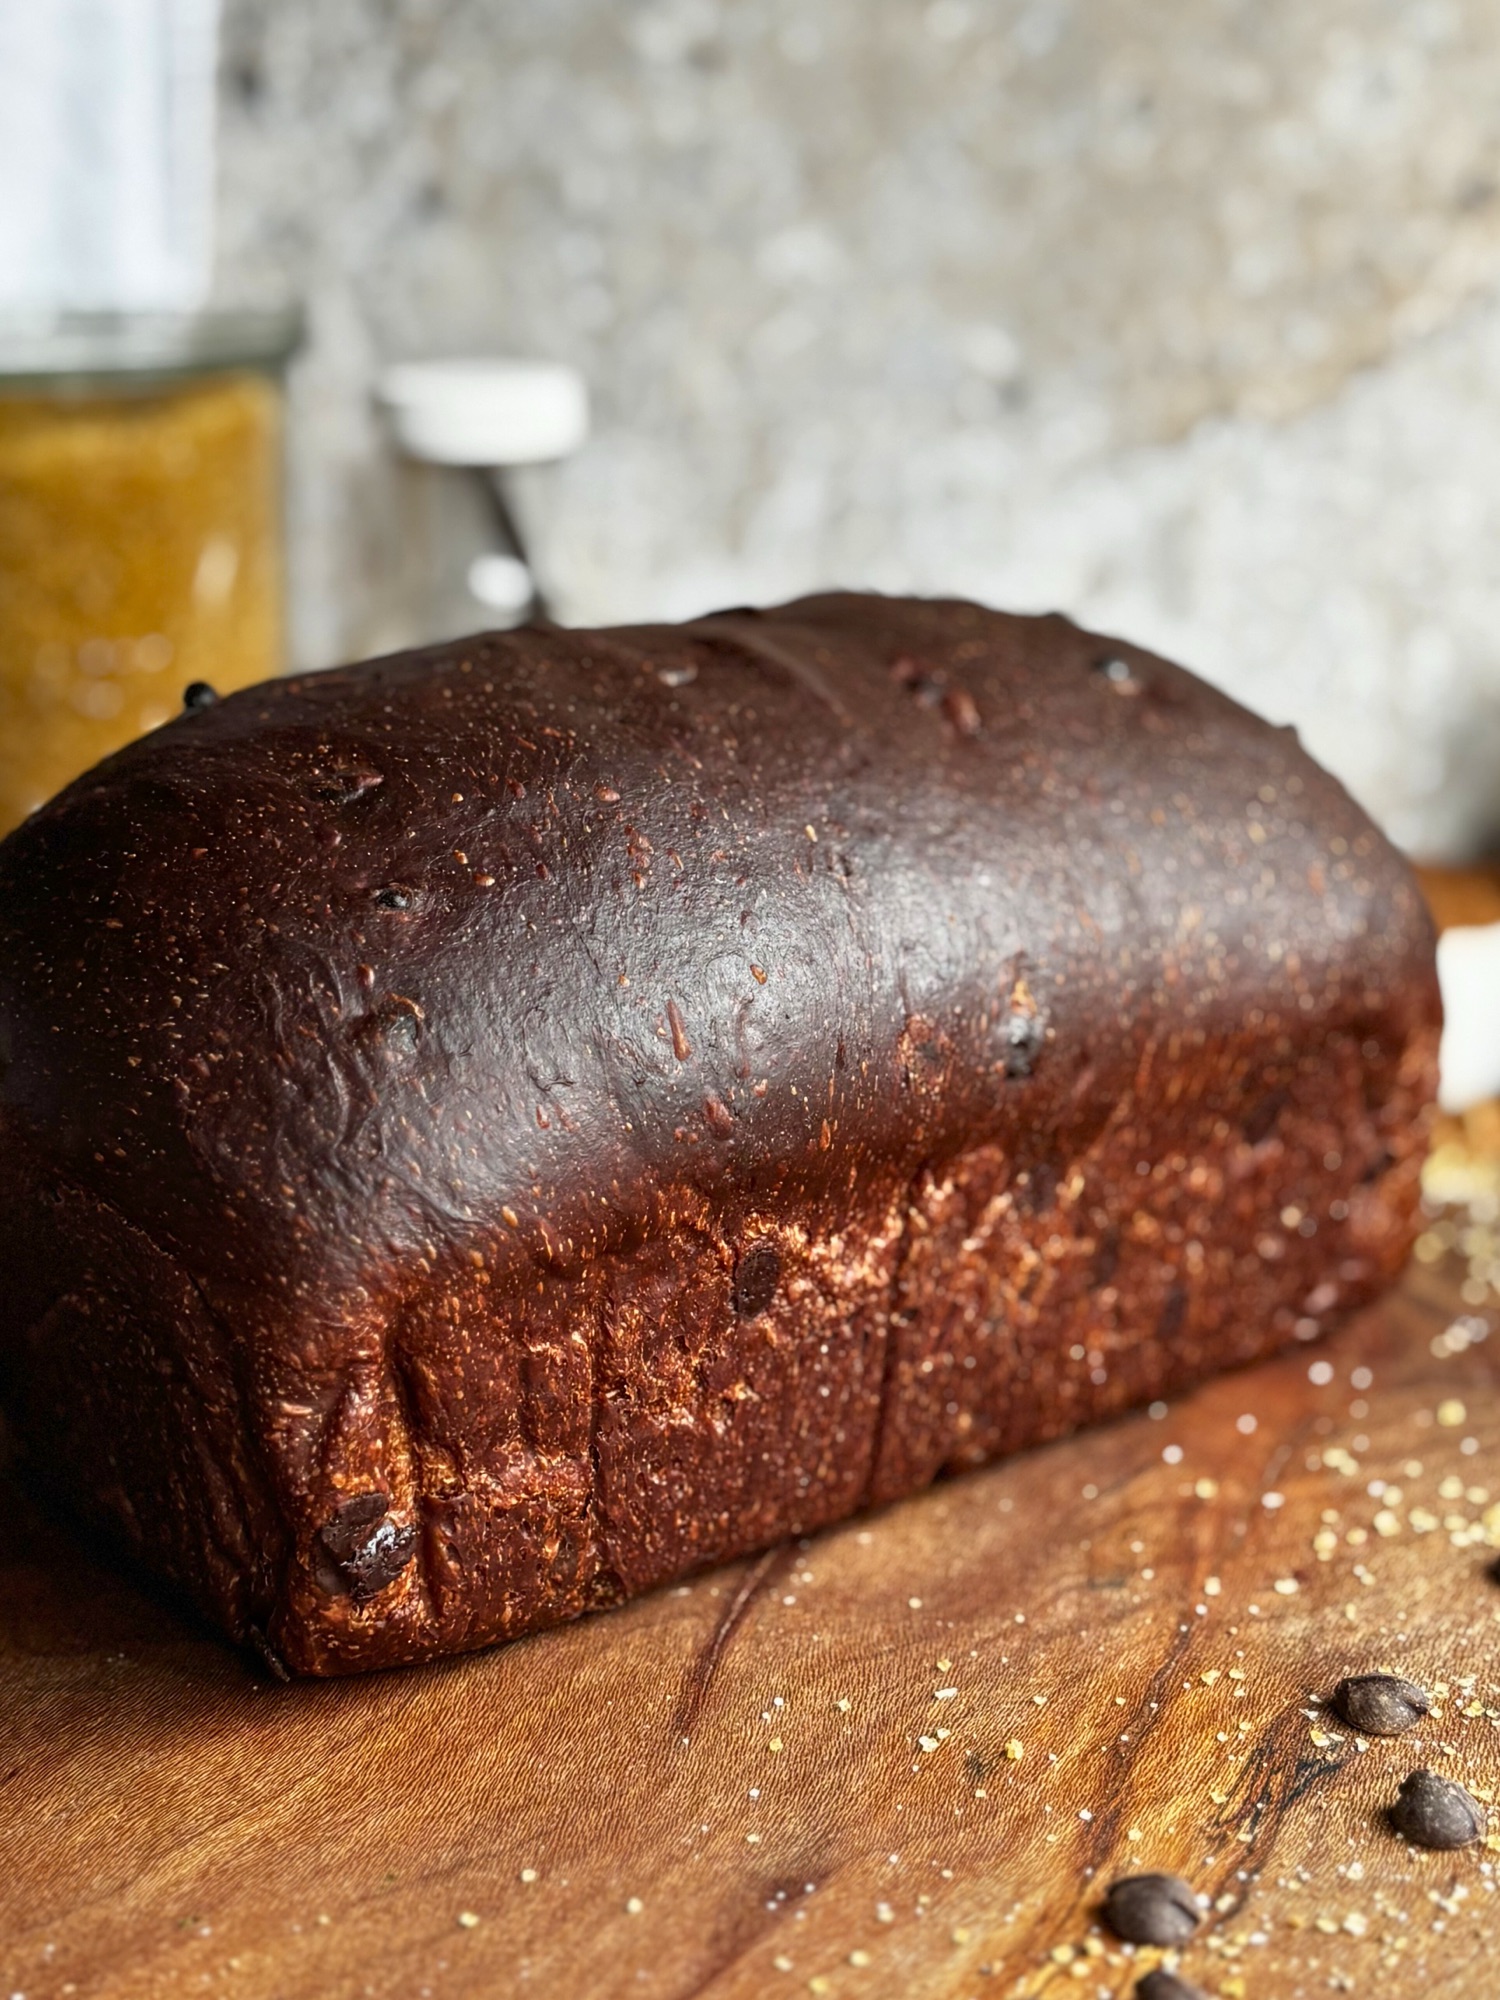
You know what this world does not need? Another reason to avoid chocolate. And if I can work a loaf of bread into the conversation that delivers real chocolate flavor, a soft pillowy crumb, and 7 grams of protein per slice, we are baking.
This high protein chocolate sourdough sandwich bread started exactly where the best recipes always do: with wanting something that did not exist yet. You can find artisan chocolate sourdough boules with wild open crumb. You can find chocolate quick breads that are basically delicious unfrosted cake. What you cannot find is a soft, sliceable, naturally leavened chocolate sandwich bread that is actually high in protein without any protein powder in sight. So I made one.
The secret is the same one behind my High-Protein Sourdough Sandwich Bread: nonfat Greek yogurt mixed right into the dough. No supplements, no weird additives, just a fridge staple doing its job beautifully. Pair that with Dutch process cocoa, mini chocolate chips folded in at the very end of mixing, and a proper naturally leavened fermentation, and what comes out of that oven is going to make you want to bake bread every single week.
At 7.6 grams of protein per slice based on 13 slices, this one belongs in your rotation.
Table of Contents
- Why You Will Love This Recipe
- Why This Bread Is Actually High-Protein
- Why a Chocolate Version
- Ingredients and Why Each One Matters
- The Bloom
- Fermentation
- Shaping
- Baking
- Cooling
- Shop This Recipe
- FAQ
- More High Protein Recipes

Why You Will Love This Recipe
- 7+ grams of protein per slice with zero protein powder, helping keep you fuller for longer
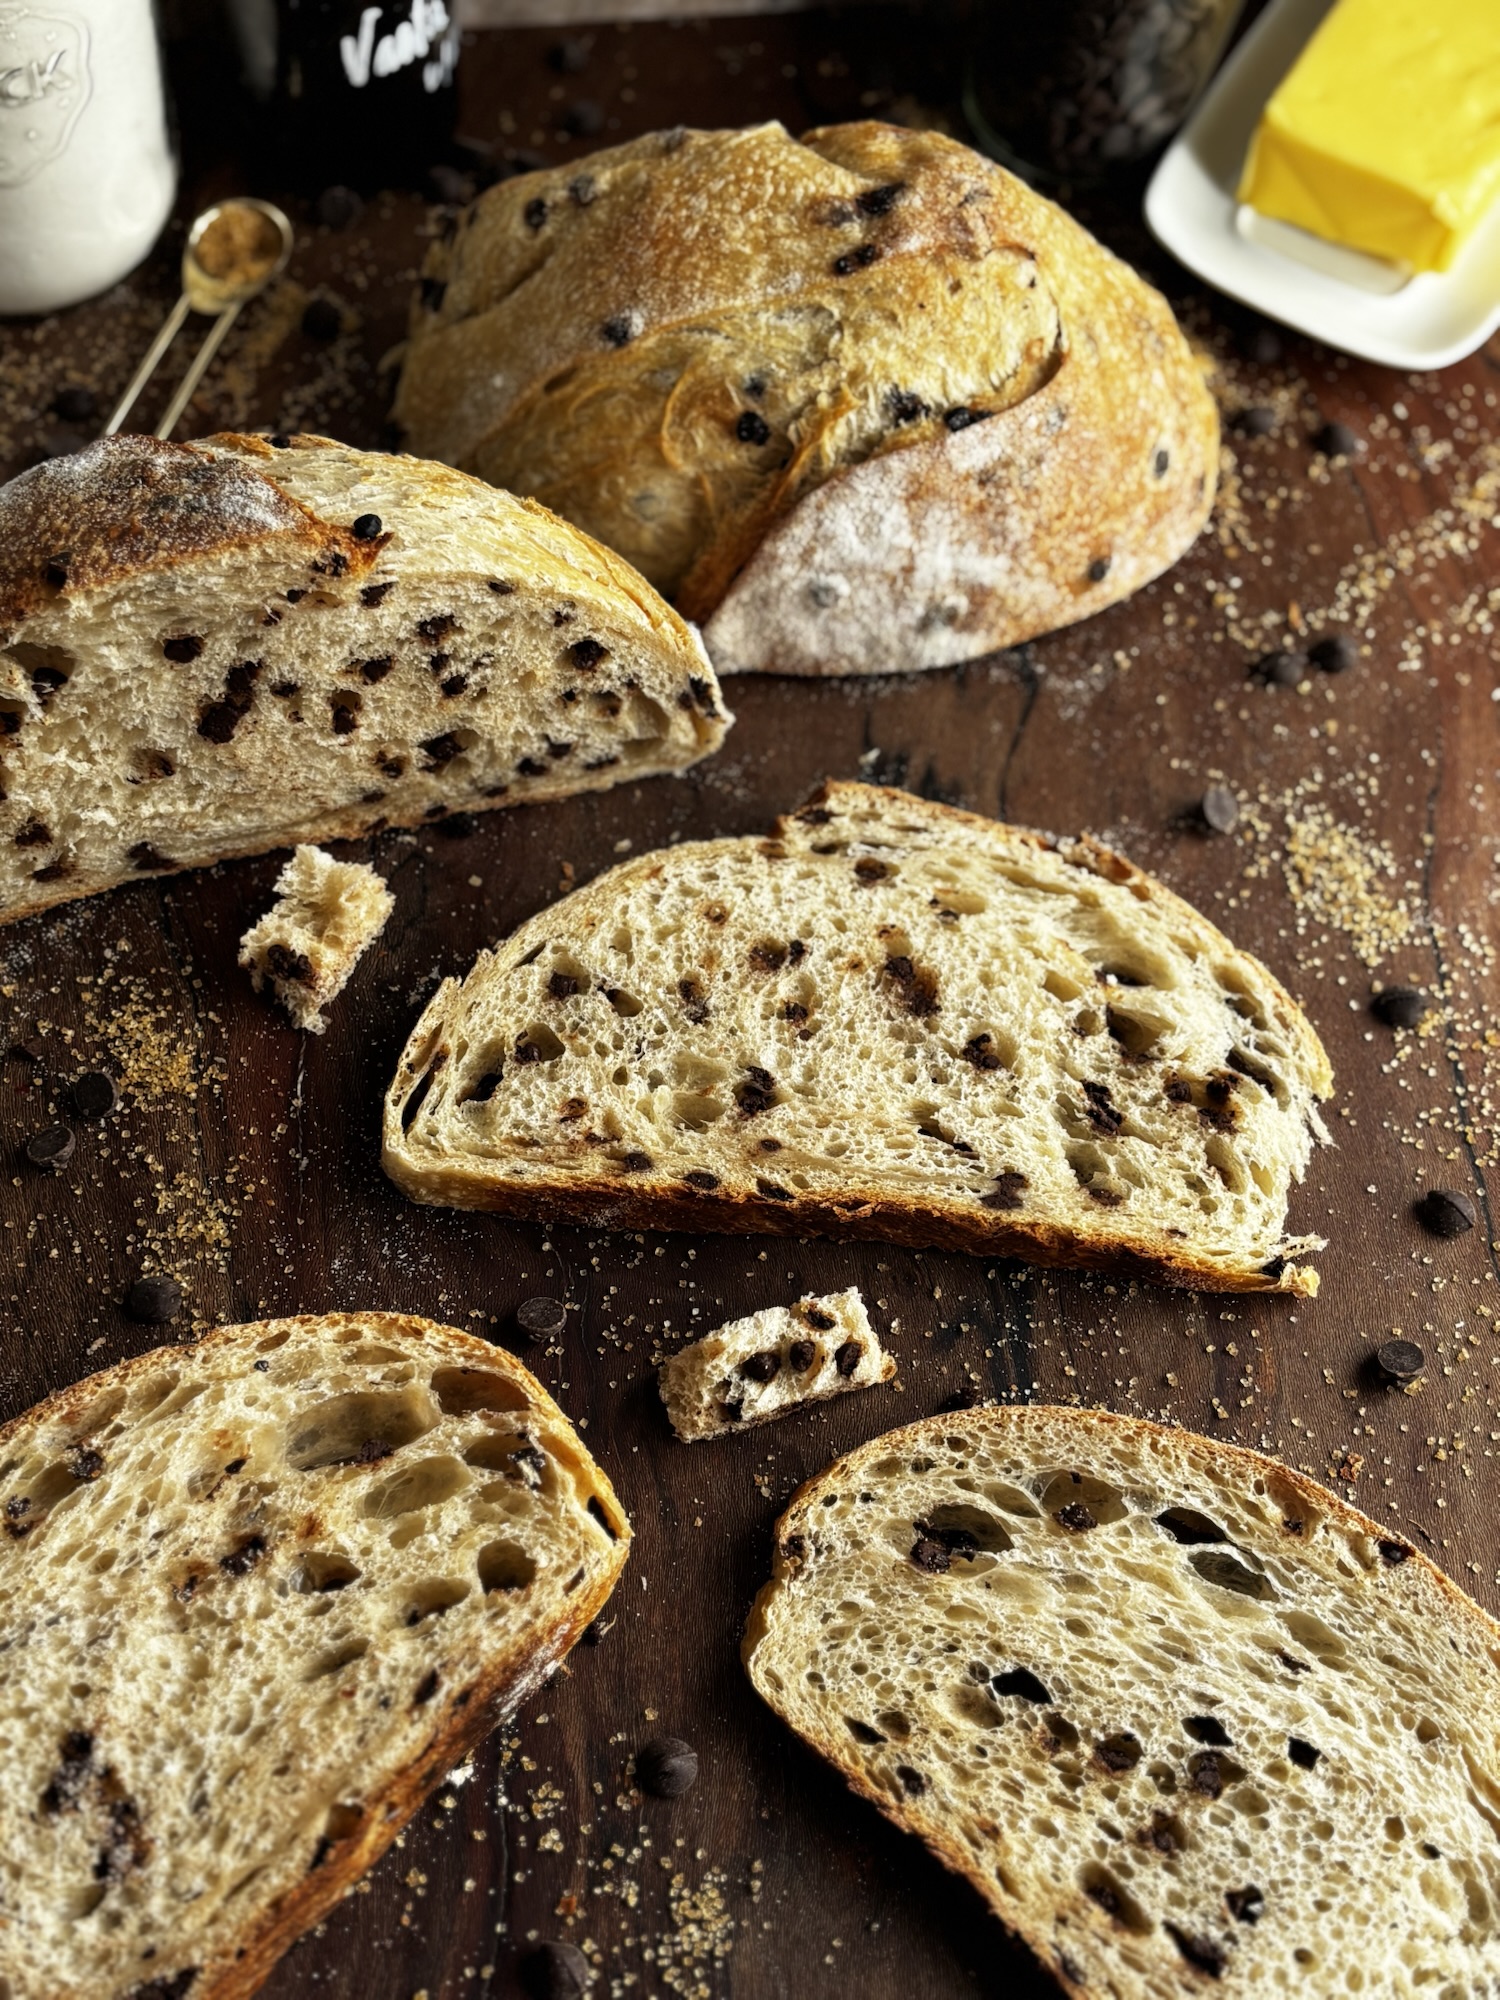
- Soft, pillowy crumb that slices clean and holds up to any sandwich filling
- Rich chocolate flavor in every single bite thanks to bloomed Dutch process cocoa and mini chocolate chips throughout
- Naturally leavened with active sourdough starter, no commercial yeast needed
- Flexible timeline: mix before bed and bake in the morning, or mix and bake all in the same day
Why This Bread Is Actually High-Protein
The high-protein label gets thrown around a lot, so let me tell you exactly where the protein in this loaf comes from. There is no protein powder hiding anywhere. The protein comes from three real ingredients working together: bread flour, nonfat Greek yogurt, and the egg.
Bread flour clocks in at around 13 grams of protein per 100 grams, which is significantly higher than all-purpose. With 400 grams of bread flour in this recipe, that is already a strong protein foundation. The nonfat Greek yogurt adds around 10 grams of protein per 100 grams, and because we are using 200 grams of it, that contribution is meaningful. The egg adds another 6 grams. Even the Dutch process cocoa powder brings a small but real amount to the total.
The result is a loaf with approximately 99 grams of total protein, which works out to about 7.6 grams per slice when cut into 13 slices. That is a genuine, measurable difference from a standard sandwhich loaf, and it comes purely from the ingredients, not from anything added after the fact.
There is also a bonus that comes with naturally leavened bread: the long fermentation process helps break down the proteins in the dough, making them easier for your body to digest and absorb. So you are not just getting more protein per slice, you are getting protein that your body can actually put to use.
If you are looking for more high-protein sourdough options, you might love my High-Protein Sourdough Sandwich Bread, my High-Protein Chocolate Chip Scones, or my High-Protein Plain Scones.

Why a Chocolate Version
Some recipe ideas have a very complicated origin story. This one does not. I have a chocolate sourdough sandwich bread because you simply cannot go wrong with chocolate. That is genuinely the whole reason.
The existing high-protein sandwich bread in my lineup is a workhorse. Soft, reliable, great with everything. But the moment I started thinking about what a chocolate version could look like, the direction was obvious. The same Greek yogurt base that makes the original so tender and protein-rich would work perfectly with cocoa. The enriched dough structure would hold the chocolate chips without them sinking. And the fermentation would develop complexity without introducing any noticeable sourdough flavor. In a chocolate dough, you want chocolate to lead. Everything else is background.
After days of recipe testing, working through every variable from cocoa type to chip incorporation to proof timing, this is the version that earned its place on the blog. It is everything the original is but with chocolate doing the heavy lifting.

Ingredients and Why Each One Matters
Bread Flour (400g)
Bread flour is non-negotiable here. The higher protein content at around 13 percent is what gives this loaf the gluten structure it needs to hold an enriched, cocoa-heavy dough together and still rise properly. All-purpose flour will not give you the same result.
Dutch Process Cocoa (40g)
Dutch process cocoa is strongly preferred in this recipe, and here is why it matters. Dutch process cocoa has been treated to neutralize its natural acidity, which gives it a smoother, richer chocolate flavor and a deeper color. It also works cleanly with the baking powder in this recipe without any additional leavening adjustments needed.
I did test this recipe with natural cocoa combined with baking soda, and while it produced a decent loaf, the results were noticeably different from Dutch process. The flavor was sharper and less smooth, and the texture was slightly different. Dutch process just produces a better bread here, full stop.
Do not go above 40 grams of cocoa. When I pushed it higher, the crumb became tight and dry. Cocoa absorbs a significant amount of liquid and also interacts with gluten development through its tannins. At 40 grams, you get full chocolate presence without sacrificing the soft crumb.
Mini Chocolate Chips (100g)
The chips are what give this bread its primary, recognizable chocolate flavor. The cocoa provides the color and background complexity, but the chips are the chocolate hit in every bite.
Getting them evenly distributed took some testing. I tried folding them in during stretch and folds, which left clusters in some spots and bare spots in others. I also tried rolling them into the dough during shaping, which shifted them toward the outside of the loaf. The method that actually works is adding them in the last one to two minutes of stand mixer time only. The mixer distributes them quickly and evenly without overworking the dough, and the result is chocolate in every single slice.
Nonfat Greek Yogurt (200g)
Room temperature is not optional here. Cold Greek yogurt mixed directly into the dough can weaken your starter when they come into contact. The easiest fix: pull it out of the fridge when you feed your starter and let it come up on its own. Or give it 30 seconds in the microwave, stir it well, and it will be the perfect temperature to add in. Just watch that you do not overheat it. You want it slightly warm, not hot.
The yogurt does three things: it adds protein, it contributes to the incredibly soft crumb, and its slight acidity works with the fermentation to develop flavor without the bread tasting tangy. Nonfat is what I have tested and confirmed. See the FAQ section below for notes on full fat.
Sourdough Starter (100g)
Active and bubbly. This is not the recipe to use a sluggish or underfed starter in. Because cocoa tannins and brown sugar both slow fermentation, you need your starter performing at its best going into the dough. Feed it, wait for peak activity, then mix.
Unsalted Butter (50g)
Melted and used as part of the bloom. The fat coats the cocoa particles and helps the chocolate flavor disperse evenly throughout the dough.
Brown Sugar (45g)
Lightly sweet, not dessert-sweet. The brown sugar adds just enough sweetness to support the chocolate flavor without making this taste like cake. Know going in that it will slow your fermentation. Watch the dough, not the clock.
Whole Milk (95g)
All 95 grams go directly into the bloom with the butter and cocoa. Whole milk gives better flavor and a slightly richer crumb than lower fat options, though 2 percent works fine.
Egg (1 large)
Room temperature. The egg adds structure, richness, and contributes to the protein content. Do not use a cold egg straight from the fridge.
Salt (8g)
Salt is what makes everything taste like something. Do not reduce it.
Vanilla Extract (5g)
Vanilla rounds out the chocolate and makes it taste more complete. It is a small addition with a noticeable effect.
Baking Powder (3g)
Just a small amount to support the lift. Note there is no baking soda in this recipe. Dutch process cocoa is alkaline, so it does not need the acidic reaction that baking soda provides. If you substitute natural cocoa, you would need to adjust your leavening, which is another reason Dutch process is the better choice here.
The Bloom: Do Not Skip This Step
Blooming the cocoa is what separates a loaf that tastes like chocolate from one that just looks like it. Combine all 95 grams of warm milk with 50 grams of melted butter, then whisk in the 40 grams of Dutch process cocoa until fully incorporated and smooth. Let this mixture cool to room temperature before adding it to the dough.
Heat activates the cocoa’s flavor compounds and the fat helps the chocolate disperse evenly throughout the dough. Adding cocoa directly to the flour without blooming it first is not the same thing and will give you a noticeably flatter chocolate flavor.
Fermentation: The Most Important Variable in This Recipe
Enriched sourdough doughs behave differently than lean sourdough, and this one has extra variables at play. The cocoa tannins and brown sugar both slow fermentation considerably, which means your bulk will feel like it is taking forever at first and then pick up speed once the starter gets established. This is normal. Watch the dough, not the clock.
For bulk fermentation, this dough can surprise you. Because the cocoa and sugar slow fermentation early on, you may find it takes longer than expected to get going, and then it moves. In my testing, the dough actually doubled in size by the end of bulk, which is more than a typical enriched sourdough needs. What you are really watching for is the feel and the structure, not just the volume. The dough should feel noticeably lighter and airier than when you first mixed it, almost puffy when you press into it gently. You may not see a lot of visible surface bubbles with this dough because the cocoa obscures them, and that is okay. Trust how it feels over how it looks.
In my kitchen, bulk fermentation took about 6 hours at 72 degrees Fahrenheit and closer to 8 hours at 70 degrees. Your timing will vary based on your starter health, the temperature of your ingredients going in, and your kitchen environment. Use the visual cues as your guide, not a set number of hours.
Two Timing Options
Mix in the morning, bake same day: Bulk ferment at room temperature, watching for the signs described above. When the dough feels light, airy, and noticeably puffy, you are ready to shape, proof, and bake.
Mix before bed, bake in the morning: Let the dough bulk ferment at room temperature overnight. In the morning, shape, proof in the pan, and bake. Make sure your kitchen is not too warm overnight or the dough can move faster than expected.
Second Proof (In the Pan)
After shaping and placing the dough in your USA Pan 9×5, let it proof at room temperature until it is at least an inch above the rim of the pan. Give yourself grace here and rely on the visual and the poke test rather than a clock. If your kitchen is running cool, you can place the pan in your oven with just the oven light on for up to an hour to give it a gentle nudge.
One thing worth knowing: even when the dough looks like it clears the rim by an inch, it can still be underproofed. This pan gives the dough plenty of room to climb, and the visual alone is not always enough. The poke test is your most reliable indicator.
Poke test:
- Immediate spring back with no impression: still underproofed, needs more time
- Slow spring back leaving a faint impression: ready to bake
- Indentation stays with no spring back: overproofed

Shaping
Lightly dust your counter and your rolling pin, not the dough itself. Turn the dough out and use a bench scraper to help coax it onto the surface if needed. With your rolling pin, roll the dough out into a roughly 12 by 9 inch rectangle, working gently so you do not deflate it entirely.
Starting at one of the 9 inch ends, begin rolling the dough toward you. As you roll, apply gentle downward pressure and pull the roll slightly toward you with each pass to create tension. You want a tight, taut log rather than a loose roll. Once you reach the end, pinch the seam firmly closed and place the log seam side down in your greased USA Pan 9×5 loaf pan. The 9 inch width of the roll fits the length of the pan perfectly.

Baking
Preheat your oven to 375 degrees Fahrenheit. If you want to trap a little extra steam for the first part of the bake, place an inverted baking sheet or pan over the loaf for the first 10 to 15 minutes. This is optional but can help with oven spring and keeping the top crust soft. Just make sure there is enough clearance above the dome of the loaf before you cover it.
If you skip the cover, that is completely fine. Either way, keep an eye on the top after about 35 minutes and tent loosely with aluminum foil if it is getting too dark before the interior is done.
Always pull by internal temperature. This loaf is done at 200 degrees Fahrenheit. The dark cocoa color will make it look finished long before it actually is, so do not trust the color on this one. Use your thermometer every single time.
Cooling: Do Not Skip the Butter
The moment this loaf comes out of the oven, brush the top generously with melted butter. This is what gives the crust its soft, tender finish. Do not skip it and do not wait.
Rest the loaf in the pan for 5 minutes, then transfer to a wire rack with airflow on all sides. Let it cool for a minimum of 2 hours before slicing. The crumb is still setting during this time. Cutting too early will give you a gummy center, not because the bread is underbaked, but because the structure has not finished firming up.
Once cooled, wrap tightly in plastic wrap if you are not cutting it the same day. Never a kitchen towel. Towels pull moisture out of the crust and accelerate staling.

Pan Choice Matters
I bake this in a USA Pan 9×5. The aluminized steel construction and light-colored surface distribute heat evenly and prevent the bottom from overbrowning, which is a real risk with a dark dough. Older dark pans conduct heat unevenly and can produce a dense band at the bottom of the loaf. If you are seeing that issue, your pan is probably part of the problem.
Substitutions and Variations
Can I Use Natural Cocoa Instead of Dutch Process?
You can, but I do not recommend it. I tested this recipe with natural cocoa and baking soda, and while the loaf worked, the results were noticeably different from Dutch process. The flavor was sharper and less smooth, and I was not happy with the overall outcome. If you choose to use natural cocoa, you will need to adjust your leavening to account for the acidity. Dutch process is the correct cocoa for this recipe.
Full Fat Greek Yogurt
I have only tested this recipe with nonfat Greek yogurt, so I cannot confirm how full fat will perform. That said, full fat Greek yogurt has a higher fat content than nonfat, which means the effective hydration coming into the dough will be different. You may find the dough is a bit wetter. The crumb will likely be even more tender and rich. If you test it, I would love to hear how it goes in the comments.
Dairy
I have not tested any dairy substitutions in this recipe. The whole milk, butter, and yogurt all serve specific structural and flavor functions, and this is not a recipe I can confidently guide dairy-free adaptations on without testing them myself.
How to Serve This Bread
The most obvious answer is toasted with butter and a little flaky salt. But this loaf also makes a genuinely excellent base for a peanut butter and jam sandwich, a Nutella and banana situation, or French toast. The chocolate flavor is present but not aggressive, which means it plays well with both sweet and savory. A slice with cream cheese and strawberries is not a bad breakfast decision.

Storage
- Room temperature: Up to 3 days, wrapped tightly in plastic wrap
- Freezer: Slice the cooled loaf completely, place a small piece of parchment between each slice, and freeze in an airtight bag for up to one month. Pull slices directly from the freezer and toast as needed.
Shop This Recipe
These are the tools that make a real difference with this loaf:
- USA Pan 9×5 Loaf Pan — the pan I use and recommend for this recipe specifically. The light-colored aluminized steel is what keeps the bottom from overbrowning with a dark dough.
- Instant Read Thermometer — not optional. The dark color of this loaf will fool you every time. Pull at 200 degrees Fahrenheit, always.
- Dutch Process Cocoa — the cocoa matters here. Dutch process is what gives this loaf its smooth, deep chocolate flavor.
- Parchment Loaf Pan Liners — makes cleanup easy and helps with releasing the loaf cleanly.
- Bench Scraper — helpful for getting the dough out of the bowl cleanly.
Frequently Asked Questions
Why does this bread take longer to bake than my regular sourdough?
Three reasons: cocoa powder has thermal mass and absorbs heat differently than flour, the Greek yogurt adds moisture to the crumb that needs time to cook through, and the dark color of the loaf absorbs surface heat quickly while the interior lags behind. Always use a thermometer and pull at 200 degrees internal.
Why does my bread taste tart?
Most likely over-fermentation, meaning your bulk went too long or your kitchen was warmer than expected. It can also come from an overly acidic starter. If you are noticing consistent tang, try using your starter a little earlier in its peak window before it has had a chance to build too much acidity.
Why is my crumb tight or dry?
Possible culprits: too much cocoa, or over-fermentation. Do not go above 40 grams of cocoa. Highly recommend using a kitchen scale for all baking recipes. Cups measurements can have too much of a variation. Also make sure you are not cutting into the loaf before it has cooled for at least 2 hours.
Why did my loaf burst on the side?
That is an underproofed loaf. The dough was not given enough time in the pan before going into the oven. Remember that even when the dough looks like it has cleared the rim, it can still need more time. Rely on the poke test, not just the visual.
Why is my chocolate flavor subtle?
Increase the chips, not the cocoa. The cocoa provides background depth and color. The chips are where the recognizable chocolate hit comes from.
Why is my bulk fermentation taking so long?
Completely normal. The combination of cocoa tannins and brown sugar creates a slower environment for your starter. Expect roughly 6 hours at 72 degrees Fahrenheit and closer to 8 hours at 70 degrees. Cooler kitchens, colder ingredients, and a starter that is just past its peak will all push that time longer. Watch the dough, not the clock.
Can I use full fat Greek yogurt?
I have not tested full fat in this recipe. Based on the higher fat content, the dough may behave differently. The crumb will likely be richer and more tender. If you try it, let me know how it goes in the comments.
Why is there a dense band at the bottom of my loaf?
Usually caused by a combination of chip sinking, rushing the second proof, and potentially underbaking. Make sure you are adding chips only in the last 30 to 60 seconds of mixer time, giving the second proof the full time it needs, and pulling the loaf at 200 degrees internal. Pan choice matters too. A dark or older pan can produce uneven bottom heat.

High-Protein Chocolate Sourdough Sandwich Bread
Equipment
- – Stand mixer with dough hook
- USA Pan 9×5 loaf pan
- kitchen scale
- Large mixing bowl
- Small mixing bowl or liquid measuring cup
- Whisk
- Rolling Pin
- bench scraper
- Instant read thermometer
- – Pastry brush
Ingredients
Bloom
- 95 grams whole milk 6 tablespoons plus 1 teaspoon
- 50 grams unsalted butter melted (3 tablespoons plus 1 teaspoon)
- 40 grams Dutch process cocoa powder 1/3 cup plus 1 teaspoon
Dough
- 400 grams bread flour 3 1/4 cups
- 200 grams nonfat Greek yogurt room temperature (3/4 cup plus 2 tablespoons)
- 100 grams active bubbly sourdough starter 1/3 cup plus 1 tablespoon
- 45 grams brown sugar 3 tablespoons plus 1 teaspoon
- 1 large egg room temperature
- 8 grams salt 1 1/2 teaspoons
- 5 grams vanilla extract 1 teaspoon
- 3 grams baking powder 3/4 teaspoon
- 100 grams mini chocolate chips 1/2 cup plus 2 tablespoons
Instructions
- Make the bloom. Warm the milk until just warm to the touch, then combine it with the melted butter in a small bowl or liquid measuring cup. Whisk in the Dutch process cocoa powder until fully incorporated and smooth with no dry streaks remaining. Set aside and allow to cool to room temperature before using. Do not add the bloom to the dough while it is still warm.
- In the bowl of your stand mixer, combine the active sourdough starter, room temperature Greek yogurt, egg, vanilla extract, and the bloom. The bloom can be slightly warm when added but should not be hot. Whisk together until smooth and fully combined.
- Add the bread flour, brown sugar, salt, and baking powder on top of the wet ingredients. Mix on low speed with the dough hook until a shaggy dough forms with no dry flour remaining. Increase to medium speed and mix for 5 to 6 minutes until the dough is smooth, elastic, and pulls away cleanly from the sides of the bowl. The dough will be slightly tacky but should not be sticky.
- In the last 1 to 2 minutes of mixing only, add the mini chocolate chips and continue mixing just until they are evenly distributed throughout the dough. Adding the chips at this stage ensures even distribution in every slice without clustering or sinking during fermentation.
- Transfer the dough to a lightly oiled bowl and cover tightly. Allow the dough to rest for 1 hour.
- After the 1 hour rest, perform one set of stretch and folds. To do this, wet your hand, grab one side of the dough, stretch it upward, and fold it over the center. Rotate the bowl 90 degrees and repeat until you have gone all the way around. The dough will feel noticeably stronger after this set.
- Bulk ferment the dough at room temperature until it feels noticeably lighter, airier, and puffy when pressed gently. In a kitchen at 72 degrees Fahrenheit this takes approximately 6 hours. At 70 degrees expect closer to 8 hours. The cocoa tannins and brown sugar slow fermentation, so trust the feel of the dough over the clock. You may not see significant surface bubbles because the dark color of the dough obscures them. This is normal.
- If mixing before bed, allow the dough to bulk ferment at room temperature overnight. Shape in the morning once it feels light and airy.
- When bulk fermentation is complete, turn the dough out onto a lightly dusted surface. Dust your rolling pin lightly as well. Do not flour the dough itself. Roll the dough into a rough 12 by 9 inch rectangle, working gently to preserve some of the gas without fully deflating it. Use a bench scraper to help move the dough if needed.
- Starting at one of the 9 inch ends, begin rolling the dough toward you. Apply gentle downward pressure with each pass and pull the roll slightly toward you to create tension. You are aiming for a tight, taut log rather than a loose roll. Once you reach the end, pinch the seam firmly closed and place the log seam side down into a greased USA Pan 9×5 loaf pan.
- Cover the pan loosely and allow the dough to proof at room temperature until it rises at least 1 inch above the rim of the pan. Use the poke test to confirm readiness. Press one finger gently into the surface of the dough. If it springs back immediately with no impression the dough needs more time. If it springs back slowly and leaves a faint impression the dough is ready to bake. If the impression stays without springing back the dough is overproofed. Note that even when the dough appears to be well above the rim it can still be underproofed, so rely on the poke test over the visual.
- If your kitchen is running cool, place the pan in your oven with only the oven light on for up to 1 hour to give the proof a gentle boost.
- Preheat your oven to 375 degrees Fahrenheit. For extra oven spring and a softer top crust, place an inverted baking sheet over the loaf pan for the first 10 to 15 minutes of baking. Make sure there is enough clearance between the baking sheet and the dome of the loaf before covering. This step is optional but recommended.
- Bake for approximately 50 to 55 minutes total, tenting loosely with aluminum foil after 35 minutes if the top is darkening too quickly. The dark color of this loaf will make it look finished well before it is done. Always use an instant read thermometer and pull the loaf when the internal temperature reaches 200 degrees Fahrenheit.
- The moment the loaf comes out of the oven, brush the top generously with melted butter using a pastry brush. This step is essential for achieving a soft, tender crust. Do not skip it and do not wait.
- Allow the loaf to rest in the pan for 5 minutes, then transfer to a wire rack with airflow on all sides. Cool completely for a minimum of 2 hours before slicing. The crumb continues to set during this time and cutting too early will result in a gummy interior.
Notes
More High-Protein Sourdough Recipes
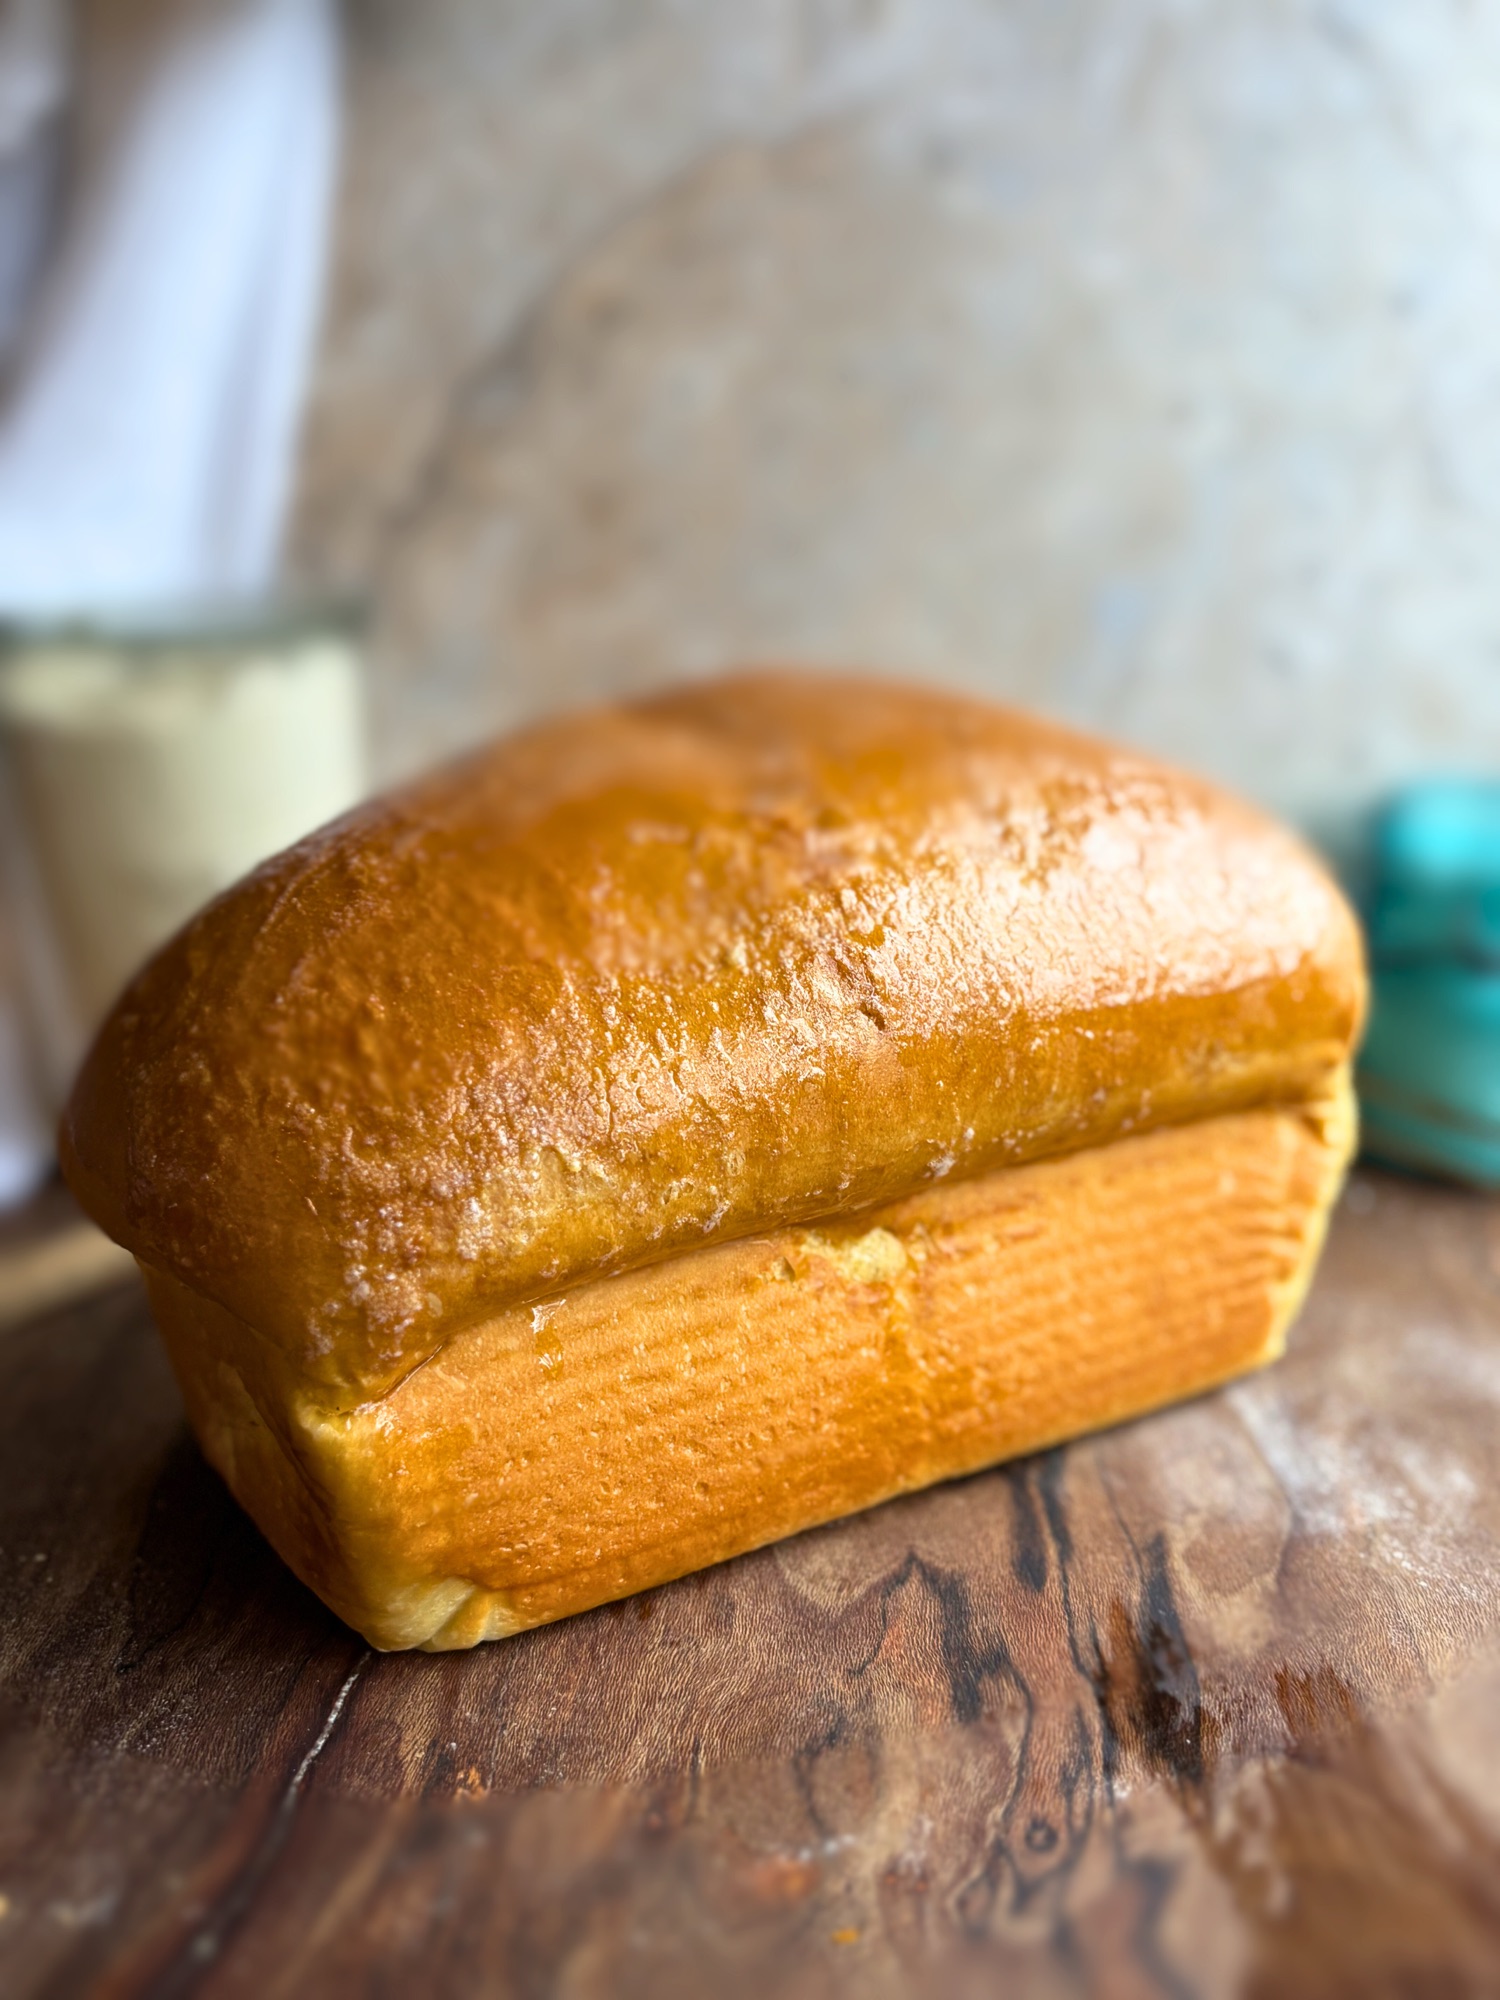
- High-Protein Sourdough Sandwich Bread — the original, same Greek yogurt base without the chocolate
- High-Protein Pretzel Bites (Sourdough or Yeast)- the perfect chewy high protein pretzel bites made with cottage cheese
- High-Protein Chocolate Chip Scones — tender, flaky, and packed with protein
- High-Protein Plain Scones — simple and versatile, great as a base for toppings
Made This Recipe?
I want to see it! Tag me on Instagram and Facebook so I can share your bake. And if you have questions, drop them in the comments below. I read every single one.
Want this recipe saved directly to your inbox? Subscribe below and I will send it straight to you.


Leave a Reply