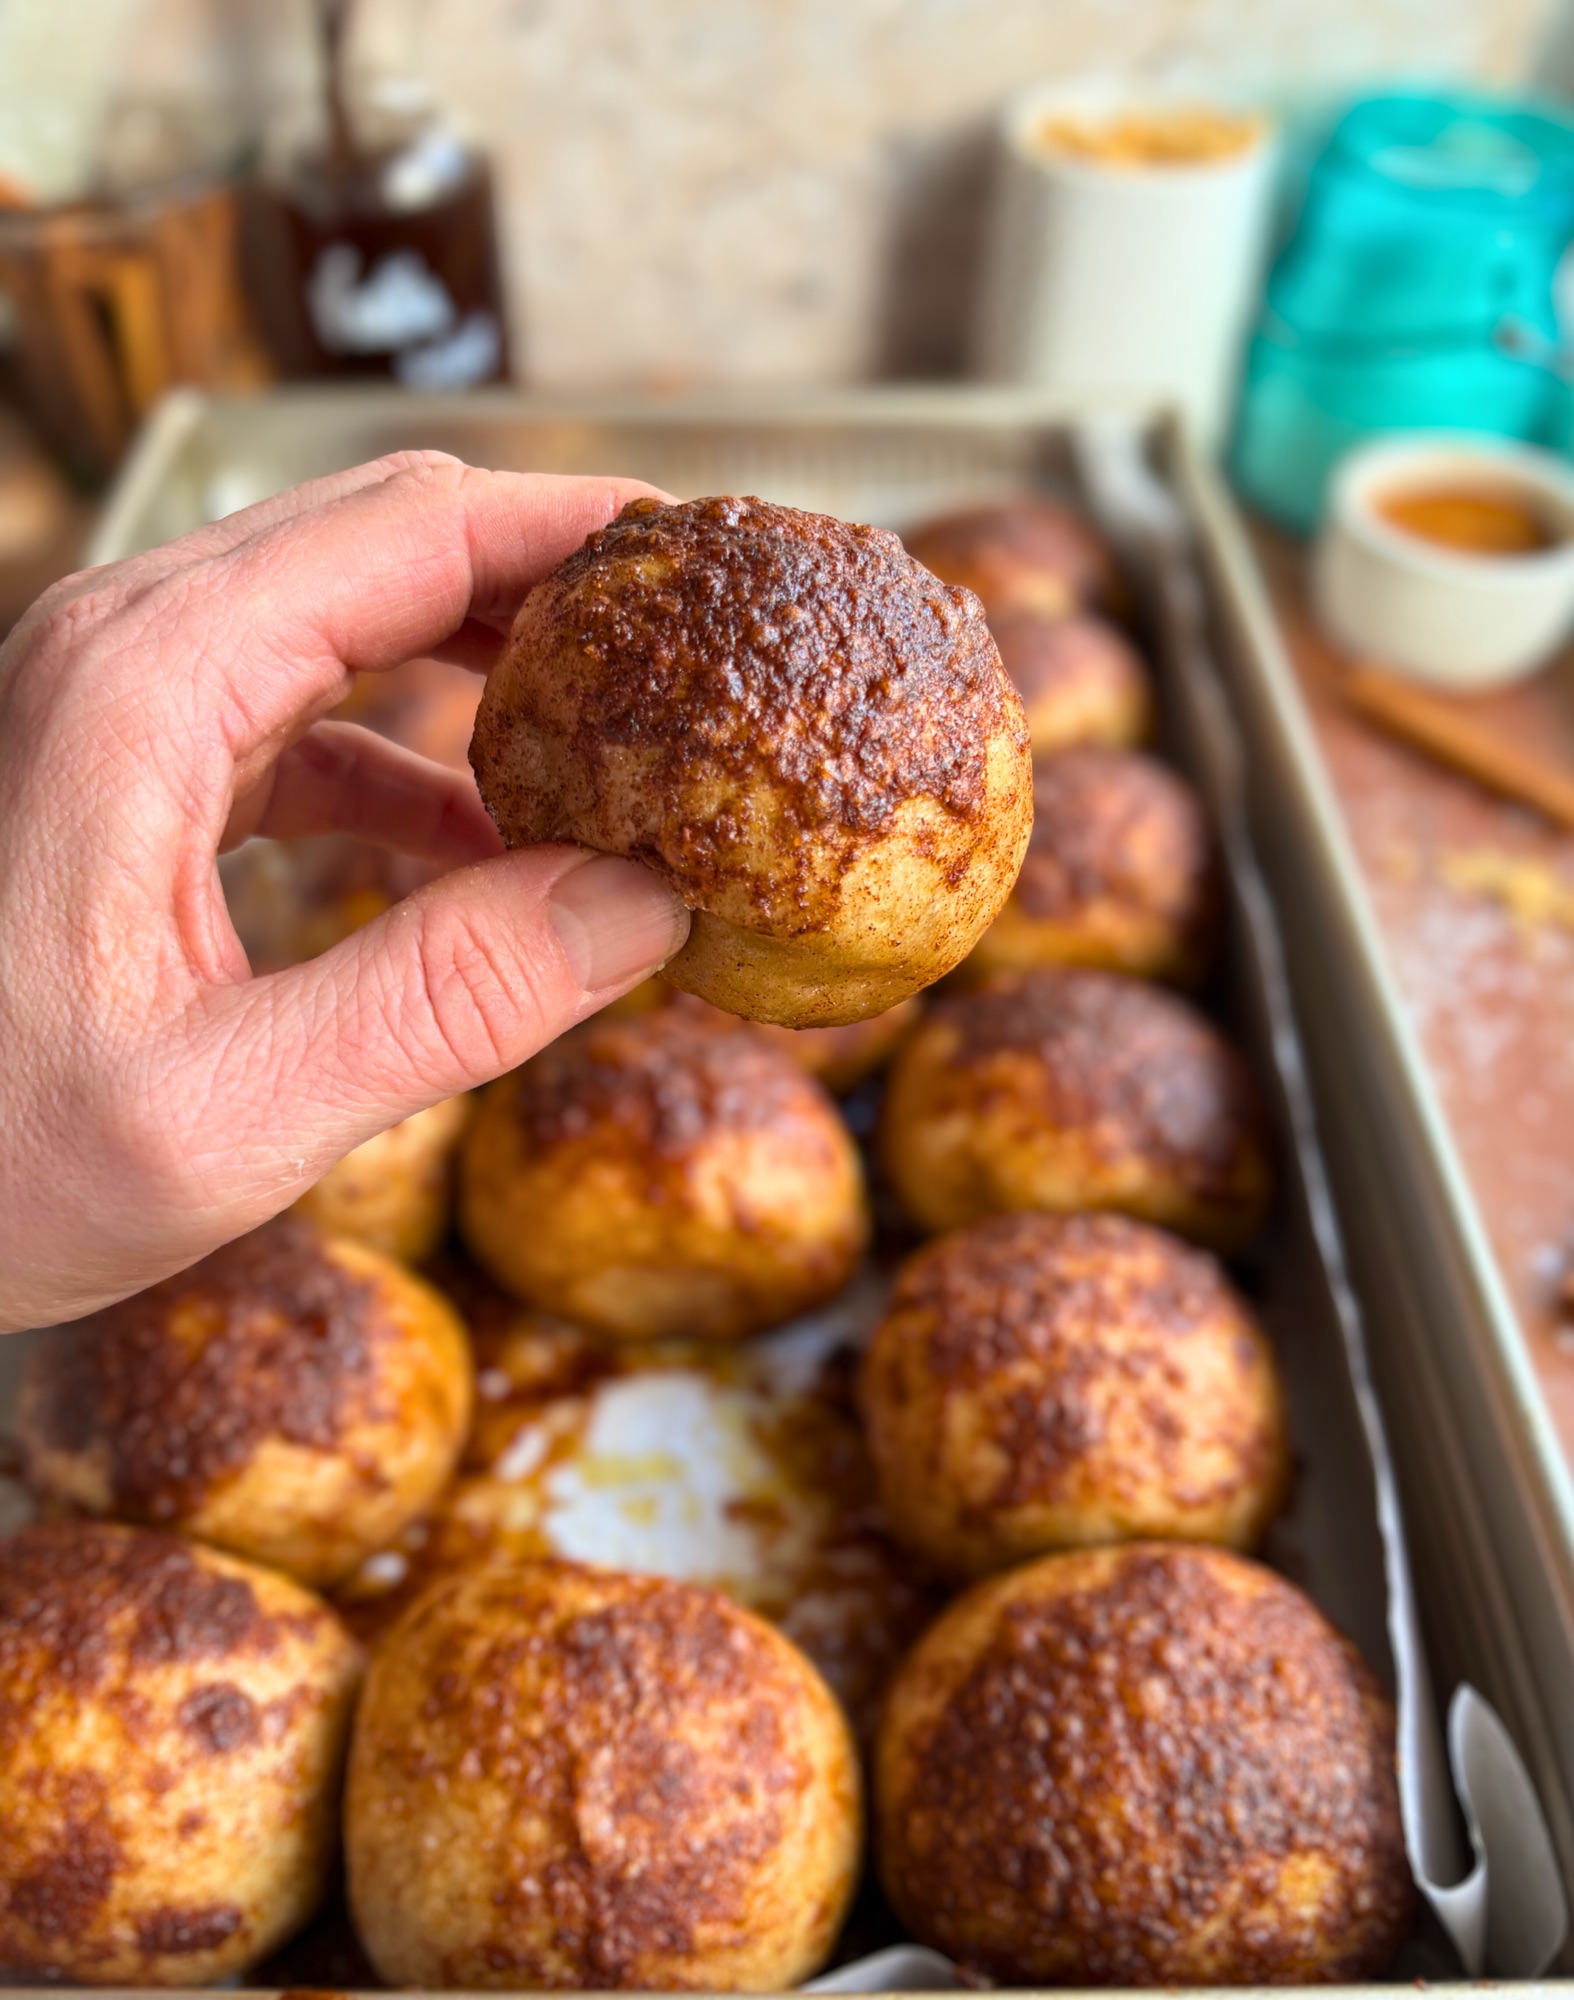
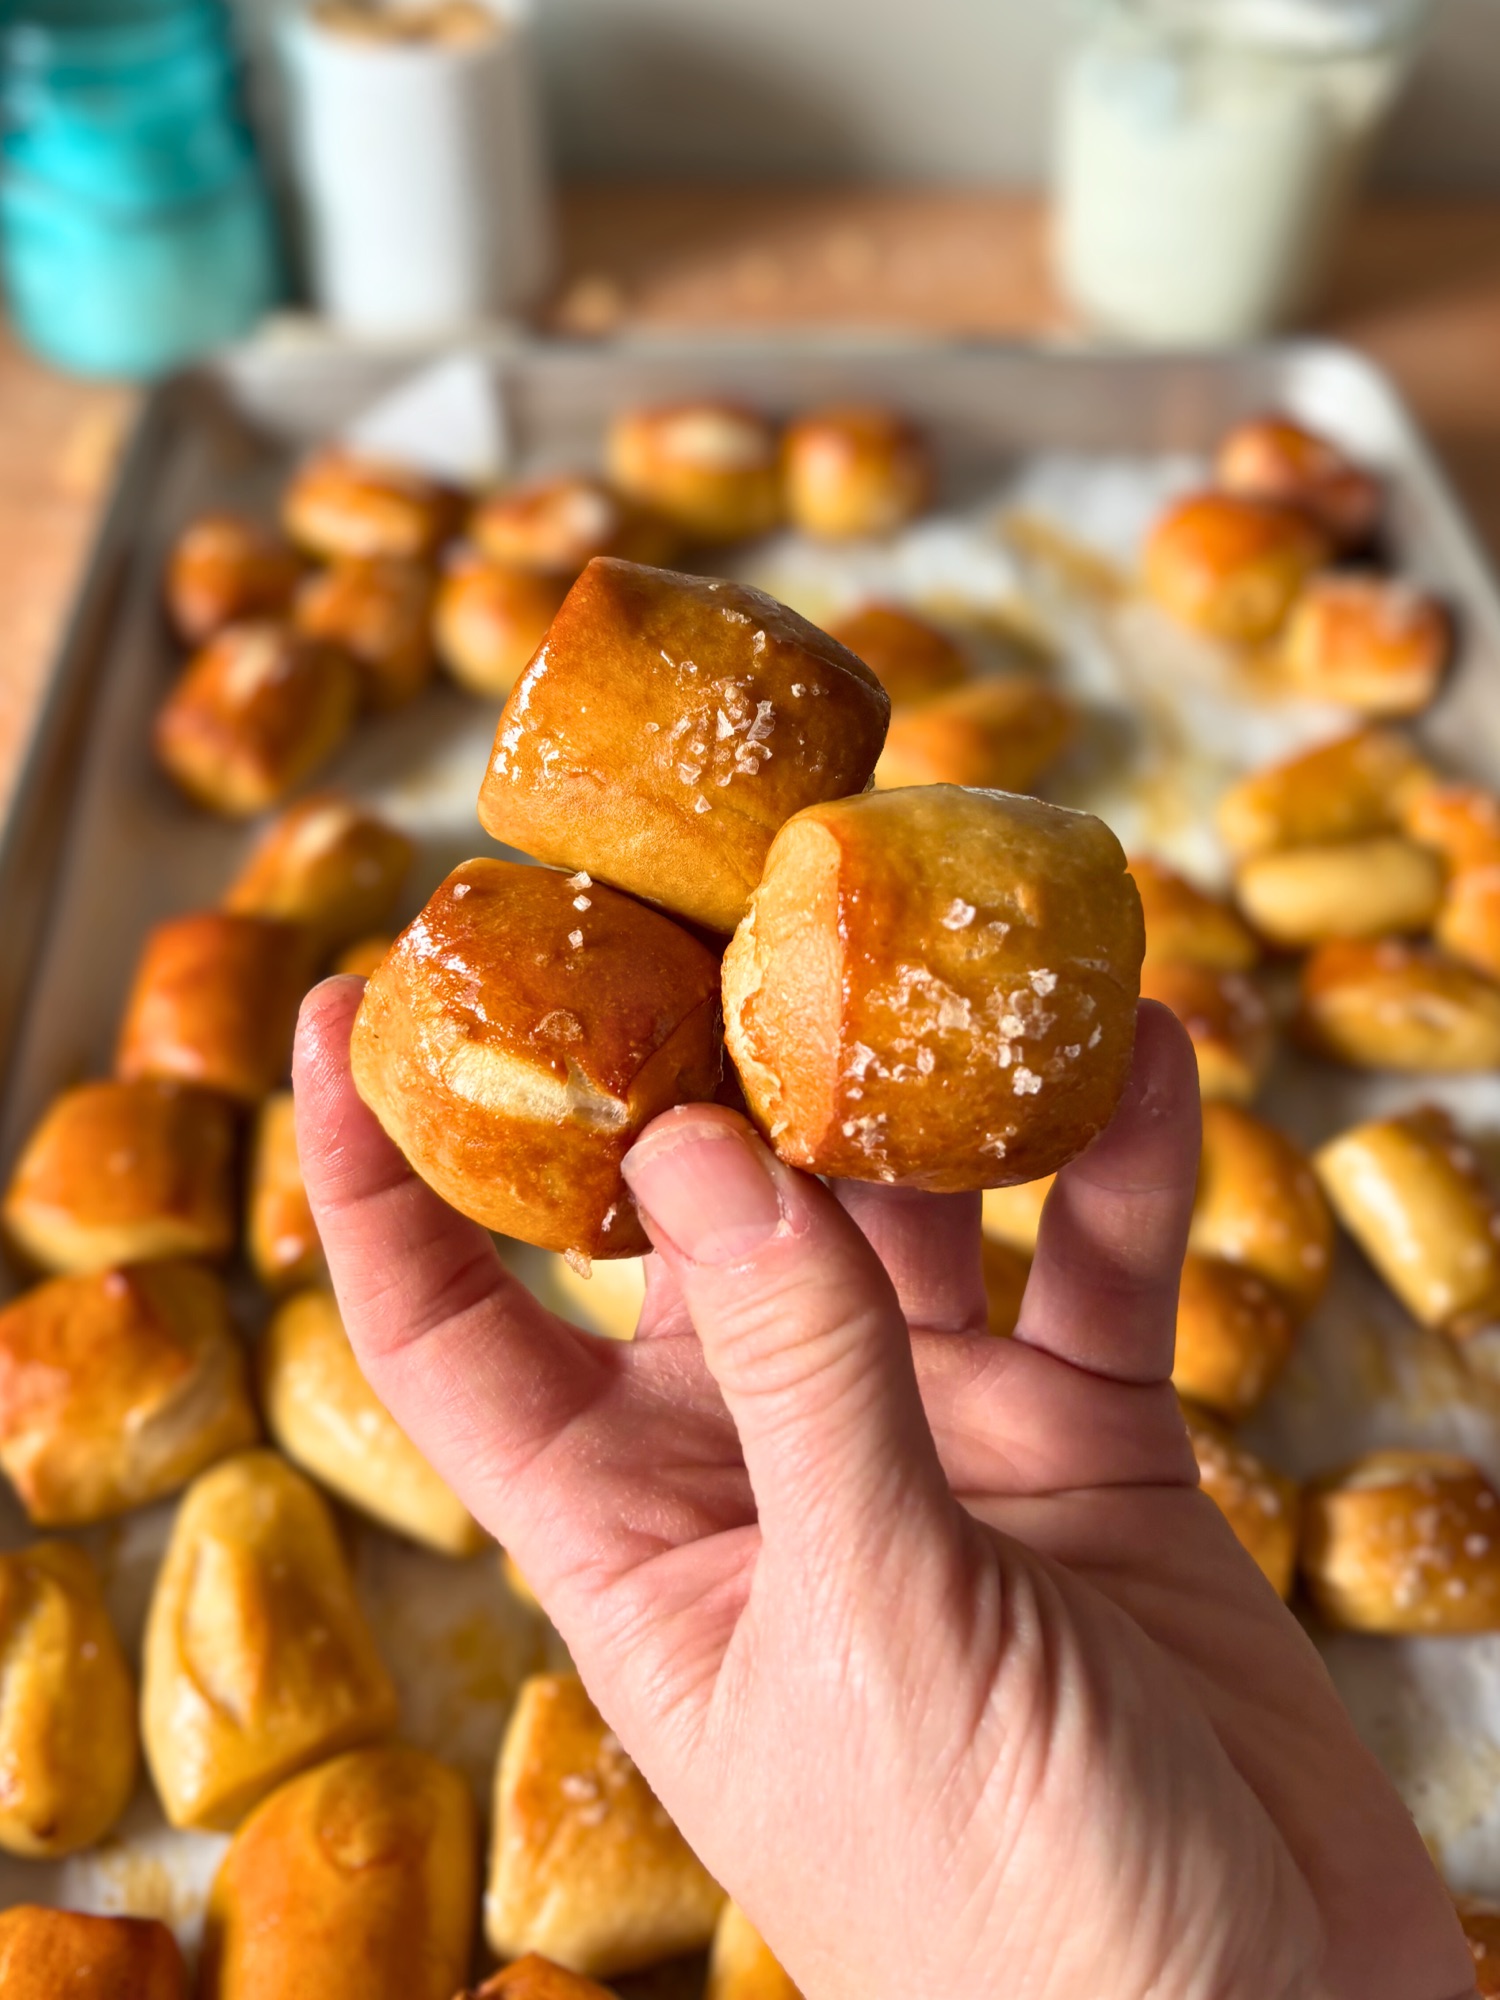
If you’ve been making traditional sourdough bagels with the whole shaping and hole poking situation, let me introduce you to a much easier (and way more fun) approach: bagel pull aparts. Instead of wrestling with individual bagel rings, you’re making perfectly portioned 60g balls, boiling them in batches, dunking them in melted butter, rolling them in cinnamon sugar, and baking them all together in one pan. The result? A pull apart breakfast situation that’s part cinnamon roll, part bagel, and completely irresistible.
This isn’t your standard bagel recipe. We’re using sourdough for that easier digestibility and chewy texture, but we’re skipping the traditional ring shape entirely. These bagel balls get boiled just like regular bagels (that’s what gives them the signature chewy crust), then coated in a butter and cinnamon sugar mixture that caramelizes in the oven. You end up with crispy, sweet exteriors and soft, pillowy interiors with all that sourdough complexity.
The best part? You can boil 8-10 balls at a time depending on your pot size, which means the whole process moves way faster than traditional bagel making. No careful hole stretching, no worrying about rings closing up during proofing. Just perfectly round balls that you pull apart at the table while they’re still warm.
Table of Contents
- Why This Recipe Works
- Customizing Bagel Size
- Understanding Sourdough Bagel Fermentation
- The Boiling Process
- Parchment Paper Technique
- Flexible Timeline Options
- Optional Cream Cheese Filling
- Yeast Version Non Sourdough
- Troubleshooting Common Issues
- Storage and Reheating

Sourdough Cinnamon Sugar Bagel Pull Apart
Equipment
- Stand mixer with dough hook or mixing by hand
- Large bowl
- kitchen scale
- Large pot or Dutch oven
- Slotted spoon or spider strainer Fish spatula
- 13×9 inch baking pan
- Parchment paper
- Baking sheet
- Plastic wrap or large plastic bag
- Cooling rack
- 2 small bowls for butter and cinnamon sugar
Ingredients
FOR THE DOUGH:
- 600 g bread flour 4 3/4 cups
- 310 g water 1 1/3 cups
- 180 g active sourdough starter 3/4 cup
- 35 g brown sugar 3 tablespoons, packed
- 12 g salt 2 teaspoons
- 5 g ground cinnamon 1 teaspoon
FOR BOILING:
- 1420-1900 g water 6 to 8 cups
- 30 g honey or sugar 2 tablespoons
FOR COATING:
- 75-115 g unsalted butter melted (1/3 to 1/2 cup)
- 5 g vanilla extract 1 teaspoon
- 100 g brown sugar 1/2 cup, packed
- 12-18 g ground cinnamon 2 to 3 tablespoons
OPTIONAL CREAM CHEESE FILLING:
- 10-15 g cream cheese per bagel ball 2 to 3 teaspoons per ball, formed into balls and frozen for 30 minutes
Instructions
DAY 1 MORNING:
- In a large bowl, dissolve the 180g (3/4 cup) sourdough starter and 35g (3 tablespoons, packed) brown sugar in the 310g (1 1/3 cups) water.
- In a separate bowl, whisk together 600g (4 3/4 cups) bread flour, 12g (2 teaspoons) salt, and 5g (1 teaspoon) ground cinnamon.
- Add dry ingredients to wet ingredients.
- Mix until all flour is absorbed and forms a shaggy dough.
- Cover and rest 45 minutes to 1 hour.
- Knead by hand for 8 to 10 minutes or in a stand mixer on speed 2 for 6 to 8 minutes until smooth and elastic.
- Place dough in a lightly oiled bowl and cover with plastic wrap.
- Let bulk ferment at room temperature, ideally 70 to 75°F (21 to 24°C), until 1.5x in size, approximately 5 to 7 hours.
- Do NOT let it fully double before refrigerating.
DAY 1 EVENING (BEFORE BED):
- Remove dough from refrigerator if you refrigerated after bulk ferment.
- Divide dough into 18 pieces at 60g (2 ounces) each.
- If using cream cheese filling, flatten each piece, place frozen 10-15g (2 to 3 teaspoons) cream cheese ball in center, wrap and seal tightly.
- Shape each piece into a tight ball by cupping hand over dough and rolling in circles on an unfloured surface.
- Cut 18 squares of parchment paper, about 3×3 or 4×4 inches.
- Place each shaped ball on its own parchment square on a large baking sheet.
- Cover the entire tray with plastic wrap or place in a large clean plastic bag.
- Make sure it is well sealed so dough does not dry out.
- Transfer tray to refrigerator for 12 to 24 hours.

DAY 2 MORNING:
- Remove tray from refrigerator.
- Let rest at room temperature, still covered, for 1 to 1.5 hours.
- Do the poke test: gently press a ball with your finger. It should have give and spring back slowly.
- If it feels tight and cold, give it another 15 to 30 minutes.
- Preheat oven to 425°F (218°C).
- Line a 13×9 inch pan with parchment paper.
- Bring 1420-1900g (6 to 8 cups) water to a boil in a large pot.
- Add 30g (2 tablespoons) honey or sugar and stir until dissolved.
- Melt 75-115g (1/3 to 1/2 cup) butter in a small bowl and whisk in 5g (1 teaspoon) vanilla extract.
- Mix 100g (1/2 cup, packed) brown sugar and 12-18g (2 to 3 tablespoons) cinnamon in a separate shallow bowl.
- Spray a cooling rack with cooking spray or oil.
BOILING AND COATING:
- Working in batches of 8 to 10 balls, pick up a parchment square with bagel ball on it.

- Lower the whole thing into boiling water, parchment side down.
- The parchment will release and float to the surface. Or when you flip them over take it off.
- Use tongs or slotted spoon to remove the parchment square and discard.
- Boil bagel ball for 20 to 30 seconds.
- Use slotted spoon or spider strainer to flip bagel ball over.
- Boil for another 20 to 30 seconds.
- Bagels should float immediately. If they sink, they need more proofing time.
- Remove with slotted spoon and place on the oiled cooling rack.
- Repeat with remaining bagel balls.
- Once all balls are boiled and have cooled slightly (you can start coating while the last batch finishes boiling), dunk each ball in melted butter.
- Immediately roll in cinnamon sugar mixture, coating generously. Feel free to add a little extra on the top.
- Arrange coated balls in the prepared 13×9 pan with about 1/2 inch spacing between balls.
BAKING:
- Bake for 22 to 25 minutes until deep golden brown.
- Cool 5 to 10 minutes before pulling apart and serving.
Notes
Why This Recipe Works
Traditional bagel recipes rely on commercial yeast for a quick rise and predictable timing. This sourdough version takes a different approach entirely, using your active starter to create bagels with more complex flavor and a chewier, more substantial texture.
The fermentation happens in two stages. First, a room temperature bulk ferment that takes the dough to about 1.5x its original size (not fully doubled, which is crucial). Then, a cold retard in the refrigerator that slows everything down and develops flavor. This two stage process gives you control over the timeline while building that characteristic sourdough tang.
Brown sugar in the dough does double duty. It feeds the fermentation and adds a subtle molasses depth that plays beautifully with the cinnamon. Unlike white sugar, brown sugar brings complexity rather than just sweetness.
The boiling step is what separates bagels from regular bread rolls. When you drop the shaped dough into boiling water with honey or sugar, the exterior gelatinizes immediately. This creates that distinctive chewy crust and prevents the bagels from spreading too much in the oven. Without this step, you’d just have sweet dinner rolls.
After boiling, these bagels get dunked in melted butter and rolled in cinnamon sugar while they’re still warm and slightly wet. The butter acts as glue for the cinnamon sugar and adds richness, while the sugar caramelizes during baking to create a crispy, crackly coating.
Baking them together in a 13×9 pan with a bit of space between each ball means they stay separate enough to pull apart easily, but close enough that the edges stay soft where they almost touch. You get the best of both worlds: crispy caramelized tops and soft, pullable sides.

Customizing Bagel Size
The 60g sizing in this recipe creates bagel balls that are slightly smaller than traditional full size bagels, which makes them perfect for a pull apart situation where people are grabbing multiple pieces. But you can absolutely adjust the size based on what you’re going for.
Mini Bagel Bites (30g each)
Divide the dough into 36 pieces at 30g each for bite sized bagel balls. These are great for brunches, parties, or when you want more individual pieces to share. The smaller size means they cook faster.
Reduce the boiling time to 15 to 20 seconds per side instead of 20 to 30 seconds. The balls are smaller and will gelatinize faster, so you don’t need as much time in the water.
For baking, check them at 18 to 20 minutes instead of the full 22 to 25 minutes. Mini bagels will brown faster because of their size. Start checking at 18 minutes and pull them when they’re deep golden brown on top.
You can fit all 36 mini bagels in a 13×9 pan if you arrange them in a tight grid, or use two 9×9 pans for a less crowded arrangement. The tighter packing means softer sides and more pull apart texture.
Standard Bagel Size (90g each)
Divide the dough into 12 pieces at 90g each for full size bagels that match what you’d get at a bagel shop. These are substantial, filling, and perfect if you want traditional bagel sandwich material.
Keep the boiling time the same at 20 to 30 seconds per side. The larger size can handle the full boil without getting waterlogged.
For baking, increase the time to 25 to 28 minutes. Larger bagels need more time in the oven to cook through completely. Check them at 25 minutes. If the tops are getting too dark but the sides still look pale, tent with foil for the last few minutes.
You’ll need to adjust your pan situation. Twelve 90g bagels won’t fit comfortably in a 13×9 pan with proper spacing. Use a large half sheet pan (18×13 inches) or two 9×13 pans to give them room. Space them about 2 inches apart so they have room to expand without touching too much.
Adjusting the Pan and Spacing
The pull apart effect works best when the bagels are close but not touching before baking. As they bake, they’ll puff slightly and the edges will just barely connect, which is what makes them easy to pull apart.
For 60g bagels in a 13×9 pan, space them about 1/4 inch apart in a 3×6 grid. For mini 30g bagels, you can go tighter at spacing. For full size 90g bagels, give them closer to 1.5 to 2 inches on a larger pan.
If you want more separated individual bagels instead of a pull apart situation, just increase the spacing regardless of size. They’ll bake up as distinct bagels with crispy edges all around instead of soft connected sides.

Cream Cheese Filling Adjustments
If you’re stuffing with cream cheese, adjust the filling size proportionally. For 30g mini bagels, use 5 to 8g of cream cheese per ball (about half the amount). For 90g standard bagels, use 15 to 20g of cream cheese per ball.
The freezing technique stays the same regardless of size. Portion the cream cheese, freeze for 30 minutes, then stuff and seal. Smaller bagels need tighter sealing since there’s less dough to work with, so be extra careful with your pinching and rolling.

Understanding Sourdough Bagel Fermentation
Fermentation timing is where most people run into trouble with sourdough bagels. Unlike bread dough that you want to double or even triple, bagel dough needs to be handled more conservatively. Here’s what to watch for at each stage.
Bulk Fermentation (Room Temperature)
After you mix and knead your dough, it goes into a lightly oiled bowl for bulk fermentation at room temperature. Your target here is 1.5x the original size, which usually takes 5 to 7 hours depending on how warm your kitchen is and how active your starter was.
At 70°F, expect this to take closer to 7 hours. At 75°F to 78°F, you might hit 1.5x in 5 hours. The dough should look slightly puffy and feel softer than when you first mixed it, but it shouldn’t be dramatically inflated or full of large air bubbles.
Why stop at 1.5x instead of letting it double? Bagel dough is stiff and dense compared to bread dough. If you let it rise too much during bulk fermentation, the gluten structure gets overstretched and you lose the tight, chewy texture that makes bagels special. Over fermented bagel dough produces dense, heavy bagels even after boiling.
The best way to track this is to use a clear container or mark the side of your bowl with a piece of tape when you start. Check it every hour or so in the final stages. When it looks about 50% larger than where you started, get it into the fridge.
Cold Retard (Refrigerator)
Once your dough hits 1.5x, transfer the whole bowl to the refrigerator for 12 to 24 hours. The cold temperature slows down fermentation dramatically, which does two things: it develops more complex flavor through the longer timeline, and it makes the dough much easier to handle when you’re ready to shape.
During this time, the dough might grow a bit more, but the cold keeps it from going wild. If you’re planning to let it sit for the full 24 hours, make sure you’re refrigerating it right at 1.5x, not later. Starting the cold retard at 1.75x or 2x means you might end up with over proofed dough by morning.
Shaping and Final Proof
After the cold retard, the dough comes out of the fridge and rests at room temperature for 30 to 45 minutes. This takes the chill off so it’s easier to divide and shape. The dough should feel relaxed and pliable, not tight and cold.
Divide it into 18 pieces at 60g each. If you’re adding cream cheese filling (more on that below), now’s the time. Shape each piece into a tight ball by cupping your hand over the dough and rolling in circles on an unfloured surface. The slight tackiness of the dough against the counter creates tension that helps form a smooth ball.
Once shaped, the balls rest on a parchment lined baking sheet for 15 to 20 minutes under a damp towel. This is just a short bench rest to let the gluten relax after shaping.
Then comes the final proof, which is the most important part: 45 to 60+ minutes at room temperature until the balls are slightly puffy and airy. Press one gently with your finger. It should have give and spring back slowly, leaving a slight indent. If it springs back immediately with no indent, keep proofing. If it doesn’t spring back at all, you’ve gone too long (but you can still bake them, they’ll just be a bit denser).
This final proof is what gives you light, airy bagels instead of dense hockey pucks. Skipping it or cutting it short means the dough hasn’t had time to relax and develop those air pockets that make the interior soft and pillowy.
The Float Test
When you drop the bagel balls into the boiling water, they should float immediately. This is your proof (literally) that they’re properly fermented and ready to bake. If they sink and stay on the bottom, they’re under proofed and need more time. Gently move them around with a slotted spoon if they do sink, but ideally you want instant floaters.
Bagels that float right away will have better oven spring, a lighter interior, and that characteristic bagel chew. Sinkers tend to be dense and heavy even after baking.

The Boiling Process
Boiling bagels isn’t just about cooking them partway through. It’s a chemical process that transforms the exterior and sets up the signature bagel texture. Understanding what’s happening in that pot helps you get consistent results every time.
Why Honey (or Sugar)
The boiling water gets an addition of honey or sugar. This adds a subtle sweetness and helps with browning in the oven through caramelization. More importantly, it affects the texture of the crust, making it slightly softer and more pliable than a plain water boil would.
The sugars in the honey also contribute to that beautiful golden brown color during baking. As the bagels bake, the residual honey on the surface caramelizes and creates a slightly glossy finish.
The Color Change
Don’t panic when your boiling water turns slightly yellow or takes on an amber tint after you add the honey. This is completely normal. The honey dissolves and disperses through the water, giving it a light golden color.
This discoloration doesn’t affect the bagels at all. They won’t taste overly sweet or look strange. It’s just the natural color of the honey coming through in the water.
Boiling Technique
Bring 6 to 8 cups of water to a rolling boil, then add the honey or sugar. Stir until completely dissolved. You can reduce to a gentle simmer or keep it at a low boil, whichever is easier to maintain.
Work in batches of 8 to 10 bagel balls depending on the size of your pot. You want enough room for them to float freely without crowding. Crowded bagels can stick together or to the sides of the pot.
Boil for 20 to 30 seconds per side. Use a slotted spoon, fish spatula or spider strainer to flip them halfway through. The bagels should float immediately when they hit the water. If they sink, gently move them around with your spoon to prevent sticking, but this usually means they need more proofing time.
After boiling, transfer to a cooling rack sprayed with cooking spray or oil to prevent sticking. If you’re working in batches of 8 to 10 balls, by the time you finish boiling the first batch, they’ll be ready to dunk in butter and coat in cinnamon sugar while you start the next batch.
Parchment Paper Technique
Here’s a game changer that makes boiling so much easier and helps prevent cream cheese filled bagels from bursting open: individual parchment squares.
Setting Up
Cut small squares of parchment paper, about 3×3 inches or 4×4 inches. You’ll need 18 squares total, one for each bagel ball. After you shape each ball, place it directly on its own parchment square on your baking sheet.
Let them do their final 30 to 45 minute proof sitting on these parchment squares. The parchment prevents them from sticking to the pan and makes the transfer to boiling water seamless.
The Boiling Method
When you’re ready to boil, pick up one parchment square with a bagel ball on it. Lower the whole thing into the boiling water, parchment and all, with the parchment side facing down in the water.
The parchment will float for a second, then release from the bagel and float to the surface on its own. Use your slotted spoon or tongs to fish out the parchment square and discard it. The bagel stays in the water for its 20 to 30 second boil time.
Why This Works
Placing the bagel parchment side down in the water means the bottom seam (where you pinched the dough closed after shaping, or where you sealed in the cream cheese) gets hit with heat immediately. This helps seal that seam before any filling has a chance to escape.
If you’re making cream cheese filled bagels, this technique is especially helpful. That initial heat burst on the seam side creates a barrier that keeps the cream cheese locked inside during the rest of the boiling and baking process.
It also means you’re not trying to peel sticky dough off a baking sheet or use a bench scraper to scrape under each ball. You just lift and drop. Much cleaner, much faster, especially when you’re working with 18 individual balls.
What Happens to the Parchment
The parchment gets wet and softens, but since you’re fishing it out immediately after the bagel releases or you remove it after flipping the bagel, it stays intact. You can reuse your parchment squares for multiple bagels if you work quickly, though most people find it easier to just use fresh squares for each one.
Don’t skip this step if you’re doing cream cheese filling. The seam sealing benefit alone makes it worth the extra 2 minutes of parchment cutting.
Rinse them off and allow to dry and reuse for your next batch.

Flexible Timeline Options
One of the best things about this recipe is how adaptable it is to your schedule. Here’s a timeline that works beautifully for fresh bagels first thing in the morning without having to wake up at 4am.
Day 1: Morning
Mix your dough in the morning. This can be 7am, 8am, whenever you have 15 minutes to combine ingredients and knead. Once mixed, place it in a lightly oiled bowl, cover, and let it bulk ferment at room temperature.
Throughout the day, check on it periodically. You’re watching for that 1.5x increase in size. Depending on your kitchen temperature and starter activity, this could take 5 to 7 hours. So if you mixed at 8am, you might be ready to shape anywhere from 1pm to 3pm.
Day 1: Evening (Before Bed)
Once the dough hits 1.5x, divide it into 18 pieces at 60g each. Shape each piece into a tight ball. If you’re doing cream cheese filling, add it now.
Place each shaped ball on its own small square of parchment paper (3×3 or 4×4 inches). Arrange all 18 on a large baking sheet. You can place them fairly close together since they won’t rise dramatically overnight.
Cover the entire tray well with plastic wrap or place it in a large clean plastic bag. Make sure it’s sealed so the dough doesn’t dry out in the fridge. If you have a lid that fits your baking sheet, that works too. Transfer the whole tray to the refrigerator.
This overnight cold proof does two things: it develops more flavor through the extended fermentation time, and it gives you flexibility. The shaped balls can sit in the fridge for 12 to 24 hours, so if your evening shaping happened at 8pm, you can bake anytime from 8am to 8pm the next day.
Day 2: Morning
Pull the tray of shaped bagel balls out of the fridge first thing in the morning. Let them sit at room temperature, still covered, for 1 to 1.5 hours. This takes the chill off and allows them to finish their final proof.
After an hour, start checking them with the poke test. Gently press one with your finger. It should have give and spring back slowly. If it feels tight and cold, give it another 15 to 30 minutes.
Once they’re properly proofed (soft, airy, with a bit of give), you’re ready to boil and bake. The whole boiling and baking process takes about 45 minutes from start to finish, so if you pulled them out at 7am and they’re ready by 8:30am, you can have fresh bagels on the table by 9:15am.
Why This Timeline Works
Mixing in the morning means you’re working with dough during daylight hours when it’s easier to track fermentation. Shaping in the evening means the cold overnight proof happens while you sleep, developing flavor without any hands on time.
Pulling them out to warm up while you’re making coffee or getting ready means they’re proofing while you’re doing other things. By the time you’re ready to focus on breakfast, they’re ready to boil.
This schedule also means you’re not wrestling with sticky dough late at night when you’re tired. The shaping happens in the evening when you still have energy, and the fussy parts (boiling, coating, baking) happen in the morning when you’re fresh.
If you need to adjust the timing, the most flexible part is that overnight cold proof. Shaped balls can sit in the fridge for up to 24 hours, so you have a full day window to work with. Just make sure they’re well covered so they don’t dry out.
Optional Cream Cheese Filling
Adding cream cheese to the center of each bagel ball turns these into an even more decadent breakfast treat. The key is preparation and technique.
Preparing the Cream Cheese
Portion out 10 to 15g balls of cream cheese (a small kitchen scale is helpful here, but you can also eyeball pieces about the size of a large marble). Place them on a small plate or parchment lined tray and freeze for at least 30 minutes before you’re ready to shape the dough.
The freezing step is non negotiable. Room temperature or even cold cream cheese will be too soft and will squish out the sides when you try to seal the dough around it. Frozen cream cheese stays put and gives you time to work.
Stuffing Technique
When you’re ready to shape, take one 60g piece of dough and flatten it into a disc about 3 to 4 inches across on your work surface. Place a frozen cream cheese ball in the center. Bring the edges of the dough up and over the cream cheese, pinching and sealing tightly at the top.
Flip the ball seam side down and cup your hand over it. Roll in circles on the counter to smooth out the seam and create a tight, round ball. The seam should disappear into the bottom of the ball. If you see any cracks or openings, pinch them shut and roll again.
The goal is a completely sealed ball with no weak spots. Cream cheese will try to escape during boiling and baking, so you want a tight seal. If you’re seeing cream cheese poke through during shaping, your dough might be too cold (let it warm up a few more minutes) or you’re not sealing aggressively enough.
What to Expect During Baking
Even with perfect sealing, you might see a tiny bit of cream cheese leak out during boiling or baking. This is normal and not a big deal. It’ll bake into the cinnamon sugar coating and create little pockets of cream cheese flavor.
The cream cheese stays relatively solid in the center during baking, softening just enough to be creamy when you bite in. It won’t completely melt and run out like mozzarella would. The contrast between the tangy cream cheese center and the sweet cinnamon sugar exterior is excellent.
If you’re nervous about stuffing, start with just 3 or 4 filled balls on your first attempt and leave the rest plain. You’ll get a feel for the sealing technique without committing to a full batch.

Yeast Version Non Sourdough
If you don’t have a sourdough starter or want to make these bagels faster, you can easily adapt this recipe to use commercial yeast. The process remains almost identical, with just a few timing adjustments.
Ingredient Substitutions
Replace the 180g active sourdough starter with:
- 7g (2 1/4 teaspoons) instant yeast OR 8g (2 3/4 teaspoons) active dry yeast
- 90g additional water (bringing your total water to 400g)
- 90g additional bread flour (bringing your total flour to 690g)
Everything else stays exactly the same: brown sugar, salt, cinnamon, honey for boiling, butter and cinnamon sugar for coating.
Which Yeast to Use
Instant yeast and active dry yeast both work, but they’re handled slightly differently.
Instant yeast (also called rapid rise or bread machine yeast) can be added directly to the flour mixture. You don’t need to bloom it first. Use the suggested temperature water when mixing the dough. The rise time will be faster, about 1 to 1.5 hours for bulk fermentation.
Active dry yeast needs to be bloomed first. Dissolve it in the warm water (100 to 110°F / 38 to 43°C) along with the brown sugar. Let it sit for 5 to 10 minutes until it becomes foamy and bubbly. This proves the yeast is alive and active. Then proceed with mixing the dough. The rise time will be slightly longer, closer to 1.5 to 2 hours for bulk fermentation.
Timing Adjustments
The biggest difference between the sourdough and yeast versions is fermentation time.
Bulk Fermentation: Instead of 5 to 7 hours to reach 1.5x size, the yeast version will take 1 to 1.5 hours (instant yeast) or 1.5 to 2 hours (active dry yeast) until the dough has fully doubled in size. Watch for it to double, not just increase by 50%.
Same Day or Overnight: You can still do the overnight cold retard after shaping if you want. The timeline works the same way: mix dough in the morning, let it rise 1 to 2 hours, shape in the evening, refrigerate overnight, bake the next morning.
If you want same day bagels, you can skip the overnight refrigeration entirely. After bulk fermentation, divide and shape the balls, let them rest 15 to 20 minutes, then do a final proof of 30 to 45 minutes at room temperature before boiling and baking.
Everything Else Stays the Same
The kneading, shaping, parchment paper technique, boiling process, butter dunking, cinnamon sugar coating, and baking all work exactly as written in the main recipe. The yeast version will give you delicious cinnamon sugar bagel pull aparts in less total time, though the overnight cold proof option is still available if you want to spread the work over two days.
Troubleshooting Common Issues
Dense, Heavy Bagels
This is the number one complaint with sourdough bagels, and it almost always comes down to fermentation timing. If your bagels are dense instead of light and chewy, you either over proofed during bulk fermentation or under proofed during the final rise.
Over proofing during bulk fermentation happens when you let the dough rise past 1.5x before refrigerating. The gluten gets overstretched, the dough loses structure, and you end up with bagels that are gummy and dense even after boiling. Solution: Watch your bulk ferment closely and refrigerate right at 1.5x.
Under proofing during final proof happens when you rush the 30 to 45 minute rest after shaping. The dough balls look only slightly puffy and don’t have much give when you press them. Solution: Be patient with final proof and do the poke test. Properly proofed dough should feel airy and soft, not tight and dense.
Bagels That Spread Too Much
If your bagels flatten out during boiling or baking instead of keeping their round shape, the dough was too wet or over proofed. Bagel dough should be quite stiff compared to bread dough. When you knead it, it should feel firm and only slightly tacky.
Check your flour measurements (use a scale if possible) and make sure you’re measuring 600g of bread flour, not scooping and packing it into a cup. Too much water makes the dough slack and unable to hold its shape.
Over proofing also causes spreading. If the dough rises too much during bulk or final proof, the structure weakens and the bagels can’t maintain their shape when they hit the hot water or oven.
Bagels That Sink During Boiling
This means they’re under proofed and need more time for final proof. Pull the remaining unboiled balls aside, cover them, and let them continue proofing for another 15 to 30 minutes. Check them with the poke test before trying to boil again.
Bagels that sink will still be edible after baking, but they’ll be denser and less airy than properly proofed ones.
Cinnamon Sugar Won’t Stick
If the cinnamon sugar is sliding off instead of adhering, the bagels either cooled too much after boiling, or you didn’t use enough butter. The bagels need to be warm and the butter needs to be melted and liquid when you dunk.
Work in batches: boil all the bagels, placed them on the cooling rack, then dunk and coat in batches of 4 to 5 balls at a time. Keep the butter warm (you can set the bowl in a larger bowl of hot water if your kitchen is cold).
If you’re seeing bare spots after coating, double dunk: dip in butter, roll in cinnamon sugar, then dip in butter again and roll in cinnamon sugar a second time. And there’s always packing it on the very top by hand.
Uneven Baking
If some bagels are getting too dark while others are still pale, your oven has hot spots. Rotate the pan 180 degrees halfway through baking (around the 12 minute mark). Also make sure you’re baking on the middle rack, not too close to the top or bottom heating elements.
Using a light colored metal pan helps with even browning. Dark pans absorb more heat and can cause the bottoms to over brown before the tops are done.
Using All Purpose Flour Instead of Bread Flour
This recipe is designed for bread flour, which has a higher protein content (around 12 to 14%) that creates more gluten and gives bagels their characteristic chewy texture. If you only have all purpose flour, you can substitute it, but expect slightly different results.
All purpose flour has less protein (around 10 to 12%), so your bagels will be a bit less chewy and slightly softer in texture. The dough may also absorb liquid differently. Start by reducing the water by 10 to 20g when mixing. The dough should still feel stiff and only slightly tacky, not wet or sticky. Add more water a tablespoon at a time if needed during kneading.
The fermentation timing, shaping, boiling, and baking all remain the same. The bagels will still be delicious, just with a texture that’s closer to a soft roll than a traditional New York bagel.

Storage and Reheating
These bagels are absolutely best on the day you make them, still warm from the oven with that crispy cinnamon sugar crust intact. But if you have leftovers (unlikely, but possible), here’s how to store them.
Room Temperature Storage
Store cooled bagels in a paper bag or loosely covered with a kitchen towel at room temperature for up to 2 days. Do not store them in an airtight container or plastic bag. The cinnamon sugar coating needs air circulation or it will turn sticky and wet.
The bagels will lose some of their crispy exterior by day two, but you can revive them by reheating.
If there’s cream cheese in them, store them in the refrigerator right away.
Reheating
For the best texture, reheat in a 350°F oven for 5 to 8 minutes. Place them on a baking sheet and don’t cover them. This crisps up the cinnamon sugar coating again and warms the interior without drying them out.
You can also use a toaster oven if you’re just reheating a few. Avoid the microwave, which will make the coating gummy and the texture rubbery.
Freezing
Freezing is not ideal for these because of the sugar coating, which can get sticky and weird when thawed. If you must freeze them, let them cool completely, then freeze in a single layer on a baking sheet. Once frozen solid, transfer to a freezer bag.
To use, let them thaw at room temperature for 30 to 60 minutes, then reheat in a 350°F oven for 8 to 10 minutes. The texture won’t be quite as good as fresh, but they’re still worth eating.
If you know you’ll be freezing some, consider leaving a portion plain (no cinnamon sugar coating) and adding the coating after you reheat. This gives you much better results.
This sourdough cinnamon sugar bagel pull apart hits every note: chewy sourdough bagel texture, caramelized cinnamon sugar crust, soft pullable interiors, and way less fussy than traditional bagel shaping. Whether you’re making them for a weekend brunch, a holiday breakfast, or just because you want something special, these deliver every time. The fermentation timeline gives you flexibility (you can stretch that cold retard to 24 hours if you need to), and the pull apart format means you can customize with different coatings or fillings. Master the basic version and you’ve got a framework for endless variations.


Leave a Reply