Welcome back to Croissant Class! If you made it through Week One and you have a beautiful, evenly rolled butter block ready to go, you are in the right place. This week we are locking that butter into your dough using the envelope fold method, also called the diamond method.
But before we get to folding, we need to talk about butter temperature. Because it does not matter how perfectly you made your butter block if it is the wrong temperature when it goes into the dough. This step is where so many bakers lose their lamination before they even begin, and I am going to make sure that does not happen to you.
Since building out this class series, I have also released my full Master Croissant Recipe and Masterclass Guide. If you are ready to put everything together, grab it there.
Table of Contents
- The Full Croissant Class Series
- How to Test Your Butter Block Temperature
- Troubleshooting Butter Temperature
- The Envelope Fold Method
- Step by Step: Locking In the Butter
- Tips for Success
- Common Issues and Solutions
- Watch the Full Video
The Full Croissant Class Series
Week One: How to Make a Butter Block
Week Two: Locking In Your Butter Block (you are here)
Week Three: Rolling and Lamination
Week Four: The Single Fold Lamination Method
Week Five: Croissant Final Rollout
How to Test Your Butter Block Temperature
Perfect lamination starts with properly tempered butter. A butter block that is too warm will melt into your dough and give you a tight, bread-like crumb. A butter block that is too cold will break apart during folding, creating uneven lamination and excess butter leakage during the bake.
Here are six ways to check whether your butter block is ready.

The Appearance Test
Perfect: Butter has a matte finish with a subtle sheen.
Too Cold: Appears dull, frosty, or has white spots.
Too Warm: Looks glossy or has translucent edges.
The Corner Bend Test
Gently lift one corner of your butter block with a bench scraper.
Perfect: It flexes 15 to 20 degrees without breaking.
Too Cold: It snaps or cracks when bent.
Too Warm: It bends easily beyond 30 degrees or feels floppy.
The Finger Impression Test
Press your fingertip firmly into both the center and edge of the butter block.
Perfect: Center shows slight resistance with minimal indentation. Edges take a slightly deeper impression that slowly fills back in.
Too Cold: No visible impression, or it cracks around your fingerprint.
Too Warm: Deep impression that does not recover.
The Parchment Release Test
Slowly peel back the parchment paper from your butter block.
Perfect: Parchment releases with slight resistance.
Too Cold: Parchment pops off immediately with zero resistance.
Too Warm: Butter sticks to the parchment or leaves residue.
The Temperature Check
Use an instant read thermometer and check multiple spots across the block.
Perfect: Center reads 38 to 42°F (3 to 5°C). Edges read 48 to 52°F (9 to 11°C).
Too Cold: Below 36°F (2°C) in the center.
Too Warm: Above 55°F (13°C) at the edges.
The Sound Test
Tap the butter block lightly with your knuckle.
Perfect: Produces a dull thud.
Too Cold: Creates a sharp, hard knock.
Too Warm: Makes a soft, muted tap.
Troubleshooting Butter Temperature
If your butter is too cold: Let it rest at room temperature for 3 to 5 minutes, then retest.
If your butter is too warm: Return it to the refrigerator (not the freezer) for 5 to 7 minutes and test again before proceeding. In an emergency, you can chill it in the freezer for 2 to 3 minutes maximum, but watch it closely.

The Envelope Fold Method
The envelope fold, also called the diamond method, is the technique we use to lock the butter block securely inside the croissant dough. It creates multiple overlapping seams that hold the butter in place and give you a strong, even foundation for lamination.
Here is why it works so well:
It creates a very secure butter enclosure with overlapping seams on all four sides. It provides excellent structure for the initial lamination passes. It distributes butter evenly across the dough from the start. And it significantly reduces the risk of butter breakthrough when you begin rolling.
Before you start, make sure your croissant dough has rested in the refrigerator until fully chilled, your butter block is at the correct temperature, and your work surface is clean, cool, and lightly floured.
Step by Step: Locking In the Butter

Step 1: Prepare Your Dough
Remove your chilled dough from the refrigerator and lightly flour your work surface. Roll the dough into a square, working from the center outward and rotating the dough 45 degrees between passes to keep the thickness even throughout.
Size matters here. Your dough square should be approximately 2 to 3 inches larger than your butter block on each side. If your butter block is a 6 inch square, your dough should be roughly an 8 to 9 inch square. This gives each corner of the dough just enough length to meet in the center without excess overlap, which would create uneven layers.
Step 2: Position Your Butter Block
Open your butter block and remove the parchment carefully. Hold the parchment flat against the block and peel it back at a very low angle, almost parallel to the surface. Pull slowly and steadily, keeping the paper close to the work surface. Never pull upward at a steep angle, which can tear the butter. If you feel resistance, gently loosen the edge before continuing.
Place the butter block in the center of your dough square with the corners of the butter pointing toward the middle of each side of the dough. This creates a diamond shape sitting inside a square. Lightly brush off any excess flour from the dough surface between the butter and the dough so the layers adhere cleanly.
Step 3: Begin the Envelope Fold
Working one corner at a time, fold the first corner of the dough over the butter toward the center. The point should extend slightly past the center of the butter block. Press the dough gently against the butter to adhere it and work out any air pockets as you go.
Step 4: Complete the Envelope
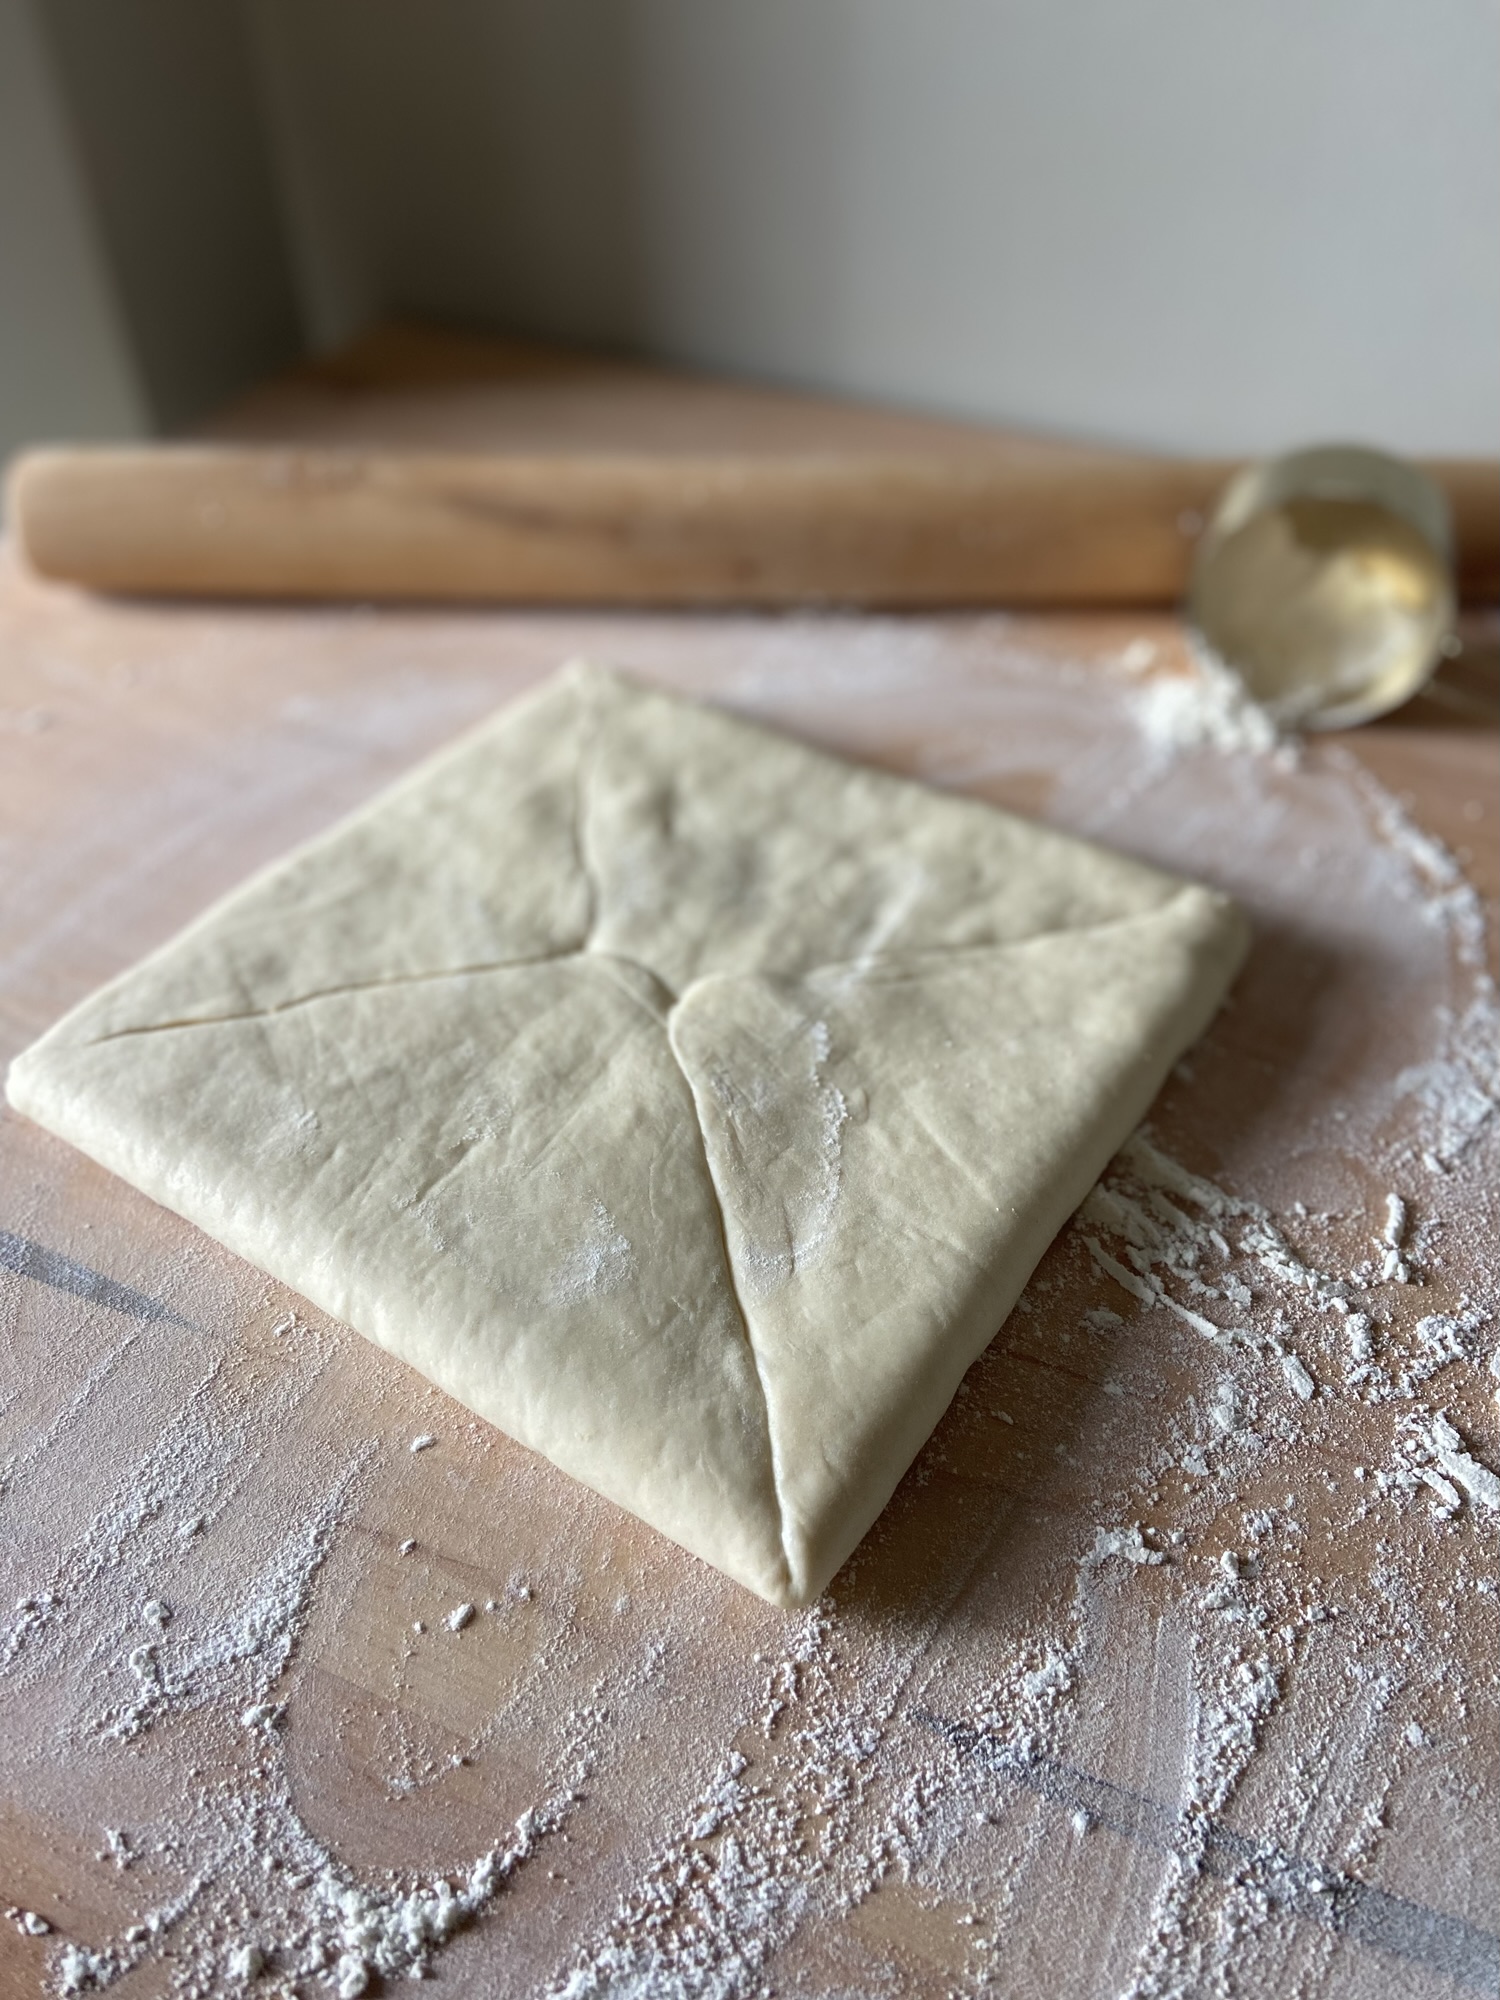
Repeat with the remaining three corners, bringing each point toward the center. Each corner should slightly overlap the previous one, just like sealing an envelope. When all four corners are folded in, the butter should be completely enclosed with no gaps.
Step 5: Seal the Package
[image: img_2287-1 — seams being pinched closed along each fold line]
Pinch the seam lines firmly together. Work inward from the corners toward the center, pressing along each seam line. Then use your rolling pin to apply gentle, even pressure across the entire package to reinforce the seals. There should be no openings where butter could escape during rolling.
Step 6: Square the Package
Use your hands to gently shape the package into a clean, even square. Edges should be straight and corners should be square. Lightly tap the entire package with your rolling pin to strengthen the seals without flattening the butter inside.
Step 7: Rest the Dough
Dust off any excess flour from the surface. Wrap the dough package tightly in plastic wrap and refrigerate for approximately 15 minutes to allow the gluten to relax and the dough to chill before you move into lamination.

Tips for Success
The finished package should have a distinct envelope appearance with seams forming an X through the center. No butter should be visible from the outside. The package should be relatively square with even thickness throughout.
If at any point your butter feels too soft or starts to ooze, put the dough in the refrigerator immediately for 5 minutes before continuing. Working quickly and precisely is more important than working fast. Keep your environment cool. A warm kitchen is your biggest obstacle at this stage.

Common Issues and Solutions
Gaps at the center: Your corners did not extend far enough past the center point. Make sure your dough square is large enough relative to the butter block.
Butter escaping during folding: Your butter block is too warm or too large for your dough square. Chill the butter and check your proportions.
Difficulty folding corners: Your dough square is too small. Roll it out a bit further before trying again.
Butter too soft mid-fold: Stop immediately and refrigerate the entire package for 5 to 10 minutes before continuing.
Watch the Full Video
The full Week Two video is up on Instagram if you want to see every step in real time alongside this guide.
Watch: Locking In Your Butter Block
Up next is Week Three: Rolling and Lamination, where we get into the double fold and start building those layers for real.
And if you are ready for the full recipe with every detail in one place, the Master Croissant Recipe and Masterclass Guide has everything you need.


Leave a Reply