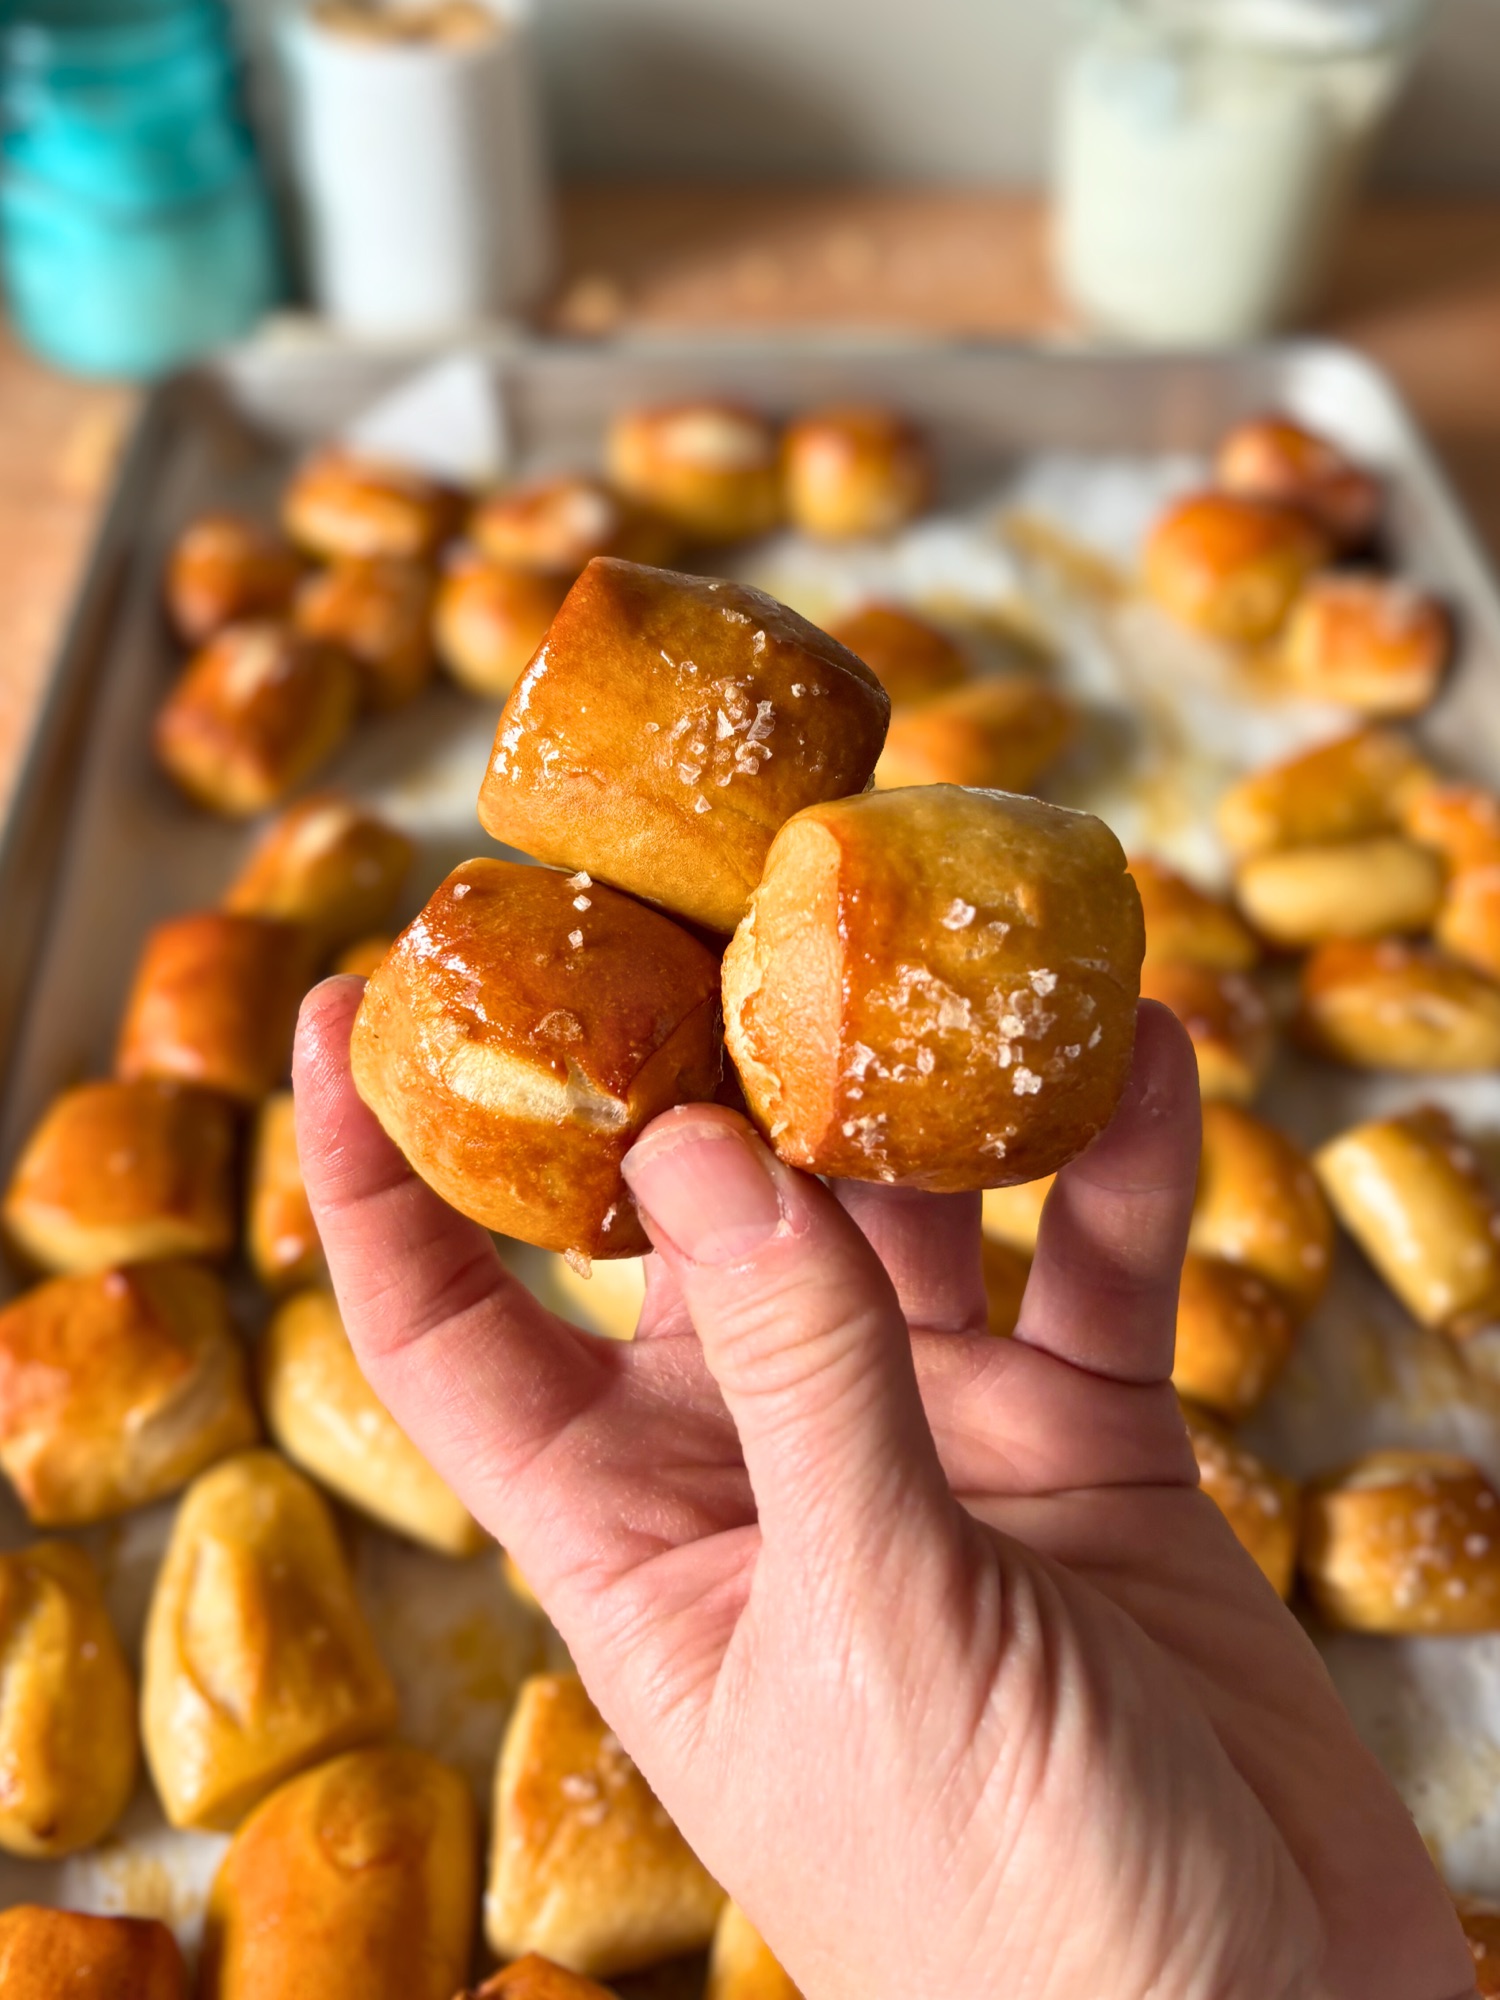
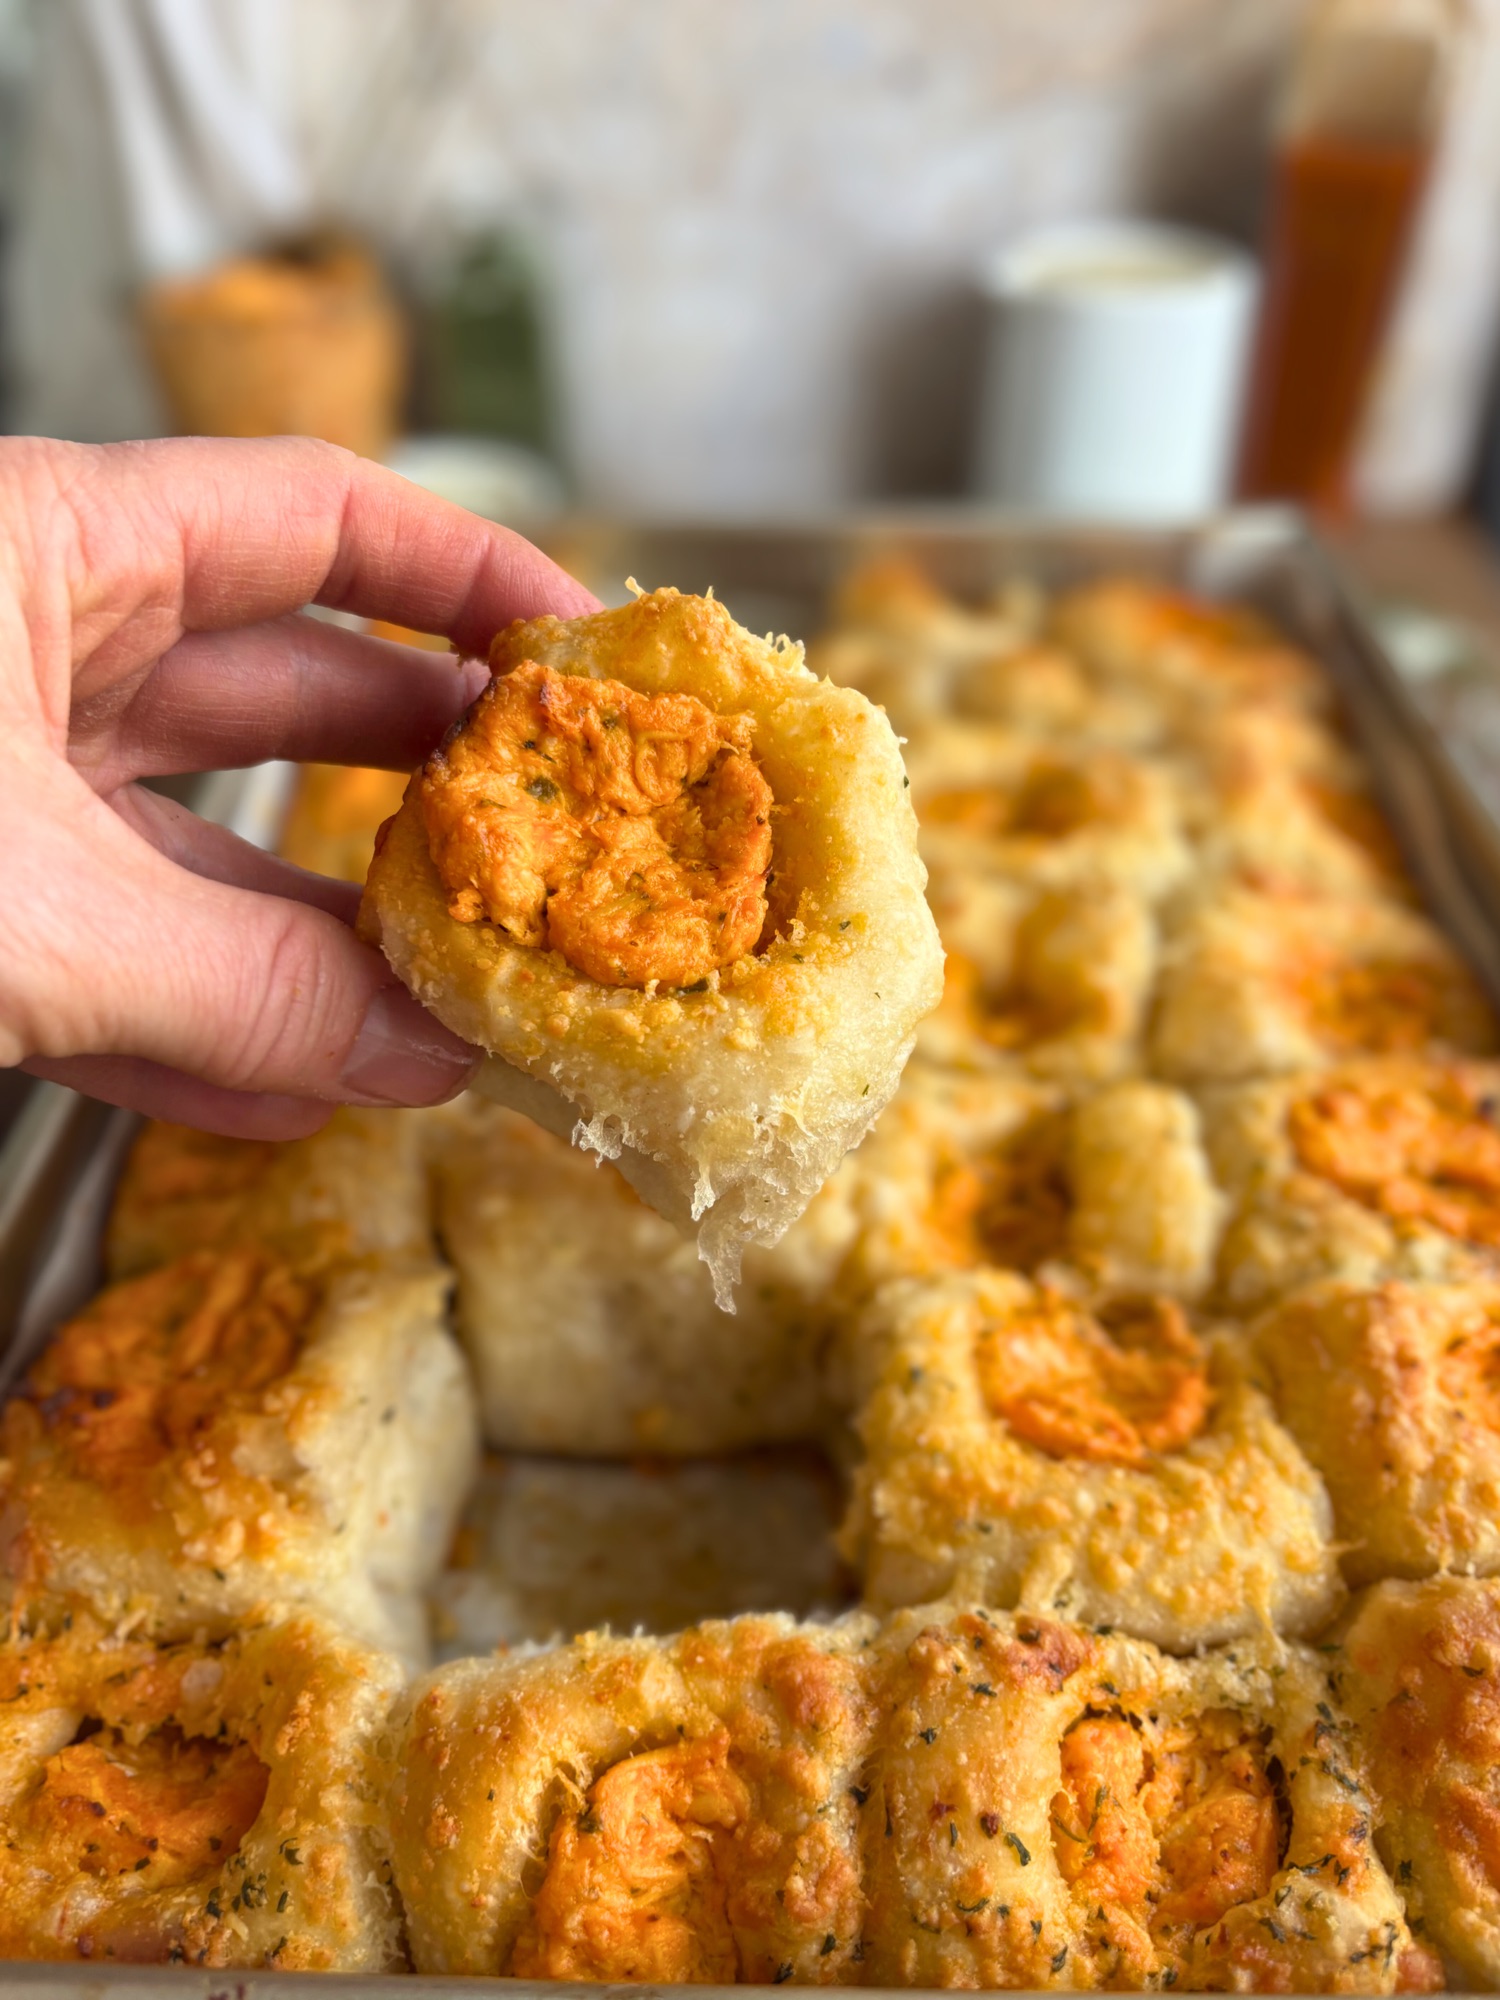
Soft, chewy pretzel bites packed with protein from cottage cheese. These High Protein Pretzel Bites taste exactly like classic mall pretzels but with a serious protein boost. Make them with sourdough for long fermentation benefits or use the quick yeast version for same day snacking.

If you have been looking for a high protein snack that actually tastes good, these cottage cheese pretzel bites are about to become your new obsession. They have that perfect soft pretzel texture with a shiny, chewy crust and pillowy interior. The best part? You cannot taste the cottage cheese at all. My kids devoured these and had no idea they were eating something packed with protein.
These pretzel nuggets are so good that you might want to make a double batch. They disappear fast, especially when served warm with your favorite dipping sauce. Whether you are meal prepping protein snacks for the week or need a crowd pleasing appetizer, these high protein pretzel bites deliver on flavor and nutrition.
Table of Contents
- Why This Recipe Works
- Key Ingredients
- Step by Step Process
- Understanding the Timing
- Shaping Tips (The Scissors Method!)
- Why the Water Changes Color
- Quick Yeast Version
- Making Traditional Pretzel Shapes
- Serving Suggestions
- Storage and Reheating
- Frequently Asked Questions

High Protein Pretzel Bites (Sourdough or Yeast!)
Equipment
- – Stand mixer with dough hook
- Food processor or blender
- Large mixing bowl
- Kitchen scissors or bench scraper
- Parchment paper
- 2 baking sheets
- Large pot for boiling
- Slotted spoon
- plastic wrap
- – Pastry brush
- Cooling rack
Ingredients
For the Pretzel Dough
- 500 g bread flour
- 150 g cottage cheese blended until completely smooth
- 155 g water
- 100 g active sourdough starter fed and bubbly
- 10 g salt
- 12 g granulated sugar
For the Baking Soda Bath
- 2 quarts of water
- 45 g baking soda about 3 tablespoons
- 30 g brown sugar optional, for enhanced browning
- neutral oil spray, for the cooling rack after boiling to keep the dough from sticking.
For Topping
- Coarse pretzel salt or flaky sea salt
- Melted butter optional, for brushing after baking
Instructions
Day 1: Mix and Bulk Ferment
- Blend the cottage cheese in a food processor or blender until completely smooth with no visible curds. Set aside.
- In the bowl of a stand mixer, combine the water, blended cottage cheese, sourdough starter, and sugar. Stir briefly to mix.
- Add the bread flour and salt to the wet ingredients.
- Using the dough hook attachment, knead on medium low speed for 8 to 10 minutes until the dough is smooth, elastic, and passes the windowpane test. The dough should be slightly tacky but not sticky.
- Form the dough into a smooth ball and place in a lightly oiled bowl. Cover tightly with plastic wrap.
- Let the dough bulk ferment at room temperature (72 to 75°F) for 2 to 2.5 hours, until puffy and increased by about 50 percent. It should not quite double in size.
- Transfer the covered bowl directly to the refrigerator for 12 to 24 hours for cold fermentation.
Day 2: Shape, Rest, and Bake
- Remove the cold dough from the refrigerator and let it rest at room temperature for 45 minutes. This allows the dough to warm up enough to be pliable for rolling.
- Turn the dough out onto a clean work surface. Eyeball dividing the dough if you prefer. If you want to be more precise, divide into 8 to 10 equal portions (80 to 100g each). But really eyeballing works just fine.
- Working with one portion at a time and keeping the others covered, roll each piece into a rope about 12 to 18 inches long and roughly 3/4 inch thick.
- Using kitchen scissors or a bench scraper, cut each rope into 1/2 – 1 inch pieces. If you find resistance when rolling, cover and let rest for 15 minutes and then continue to roll out.
- Transfer the cut nuggets to parchment lined baking sheets as you go. Keep them covered with plastic wrap.
- Let the shaped nuggets rest at room temperature, covered, for 30 minutes. This allows the gluten to fully relax.
- Place the baking sheets in the refrigerator, uncovered, for 30 to 45 minutes. This develops a slightly dry skin on the outside of each nugget.

- Preheat your oven to 425°F.
- Bring 2 quarts of water to a boil in a large pot. Add the baking soda and brown sugar (if using). Stir to dissolve, then reduce to a gentle simmer. The water will turn brownish amber in color.
- Working in batches of 20 to 25 nuggets at a time, carefully drop the cold nuggets into the simmering baking soda bath. Boil for 30 seconds total, flipping halfway through with a slotted spoon.
- Remove the nuggets with the slotted spoon and put them on a cooling rack that you sprayed with oil (avocado or olive) to help with non stick. Immediately sprinkle the boiled nuggets with coarse salt while they are still wet.
- Once finished with all the nuggets transfer them to a parchment lined baking sheet.
- Bake for 12 to 15 minutes, rotating the pans halfway through, until the nuggets are deep golden brown.
- Remove from the oven and brush with melted butter if desired. Serve warm.
Notes
10:52 AM (0 minutes ago)
to me
Why This Recipe Works

The secret to these high protein pretzel bites is cottage cheese. When blended smooth and incorporated into the dough, cottage cheese adds significant protein (about 60% more per nugget than traditional pretzels) while keeping the texture incredibly soft and tender. The mild flavor completely disappears, leaving you with authentic pretzel taste.
The Cottage Cheese Advantage
The cottage cheese does more than boost protein. It adds moisture and richness to the dough, creating that pillowy soft interior we all love in a good pretzel. The slight acidity from the cottage cheese also speeds up fermentation in the sourdough version, making the timeline more manageable than traditional sourdough baking.
The Essential Baking Soda Bath
The baking soda bath is non negotiable. This quick 30 second boil in alkaline water is what transforms ordinary dough into pretzels. It creates that signature shiny, chewy crust and deep brown color. Without it, you just have bread shaped like pretzels.
Long Fermentation Benefits
For the sourdough version, the long cold fermentation develops complex flavor and breaks down gluten proteins, making these easier to digest. This is especially helpful for anyone with gluten sensitivity. The cold retard also makes the dough much easier to work with when shaping.
Why the Nugget Format Works
The nugget format is genius for a few reasons. First, no complicated pretzel shaping required. Second, they cook evenly and quickly. Third, they are perfect for dipping and snacking. Fourth, kids love them. These are basically the most practical way to enjoy homemade pretzels.
Key Ingredients
Cottage Cheese: The star ingredient. Use full fat cottage cheese for the best texture and richness. You must blend it completely smooth before adding it to the dough. No one wants surprise curds in their pretzels. The cottage cheese adds protein, moisture, and a subtle tang that complements the sourdough beautifully.
Bread Flour: Higher protein content than all purpose flour means better gluten development, which creates that chewy pretzel texture. The cottage cheese softens the gluten structure, so bread flour helps maintain the right amount of chew.
Active Sourdough Starter: Your starter should be fed, bubbly, and at peak activity. The sourdough adds complex flavor and provides all the leavening power for this recipe. If you are using the yeast version instead, skip ahead to that section.
Water: Regular tap water works fine. The exact amount matters because pretzel dough needs to be on the stiffer side to hold its shape during boiling.
Salt: Enhances flavor and strengthens gluten. Do not skip it.
Sugar: Just a small amount feeds the yeast and helps with browning. Granulated sugar works perfectly.
Baking Soda: For the boiling bath, not the dough. This is what gives pretzels their characteristic flavor and color.
Brown Sugar: Optional addition to the baking soda bath. It helps enhance browning and adds a subtle sweetness to the crust.
Coarse Salt: Pretzel salt or flaky sea salt for topping. The large crystals are traditional and add the perfect salty crunch.
Step by Step Process
Day 1: Mixing and Bulk Fermentation
Blend the Cottage Cheese
Start by blending your cottage cheese until it is completely smooth with absolutely no visible curds. Use a food processor or high powered blender. This step is crucial. Any remaining lumps will create weird pockets in your dough.
Mix the Dough
Combine your water, blended cottage cheese, sourdough starter, and sugar in a bowl. Stir briefly to mix. Add the bread flour and salt. Using a stand mixer with a dough hook, knead on medium low speed for 8 to 10 minutes. The dough should be smooth, elastic, and pass the windowpane test. It should feel slightly tacky but not sticky.
If you are mixing by hand, knead for 12 to 15 minutes on a lightly oiled surface. The cottage cheese makes this dough a bit softer than traditional bread dough, but you want it to pull away from your hands cleanly.
Bulk Fermentation
Form the dough into a smooth ball and place it in a lightly oiled bowl. Cover tightly with plastic wrap or a damp towel. Let it rise at room temperature (around 72 to 75°F) for 2 to 2.5 hours. You are looking for the dough to become puffy and increase by about 50 percent. It should not quite double. The cottage cheese acidity speeds up fermentation, so this happens faster than typical sourdough.
Cold Retard
Transfer the covered bowl directly to the refrigerator for 12 to 24 hours. This cold fermentation develops flavor, makes the dough easier to handle, and fits perfectly into a relaxed baking schedule. You can mix the dough one evening and shape it anytime the next day.
Day 2: Shaping, Resting, and Baking
Rest the Dough
Remove the cold dough from the refrigerator and let it sit at room temperature for 45 minutes. This is crucial. The dough needs to warm up enough to be pliable and easy to roll without being sticky. Cold dough straight from the fridge is too stiff and will fight you when you try to roll it into ropes.
Shape into Nuggets
Turn the rested dough out onto a clean work surface. Divide it into 8 to 10 equal portions (about 80 to 100g each). Working with one portion at a time and keeping the others covered, roll each piece into a rope about 18 to 20 inches long and roughly 3/4 inch thick.
Here is where it gets easy. Using kitchen scissors or a bench scraper, cut each rope into 1 inch pieces. You should get about 15 to 20 nuggets per rope. Do not worry about making them perfectly round. The rough cut edges will puff up and round out during boiling and baking.
Transfer the cut nuggets to parchment lined baking sheets as you go. Keep them covered with plastic wrap.
Rest After Cutting
Let the shaped nuggets sit at room temperature, covered, for 30 minutes. This allows the gluten to relax completely after all that rolling and cutting. Relaxed gluten means the nuggets will hold their shape better and bake up lighter. Use this time to get your baking soda bath ready and gather your supplies.
Uncovered Chill
Place the baking sheets in the refrigerator, uncovered, for 30 to 45 minutes. This develops a slightly dry skin on the outside of each nugget. That skin is crucial for maintaining shape during the boil and creating that shiny, tight pretzel crust.
Prepare the Baking Soda Bath
While the nuggets are chilling, bring 2 liters of water to a boil in a large pot. Once boiling, add 3 tablespoons (about 45g) of baking soda and 2 tablespoons of brown sugar if using. Stir to dissolve, then reduce to a gentle simmer. The water will turn a brownish amber color. This is completely normal and exactly what you want.
Boil the Nuggets
Preheat your oven to 425°F. Working in batches of 8 to 10 nuggets at a time, carefully drop them into the simmering baking soda bath straight from the cold refrigerator. Boil for 30 seconds total, flipping them halfway through with a slotted spoon. They should float.
Remove with the slotted spoon and let excess water drip off before placing them back on the parchment lined baking sheets. The entire boiling process for the full batch takes only about 3 minutes.
Salt and Bake
Immediately sprinkle the boiled nuggets with coarse salt while they are still wet. This is when the salt will stick. Bake for 12 to 15 minutes, rotating the pans halfway through, until the nuggets are deep golden brown with that characteristic pretzel color.
Finish and Serve
Remove from the oven and brush with melted butter if desired. The butter adds richness and shine, but it is optional. Serve warm for the best experience.

Understanding the Timing
The fermentation schedule for these cottage cheese pretzel bites is specifically designed to work around the cottage cheese acidity while giving you maximum flexibility.
Why the Short Bulk Ferment?
Traditional sourdough often bulk ferments for 4 to 6 hours or more. These pretzel bites only need 2 to 2.5 hours at room temperature. The cottage cheese adds extra acidity to the dough, which accelerates fermentation. If you let it go too long, the dough becomes over fermented, leading to a sticky, hard to handle mess that will not hold its shape.
Watch for the dough to become puffy and increase by about 50 percent. It should look alive and airy but not fully doubled. When you gently press it with a finger, it should slowly spring back but leave a small indent.
Why Shape After the Cold Retard?
Shaping cold dough is significantly easier than shaping room temperature dough, especially with the softer texture that cottage cheese creates. The cold dough is firmer and less sticky, making it simple to roll into ropes and cut into nuggets. Your hands stay cleaner and the pieces hold their shape better.
The 12 to 24 hour cold retard also develops deeper, more complex flavor in the dough. This is where the sourdough magic really happens. The long, slow fermentation at cold temperatures allows the bacteria in your starter to produce those tangy, nuanced flavors that make sourdough special.
Why the 45 Minute Warm Up?
When dough comes straight out of the refrigerator after 12 to 24 hours, it is cold and stiff. Trying to roll cold dough into ropes is frustrating. It tears, springs back, and fights you at every turn. Letting the dough sit at room temperature for 45 minutes brings it to the perfect working temperature. It becomes pliable and cooperative without getting warm enough to be sticky.
This rest also gives the gluten time to relax after the long cold ferment, making the dough much easier to shape. You will notice a huge difference in how smoothly the dough rolls out after this rest.
Why 30 Minutes After Cutting?
After you have rolled and cut all your nuggets, they need another 30 minutes at room temperature, covered. This second rest serves a different purpose. The rolling and cutting action tightens up the gluten. If you tried to boil them immediately, they might be a bit tough or dense.
The 30 minute rest allows the gluten to fully relax so the nuggets bake up light and tender with that perfect soft pretzel texture. This is also the perfect time to prepare your baking soda bath, preheat your oven, and get everything ready for the final steps.
Why the Uncovered Chill Before Boiling?
This 30 to 45 minute uncovered rest in the refrigerator is a professional pretzel technique. It develops a slightly dried skin on the outside of each nugget. When the nuggets hit the hot water, that skin acts like armor, helping them maintain their shape instead of falling apart or puffing up too much. The dry exterior also contributes to that shiny, tight pretzel crust we all love.
Total Timeline:
Day 1 (Evening): Mix and knead (10 minutes), bulk ferment (2 to 2.5 hours), refrigerate overnight
Day 2 (Anytime): Rest dough (45 minutes), shape and cut (15 minutes), rest nuggets (30 minutes), chill uncovered (30 to 45 minutes), boil and bake (20 minutes)
Active time is minimal. Most of the process is hands off waiting, which makes this recipe perfect for busy schedules.
Shaping Tips (The Scissors Method!)

Forget trying to portion out 50+ individual pieces of dough. The rope and cut method is faster, easier, and gives you consistent results.
The Process:
Divide your cold dough into 8 to 10 equal portions. You can weigh them (80 to 100g each) for consistency, but I definity eyeballed them.
Take one portion and roll it into a rope. Start from the center and work your way out toward the ends, applying gentle, even pressure. The rope should be about 18 to 20 inches long and roughly 3/4 inch thick. Do not stress about getting it perfectly uniform. Slight variations add character.
Here is where the scissors come in. Using clean kitchen scissors (or a bench scraper if you prefer), cut the rope into 1 inch pieces. Just snip, snip, snip down the length of the rope in the size you prefer, i liked 1/2 inch to 1 inch size.
The cut edges might look a bit rough and uneven. That is perfectly fine. When the nuggets hit the boiling water and then bake in the oven, those edges will puff and round out naturally. You will end up with rustic looking bites that still have that perfect pretzel shape.
Do Not Worry About Perfection:
The beauty of pretzel nuggets is that they do not need to be perfect. Unlike traditional shaped pretzels where you are trying to get those elegant loops and twists, these are meant to be quick and casual. As long as your pieces are roughly the same size so they bake evenly, you are golden.
I have made these dozens of times and I promise, the rough cut method is the way to go. You will save at least 15 minutes of fussy shaping time, and the end result tastes exactly the same.
Keep Dough Covered:
Work with one portion at a time and keep the rest covered under plastic wrap or a damp towel. The dough will start to warm up and get stickier if it sits out too long. Cold dough is easy dough.
Why the Water Changes Color

If you have never made pretzels before, you might be surprised when you add the baking soda to your boiling water and it suddenly turns a brownish, amber color. Do not panic. This is completely normal and exactly what should happen.
The Science:
Baking soda is alkaline (meaning it has a high pH). When you add brown sugar to that alkaline environment, the sugars start to caramelize faster than they normally would. This creates those brown, amber tones in the water. The alkaline environment is also what triggers the Maillard reaction on the surface of your pretzels, which is responsible for that deep brown color and distinctive pretzel flavor.
Some recipes use just baking soda without any sugar, and the water will still take on a slightly cloudy, yellowish tint. That is also normal. Adding brown sugar just enhances the effect and helps your pretzels get even darker and shinier.
What About Bitterness?
You might have heard that too much baking soda can make pretzels taste bitter or soapy. This is true, which is why the ratio matters. Using 3 tablespoons (about 45g) of baking soda in 2 liters of water gives you great color and flavor without any bitterness. If you use way more baking soda (like 1/2 cup or more), you risk that soapy aftertaste.
The 30 second boil time is also important. You want just enough time for the alkaline bath to work its magic on the exterior, but not so long that it penetrates deep into the dough. Some recipes call for rinsing the pretzels after boiling to remove excess alkalinity, but I have never found this necessary with the ratios in this recipe.
Add Baking Soda Before Boiling:
Always add your baking soda and brown sugar to the water before it comes to a full boil. If you dump baking soda into already boiling water, it will foam up dramatically and can overflow your pot. Start with cold or warm water, add the baking soda, stir to dissolve, then bring it to a boil. Much safer and easier.
Quick Yeast Version
Not everyone keeps a sourdough starter, and sometimes you just want fresh pretzels without the overnight wait. This yeast version uses the exact same technique and produces pretzel bites that are just as delicious. The main difference is timing and a slightly less complex flavor.
Yeast Version Ingredients:
- 500g bread flour
- 150g cottage cheese, blended until completely smooth
- 200g warm water (about 110°F)
- 7g instant yeast (1 standard packet or 2 1/4 teaspoons)
- 10g salt
- 12g granulated sugar
For the baking soda bath and topping, use the same ingredients as the sourdough version.
Yeast Version Instructions:
Blend the cottage cheese until completely smooth. Set aside.
In a stand mixer bowl, combine the warm water, instant yeast, and sugar. Stir briefly and let sit for 5 minutes until the mixture looks slightly foamy. This proves your yeast is active.
Add the blended cottage cheese to the yeast mixture and whisk until fully incorporated.
Add the bread flour and salt. Knead with the dough hook on medium low speed for 8 to 10 minutes until smooth and elastic. The dough should pass the windowpane test.
Form into a ball and place in a lightly oiled bowl. Cover and let rise at room temperature for 45 minutes to 1 hour, until puffy and increased by about 50 percent.
At this point, you have two options. You can shape the dough immediately for same day pretzels, or you can refrigerate it for 4 to 12 hours to develop more flavor (this is optional with the yeast version but recommended).
Same Day Option:
After the 45 minute to 1 hour rise, turn the dough out and divide into portions. Roll into ropes and cut into nuggets as described in the shaping section. Let the shaped nuggets rest at room temperature, covered, for 15 to 20 minutes.
Skip the uncovered chill (or do just 15 to 20 minutes if you want) and proceed directly to boiling and baking.
Cold Ferment Option:
After the initial rise, punch down the dough, cover tightly, and refrigerate for 4 to 12 hours. When ready to bake, remove from the fridge and shape while cold following the same process as the sourdough version. This gives you more scheduling flexibility and slightly better flavor.
Timing Notes:
The yeast version is significantly faster. From start to finish, you can have warm pretzel bites on the table in about 2 hours for the same day method, or you can split the work over two days like the sourdough version if that works better for your schedule.
The flavor will be more straightforward and less tangy than the sourdough version. Both are delicious. Both are packed with protein from the cottage cheese. Choose based on what fits your lifestyle.
Making Traditional Pretzel Shapes
While I love the simplicity of pretzel nuggets, you can absolutely use this dough to make traditional pretzel shapes. The process is nearly identical with just a few tweaks to the shaping.
How to Shape Traditional Pretzels:
After the cold retard, divide your dough into 10 to 12 equal pieces (about 80 to 90g each for medium pretzels, or 60 to 70g for smaller ones).
Roll each piece into a long rope, about 20 to 24 inches. The rope should be slightly thicker in the middle and taper toward the ends.
To form the classic pretzel shape, lay the rope in a U shape on your work surface. Cross the ends over each other about 2 inches from the tips, twist once, then fold the twisted section down and press the ends onto the bottom curve of the U. This creates that iconic pretzel look with the two “arms” and the fat bottom.
Place the shaped pretzels on parchment lined baking sheets. Cover and let rest for 15 to 20 minutes at room temperature, then chill uncovered for 30 to 45 minutes just like the nuggets.
Boil the pretzels one or two at a time for 30 seconds per side. They are larger than the nuggets so you will not be able to fit as many in the pot at once. Use a large slotted spatula or spider to carefully lower them into the water and lift them out.
Baking Traditional Pretzels:
Traditional shaped pretzels need slightly longer in the oven than the nuggets. Bake at 425°F for 14 to 16 minutes, until deep golden brown. The thicker center section needs that extra time to bake through.
If you want to get fancy, you can score the fat bottom section of each pretzel with a sharp knife or lame before baking. This is traditional and looks professional, but it is completely optional.
Rolling Tips:
Getting those ropes long and even takes a bit of practice. Start by rolling the dough under both hands at once, working from the center outward. Apply even, gentle pressure. If the dough keeps springing back, let it rest for 5 minutes to relax the gluten, then try again.
The cold dough from the fridge is much easier to roll than room temperature dough. If your dough starts getting too warm and sticky, pop it back in the fridge for 10 minutes.
Serving Suggestions
These high protein pretzel bites are incredibly versatile. They are delicious on their own, but they really shine when paired with the right dips and accompaniments.
Classic Dipping Sauces:
- Beer Cheese Sauce: The gold standard for pretzel dipping. Sharp cheddar melted with a bit of beer, milk, and seasonings creates that rich, tangy dip that is perfect for pretzels. You can make a high protein version by blending cottage cheese with cheddar and taco seasoning, heating until melted and smooth.
- Honey Mustard: A classic pairing that never disappoints. The sweet and tangy flavors complement the salty pretzels beautifully. Mix equal parts Dijon mustard and honey, or use grainy mustard for more texture.
- Spicy Brown Mustard: Simple and traditional. Whole grain mustard or spicy brown mustard adds sharp, pungent flavor that cuts through the richness of the pretzels.
- Cheese Sauce (Queso Style): Always a hit, especially with kids. Melt together cheddar, a bit of cream cheese or cottage cheese for extra protein, and some salsa or diced tomatoes with green chiles.
Creative Dipping Options:
- Ranch Dressing or Dip: Ranch seasoned cream cheese dip or classic ranch dressing works surprisingly well with pretzels. The cool, herby flavor is a refreshing contrast.
- Marinara Sauce: Turn these into pizza pretzel bites by serving with warm marinara. Sprinkle some mozzarella and pepperoni on top before baking for the full pizza experience.
- Cinnamon Sugar Coating: Transform these into a sweet snack. Skip the salt topping, bake as directed, then brush with melted butter and roll in cinnamon sugar while still warm.
- Peanut Butter or Almond Butter: Add even more protein and create a sweet and salty combination. This works especially well for kids or as a post workout snack.
- Hummus: A great option for a Mediterranean twist. Classic, roasted red pepper, or garlic hummus all pair beautifully with the pretzel flavor.
Serving Ideas:
These pretzel bites are perfect for game day spreads, parties, after school snacks, or meal prep. Serve them in a big bowl with multiple dipping sauces and watch them disappear.
They are excellent alongside soup or salad as a bread alternative. The protein boost makes them more substantial than regular bread.
Pack them in lunchboxes with some cheese cubes and veggies for a balanced, kid friendly lunch.
Storage and Reheating
Room Temperature Storage:
Store completely cooled pretzel bites in an airtight container at room temperature for 2 to 3 days. They will stay relatively soft, though the crust will lose some of its initial crispness. The salt on top may start to dissolve slightly after the first day, which is normal.
Refrigerator Storage:
For longer storage, keep them in an airtight container in the refrigerator for up to 5 days. The cold environment will firm them up, but they reheat beautifully.
Freezer Storage:
These freeze exceptionally well. Let the baked pretzel bites cool completely, then freeze them in a single layer on a baking sheet for about 2 hours. Once frozen solid, transfer them to a freezer safe bag or container. They will keep for up to 3 months.
You do not need to thaw them before reheating. Frozen pretzel bites can go straight from freezer to oven.
Reheating:
The best way to reheat pretzel bites is in the oven. Preheat to 350°F and bake for 5 to 7 minutes (8 to 10 minutes if frozen) until warmed through. This restores that fresh baked texture with a crispy exterior and soft interior.
You can also reheat them in an air fryer at 350°F for 3 to 5 minutes. This method is especially good for getting that crunchy crust back.
Microwave reheating works in a pinch but will make the pretzels softer and slightly chewy rather than crispy. Wrap them in a damp paper towel and microwave in 15 second intervals until warm.
Make Ahead Strategy:
You can prepare these through the shaping step, then freeze the raw, shaped nuggets before boiling. When you want fresh pretzels, boil them straight from frozen (they will need an extra 10 to 15 seconds in the water), then bake as directed. This gives you the convenience of freezer pretzels with the taste and texture of fresh baked.
Frequently Asked Questions
Can I taste the cottage cheese in these pretzels?
Not at all. When cottage cheese is blended smooth and incorporated into dough, it completely disappears flavor wise. These taste exactly like traditional soft pretzels. The cottage cheese contributes moisture, tenderness, and protein, but no distinct flavor. Even picky eaters and cottage cheese skeptics love these.
Can I use Greek yogurt instead of cottage cheese?
Greek yogurt can work as a substitute, but the results will be slightly different. Use whole milk or 2% milk Greek yogurt for best results. Greek yogurt has a stronger tang and less moisture than cottage cheese. If you use Greek yogurt, you may need to reduce the water slightly (start with 10 to 15g less) and be prepared for a slightly more sour flavor. Cottage cheese gives better results for this recipe.
Do I have to boil the pretzels?
Yes, the baking soda bath is essential. Without it, you will end up with bread rolls shaped like pretzels. The alkaline boil creates that distinctive pretzel crust, flavor, and color. There is no shortcut that gives the same result. It only takes 30 seconds per batch and is worth it.
Can I use all purpose flour instead of bread flour?
You can, but bread flour is strongly recommended. The higher protein content in bread flour creates better gluten development, which gives you that characteristic pretzel chew. All purpose flour will produce softer, less chewy pretzels that are more bread like in texture.
Why did my pretzel bites turn out dense?
Dense pretzel bites usually result from under fermentation or over handling. Make sure your sourdough starter is active and bubbly before using it. Let the dough bulk ferment until it is puffy and airy, not just sitting there looking flat. Handle the shaped nuggets gently and avoid squeezing or compressing them.
Can I make these without a stand mixer?
Absolutely. You can mix and knead the dough by hand. It will take about 12 to 15 minutes of kneading on a lightly oiled surface. The dough should be smooth, elastic, and pass the windowpane test. Your arms will get a workout, but it is completely doable.
How do I know when my pretzels are done baking?
Look for a deep golden brown color, almost mahogany. They should be darker than you think. That dark color is what gives pretzels their characteristic flavor. If they are pale, they need more time. The internal temperature should reach about 200°F if you want to be precise.
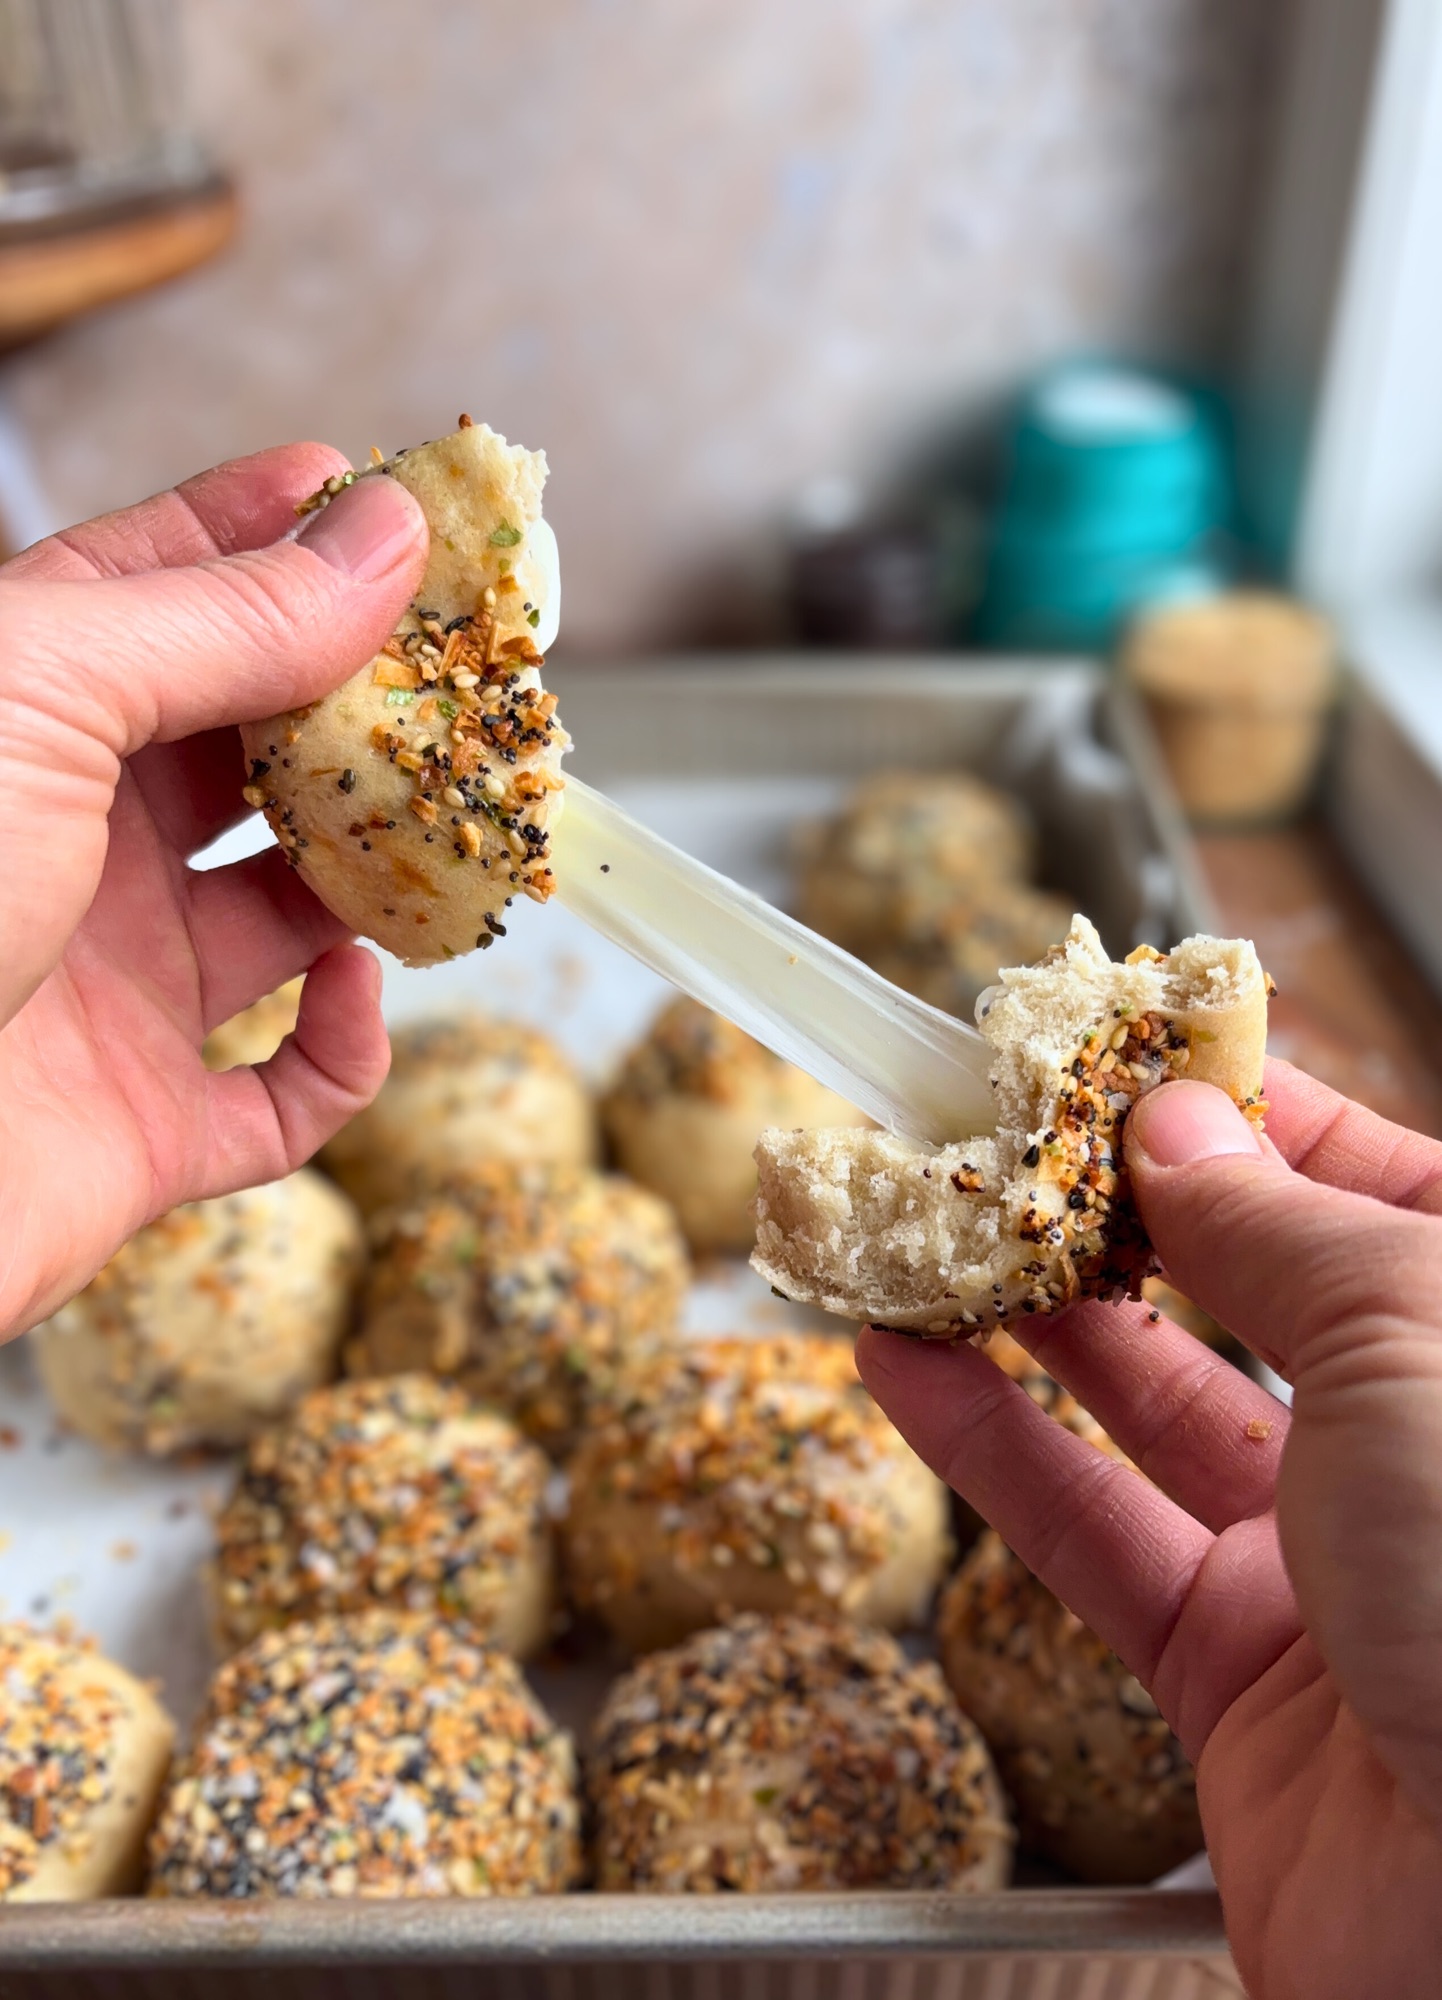
Can I add cheese to the dough?
You can fold in shredded cheese after kneading for cheese filled pretzel bites. Sharp cheddar works especially well. Add about 1 cup of shredded cheese and gently knead it in until distributed. The cheese will create pockets and some may leak out during boiling, but they will still be delicious.
What if I do not have pretzel salt?
Flaky sea salt or coarse kosher salt work as substitutes. Regular table salt is too fine and will dissolve too quickly. You want those visible salt crystals on top for the full pretzel experience.
Can I make these ahead for a party?
Yes. Bake them up to 2 days ahead and store in an airtight container. Reheat in a 350°F oven for 5 to 7 minutes before serving. Or, freeze them baked and reheat from frozen on the day of your party. They taste freshly made when reheated properly.
Why are my pretzels bitter?
Bitterness comes from too much baking soda in the boiling water or boiling for too long. Stick to 3 tablespoons of baking soda in 2 liters of water and boil for only 30 seconds total. That ratio gives you great color and flavor without any soapy or bitter taste.
Do these really have more protein than regular pretzels?
Yes. Each pretzel nugget contains approximately 1.3g of protein compared to about 0.8g in traditional soft pretzel bites. That is about 60% more protein per nugget, thanks to the cottage cheese. This adds up when you are snacking on a handful of these delicious bites.
These High Protein Pretzel Bites prove that healthy snacking does not have to be boring or complicated. With cottage cheese as the secret ingredient, you get authentic pretzel flavor and texture with a serious protein upgrade. Whether you make the sourdough version for that long fermented goodness or the quick yeast version for same day snacking, you will end up with pretzel bites that rival anything from the mall.
The best part? They are so simple to make. No fancy shaping skills required. Just roll, cut with scissors, boil, and bake. My kids request these constantly, and I love that I can feel good about giving them a snack that is both delicious and nutritious.
Make a double batch. Trust me on this one. They disappear faster than you expect, especially when served warm with your favorite dipping sauce. These high protein pretzel nuggets might just become your new favorite way to use cottage cheese.

Other High Protein Recipes


Leave a Reply