Table of Contents
- Why You’ll Love This Buffalo Chicken Dip Pull Apart Focaccia
- What Makes This Recipe Special
- The Benefits of Sourdough Fermentation
- Key Ingredients
- How to Make Buffalo Chicken Dip Pull Apart Focaccia
- Tips for Success
- Substitutions and Variations
- Make Ahead Instructions
- Serving Suggestions
- Storage and Reheating
- No Sourdough Starter? Use Yeast Instead!
- Frequently Asked Questions
Why You’ll Love This Buffalo Chicken Dip Pull Apart Focaccia
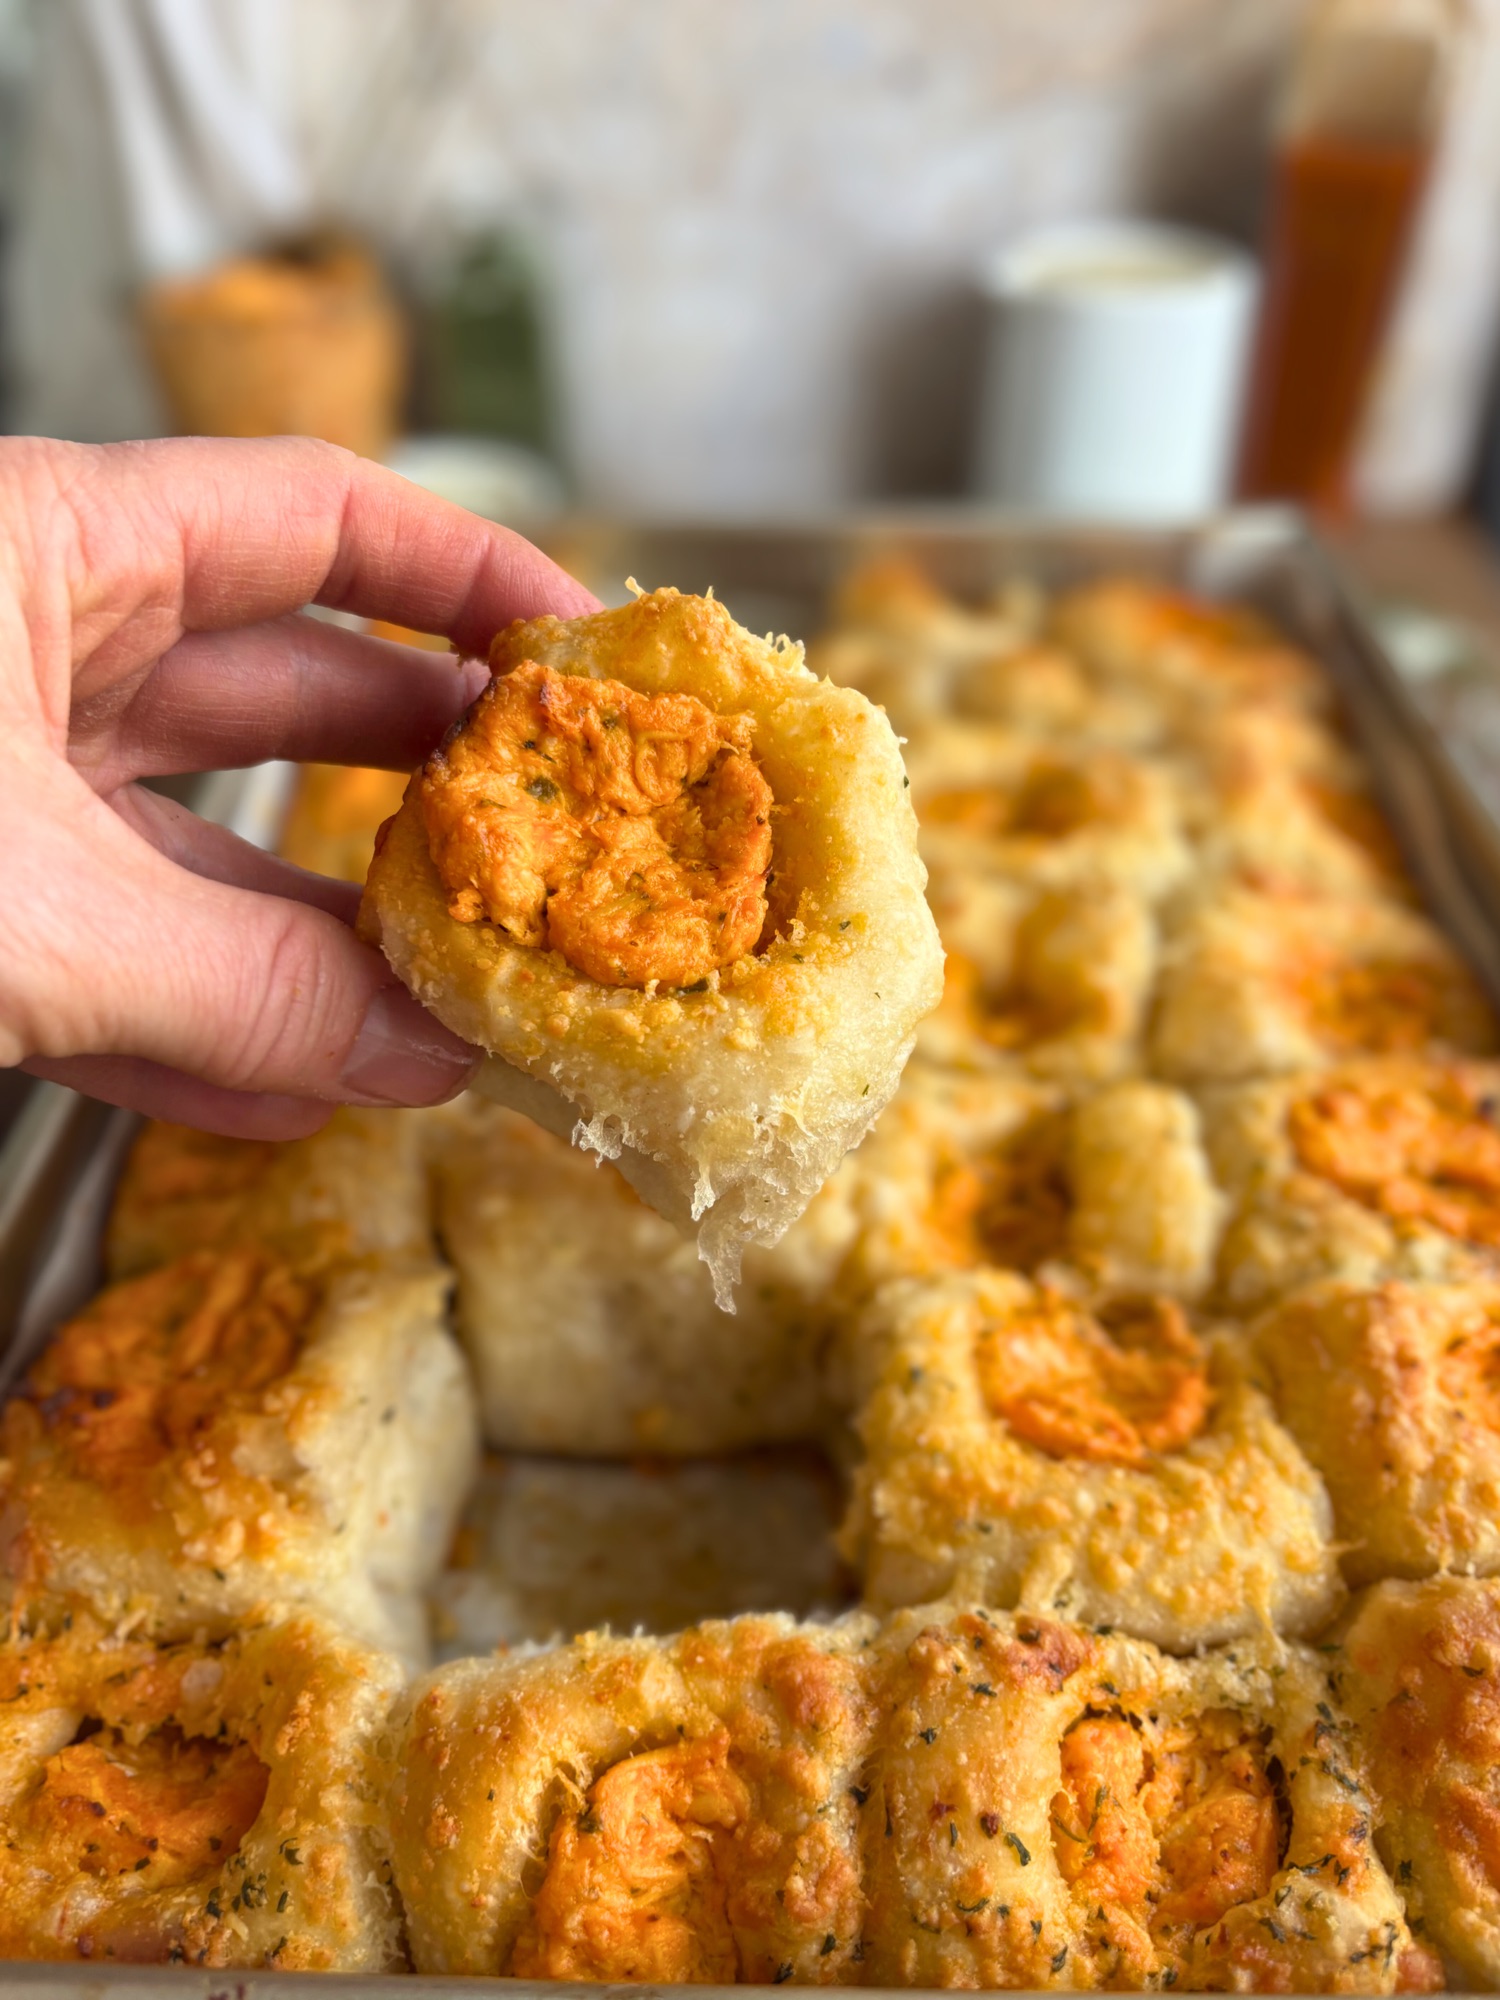
Game day just got a major upgrade. When I was looking for an easier way to serve buffalo chicken dip to a crowd, I knew I wanted something that transformed that classic creamy, tangy dip into bite-sized pieces that were perfect for sharing. These pull apart focaccia rolls give you two or three bites of pure deliciousness in every piece, no double dipping required.
My kids absolutely love these. The combination of soft, pillowy sourdough focaccia filled with gooey buffalo chicken dip is irresistible, even to pickier eaters who might normally shy away from spicy foods. The ranch drizzle helps cool things down, making this recipe accessible for the whole family while still delivering that signature buffalo flavor that makes game day snacks so addictive.

Whether you’re hosting a Super Bowl party, tailgating, or just looking for a crowd-pleasing appetizer that will disappear in minutes, this buffalo chicken dip focaccia delivers. It combines everything people love about buffalo chicken dip with the satisfaction of pulling apart warm, freshly baked bread. Trust me, this will become your new go-to party recipe.

Buffalo Chicken Dip Pull-Apart Focaccia (Sourdough or Yeast)
Ingredients
FOCACCIA DOUGH:
- 500 g bread flour 4 cups plus 2 tablespoons
- 400 g water 1⅔ cups
- 75 g active sourdough starter (for sourdough version) ⅓ cup
- 10 g fine sea salt 2 teaspoons
BUFFALO CHICKEN DIP FILLING:
- 150 g chunk chicken, drained 5 oz or about 1 can
- 120 g cream cheese, softened to room temperature ½ cup
- 30 g ranch dressing 2 tablespoons
- 45 g Frank’s Red Hot sauce 3 tablespoons
- 50 g shredded cheddar cheese ⅓ cup plus 1 tablespoon
BUTTER DIP:
- 56 g melted butter 4 tablespoons
- 60 ml avocado oil or olive oil (light tasting) 4 tablespoons or ¼ cup
- 3 g dried parsley 1 teaspoon
PARMESAN COATING:
- 150 g finely grated Parmesan cheese 1½ cups
- 24 g cornstarch 3 tablespoons
DRIZZLE (CHOOSE ONE OR BOTH):
- Ranch Drizzle:
- 60 g mayonnaise ¼ cup
- 30 g buttermilk 2 tablespoons
- 8 g ranch seasoning 1 tablespoon
- 5 g lemon juice ½ teaspoon
- Additional buttermilk to thin as needed
- Blue Cheese Drizzle:
- 60 g sour cream ¼ cup
- 35 g blue cheese crumbles ¼ cup
- 15 to 20 ml regular milk 1 to 1.5 tablespoons
- 1 g salt pinch
- 5 g lemon juice 1 teaspoon
- Black pepper to taste
Instructions
MAKE THE FOCACCIA DOUGH (SOURDOUGH VERSION):
- In a large mixing bowl, combine 500g bread flour, 400g water, 75g active sourdough starter, and 10g salt. Mix until a shaggy dough forms with no dry flour remaining.
- Cover the bowl with a damp towel or plastic wrap. Let the dough rest (autolyse) for 30 to 45 minutes.
- Perform a stretch and fold: wet your hands, grab one side of the dough, stretch it up, and fold it over itself. Rotate the bowl 90 degrees and repeat. Do this 4 times (one complete rotation). Cover and rest for 30 minutes.
- Perform one more stretch and fold using the same technique. Cover the bowl.
- Bulk fermentation: Let the dough ferment at room temperature for 8 to 12 hours, or until doubled to tripled in size. Watch the dough, not the clock. Kitchen temperature will affect fermentation time.
MAKE THE BUFFALO CHICKEN DIP FILLING:
- While dough is bulk fermenting, make the buffalo chicken dip filling. Heat drained chicken and hot sauce in a skillet over medium heat until warmed through.
- Stir in cream cheese and ranch dressing. Cook, stirring, until well blended and warm.
- Mix in half the shredded cheddar cheese (reserve remaining for optional garnish).
- Transfer mixture to a bowl and let cool completely to room temperature. This is critical. The filling must be cool before using or it will melt the butter in your dough. Once cooled, stir to check consistency. It should be thick and spreadable like paste, not runny.
SHAPE THE DOUGH BALLS:
- Lightly oil your work surface. Turn out the fermented dough onto the oiled surface.
- If the dough is too sticky, perform one stretch and fold to build structure, then gather it into a loose ball. Let it rest for 5 to 10 minutes.
- Divide the dough into 27 equal pieces (approximately 36 to 37g each, about 2 tablespoons of dough, slightly smaller than a golf ball). You can use a kitchen scale for accuracy.
- You can just grab a hunk off of the dough ball or if you want it to be more accurate you can shape each piece into a ball by gathering the edges underneath and rolling gently on the counter with a cupped hand.
COAT THE DOUGH BALLS:
- Prepare the butter dip: In a small bowl, whisk together 56g melted butter, 60ml oil, and 3g dried parsley until combined.
- Prepare the Parmesan coating: In a separate shallow bowl, mix together 150g finely grated Parmesan cheese and 24g cornstarch until well combined.
- Prepare a 9×13 inch baking pan by lining with parchment paper and brushing generously with olive oil or butter.
- Take one dough ball and dip it into the butter oil parsley mixture, coating all sides.
- Roll the coated ball in the Parmesan cornstarch mixture until well coated.
- Place the coated ball seam side down in the prepared pan.
- Repeat with all remaining dough balls, arranging them in rows in the pan (typically 5 to 6 rows). They should be close but not quite touching.

FINAL PROOF:
- Cover the pan loosely with plastic wrap or a damp towel.
- Let the dough balls proof for 1 to 2 hours at room temperature, or until they are puffy and touching each other. They should look noticeably larger and feel soft when gently pressed.
- To test if focaccia is properly proofed: Gently press a fingertip into the dough. If the indentation slowly springs back halfway, it’s ready. If it springs back quickly, it needs more time. If it doesn’t spring back at all, it may be slightly overproofed but will still bake fine.
ADD BUFFALO CHICKEN DIP:
- Once the dough balls are fully proofed and puffy, preheat your oven to 425°F (220°C).
- Using a small spoon or cookie scoop, take approximately ½ tablespoon to 1 tablespoon of the cooled buffalo chicken dip filling and place it on top of each dough ball.

- Using your finger or the back of a spoon, gently press the buffalo chicken dip down into the center of each dough ball, creating a dimple. The dip should sink into the dough but not break through the bottom.

- Continue until all dough balls have buffalo chicken dip pressed into them.
BAKE:
- Bake in the preheated 425°F oven for 30 to 35 minutes, until the tops and bottoms are golden brown and crispy.
- If the tops begin to get too dark before the baking time is complete, loosely cover with aluminum foil for the last 10 minutes.
- The internal temperature should read about 190 to 200°F when fully baked.
MAKE THE DRIZZLE AND SERVE:
- While the focaccia bakes, make your choice of drizzle.
- For Ranch Drizzle: Whisk together 60g mayonnaise, 30g buttermilk, 8g ranch seasoning, and 5g lemon juice. Thin with additional buttermilk to drizzle consistency.
- For Blue Cheese Drizzle: Mix 60g sour cream, 35g blue cheese crumbles, 15 to 20ml milk, 1g salt, 5g lemon juice, and black pepper until smooth and pourable. Add more milk as needed.
- Remove the focaccia from the oven and let cool for 5 minutes.
- Drizzle generously with ranch or blue cheese dressing (or both!) while still warm.
- Serve immediately. Pull apart individual rolls and enjoy!
Notes
Sourdough version: 10 to 14 hours total (mostly hands off fermentation time)
Yeast version: 4 to 6 hours total
What Makes This Recipe Special
This isn’t your typical focaccia bread. Instead of simply topping the dough, we’re creating individual dough balls stuffed with rich, creamy buffalo chicken dip filling, then arranging them in a pan where they proof together and bake into one cohesive, pull apart masterpiece. Each roll becomes its own self-contained pocket of flavor.
The technique creates incredible texture contrast. You get a golden, slightly crispy exterior on each roll, while the inside stays soft and tender, with the buffalo chicken dip creating pockets of creamy, spicy goodness throughout. When you pull one apart, you’re rewarded with stretchy cheese, tender chicken, and that unmistakable buffalo sauce tang.

What sets this apart from other game day appetizers is the versatility. You can make it with active sourdough starter for that signature tangy flavor and digestive benefits, or use the yeast version when you need something quicker. Either way, you end up with a show-stopping centerpiece for your snack table that looks as impressive as it tastes.
The Benefits of Sourdough Fermentation
Using sourdough starter in this recipe does more than just add flavor. The long, slow fermentation process breaks down complex proteins and starches in the flour, making the bread easier to digest. For people who experience sensitivity to gluten (though this is not safe for those with celiac disease), the extended fermentation can reduce some of the compounds that cause discomfort.
The fermentation also develops deeper, more complex flavors in the dough. That characteristic sourdough tang provides a beautiful counterpoint to the rich, creamy buffalo chicken filling. The acidity in the starter helps create a tender crumb while still maintaining structure, which is essential when you’re stuffing dough balls with a moist filling.

Additionally, sourdough fermentation creates an environment that promotes beneficial bacteria and reduces the glycemic impact of the bread. You’re getting a more nutritious base for your game day treat, with better mineral bioavailability and enhanced B vitamins produced during fermentation. It’s comfort food that actually offers some nutritional benefits beyond just tasting incredible.
Key Ingredients
The magic of this recipe comes from two main components: the focaccia dough and the buffalo chicken dip filling.
For the focaccia dough, you’ll need bread flour for structure, water, active sourdough starter (or yeast for the quick version), and salt for flavor. Olive oil coats the pan, creating those signature crispy edges focaccia is known for.

The buffalo chicken dip filling is where the flavor really shines. Canned chunk chicken provides convenience (though rotisserie chicken works beautifully too), cream cheese creates the creamy base, and ranch dressing adds cooling herb flavor. Frank’s RedHot sauce delivers that authentic buffalo taste, while shredded cheddar cheese melts into gooey pockets throughout. The filling needs to cool completely before using, which is crucial for the dough structure.
Don’t skip the drizzles. Whether you choose ranch or blue cheese (or both!), that final drizzle of creamy dressing over the warm rolls is what takes this from delicious to absolutely crave-worthy. The cool, tangy sauce cuts through the richness and ties all the flavors together. Want a homemade ranch dip to pair with this? Check out my favorite ranch dressing here!
Want to learn to make a sourdough starter? Click here!
How to Make Buffalo Chicken Dip Pull Apart Focaccia
The process begins with mixing your focaccia dough and allowing it to bulk ferment. For the sourdough version, this takes 8 to 12 hours at room temperature, during which the dough doubles in size and develops its characteristic flavor. The long fermentation is what creates that open, airy crumb and complex taste.
While the dough ferments, you’ll prepare the buffalo chicken dip filling. Heat your drained chicken with hot sauce to warm it through, then stir in softened cream cheese and ranch dressing until everything is smooth and well blended. Mix in half the shredded cheddar cheese, reserving the rest for optional garnish. The key here is letting this mixture cool completely to room temperature. If the filling is even slightly warm when you add it to the dough, it will melt the butter in the dough and create a mess.

Once your dough has completed its bulk fermentation, you’ll divide it into equal portions, creating small dough balls slightly smaller than a golf ball. Just grab a piece and tear it off the dough ball. Each ball gets a luxurious double coating that creates the signature crispy, flavorful exterior. First, dip each ball in a mixture of melted butter/oil, and dried parsley for richness and color. Then roll it in finely grated Parmesan mixed with cornstarch, which helps the coating stay crispy during baking.

Arrange these coated balls in your prepared pan, placing them close but not quite touching. They need a final proof until they’re puffy and kissing each other in the pan. This is when the magic really starts. Once the dough balls are beautifully proofed, you’ll add a dollop of the cooled buffalo chicken dip on top of each one and gently press it down into the dough, creating those characteristic focaccia dimples.

As they bake, the dip melts into these pockets, infusing each roll with flavor. The smell alone will have everyone gathering in the kitchen before they’re even out of the oven.
Want more fun recipes?
- Pull apart pizza focaccia recipe
- Cinnamon roll pull apart focaccia
- Caramel apple pull apart focaccia
- Gingerbread pull apart focaccia
- Pigs in a blanket pull apart focaccia
- Sourdough starter guide
- Buffalo chicken dip brioche swirl
Tips for Success
Temperature control is everything when working with filled dough. Your buffalo chicken dip filling must be completely cool before you add it to the proofed dough balls. If the filling is warm, it can affect the final proof and create issues during baking. Let that filling cool on the counter, or even refrigerate it if you’re in a hurry.
The coating process is what gives these rolls their incredible flavor and texture. Don’t rush through dipping each ball in the butter mixture and rolling in the Parmesan coating. Make sure each ball is well coated. The cornstarch in the Parmesan mixture is important because it helps create that crispy exterior and prevents the coating from getting soggy.

Don’t rush the final proof. Your coated dough balls need time to rise and become puffy before you add the buffalo chicken dip. They should be touching each other and look noticeably larger and feel soft and pillowy when you gently press them. This is crucial for getting that light, airy texture.
When adding the buffalo chicken dip, use a gentle but firm pressing motion to create the dimple in each dough ball. You want the dip to sink into the dough and create a nice pocket, but not so hard that you deflate the dough completely or break through the bottom. This dimpling technique is classic focaccia style and allows the filling to meld with the bread as it bakes.
Use a high-quality baking pan and line it with parchment paper. A 9×13 inch pan works perfectly for this recipe, giving the rolls enough room to expand while still touching for that pull apart effect. Brush the parchment with oil or butter to prevent sticking and encourage browning on the bottom.
Substitutions and Variations
While canned chicken is convenient and works wonderfully in this recipe, feel free to substitute with shredded rotisserie chicken for even better flavor and texture. You’ll need about 2 cups of shredded chicken. The rotisserie chicken adds a bit more depth and a slightly firmer texture to the filling.
For a dairy-free version, you can create ranch dressing using dairy-free mayonnaise and dairy-free buttermilk or a combination of non-dairy milk with a splash of vinegar. Dairy-free cream cheese substitutes work reasonably well in the filling, though the texture will be slightly different. Use dairy-free cheese shreds for the filling.
If you want to switch up the protein entirely, jackfruit makes an excellent vegetarian substitute with a texture remarkably similar to shredded chicken. You can also use ground beef or sausage for a different flavor profile, though the texture will be quite different from traditional buffalo chicken dip. Just cook your ground meat thoroughly, drain any excess fat, and proceed with the recipe as written.
Heat level is easily adjustable. Use less hot sauce for a milder version, or kick things up with extra sauce or even some diced jalapeños mixed into the filling. The ranch drizzle helps temper the heat, so you can go bolder with the buffalo sauce knowing that cooling element is coming.
For a protein boost, this recipe already delivers solid protein numbers thanks to the chicken, cream cheese, cheese, and bread flour. Each roll provides approximately 6.5 grams of protein, and a typical serving of 3 rolls gives you about 19-20 grams of protein, making it more substantial than typical party snacks.
Make Ahead Instructions
This recipe is perfect for make ahead preparation, which is essential for stress-free entertaining. You can mix your dough in the morning, let it proof throughout the day (8 to 12 hours), then ball it up in the evening. At this point, you can place the portioned dough in the refrigerator overnight.
The next morning, pull the dough out and let it come to room temperature, which typically takes about an hour. Meanwhile, prepare your buffalo chicken dip filling and let it cool. Once the dough is room temperature and the filling is cool, stuff your dough balls and arrange them in the pan for their final proof. This staggered approach breaks up the work and ensures everything is fresh for your event.
You can also prepare the buffalo chicken dip filling up to two days in advance. Store it in an airtight container in the refrigerator, then bring it to room temperature (or just slightly cool) before using it to fill your dough balls. This makes day-of assembly much faster.
If you want to go even further ahead, you can shape and stuff the dough balls, arrange them in the pan, cover tightly with plastic wrap, and refrigerate for up to 24 hours before the final proof and baking. Let them come to room temperature and complete their final rise before baking as directed.
Serving Suggestions
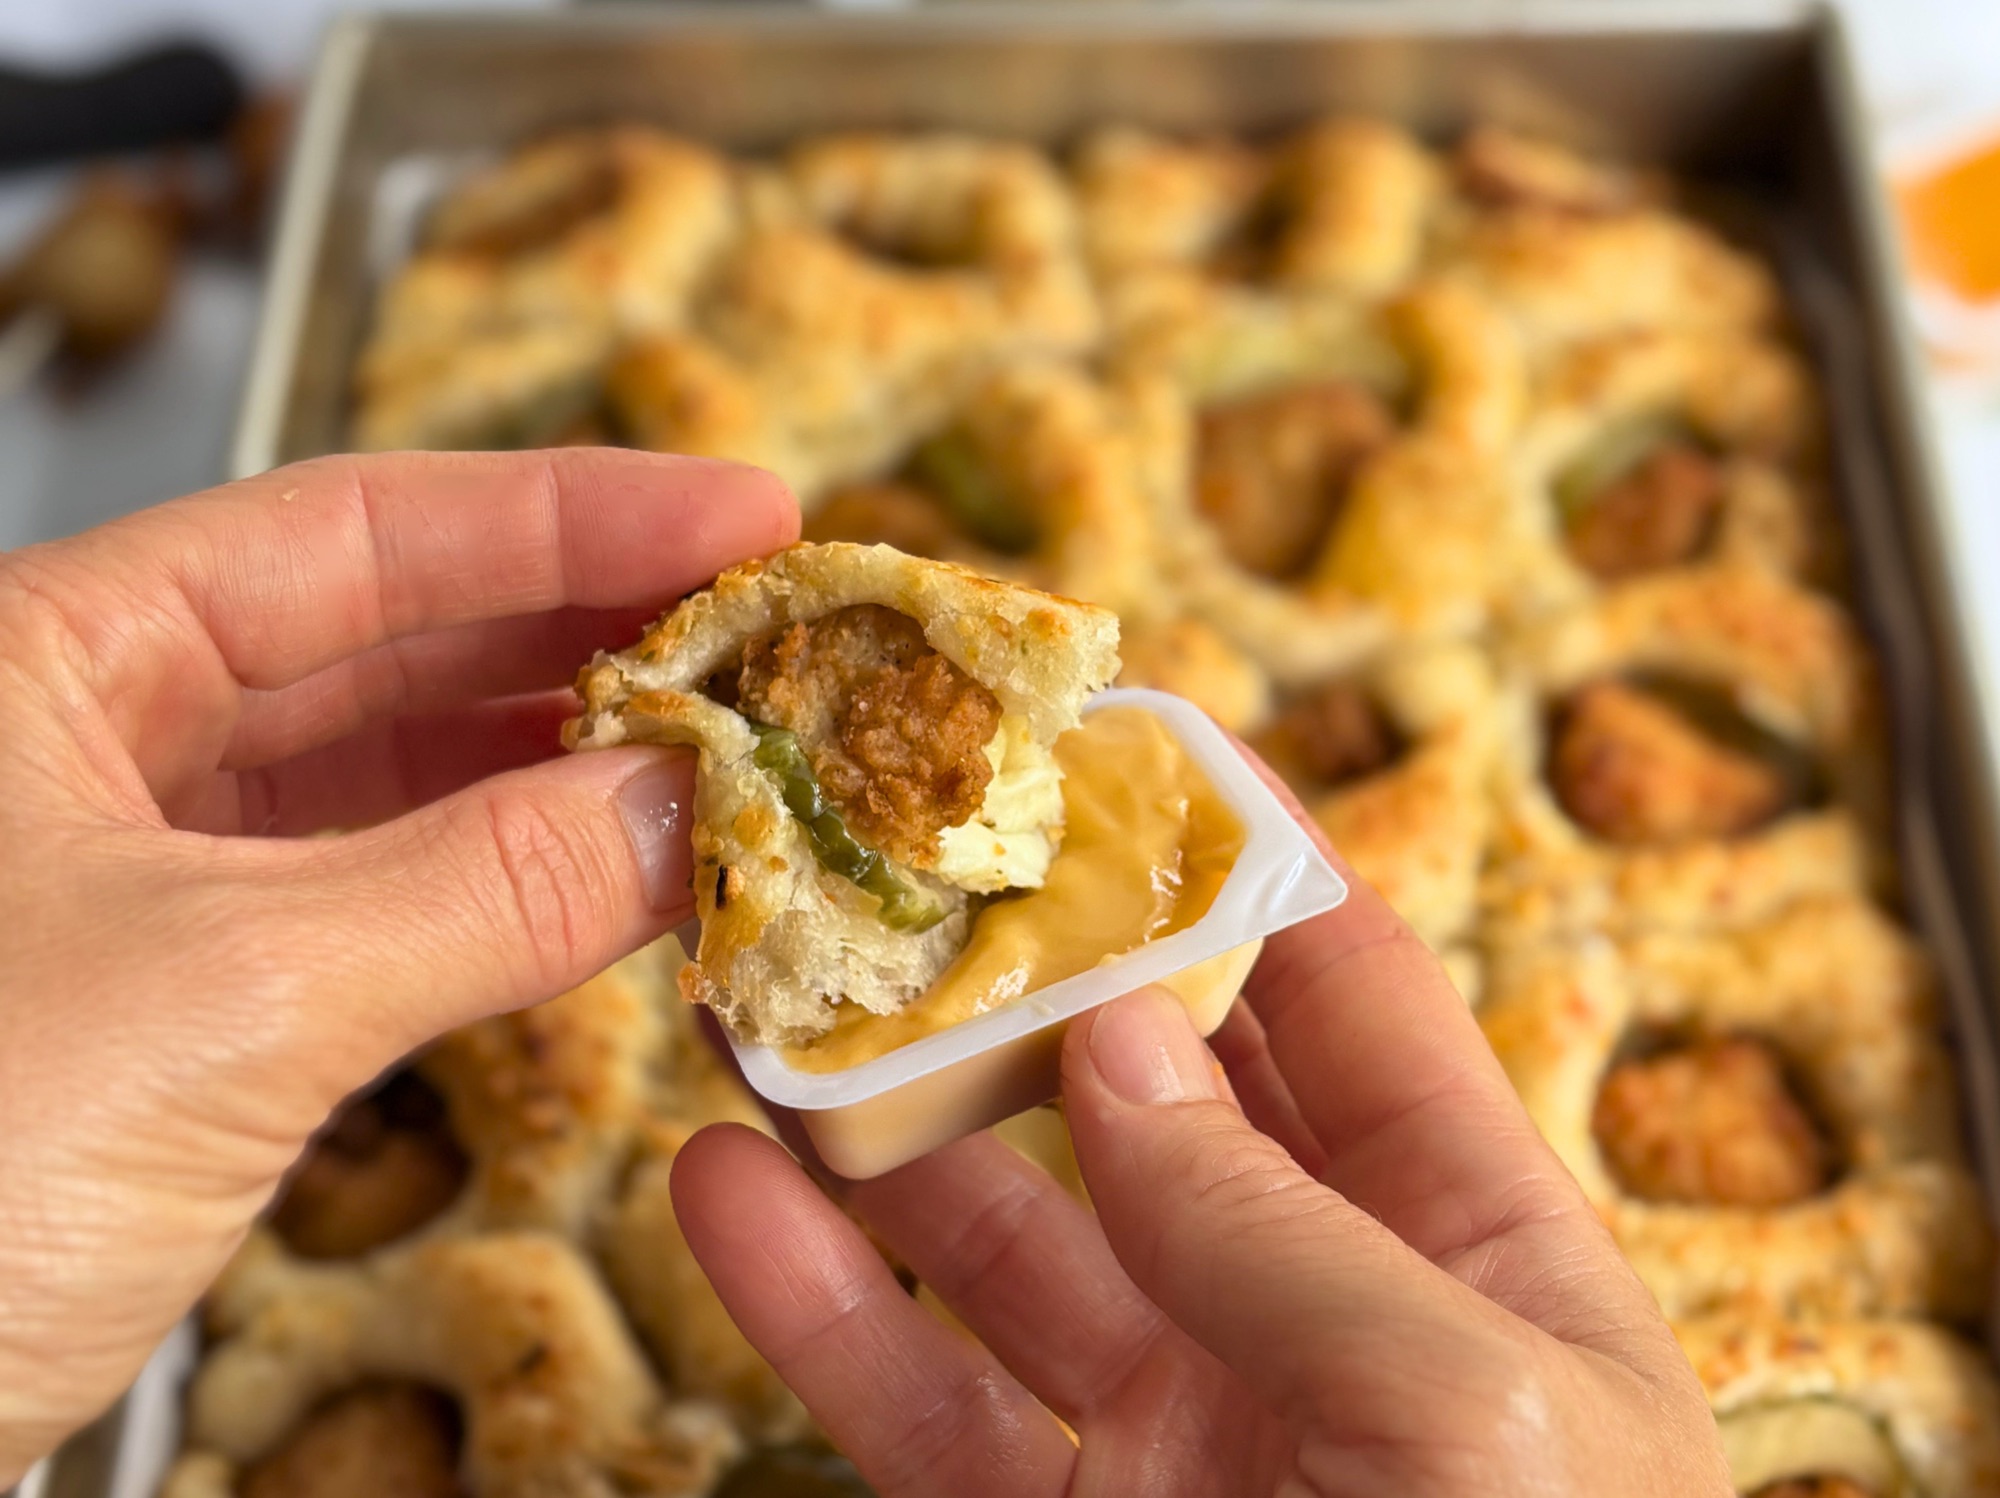
These buffalo chicken dip pull apart focaccia rolls are best served warm, straight from the oven when the cheese is at its meltiest and the bread is at its softest. Drizzle generously with your choice of ranch or blue cheese dressing (or both!) while the rolls are still hot so the dressing can seep into all those nooks and crannies.

Set out extra dressing on the side for dipping. Some people love to dunk their pieces in additional ranch or blue cheese, treating each roll like a buffalo wing. Classic buffalo chicken accompaniments like celery sticks and carrot sticks make great sides, providing a cool, crunchy contrast to the rich, warm bread.
For a complete game day spread, pair these with other complementary snacks. They work beautifully alongside creamy dips, fresh vegetables, and lighter options that balance out their richness. Consider serving them on a large wooden board or platter where guests can easily pull pieces apart.
These also make an excellent addition to a potluck or party where everyone contributes a dish. They transport well if you keep them wrapped in foil, and you can reheat them briefly before serving to restore that just-baked warmth.
Storage and Reheating
Leftovers (if you’re lucky enough to have any) should be stored in an airtight container in the refrigerator for up to three days. The bread will firm up as it cools, which is normal for any bread product. The good news is these reheat beautifully.
To reheat, wrap the rolls in aluminum foil and place in a 350°F oven for about 10 to 15 minutes until warmed through. For the last few minutes, you can open the foil to allow the tops to crisp up again slightly. Avoid microwaving if possible, as it tends to make the bread rubbery, though it will work in a pinch for individual portions.
You can also freeze the baked rolls for up to one month. Wrap them very well in plastic wrap, then aluminum foil, and freeze in an airtight container or freezer bag. Thaw in the refrigerator overnight, then reheat in the oven as directed above. The texture holds up surprisingly well to freezing.
For the best results, drizzle with fresh ranch or blue cheese dressing after reheating rather than reheating with the dressing already on the rolls. This keeps the dressing fresh-tasting and prevents it from separating or becoming oily during the reheating process.
YEAST SUBSTITUTION FOR BUFFALO CHICKEN DIP PULL-APART FOCACCIA
NO SOURDOUGH STARTER? USE YEAST INSTEAD!
Don’t have sourdough starter? No problem! You can make this Buffalo Chicken Dip Pull Apart Focaccia recipe using instant yeast or active dry yeast with fantastic results. The bread turns out just as fluffy and delicious with the same irresistible pull apart texture.
WHAT TO SUBSTITUTE
Replace the 75g active sourdough starter with:
- 37g (about ¼ cup) all purpose flour
- 37g (about 2½ tablespoons) water
- 7g (2¼ teaspoons) instant yeast OR 9g (2¾ teaspoons) active dry yeast
USING INSTANT YEAST (RAPID RISE)
Step 1: Mix everything together at once. Add the 37g flour, 37g water, and 7g instant yeast along with ALL the other recipe ingredients (the 500g bread flour, 400g water, and 10g salt) right from the start. Mix until no dry flour remains. No activation needed with instant yeast.
Step 2: Rest for 30 to 60 minutes. Cover the bowl and let the dough rest at room temperature. 30 minutes is standard for yeasted focaccia; 60 minutes will give you slightly more flavor development but may shorten your bulk fermentation time.
Step 3: Stretch and fold. With wet hands, grab one edge of the dough, stretch it up, and fold it over to the opposite side. Rotate the bowl 90 degrees and repeat. Do this 4 times total (one complete rotation around the bowl). The dough will transform from sticky and shaggy to smoother and more cohesive.
Step 4: Bulk fermentation. Cover and let the complete dough rise for 2 to 3 hours at room temperature until it doubles in size and becomes puffy and jiggly.
Step 5: Continue as normal. Once doubled, proceed with the recipe exactly as written. Same shaping into balls, same butter dip and Parmesan coating, same proofing, same baking temperature and time.
USING ACTIVE DRY YEAST
Step 1: Activate the yeast. Mix the 37g warm water (100 to 110°F) with the 9g active dry yeast and ¼ teaspoon sugar in a small bowl. Let it sit for 5 to 10 minutes until foamy and bubbly. If it doesn’t foam, your yeast is dead and you need to start over with fresh yeast.
Step 2: Mix everything together. Once your yeast is foamy, add it along with the 37g flour and ALL the other recipe ingredients (the 500g bread flour, 400g water, and 10g salt). Mix until no dry flour remains.
Step 3: Rest for 30 to 60 minutes. Cover the bowl and let the dough rest at room temperature. 30 minutes is standard; 60 minutes provides more flavor development.
Step 4: Stretch and fold. With wet hands, grab one edge of the dough, stretch it up, and fold it over to the opposite side. Rotate the bowl 90 degrees and repeat. Do this 4 times total (one complete rotation around the bowl).
Step 5: Bulk fermentation. Cover and let the complete dough rise for 2 to 3 hours at room temperature until it doubles in size.
Step 6: Continue as normal. Proceed with the recipe exactly as written.
IMPORTANT YEAST VERSION NOTES
Worried about wet dough? If you’re new to baking and concerned about sticky dough, start by decreasing the water in the main recipe to 360g (1½ cups). Experienced bakers can stick with the full 400g of water.
Water temperature matters:
- Use room temperature water for instant yeast
- Use warm water (100 to 110°F) for active dry yeast
Bulk fermentation is 2 to 3 hours instead of 8 to 12 hours with sourdough starter. The rest period is 30 to 60 minutes instead of the sourdough’s 30 to 45 minute autolyse (shorter rest = longer bulk fermentation; longer rest = shorter bulk fermentation). This is the main time difference between the two methods.
Everything else stays EXACTLY the same! Same shaping into 27 dough balls, same butter dip and Parmesan coating, same buffalo chicken dip topping, same final proof, same baking time and temperature (425°F for 30 to 35 minutes).
QUICK REFERENCE
Flour: 37g (¼ cup)
Water: 37g (2½ tablespoons)
Instant yeast: 7g (2¼ teaspoons)
Active dry yeast: 9g (2¾ teaspoons)
Pro tip: Instant yeast is more forgiving and faster to use. If you’re new to baking, choose instant yeast over active dry yeast. It eliminates the activation step and produces consistent results.
TIMELINE COMPARISON
Sourdough version: 10 to 14 hours total (mostly hands off fermentation time)
Yeast version: 4 to 6 hours total
Both versions produce incredibly fluffy, flavorful focaccia with creamy buffalo chicken dip pockets. The sourdough version has that signature tang and complexity, while the yeast version is faster and perfect for last minute game day plans.
Frequently Asked Questions
Can I use store-bought focaccia dough for this recipe?
While homemade dough gives you the best results and allows you to control the fermentation, you can use store-bought pizza dough or focaccia dough in a pinch. The texture and flavor won’t be quite the same, but it will still be delicious. Follow the shaping and baking instructions as written, adjusting the final proof time as needed based on how quickly your store-bought dough rises.
Why does my buffalo chicken dip filling leak out during baking?
This usually happens for one of two reasons. Either the filling was too warm when you stuffed the dough balls (it should be completely cool or even cold), or the seams weren’t sealed tightly enough. Make sure to pinch the dough very firmly where it comes together, and check for any thin spots or gaps before arranging the balls in the pan.
Can I make these rolls smaller or larger?
Absolutely! Just keep in mind that smaller rolls will need less filling and a shorter final proof and baking time, while larger rolls will need more filling and longer to proof and bake. The key is ensuring the dough balls are roughly the same size so they bake evenly. For appetizer-sized portions, you might divide the dough into 20 to 24 pieces instead of 15 to 18.
What’s the best way to reheat these if I’m bringing them to a party?
Wrap the baked rolls in foil and transport them that way. When you arrive, you can pop them in a 350°F oven (still wrapped in foil) for 10 to 15 minutes to warm through. Remove the foil for the last 5 minutes to crisp up the tops. Bring your ranch or blue cheese drizzle in a separate container and add it just before serving.
Why is my focaccia dense instead of light and airy?
Dense focaccia usually results from insufficient fermentation time or old, weak starter (for the sourdough version). Make sure your starter is active and bubbly before using it, and don’t rush the bulk fermentation. The dough should truly double in size. For the yeast version, check that your yeast is fresh and active. Dense texture can also result from over-handling the dough or adding too much extra flour during shaping.
Can I make this recipe without any dairy?
Yes, with some modifications. Use dairy-free cream cheese and dairy-free ranch dressing (or make your own with dairy-free mayo and seasonings). Choose dairy-free cheese shreds for the filling. The dough itself typically contains butter, so substitute with olive oil or vegan butter. The results will be slightly different in flavor and texture, but still delicious.
How do I know when the rolls are done baking?
The rolls should be deeply golden brown on top and sound hollow when tapped. An instant-read thermometer inserted into the center of a roll should read about 190 to 200°F. The cheese should be melted and bubbly, and you might see some delicious crispy cheese edges around the sides of the pan. Don’t underbake, or the centers will be doughy.
Did you make this Buffalo Chicken Dip Pull Apart Focaccia? I’d love to hear how it turned out! Leave a comment below and let me know what you thought. If you share your creation on Instagram, Facebook, or TikTok, make sure to tag me so I can see your beautiful bake!
Want more delicious recipes delivered straight to your inbox? Sign up for my newsletter and get weekly recipe inspiration, baking tips, and exclusive content you won’t find anywhere else!


Last Updated: 02/03/2026
Prep Time: 30 minutes | Fermentation Time: 8-12 hours (sourdough) or 2-3 hours (yeast) | Bake Time: 30-35 minutes


Leave a Reply