Who doesn’t love a s’more? The chocolate, the toasted marshmallow, the graham cracker crunch. The only trouble is that making them one at a time over a fire is slow going for one person. You end up roasting marshmallow after marshmallow for everyone else and never quite get to sit down with your own. So I did what I always do. I took that whole campfire feeling and rolled it right up into one of my little focaccia balls.
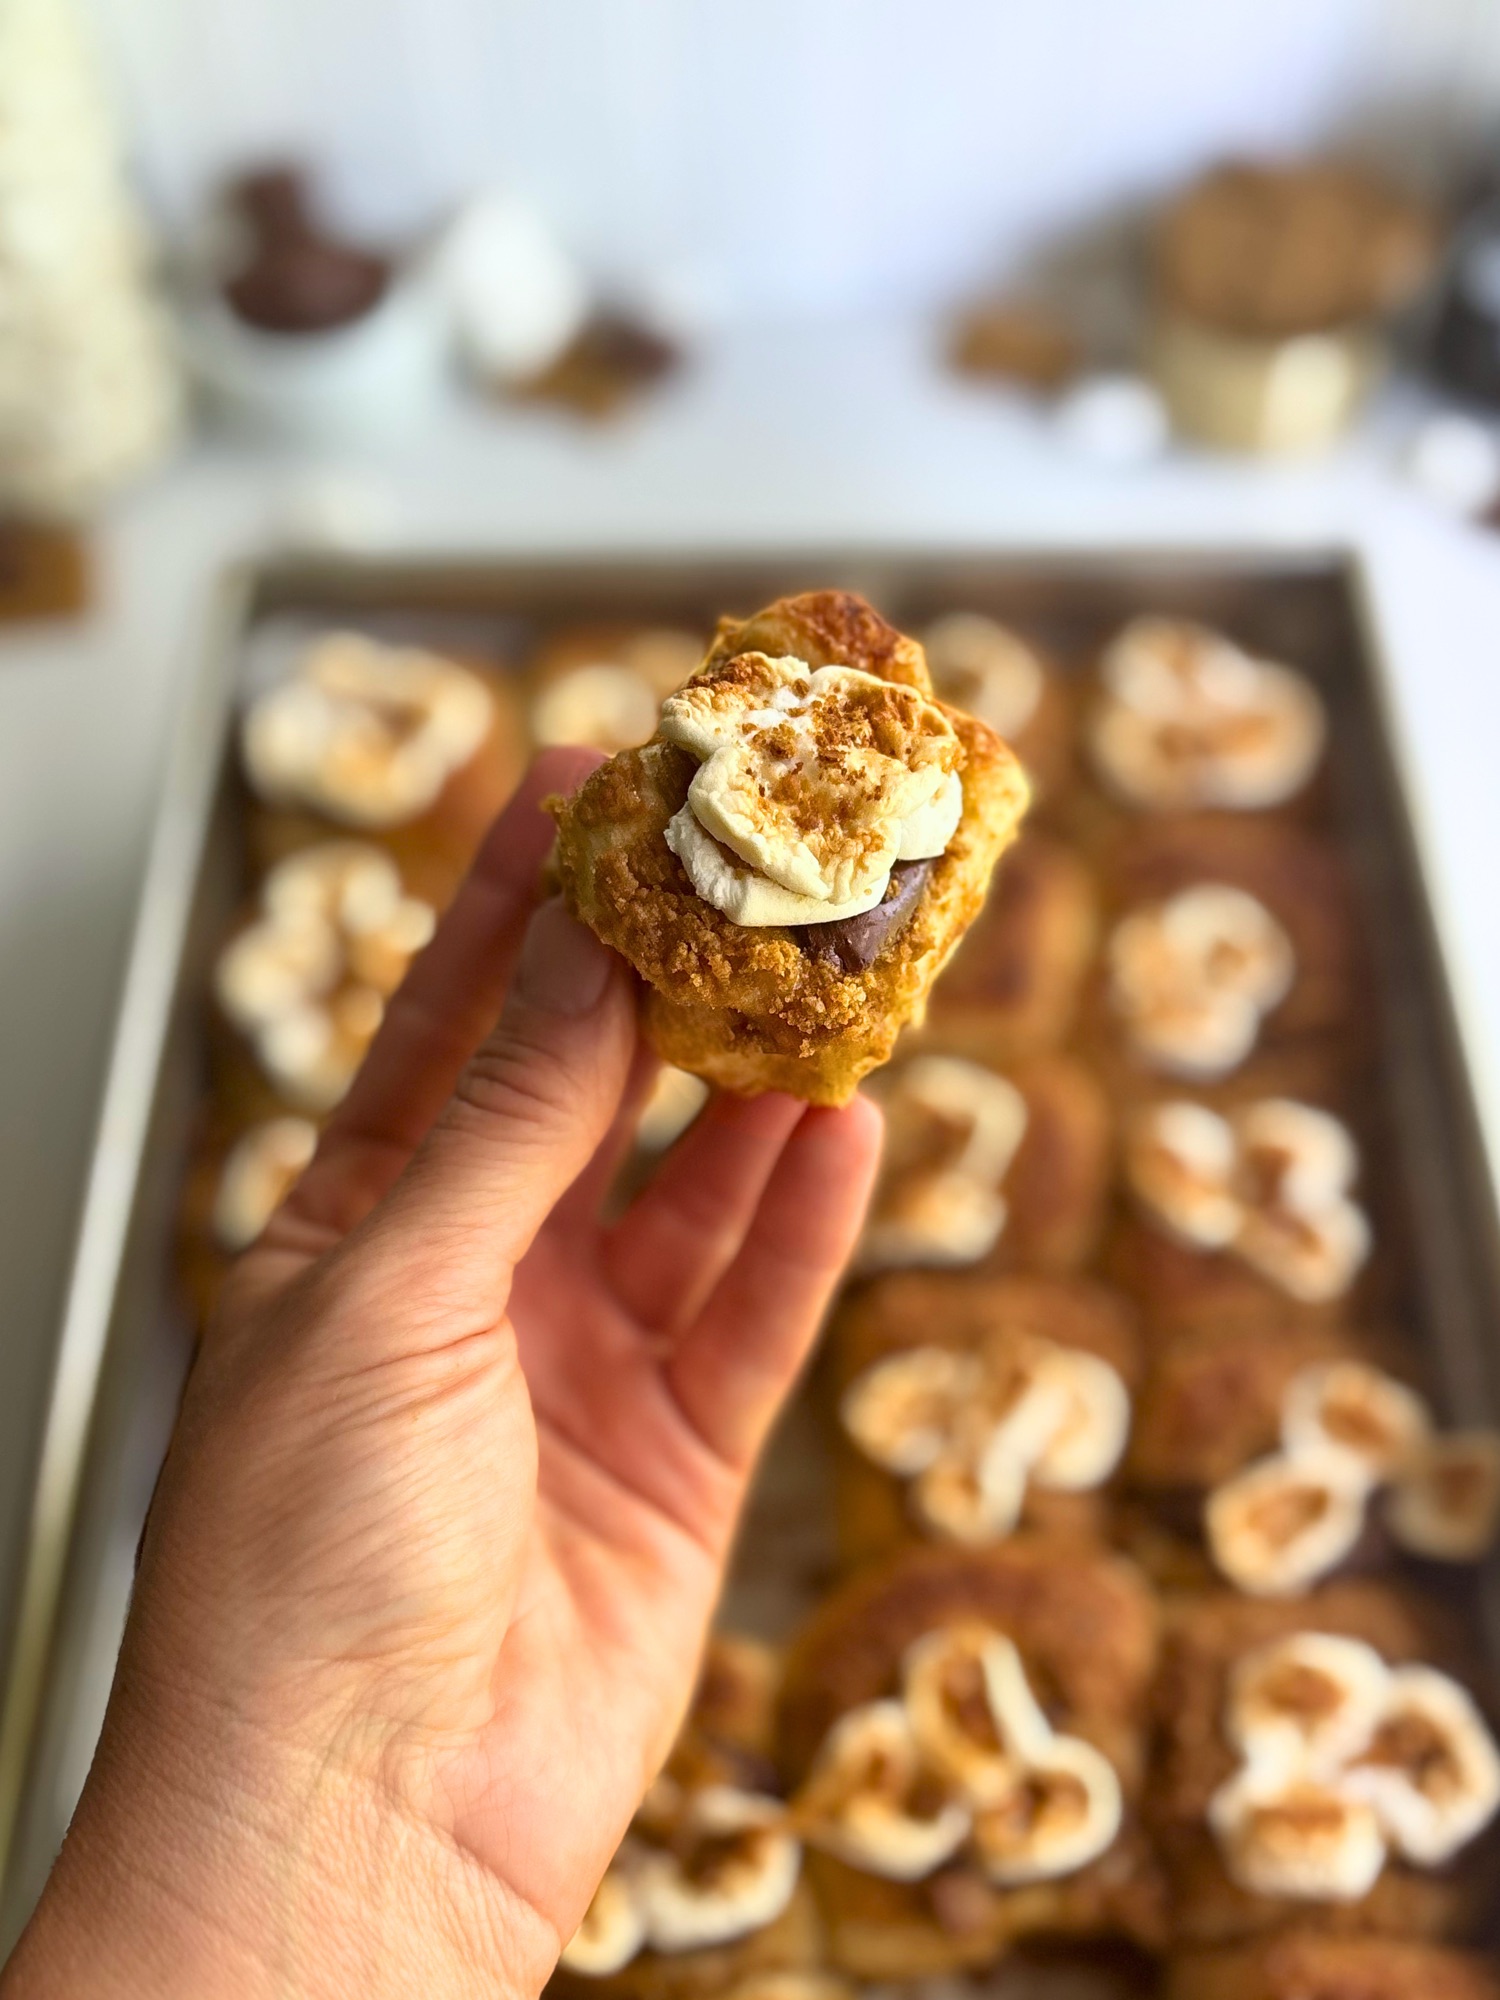
This s’mores pull-apart focaccia gives you every flavor of a classic s’more in a soft, fluffy, pull-apart bite. The dough has graham in it. Each piece is dunked in vanilla butter, rolled in a graham cracker crust, stuffed with real melty chocolate, and crowned with a cluster of toasted marshmallows. No fire, no sticky scramble for the last marshmallow, just one whole pan of s’mores ready to pull apart and share.
No sourdough starter? No problem. There is a full yeast version below with its own complete ingredient list and instructions you can follow start to finish.
Table of Contents
- Why This Recipe Works
- About the Pull-Apart Focaccia Series
- Ingredient Breakdown
- Bread Flour vs All Purpose Flour
- Why Is My Dough So Sticky?
- How to Choose the Best Chocolate
- How to Make S’mores Pull-Apart Focaccia
- Sourdough Recipe
- No Sourdough Starter? Yeast Recipe Here
- Tips for Success
- Variations and Additions
- Have Fun With It
- Storage and Make Ahead
- Frequently Asked Questions
- More Pull-Apart Focaccia Recipes
Why This Recipe Works
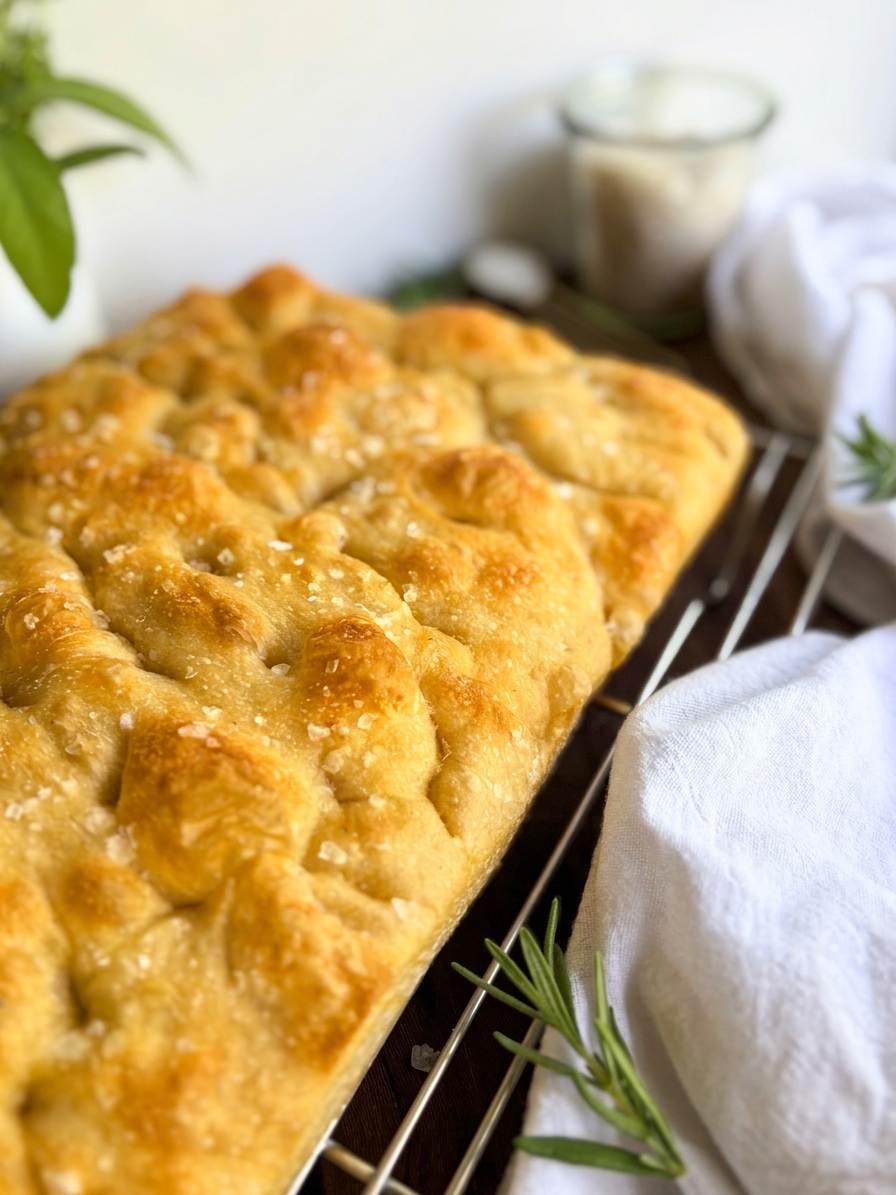
What makes this different from every other s’mores pull-apart bread out there is that it is real bread. Most versions start with canned biscuit dough layered in a bundt pan. This one is a true fermented focaccia, soft and pillowy, torn into small balls so every bite is the perfect size.
The coating is where the magic happens. Each ball gets dunked in vanilla butter and rolled in a graham cracker sugar cornstarch mixture that crisps up in the oven. The cornstarch is the secret weapon here. It creates a barrier between the dough balls so they bake together but still pull apart cleanly, with that graham cracker crunch on the outside and a soft, pillowy interior. The same technique powers every recipe in this series, and it works every single time.
Then comes the s’mores part. A square of real chocolate gets pushed down into the center of each ball before baking, so it melts into a molten pool you reach when you tear one open. The mini marshmallows go on at the very end, scattered over the top in little clusters, so they toast and puff into that golden campfire look instead of melting away inside the bread.
It is the difference between a shortcut and the real thing.

About the Pull-Apart Focaccia Series
If you are new here, the Pull-Apart Focaccia Series is my ongoing collection of recipes built around one simple technique. Tear the fermented dough into pieces, dunk each piece in something delicious, coat it in something that creates a barrier between the pieces, arrange them in a pan, let them rise, stuff or top with something and bake them into one gorgeous pull-apart loaf.
The series started with my Garlic Parmesan Pull-Apart Focaccia, which proved the technique worked for savory bakes. The Cinnamon Roll version showed it was just as brilliant for sweet ones and took off in a big way. The Caramel Apple Pie version went wildly viral. This s’mores version is the newest, and it lands right at home in the sweet family, just in time for cookout season.
Ingredient Breakdown
Bread flour gives the dough its structure and chew. The higher protein content develops stronger gluten strands that hold up to the dipping and coating process. More on flour choices in the next section.
Active sourdough starter is the leavening agent. It needs to be fed, bubbly, and at its peak before you mix the dough. If yours has not peaked, give it more time. A sluggish starter means a slower rise and a denser result.
Sugar and vanilla extract go right into the dough. A tablespoon of sugar and a teaspoon of vanilla nudge this dough out of savory territory and into something sweet enough to carry a s’more, without making it taste like dessert on its own.
Graham crackers get finely crushed for the coating. This is what builds that signature s’mores flavor into every single piece rather than just sprinkling it on top.
Granulated sugar in the coating rounds out the graham crumbs. Because the graham crackers are already sweet, the coating uses a lighter hand on the sugar than my other versions.
Cornstarch in the coating is what gives each piece its own crisp crust and lets the balls pull apart cleanly after baking. Do not skip it. Arrowroot powder is a direct substitute if you do not have cornstarch on hand.
Vanilla butter for the dunk is just melted butter and vanilla extract. It coats each ball, helps the graham coating stick, and adds a warm richness that ties everything together.
Chocolate is tucked into the center of each ball. Reach for a real chocolate bar broken into squares, not chocolate chips. There is a whole section below on why this matters.
Mini marshmallows go on top in the last few minutes of baking. Minis toast faster and more evenly than large marshmallows and pull apart cleaner.

Bread Flour vs All Purpose Flour
Bread flour is the recommendation here, and it is worth understanding why so you can make an informed swap if needed.
Bread flour has a higher protein content than all purpose flour, typically around 12 to 14 percent versus 10 to 12 percent for all purpose. That extra protein develops more gluten, which means a stronger, more elastic dough that holds its structure better through the dipping and coating process. It also gives you that characteristic focaccia chew that makes each ball feel satisfying and substantial.
All purpose flour will work in this recipe. The dough will be slightly softer, the crumb a little more tender, and the balls may spread slightly more during the second proof. The result will still be delicious, just a slightly different texture than the bread flour version. Use about 15 to 20 grams less water.
Why Is My Dough So Sticky?
This is the number one question I get about focaccia, and the answer is simple. The dough is supposed to be sticky. It is not broken. It is not wrong. It is a high hydration dough, and high hydration doughs are sticky by design.
The water to flour ratio in this recipe is exactly what creates the open, airy, pillowy interior that makes pull-apart focaccia so irresistible. Adding more flour to make the dough easier to handle compacts that crumb and works against everything the recipe is designed to do. I know it feels like soup the first time you make it. That feeling is completely normal. The stickiness is the point.
The solution is not more flour but better technique. Before you dump the dough out, oil your surface generously. Oil your hands generously. Work quickly and confidently. That is all you need. After one or two rounds of making this, working with sticky dough stops feeling intimidating and starts feeling completely normal.

How to Choose the Best Chocolate
The chocolate matters more than you might think, so let me save you a sad pan of focaccia.
You have a lot of options out there, but the rule is simple. Use a chocolate you would happily eat on its own. Reach for a good chocolate bar broken into squares, or chop it into chunks, about a tablespoon per ball if you want extra gooey centers.
Look for chocolate without a lot of additives. The cleaner the chocolate, the better it melts into that glossy molten center. This is also why I steer you away from chocolate chips. Chips are made to hold their shape, so they resist melting and you will not get that beautiful pull. Save the chips for cookies and grab a real bar for this one.
How to Make S’mores Pull-Apart Focaccia
Mix the Dough
Add the water, sourdough starter, bread flour, salt, sugar, and vanilla to a large mixing bowl. Mix everything together at once until no dry flour remains. The dough will look sticky and shaggy, which is completely normal and expected.
Cover and let rest for one hour. After that rest, perform one round of stretch and folds. Wet your hand, grab one edge of the dough, stretch it up, and fold it back over itself. Rotate the bowl and repeat four to six times. Cover again and bulk ferment at room temperature for 8 to 12 hours, until the dough has doubled or tripled in size, looks full of bubbles, and feels jiggly when you gently shake the bowl. Watch the dough, not the clock.
Coat and Pan
Line a 9×13 inch pan with parchment paper. Melt the butter, stir in the vanilla, and pour into one shallow bowl. In a second bowl, whisk together the crushed graham crackers, sugar, and cornstarch until evenly combined.
Oil your hands lightly. Pinch off a small ball of dough and dunk it fully in the vanilla butter, letting the excess drip off. Roll it generously in the graham coating until completely covered, then place it in the pan. Repeat until you have a clean 6 by 4 grid of 24 balls, all touching. Set aside any leftover graham coating for the top.

Second Proof and Add the Chocolate
Cover the pan loosely and proof for 1 to 2 hours, until the balls are visibly puffy, jiggly, and have grown together into one cohesive loaf. Once they are fully proofed, press a square of chocolate (or about a tablespoon of chunks) into the center of each ball. Push it all the way down to the bottom. The dough springs up as it bakes, so a shallow piece will get pushed right back to the surface.

Bake and Toast the Marshmallows
Preheat the oven to 425 degrees F. Bake for 22 minutes. Pull the pan out and scatter mini marshmallows over the top in small clusters, two or three per ball, then sprinkle with any reserved graham coating. Return to the oven for 3 more minutes, 25 minutes total, until the marshmallows are puffed and golden. Every oven is different, so if you want to be sure the bread is baked through, check that the internal temperature reads at least 190 degrees F. Let cool for 5 to 10 minutes, then pull apart and enjoy warm.

Recipe

S’mores Pull-Apart Focaccia
Equipment
- kitchen scale
- Large mixing bowl
- Two Medium Bowls
- Whisk
- 9×13 inch baking pan
- Parchment paper
- Instant read thermometer (optional)
Ingredients
Dough
- 400 g bread flour 3 1/4 cups
- 300 g water 1 1/4 cups
- 60 g active sourdough starter 1/4 cup
- 8 g salt 1 1/2 teaspoons
- 13 g granulated sugar 1 tablespoon
- 4 g vanilla extract 1 teaspoon
- 21 g Crushed Graham Crackers 3 Tablespoons (optional)
Graham Cracker Coating
- 140 g finely crushed graham crackers about 1 1/3 cups
- 50 g granulated sugar 1/4 cup
- 8 g cornstarch 1 tablespoon
Vanilla Butter
- 113 g unsalted butter melted (1/2 cup)
- 4 g vanilla extract 1 teaspoon
For Topping
- 170 g good quality chocolate broken into 24 squares (about two 3 ounce bars), or about 1 tablespoon chopped chocolate chunks per ball
- 75 g mini marshmallows about 1 1/2 cups
Instructions
- Add the water, sourdough starter, bread flour, salt, sugar, and vanilla to a large bowl. Mix until no dry flour remains. The dough will be sticky and shaggy, which is normal.
- Cover and let rest for 1 hour, sprinkle in crushed graham crackers (if using), then do one round of stretch and folds. With a wet hand, grab one edge of the dough, stretch it up, and fold it over itself. Rotate the bowl and repeat four to six times.
- Cover and bulk ferment at room temperature for 8 to 12 hours, until the dough has doubled and is full of bubbles.
- Line a 9×13 inch pan with parchment paper. Melt the butter and stir in the vanilla in one shallow bowl. In a second bowl, whisk together the crushed graham crackers, sugar, and cornstarch.
- Lightly oil your hands. Pinch off a small ball of dough around the size of a golf ball, dunk it fully in the vanilla butter, then roll it in the graham coating until covered. Place it in the pan. Repeat to make 24 balls in a 6 by 4 grid, all touching. Reserve any leftover coating for the top.
- Cover and proof for 1 to 3 hours, until the balls are puffy and have grown together.
- Press a square of chocolate or chocolate chunks into the center of each ball, pushing it all the way down to the bottom. The dough springs up as it bakes, so a shallow piece will get pushed back to the surface.
- Bake at 425 degrees F for 22 minutes.
- Scatter mini marshmallows over the top in small clusters, two or three per ball, then sprinkle with the reserved graham coating. Bake for 3 more minutes, for 25 minutes total, until the marshmallows are puffed and golden. The internal temperature should read at least 190 degrees F.
- Let cool for 5 to 10 minutes, then pull apart and serve warm.
Notes
No Sourdough Starter? Use Yeast Instead
No sourdough starter? No problem. This s’mores pull-apart focaccia comes together just as beautifully with instant yeast or active dry yeast, and you get the same soft, fluffy, pull-apart bite in a few hours instead of overnight. The graham cracker crust, the vanilla butter dunk, the molten chocolate centers, and the toasted marshmallow tops are all exactly the same. The only thing that changes is the dough, and the recipe card below has everything you need with measurements for both instant and active dry yeast.
S’mores Pull-Apart Focaccia (Yeast)
Equipment
- kitchen scale
- Large mixing bowl
- Two Medium Bowls
- Whisk
- 9×13 inch baking pan
- Parchment paper
- Instant read thermometer (optional)
Ingredients
Dough
- 400 g bread flour 3 1/4 cups
- 305 g water 1 1/3 cups
- 8 g salt 1 1/2 teaspoons
- 5.5 g instant yeast 1 3/4 teaspoons, or 7g active dry yeast (2 1/4 teaspoons)
- 13 g granulated sugar 1 tablespoon
- 4 g vanilla extract 1 teaspoon
- 21 g Crushed Graham Crackers 3 tablespoons (optional)
Graham Cracker Coating
- 140 g finely crushed graham crackers about 1 1/3 cups
- 50 g granulated sugar 1/4 cup
- 8 g cornstarch 1 tablespoon
Vanilla Butter
- 113 g unsalted butter melted (1/2 cup)
- 4 g vanilla extract 1 teaspoon
For Topping
- 170 g good quality chocolate broken into 24 squares (about two 3 ounce bars), or about 1 tablespoon chopped chocolate chunks per ball
- 75 g mini marshmallows about 1 1/2 cups
Instructions
- If using instant yeast, add the bread flour, water, salt, instant yeast, sugar, and vanilla to a large bowl and mix until no dry flour remains. The dough will be sticky and shaggy, which is normal.
- If using active dry yeast, first warm the water to 100 to 110 degrees F, stir in the yeast and a pinch of the sugar, and let it sit 5 to 10 minutes until foamy, then add it with the rest of the ingredients and mix.
- Cover and let the dough rest for 30 to 60 minutes.
- Add in Crushed Graham crackers, is using. Perform three sets of stretch and folds, spaced 30 minutes apart. With a wet hand, grab one edge of the dough, stretch it up, and fold it over itself. Rotate the bowl and repeat a few times for each set.
- After the last set, cover and let the dough rise for about 1 – 1.5 hour, until puffy and noticeably risen.
- Line a 9×13 inch pan with parchment paper. Melt the butter and stir in the vanilla in one shallow bowl. In a second bowl, whisk together the crushed graham crackers, sugar, and cornstarch.
- Lightly oil your hands. Pinch off a small ball of dough, dunk it fully in the vanilla butter, then roll it in the graham coating until covered. Place it in the pan. Repeat to make 24 balls in a 6 by 4 grid, all touching. Reserve any leftover coating for the top.
- Cover and proof for about 1 hour, until the balls are puffy and have grown together.
- Press a square of chocolate into the center of each ball, pushing it all the way down to the bottom. The dough springs up as it bakes, so a shallow piece will get pushed back to the surface.
- Bake at 425 degrees F for 22 minutes.
- Scatter mini marshmallows over the top in small clusters, two or three per ball, then sprinkle with the reserved graham coating. Bake for 3 more minutes, for 25 minutes total, until the marshmallows are puffed and golden. The internal temperature should read at least 190 degrees F.
- Let cool for 5 to 10 minutes, then pull apart and serve warm.
Notes
Tips for Success
Push the chocolate to the bottom. This is the number one tip. The dough springs up as it bakes, so chocolate that sits too shallow gets pushed back to the surface. Press it all the way down.
Use real chocolate, not chips. Chips resist melting. A good chocolate bar gives you that molten center and the pull you are after.
Marshmallows go on at the end. Adding them in the last few minutes gives you that toasted, puffy, golden s’mores look. Tucked inside the dough, they just melt away and leave a hollow gap.
Do not skip the cornstarch. It crisps the coating and keeps the balls separate so they pull apart cleanly.
Watch the dough, not the clock. A warm kitchen proofs faster, a cool one slower. Look for puffy and jiggly.
Use a thermometer if you are unsure. An internal temperature of at least 190 degrees F means the bread is baked through.

Variations and Additions
Chocolate swaps. Milk chocolate is the classic s’mores choice, but a good dark chocolate bar is delicious here too. Just keep it to a clean chocolate you would eat on its own so it melts well.
Extra gooey centers. Use about a tablespoon of chopped chocolate chunks per ball instead of a single square.
Bigger or smaller balls. This recipe is sized for 24 small two bite balls in a 6 by 4 grid. You can make them larger for a heartier piece, just expect fewer pieces and a slightly longer bake.
Sourdough or yeast. Pick whichever fits your schedule. The sourdough version is a slow fermented overnight project. The yeast version is same day.
Dairy free. Swap the butter for melted coconut oil or a plant based butter in the dunk, and use a dairy free chocolate bar. Check your marshmallow brand too, since some contain gelatin and some do not.
A note on allergies. This is a wheat based bread, so it is not gluten free, and the butter and most chocolate contain dairy. Chocolate and marshmallow brands vary and many are produced on shared equipment, so if you are baking for anyone with a tree nut allergy, always read the labels and look for products made without tree nuts or on dedicated lines.

Have Fun With It
Here is your permission slip to play. This recipe is a s’more, and s’mores are supposed to be fun, so do not get too precious about it.
Want more of that real campfire crunch? Tuck a little square of graham cracker in alongside the chocolate before baking. I know I told you marshmallows inside leave a hollow gap, and they do, but you know what, give it a try anyway and see what happens. Worst case you learn something and eat the evidence. Feeling extra? Skip the neat little clusters and blanket the entire top with marshmallows for a fully toasted marshmallow lid.
Make it bigger, make it gooier, make it yours. Take this recipe and enjoy yourself with it.
Storage and Make Ahead
Storage. S’mores pull-apart focaccia is at its absolute best warm, the day it is made, when the chocolate is still melty and the marshmallows are fresh. If you have leftovers, store them in an airtight container at room temperature for up to 2 days.
Reheating. Warm individual pieces in a 300 degree oven for a few minutes until the chocolate softens again. The microwave works in a pinch for about 15 seconds, though the graham coating stays crispier when you use the oven.
Make ahead. You can ball these up, arrange them in your pan, and refrigerate overnight instead of doing the second proof at room temperature. The next day, pull the pan out and let it sit at room temperature until the balls are fully puffy and jiggly. Wait until they are fully proofed before you continue. Once they look ready, press in the chocolate and bake as directed. Do not add the chocolate and marshmallows until the dough has finished its full proof.

Frequently Asked Questions
Why did my chocolate end up on top instead of in the middle?
The dough rises as it bakes and pushes the chocolate up. Press each square all the way down to the bottom of the ball before baking and it will stay put in the center.
Can I put the marshmallows inside the dough?
I do not recommend it. Marshmallows melt completely and leave a hollow gap inside the bread. Adding them on top in the last few minutes gives you that toasted s’mores look and flavor.
Can I use chocolate chips?
You can, but they are made to hold their shape and will not give you that molten chocolate pull. A real chocolate bar is worth it here.
What pan should I use?
A 9×13 pan is perfect for 24 balls in a 6 by 4 grid. Line it with parchment for easy removal, since the sugar in the coating can stick.
Can I make these ahead?
Yes. Shape and arrange the balls, then refrigerate overnight. Let them come to room temperature and finish proofing fully the next day before adding the chocolate and baking.
How do I know when they are done?
Bake until the marshmallows are puffed and golden and the bread is deeply golden. If you want to be sure, the internal temperature should read at least 190 degrees F.

More Pull-Apart Focaccia Recipes
If this is your first pull-apart focaccia, welcome to the obsession. Here are more flavors waiting for you in the series.
The Cinnamon Roll Pull-Apart Focaccia is where the sweet series really took off, with a caramelized cinnamon sugar coating that cracks when you pull it apart.
The Caramel Apple Pie Pull-Apart Focaccia is the one that went completely viral, with a spiced apple filling and a caramel drizzle that hardens into a crackly shell.
The Lemon Blueberry Pull-Apart Focaccia brings a jammy blueberry compote dunk and a crackly lemon glaze that tastes like spring.
The Banana Bread Pull-Apart Focaccia takes everything you love about a loaf of banana bread and turns it into pull-apart form.
The Carrot Cake Pull-Apart Focaccia is built with shredded carrot and warm spices and finished with a cream cheese drizzle.
The Gingerbread Pull-Apart Focaccia is a cozy holiday favorite with molasses butter and warm spiced sugar.
The Celebration Pull-Apart Focaccia is rolled in rainbow sprinkles and finished with a crinkly donut glaze.
And the Jelly Donut Pull-Apart Focaccia is filled with jammy fruit and rolled in sugar like a proper donut.
It all started with the original Garlic Parmesan Pull-Apart Focaccia, the base recipe that every flavor in this series is built on.
Made This Recipe?
I would love to see your s’mores pull-apart focaccia! Leave a comment below and let me know how the bake went, including any tweaks you made and whether you went sourdough or yeast. If you share it on Instagram or TikTok, tag me at @h3artofthehome so I can see your bake.
Subscribe
Want recipes like this one delivered straight to your inbox? Subscribe to the H3art of the Home newsletter so you never miss a new pull-apart focaccia, fresh sourdough bake, or seasonal treat.


Leave a Reply