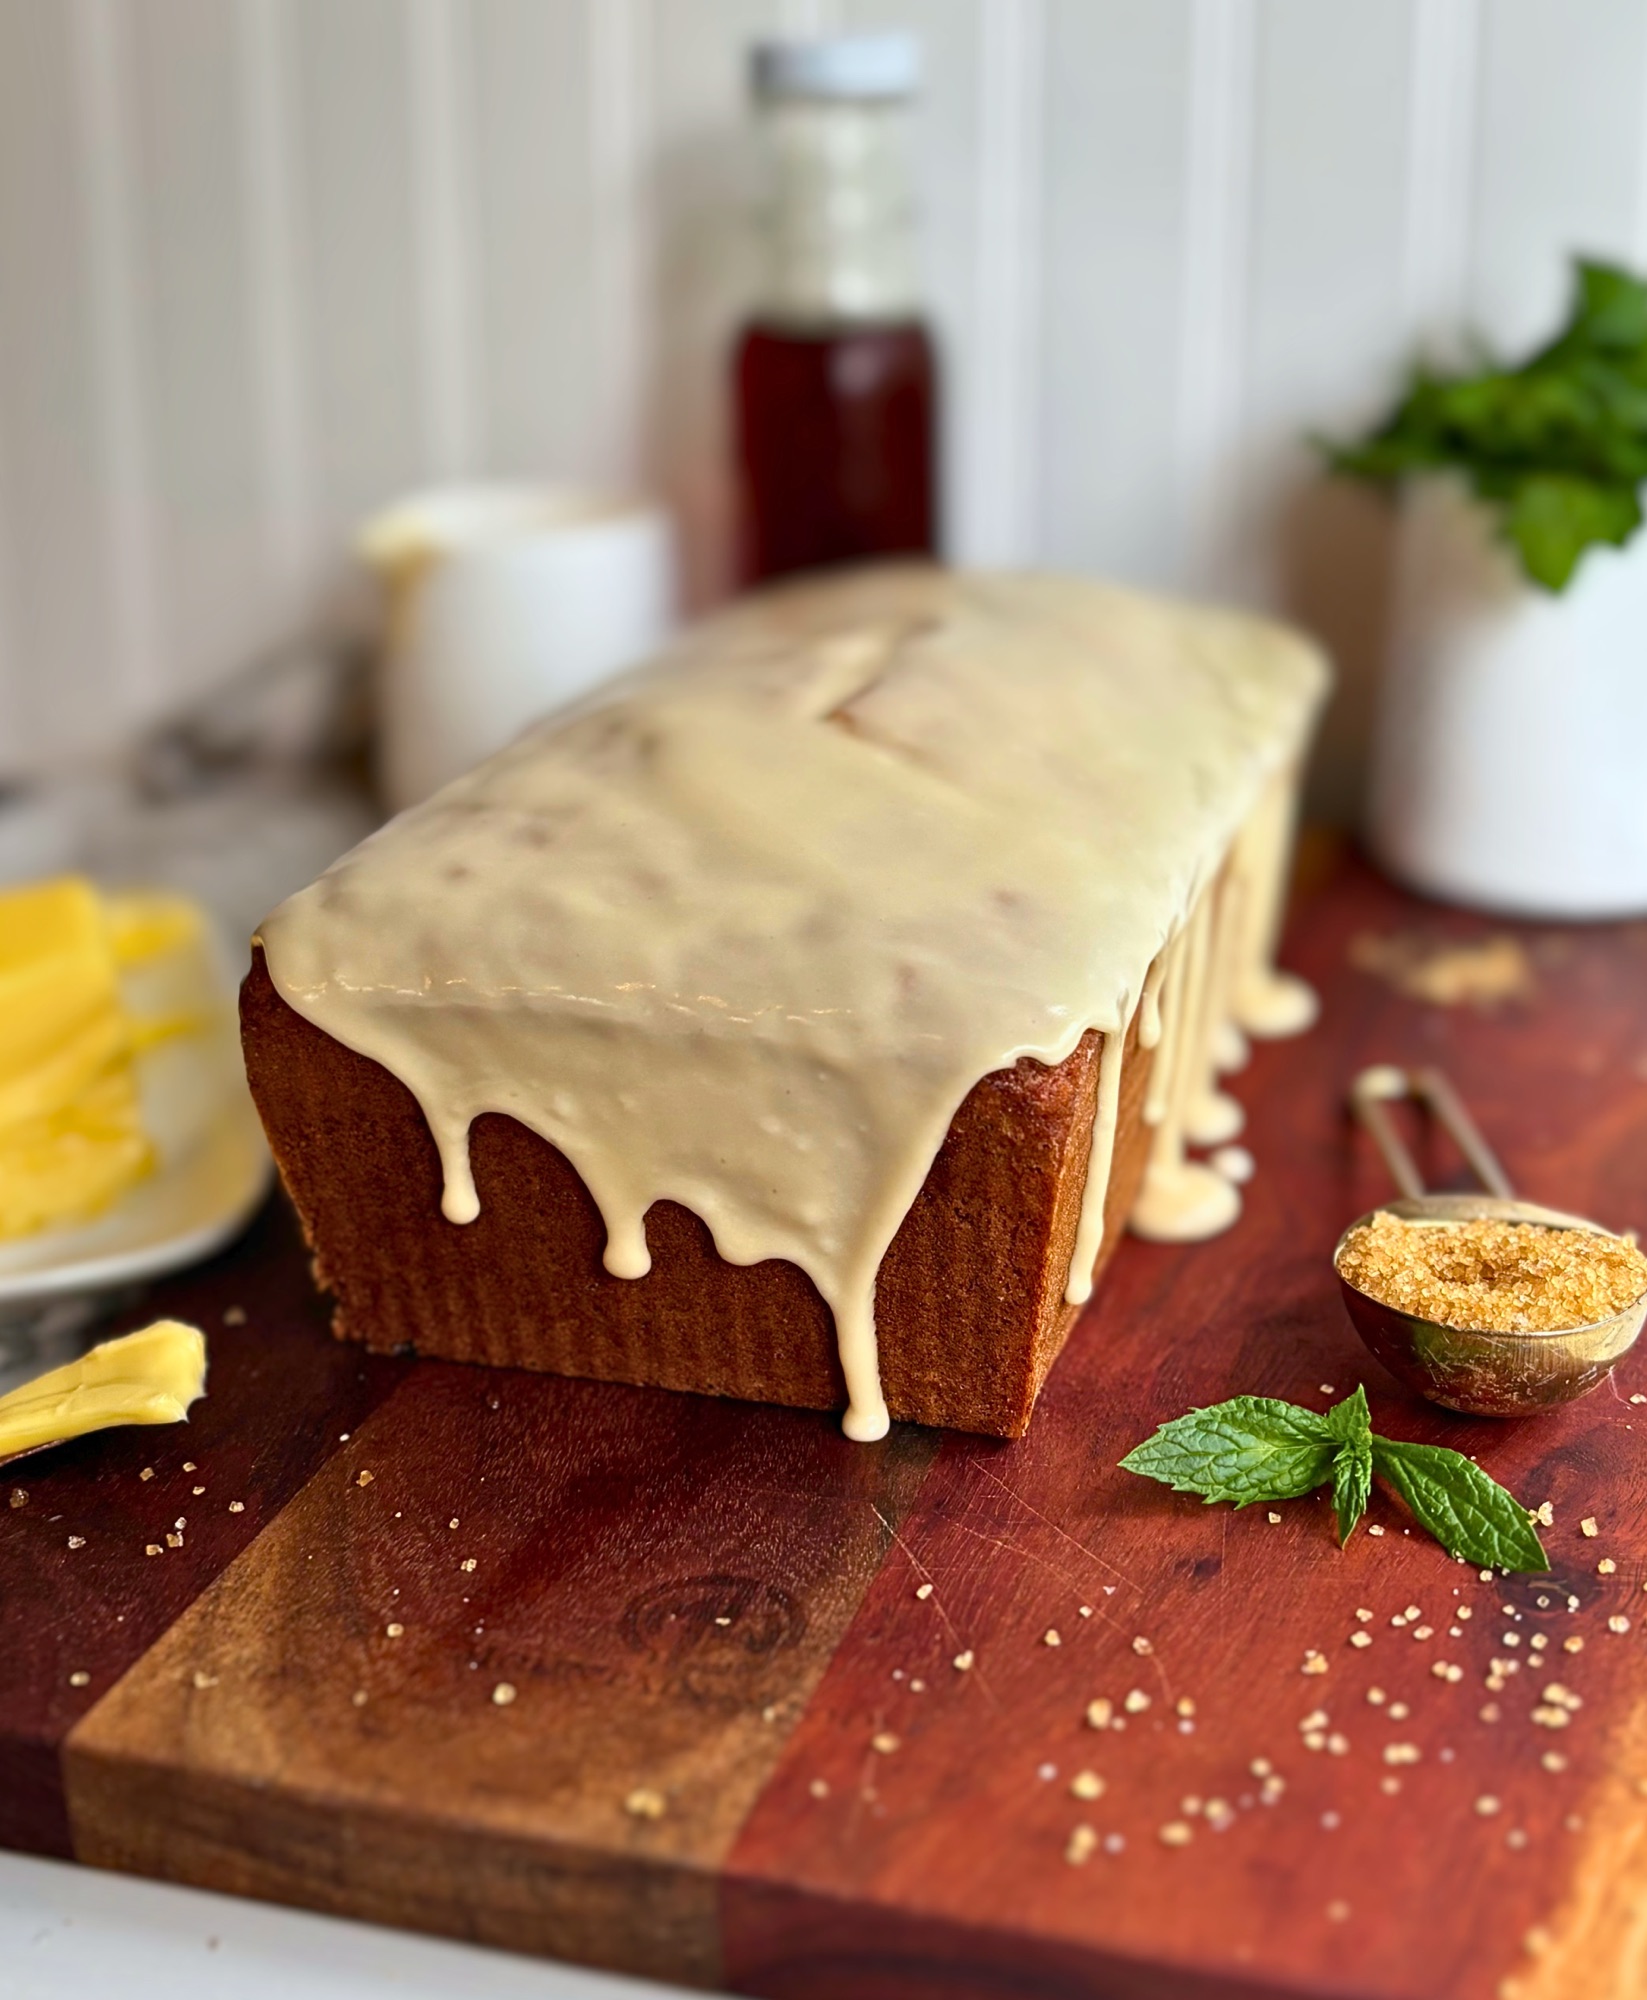
One morning I had more pancake batter than I had patience for, and I did not want to keep standing at the stove flipping one round after another while everyone else was already eating. I started thinking about what else that batter could become, and my first idea was sheet pan pancakes, which got me wondering what would happen if I baked pancakes into a loaf of bread instead. The more I thought about it, the more I was sure it would make a delicious quick bread, so I started testing, and this pancake bread is the result.
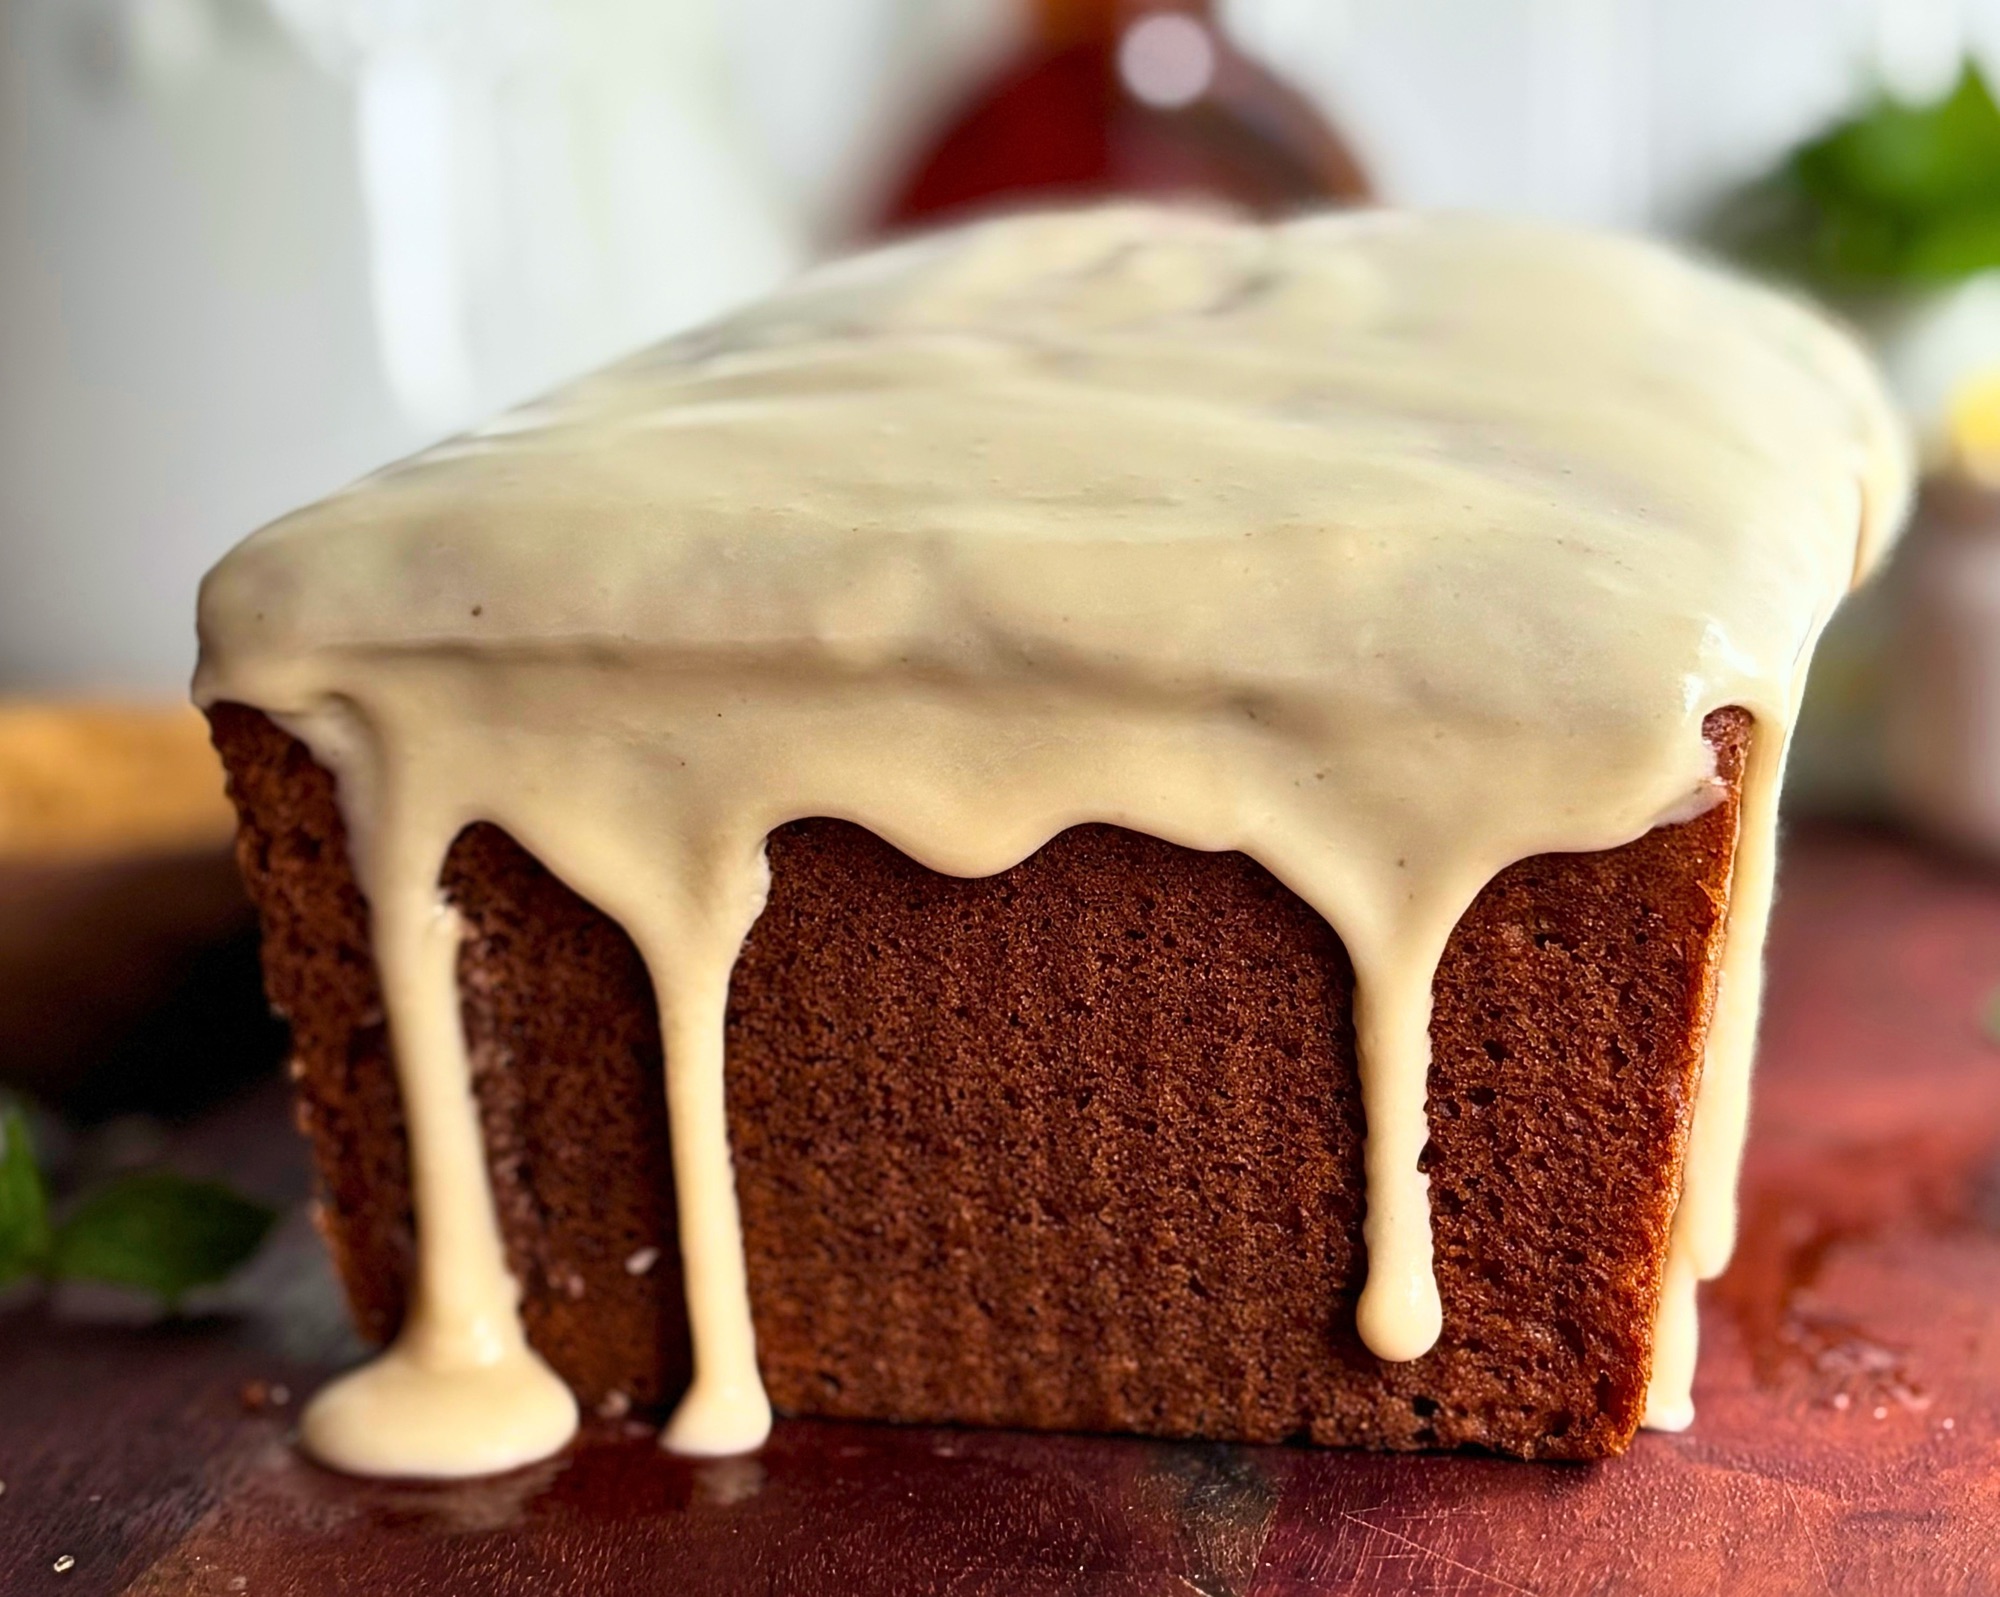
It tastes like a stack of maple pancakes with butter and syrup, but it is baked in a loaf pan, sliced like bread, and finished with a light maple glaze that sets glossy and firm. While I was testing it, someone mentioned Trader Joe’s pancake bread to me, which I had never heard of because there is no Trader Joe’s anywhere near me. I still have not tried theirs, so this is not a copycat. It is my own recipe, built from scratch over five test bakes until the crumb was soft and even, the top baked into a gentle dome, and the loaf was just as tender the next morning as it was the day I made it.
If you keep a sourdough starter, my Sourdough Discard Pancake Bread works the discard right into the batter and comes with an overnight option too.
Table of Contents
- What Is Pancake Bread?
- Why You Will Love This Pancake Bread
- Ingredient Notes
- How to Make Pancake Bread
- How to Get a Split Down the Middle of Pancake Bread
- The Maple Glaze
- Pancake Bread Recipe
- Make It With Sourdough Discard
- What Five Test Bakes Taught Me
- Tips for the Best Pancake Bread
- Substitutions
- How to Serve Pancake Bread
- How to Store and Freeze Pancake Bread
- Frequently Asked Questions
- Shop This Recipe
- More Recipes You Will Love
- Made This Recipe?
- Subscribe for Free
What Is Pancake Bread?
Pancake bread is a sweet quick bread that takes the flavors of a classic pancake breakfast, maple syrup, butter, vanilla, and a little brown sugar, and bakes them into a loaf you can slice. Like pancakes, it rises with baking powder and baking soda instead of yeast, so there is no proofing or waiting for dough to rise, and the batter goes straight from the bowl into the pan.

The texture sits right between a pancake and a classic quick bread. It is tender and soft like a fluffy pancake, but the crumb is fine and sturdy enough to slice cleanly, toast, and pack up for later. Trader Joe’s helped make the name popular with their seasonal loaf, and plenty of home bakers have been making their own versions ever since.
Why You Will Love This Pancake Bread
This is the loaf I make when I want pancakes for breakfast without spending the morning at the stove, and it has a few things going for it that made it worth five rounds of testing.

- No mixer needed. Everything comes together in two bowls with a whisk and a spatula, so cleanup is quick.
- No buttermilk required. The batter is built on milk and Greek yogurt, two things most of us already have in the fridge, instead of a carton of buttermilk you will only use once.
- It stays soft the next day. The balance of sugar, butter, and oil keeps the crumb tender long after it cools, which was the whole goal of the final test bakes.
- A glaze that actually sets. The maple glaze dries glossy and firm instead of staying sticky, so the slices hold up on a plate or in a container.
- Breakfast made ahead. Bake it the day before, and breakfast is ready the moment you slice it.
Ingredient Notes
Every ingredient in this loaf has a job, and knowing what each one does makes it easier to get the same result I did. You will find the exact amounts in the recipe card below.

- All purpose flour: Weigh it if you can, since a scooped cup of flour can easily carry more than the recipe needs, and extra flour is the quickest way to a dry, heavy loaf. I do not recommend bread flour here, because its higher protein builds more gluten and turns the crumb chewy and drier.
- Baking powder and baking soda: The baking powder does most of the lifting, while the baking soda reacts with the natural acidity of the Greek yogurt, brown sugar, and maple syrup to give the loaf an extra lift and help it brown.
- Whole milk and full fat plain Greek yogurt: Together they take the place of buttermilk. The milk keeps the batter loose enough to bake evenly, and the yogurt adds body, richness, and the acidity the baking soda needs.
- Brown sugar, granulated sugar, and maple syrup: Sugar does more than sweeten a quick bread, because it holds onto moisture in the baked crumb, and that is what keeps this loaf soft the next morning. Use pure maple syrup rather than pancake syrup, which is mostly corn syrup with added flavoring and will not give you the same maple flavor.
- Eggs: Two large eggs give the loaf its structure and help it rise into a gentle dome.
- Butter and avocado oil: Melted butter brings the buttery pancake flavor, and the oil keeps the crumb soft once the loaf is completely cool. Any neutral oil can stand in for the avocado oil.
- Vanilla and salt: Vanilla rounds out the maple, and a little salt keeps all that sweetness from tasting flat.
How to Make Pancake Bread
The recipe card below has every measurement, temperature, and time, so this section walks through the method and the reasons behind each step. Start by taking the chill off the milk and yogurt with a few short bursts in the microwave, stirring between each one, so the batter goes into the oven at about room temperature instead of fridge cold.

Whisk the dry ingredients in one bowl. In a second bowl, whisk the milk, yogurt, both sugars, maple syrup, eggs, and vanilla until the sugars dissolve, then whisk in the melted butter and oil. Pour the wet ingredients into the dry and fold only until no dry flour remains, which will give you a batter that is thick and scoopable, much thicker than pancake batter, and that is exactly what you want.
Before you mix, prepare a 9×5 loaf pan one of two ways, whichever you prefer. To butter and flour it, spread a thin layer of softened butter over the entire inside of the pan, covering the bottom, the sides, and into every corner, then add about a tablespoon of flour and tap and tilt the pan until the flour completely coats every buttered surface, and tap the extra out into the sink or the trash. If you would rather skip that step, line the pan with a parchment sling instead, which also makes it easy to lift the loaf straight out.
Spread the batter into your prepared pan, smooth the top, and let it rest in the pan for 10 minutes while the oven finishes preheating. That short rest gives the flour time to hydrate, and the batter thickens enough to hold onto its air bubbles, which helps the loaf rise taller and bake up with a more even crumb.

This is a full, heavy loaf, so it takes longer in the oven than most quick breads, usually 70 to 75 minutes. Tent it loosely with foil around the 40 minute mark if the top is browning quickly, start checking the center with a thermometer at 65 minutes, and take it out once it reads 200 to 205°F. Let it cool completely before you glaze or slice it, since the center keeps setting as it cools.

How to Get a Split Down the Middle of Pancake Bread
Left as is, this loaf bakes into a gently rounded dome with one soft natural crack across the top. If you would rather have that classic bakery look with one clean split running straight down the center, a thin line of softened butter will get you there, and it only takes a minute.

Put a teaspoon of softened butter, spreadable but not melted, into a small zip top bag and snip off a tiny corner. Right after you smooth the batter in the pan, and before the 10 minute rest, pipe one line lengthwise down the center, about as thick as a pencil, and stop about an inch short of each end so the split does not tear out the short sides of the loaf.
The one detail that matters most is pressing the tip lightly against the batter as you pipe, so the butter settles into the surface instead of sitting on top of it. The butter keeps that strip from setting as quickly as the rest of the top, so as the loaf rises it opens right along the line. When I laid the butter on top without any pressure, it ran toward one end as it melted and that end split wider than the rest, so the gentle press is what keeps the split even from end to end.
In my early test bakes I tried scoring the top with a knife and did not like how it looked, and the butter line gave me the clean, even split I was after.
The Maple Glaze
I wanted a glaze that coats the top with a few drips down the sides rather than a thick layer of icing, and I wanted it to set firm so the slices are not sticky to handle. This one pours smoothly, runs down the sides on its own, and dries glossy and firm.

The maple syrup carries all of the maple flavor, so there is no need for any specialty ingredients, though a little maple extract is listed as an option in the recipe card if you want the maple to come through even stronger. The ratio of liquid to powdered sugar is what lets it set, so add the milk gradually and stop once the glaze falls off the whisk in a slow, steady ribbon.

Wait until the loaf is completely cool before you glaze it, because a warm loaf melts the glaze and it slides right off. Leave it uncovered while it sets, since covering it traps humidity and keeps the glaze soft.
Pancake Bread Recipe

Pancake Bread with Maple Glaze
Equipment
- 9×5 loaf pan
- kitchen scale
- Instant read thermometer
- 2 mixing bowls
- Whisk
- Silicone spatula
- Wire cooling rack
- Parchment paper
- Aluminum foil optional
- Small zip top bag
Ingredients
Pancake Bread
- 420 grams all purpose flour 3 1/2 cups
- 10 grams baking powder 2 1/2 teaspoons
- 3 grams baking soda 1/2 teaspoon
- 4.5 grams fine salt 3/4 teaspoon
- 229 grams whole milk 3/4 cup plus 3 tablespoons
- 122 grams full fat plain Greek yogurt 1/2 cup
- 75 grams brown sugar 1/4 cup plus 2 tablespoons, packed
- 75 grams granulated sugar 1/4 cup plus 2 tablespoons
- 105 grams pure maple syrup 1/3 cup
- 2 large eggs room temperature (100 grams)
- 6 grams vanilla extract 1 1/2 teaspoons
- 43 grams unsalted butter melted and slightly cooled (3 tablespoons)
- 54 grams avocado oil or other neutral oil 1/4 cup
Pan Prep (Optional, could use parchment instead)
- softened butter for greasing the pan
- 8 grams all purpose flour for dusting the pan 1 tablespoon
Optional Split Top
- 5 grams softened unsalted butter for the split top 1 teaspoon
Maple Glaze
- 85 grams powdered sugar for the glaze 3/4 cup
- 30 grams pure maple syrup for the glaze 1 1/2 tablespoons
- 12 grams milk for the glaze 2 1/4 teaspoons, plus a few drops if needed
- pinch of salt for the glaze
- 1 gram maple extract for the glaze optional (1/4 teaspoon)
Instructions
- Preheat the oven to 350°F (175°C) with a rack in the center so the loaf bakes evenly from top to bottom.
- Prepare the 9×5 loaf pan one of two ways. To butter and flour it, spread a thin layer of softened butter over the entire inside of the pan, covering the bottom, the sides, and every corner, then add the tablespoon of flour and tap and tilt the pan until the flour coats every buttered surface, and tap the extra out into the sink or trash. Or line the pan with a parchment sling so you can lift the loaf straight out.
- Take the chill off the milk and Greek yogurt by warming them together in the microwave in short bursts, stirring between each one, until they feel about room temperature, roughly 65 to 75°F, which takes about 30 to 45 seconds total at around 1,000 watts. Do not heat them past about 90°F or the yogurt can separate. If your eggs are cold, set them in a bowl of warm tap water for 5 to 10 minutes, since a cold batter takes noticeably longer to bake through.
- In a large bowl, whisk together the flour, baking powder, baking soda, and salt so the leavening is evenly spread through the flour.
- In a second bowl, whisk the warmed milk and yogurt, brown sugar, granulated sugar, maple syrup, eggs, and vanilla until the sugars dissolve, then whisk in the melted butter and the oil until smooth.
- Pour the wet ingredients into the dry ingredients and fold with a spatula only until no dry flour remains. The batter will be thick and scoopable, much thicker than pancake batter, and a few small lumps are fine, because overmixing builds gluten that can make the loaf tough with tunnels running through it.
- Spread the batter into the prepared pan and smooth the top. Do not score the top.
- For the optional split top, put the softened butter in a small zip top bag, snip off a tiny corner, and pipe one line lengthwise down the center of the batter about the thickness of a pencil, pressing the tip lightly against the batter as you go so the butter settles into the surface. Stop about an inch short of each end so the split does not tear out the short sides of the loaf.
- Let the batter rest in the pan for 10 minutes while the oven finishes preheating. This gives the flour time to hydrate so the batter thickens and holds its air, which helps the loaf rise taller with an even crumb.
- Bake for 70 to 75 minutes. Check the top at 40 minutes and lay a piece of foil loosely over it if it is browning quickly. Start checking the center with an instant read thermometer at 65 minutes, and take the loaf out as soon as it reads 200 to 205°F.
- Let the loaf cool in the pan for 10 minutes, then lift it out onto a wire rack and let it cool completely, about 2 hours, since the center keeps setting as it cools and a warm loaf will melt the glaze.
- To make the glaze, whisk the powdered sugar, maple syrup, salt, and maple extract if using, then add the milk gradually, whisking until the glaze falls from the whisk in a slow, steady ribbon.
- Spoon or pour the glaze over the top of the completely cooled loaf and let it run down the sides on its own. Leave it uncovered for about 1 hour so the glaze sets glossy and firm before slicing.
Notes
Make It With Sourdough Discard
If you bake with sourdough, this loaf is a wonderful way to use up discard, and I tested a version just for that. My Sourdough Discard Pancake Bread works the discard into the batter with the liquid adjusted to make room for it, and it includes an overnight option for a deeper flavor.

The swap is not as simple as stirring discard into this recipe, since discard carries both flour and water and changes how the batter behaves, so use that recipe rather than adding discard to this one.
What Five Test Bakes Taught Me
My first loaves were made from a batter that was basically pancake batter, and they baked up flat and dense with long tunnels through the top half. It turns out a loaf needs a much thicker batter than a pancake does, because a thin batter cannot hold onto the gas from the baking powder long enough to set around it, so I kept adjusting until the batter was thick and scoopable.
The next lesson came from trying to cut back on sugar. That loaf looked beautiful the day I baked it, but by the next morning it was dry and crumbly, because sugar is one of the main things that keeps a quick bread moist. Bringing the sugar back up, along with splitting the fat between butter and oil, gave me the version you see here, with a crumb that is just as soft on day two.
The last lesson was trusting a thermometer over a toothpick. A heavy loaf like this can pass the toothpick test before the center is actually done, and pulling it at 200 to 205°F is what makes it bake through without drying out.
Tips for the Best Pancake Bread
A few small habits make a big difference with this loaf, and most of them come straight out of my test bakes.

- Weigh your flour. It is the single most reliable way to avoid a dry, heavy loaf.
- Use room temperature ingredients. Cold dairy and eggs make a cold batter that takes noticeably longer to bake through, so warm the milk and yogurt briefly and set cold eggs in a bowl of warm tap water for 5 to 10 minutes.
- Stop folding as soon as the flour disappears. Overmixing builds gluten and can leave the loaf tough with tunnels running through it.
- Do not skip the 10 minute rest. It thickens the batter so the loaf rises taller and more evenly.
- Make sure the oven is fully preheated. The loaf needs steady heat from the moment it goes in.
- Bake by temperature, not by the clock. Ovens and pans vary, so the thermometer is what tells you it is done.
- Watch the browning. If your loaf pan is dark metal, the outside can brown faster, so check it a little early and tent with foil when the color looks right.
Substitutions
I tested this recipe exactly as it is written, so that is the version I can promise will turn out. That said, a few swaps are common in loaves like this one, and here is what I would expect from each.

- Sour cream for the Greek yogurt: Full fat sour cream is used in a lot of similar loaves and brings the same richness and acidity, so it should work in equal amounts, though I have not tested it here.
- Another neutral oil for the avocado oil: Vegetable, canola, or light olive oil all work the same way in the batter.
- Light or dark brown sugar: Either one works, and dark brown sugar will give a slightly deeper molasses flavor.
- Bread flour: I do not recommend it, because it makes the crumb chewier and drier.
- Dairy free: I have not tested a dairy free version. Dairy free milks and yogurts vary a lot in thickness and acidity, and the acidity matters here because it is what activates the baking soda, so I cannot promise the same rise or texture.
How to Serve Pancake Bread
A thick slice with a pat of butter and a drizzle of warm maple syrup is my favorite way to eat it, because it brings the whole pancake breakfast right back to the table.

You can also toast slices in a buttered skillet until the edges crisp, serve it alongside bacon and fresh berries for brunch, or wrap a slice to go for a breakfast you can eat in the car. It makes a great addition to a holiday brunch table, since you can bake it the day before.
How to Store and Freeze Pancake Bread
Once the loaf is completely cool, either glaze it that same day or wrap it tightly, and keep it at room temperature for up to 3 days. A glazed loaf is best stored in a container with a loose lid so the glaze stays set.

Skip the refrigerator, because cold storage dries out quick breads faster than room temperature does. To freeze it, wrap the cooled, unglazed loaf or individual slices tightly in plastic wrap and then foil, and freeze for up to 3 months. Thaw it at room temperature while it is still wrapped, then glaze the loaf once it has thawed.
Frequently Asked Questions
These are the questions I expect most often about this loaf, along with what I learned while testing it.

Is this the same as Trader Joe’s pancake bread?
No. I have never tried the Trader Joe’s loaf, since there is not a store near me, so this is my own recipe. It was developed from scratch and tested five times until the flavor, crumb, and next day texture were exactly what I wanted.
Can I use buttermilk instead of the milk and Greek yogurt?
My earliest test loaves used buttermilk, but the final recipe was built and tested with milk and Greek yogurt, which gave a better crumb and is easier for most people to keep on hand. For the most reliable result, use the milk and yogurt as written.
How do I know when pancake bread is done?
Check the center with an instant read thermometer and take the loaf out at 200 to 205°F. A toothpick can come out clean before the very center is fully set in a loaf this size, so the thermometer is the most accurate test.
Why did my pancake bread sink in the middle?
The most common reason is underbaking, which is why pulling the loaf by temperature matters so much. Overmixing the batter or putting the loaf into an oven that has not fully preheated can also cause the center to fall.
Why is my glaze sticky instead of setting?
The glaze needs a completely cool loaf and open air to set. If it goes onto a warm loaf, gets covered too soon, or has extra milk added, it stays soft. Add the milk gradually and stop once the glaze flows in a slow ribbon.
Can I make pancake bread ahead of time?
Yes, and it is one of the best reasons to make it. Bake it the day before, and it will still be soft and tender in the morning. You can also freeze it unglazed and glaze it after it thaws.
Shop This Recipe
These are the tools I used to make this pancake bread. I earn a small commission from these affiliate links at no extra cost to you, which helps support the blog.
- 9×5 Loaf Pan: The size this recipe was developed and tested in, which gives the loaf its height and gentle dome.
- Instant Read Thermometer: The most reliable way to know the center has reached 200 to 205°F.
- Kitchen Scale: I weigh the flour for every loaf, since it is the easiest way to avoid a dry, heavy bake.
- Parchment Paper: If you would rather line the pan than butter and flour it, a parchment sling lets you lift the loaf straight out.
More Recipes You Will Love
If this pancake bread is your kind of breakfast, here are a few more recipes from my kitchen that I think you will enjoy.
- Sourdough Discard Pancake Bread
- High Protein Greek Yogurt Chocolate Chip Muffins
- Cottage Cheese Chocolate Chip Cookies
Made This Recipe?
If you bake this pancake bread, I would love to hear how it turned out, so leave a comment and a star rating below. Share a photo and tag me @h3artofthehome on Instagram so I can see your loaf.
Subscribe for Free
Want new recipes sent straight to your inbox? Sign up for my newsletter, which is completely free, and you will be the first to know when a new recipe goes live.



Leave a Reply