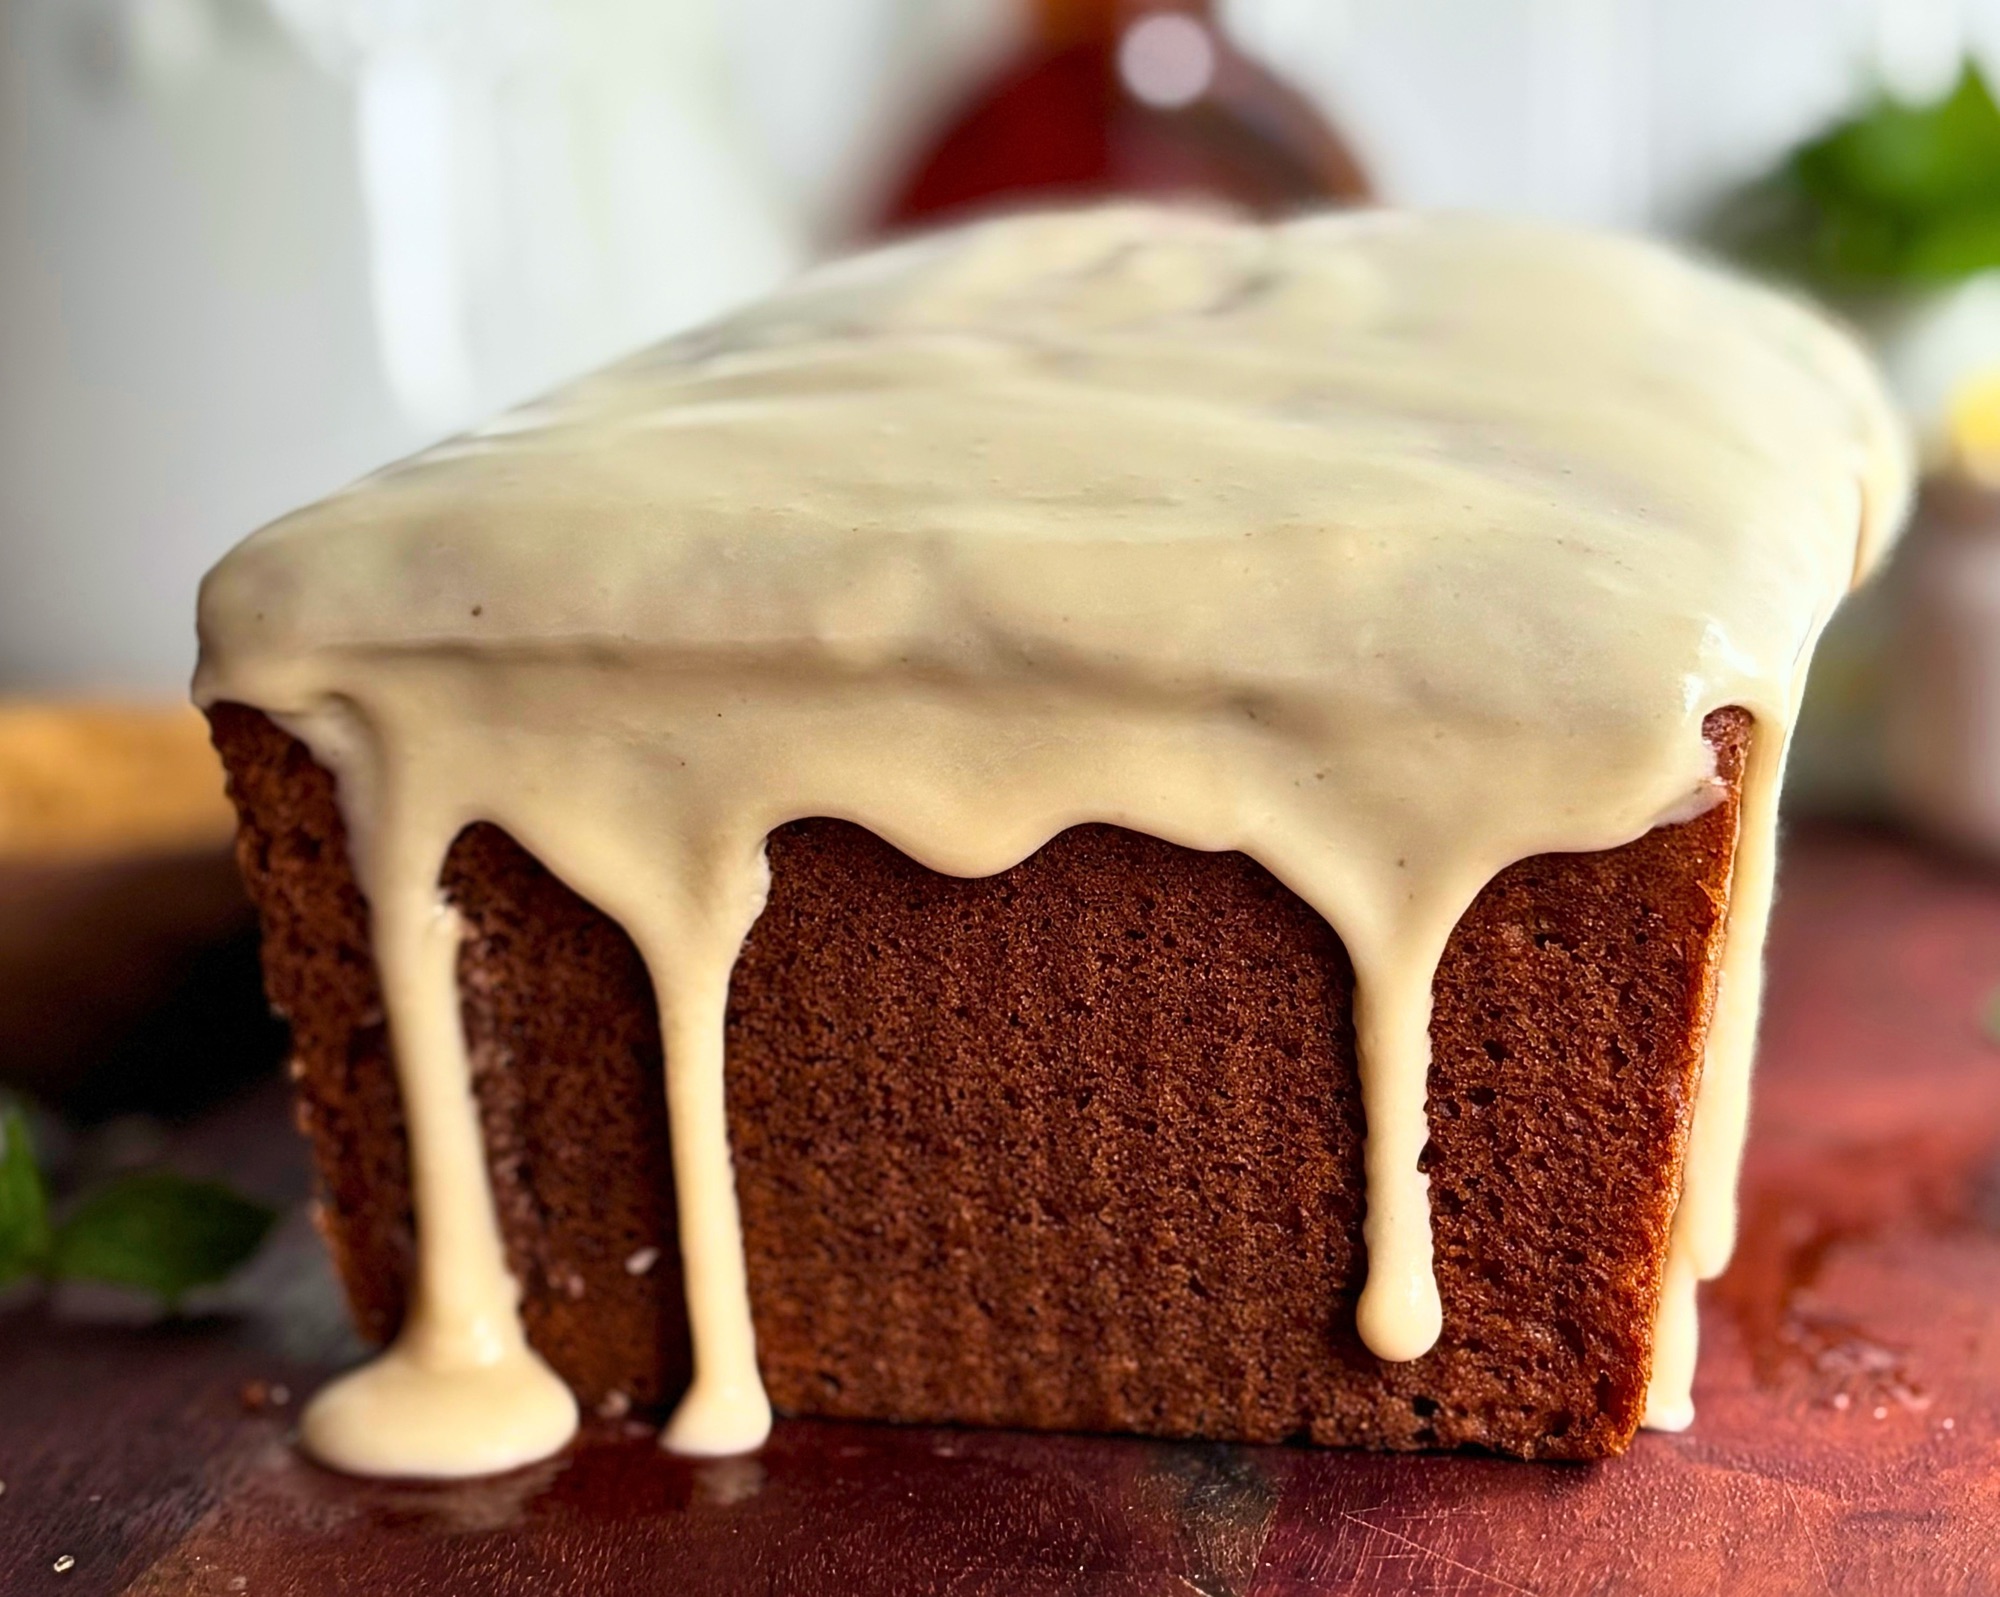
What I wanted was the whole feeling of a Saturday pancake stack, the warm maple, the butter, the soft and tender middle, baked into a loaf I could slice and toast all week instead of standing at a griddle flipping. That loaf became my Pancake Bread, and the second it came out right I knew the discard sitting in my kitchen from the day before needed a place in it too. This sourdough discard pancake bread is the result, built from the same tested base with 100g of unfed discard worked in, so you get the same fine, soft crumb and maple glaze with a little more depth and a reason to stop throwing discard away.
It does not taste sour at all, which surprised a few people in my house, and it actually gets better over the next couple of days as the flavor settles into the crumb. You can bake it the same day you mix it, or start it the night before and let the fridge do some of the work while you sleep.
Table of Contents
- Why You Will Love This Pancake Bread
- Ingredients and What Each One Does
- How the Discard Works in This Loaf
- How to Make Sourdough Discard Pancake Bread
- How to Tell When It Is Done
- The Butter Line Split (Optional)
- The Maple Glaze
- Overnight Fridge Option
- Expert Tips
- No Sourdough Version
- Storing and Freezing
- Shop This Recipe
- FAQ
- Recipe
- More Recipes
- Subscribe
Why You Will Love This Pancake Bread
This is the loaf for anyone who loves pancakes but would rather slice breakfast than flip it, and for anyone with a jar of discard that keeps growing faster than they can use it.

- It tastes like a stack of pancakes. Maple syrup and butter are baked right into the loaf, and the maple glaze on top finishes it the way syrup finishes a short stack.
- It uses unfed discard. There is no active starter to feed and no rise to wait on, because the baking powder and baking soda do the lifting while the discard brings flavor and tenderness.
- There is no sour taste. In a sweet maple loaf, 100g of discard reads as depth and warmth rather than sourness, so even the people who think they do not like sourdough will reach for a second slice.
- It stays soft for days. Greek yogurt, the right amount of sugar, and a mix of butter and oil keep the crumb tender well past the first day, and the flavor only gets better.
- No mixer needed. Two bowls, a whisk, and a spatula are all it takes.
- Same day or overnight. Bake it the day you mix it, or mix the base the night before and finish it in the morning.
Ingredients and What Each One Does
Every ingredient in this loaf is doing a job, and knowing what that job is makes it a lot easier to get it right the first time. You will find the exact amounts and volume measurements in the recipe card below, and this section covers the why behind each one.

- All purpose flour. All purpose gives the soft, fine crumb this loaf is known for, while bread flour would make it chewier. Weigh it if you can, because a scooped cup can carry a lot more flour than you think and throw the whole batter off.
- Unfed sourdough discard. Use discard at 100% hydration, meaning it was fed equal weights of flour and water, and let it come to room temperature before you mix so it whisks in smoothly.
- Whole milk and full fat Greek yogurt. Together these do what buttermilk used to do in pancake bread, with ingredients most people already have. The yogurt adds body, moisture, and a little acid, and it is a big part of why the loaf is still soft the next day.
- Brown sugar, granulated sugar, and maple syrup. Sugar does more than sweeten here, because it holds moisture in the crumb. When I tested this loaf with less sugar it came out dry and crumbly overnight, so please do not cut it.
- Eggs. Two large eggs give structure and richness without making the loaf cakey.
- Unsalted butter and avocado oil. Butter brings the pancake flavor, and oil keeps the crumb soft once the loaf is completely cool, so you get the best of both.
- Baking powder and baking soda. These are what make the loaf rise. The baking soda also balances the acid from the yogurt, brown sugar, maple, and discard, which helps the crust brown to that deep golden pancake color.
- Vanilla and salt. Vanilla rounds out the maple, and salt keeps all that sweetness from tasting flat.
How the Discard Works in This Loaf
Sourdough discard is simply flour and water that has been fermenting, so 100g of discard at 100% hydration carries 50g of flour and 50g of water into the batter. To keep this loaf behaving exactly like the tested original, the flour and the milk both come down to make room for it, which keeps the batter at the same thickness.

That thickness matters more than anything else in this recipe. While I was developing the original loaf, the wetter batters baked up flat and dense with tunnels running through the top, and it was only when the batter came down to a thick, scoopable consistency that the loaf rose tall and level with a fine, even crumb from top to bottom. The discard version keeps that exact balance.
The discard does not make this loaf rise, since unfed discard has very little lifting power left. What it does is add a deeper flavor and a little extra tenderness, while the baking powder and baking soda handle the rise. Discard left over from a bake in the last day or two is perfect. If yours is cold from the fridge, set it on the counter until it comes to room temperature, because cold discard stays stiff and will not whisk smoothly into the milk and yogurt.
How to Make Sourdough Discard Pancake Bread
This comes together in two bowls, and the full step by step with times and temperatures is in the recipe card. Here is what is happening at each stage and why it matters.

Take the chill off the wet ingredients. Cold batter takes longer to bake and bakes less evenly, so warm the milk and yogurt together in the microwave in short bursts, stirring between each, just until they feel about room temperature, around 70°F if you have a thermometer. You are only taking the chill off, so do not let them get hot. Warm dairy also keeps the melted butter from firming into little specks when it goes in.
Whisk the discard into the milk and yogurt first. Getting it smooth before anything else goes in keeps you from chasing lumps of discard around the bowl later. Then whisk in both sugars, the maple syrup, the eggs, and the vanilla until the sugars dissolve, and finish with the melted butter and oil.
If you have time, let the wet ingredients rest. Letting the wet mixture, discard and all, sit covered at room temperature for 30 minutes to an hour before you add the dry ingredients gives the discard a head start in the milk, finishes dissolving the sugars, and brings everything to room temperature on its own. When I did this the crumb came out noticeably softer, and since the leaveners stay with the dry ingredients until you mix, you do not lose any rise. It is optional, and warming the dairy works well if you want to skip it.
Fold only until no dry flour remains. The batter will be thick and scoopable, and it is easy to overmix, so stop the moment it comes together. A few small lumps are fine, just like pancake batter.
Spread it, smooth it, and do not score it. Knife scoring does not work on this batter, because the top sets faster than a blade line can hold, and in testing a scored top blew open into wide, wrinkled ridges. If you want a clean split down the center, use the butter line below instead.
Let it rest in the pan for 10 minutes. The flour hydrates and the batter thickens while it sits, so it holds its gas better in the oven for a taller rise and a moister crumb.
Bake, tent, and pull it by temperature. The sugar in this loaf browns quickly, so a loose foil tent partway through keeps the top golden instead of dark while the center finishes. Then cool it completely before you glaze or slice, because the center keeps setting as it cools.
How to Tell When It Is Done
Use an instant read thermometer and pull the loaf when the center reads 200 to 205°F. Push the probe straight down in the middle until the tip sits about halfway down, since that is the last spot to cook.

A toothpick is not reliable for this loaf. On one of my bakes the toothpick came out completely clean while the thermometer read only 185°F, and a loaf pulled there would have a gummy center and could sink as it cools. Every oven is different, so start checking around 60 minutes and expect it to take about 70, but let the temperature make the final call.
The Butter Line Split (Optional)
If you love the look of a loaf with one clean seam running down the middle, this little trick gives it to you without a knife. A thin line of softened butter piped down the center keeps that strip from setting as quickly as the rest of the top, so the loaf splits right along it as it rises.

Put a teaspoon of softened butter, spreadable but not melted, into a small zip top bag and snip off a tiny corner. Right after you spread and smooth the batter, and before the 10 minute rest, pipe one line lengthwise down the center about as thick as a pencil. Press the tip lightly against the batter as you go so the butter settles into the surface rather than sitting on top of it, because butter that sits on top can run toward one end as it melts and make that end split wider than the rest. Stop about an inch short of each end so the split does not tear out the short sides.

If you skip it, the loaf bakes up with a gently domed top and one soft natural crack, which is just as pretty under the glaze.
The Maple Glaze
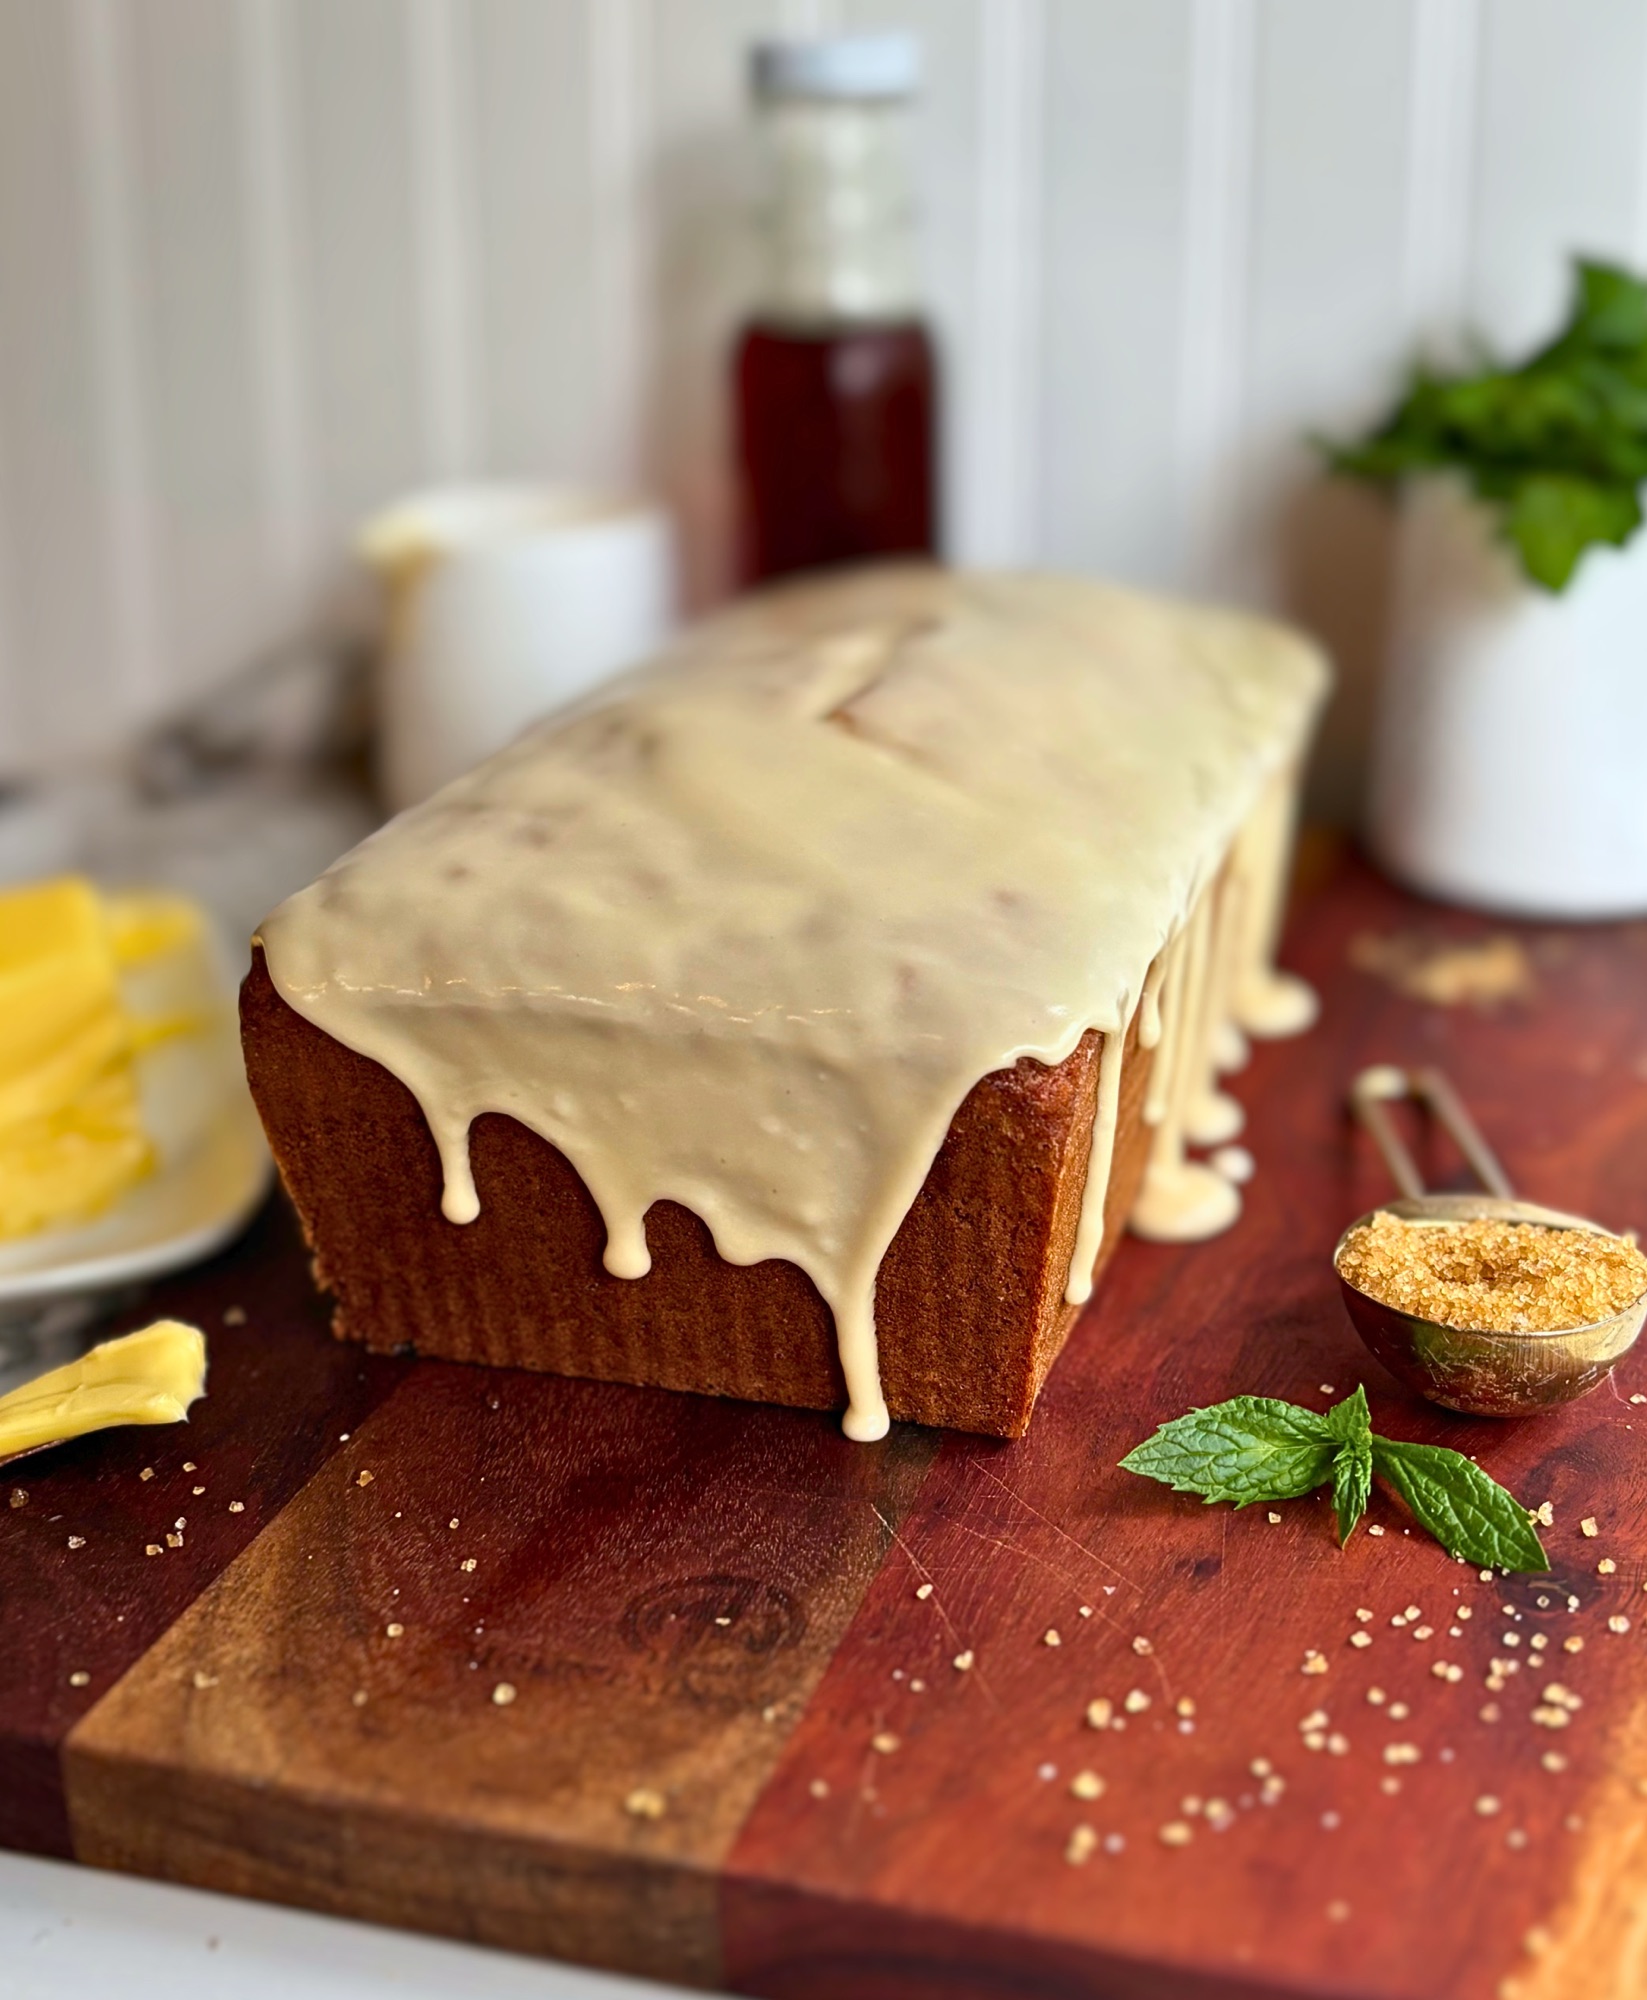
The glaze is just powdered sugar, maple syrup, a little milk, and a pinch of salt, and it sets glossy and firm instead of staying sticky. That comes down to balance, since maple syrup pulls moisture from the air, so the milk is added a little at a time until the glaze is thick but still pourable.

Spoon it over a completely cooled loaf and leave it uncovered to set. If you glaze a warm loaf, the glaze melts and soaks in instead of setting on top. Maple extract is optional for an even stronger maple flavor, but most people do not keep it on hand, and the maple syrup carries plenty of flavor on its own.
Overnight Fridge Option
If you want to give the discard a long, slow ferment, you can mix most of the batter the night before and finish it in the morning. Everything goes into the fridge overnight except the sugars, maple syrup, vanilla, butter, salt, and leaveners, so the ferment stays slow and the baking powder and baking soda keep all of their lifting power for the oven.
The night before, whisk the room temperature discard into the milk until smooth, whisk in the yogurt, eggs, and avocado oil, and then stir in all of the flour until no dry flour remains. It will be a thick batter. Cover the bowl and refrigerate it overnight. The sugars stay out on purpose, since sugar changes how the ferment behaves, and the eggs are part of why the fridge is a must for this version.
In the morning, set the bowl on the counter for about an hour to come to room temperature while the oven heats and you prep the pan. Whisk the salt, baking powder, and baking soda into both sugars, which spreads the leaveners evenly and keeps the soda from clumping, then whisk in the maple syrup, vanilla, and melted butter. Fold that into the batter until there are no streaks, spread it in the pan, and bake right away. There is no need for the 10 minute rest with this version, because the flour has already had all night to hydrate. If the batter still feels cool when it goes in, it may need a few extra minutes, so pull it by temperature just like the same day loaf.
Expert Tips
These are the details that made the biggest difference across my test bakes, and most of them come down to temperature and patience.

- Weigh the flour. This loaf depends on a thick batter, and weighing is the only way to know you have the right amount.
- Use room temperature discard and eggs. If your eggs are cold, set them in a bowl of warm tap water for 5 to 10 minutes.
- Do not overmix. Stop folding as soon as you stop seeing dry flour.
- Do not score with a knife. Use the butter line if you want a split.
- Trust the thermometer, not the toothpick. Pull it at 200 to 205°F in the center.
- Cool it completely before glazing. A warm loaf melts the glaze right off.
- Make it a day ahead. The flavor and texture are even better on day two.
No Sourdough Version
No discard? You do not need it for this loaf, because the discard is just flour and water, and putting those back gives you the original recipe exactly. Leave out the 100g of discard and add 50g of all purpose flour (1/4 cup plus 2 tbsp plus 2 tsp) and 57g of whole milk (3 3/4 tbsp) to the amounts in the recipe card, then make it exactly as written.
That brings you to the formula I published as my Pancake Bread, which has its own recipe card with all of the measurements already worked out, so you can head there if you would rather not do the math.

If you would like to start your own sourdough starter so you always have discard on hand, my guide to creating a sourdough starter walks you through it with minimal waste.
Storing and Freezing
Once it is completely cool, wrap the loaf tightly or keep it in an airtight container at room temperature for up to 4 days. It stays soft and tender, and the flavor gets better after the first day.

To freeze it, wrap the cooled, unglazed loaf or individual slices tightly in plastic wrap and then foil, and freeze for up to 3 months. Thaw it at room temperature still wrapped, then glaze the loaf once it has thawed. Frozen slices can go straight into the toaster.
Shop This Recipe
These are the tools I reach for every time I make this loaf.
- 9×5 loaf pan. The batter fills a 9×5 pan just right for a tall loaf, and a light metal pan bakes it evenly without overbrowning the sides.
- Instant read thermometer. This is how you know the center is really done, since a toothpick can come out clean before the loaf is ready.
- Digital kitchen scale. This recipe was developed and tested by weight, so I can’t guarantee results when it’s measured in cups, and weighing the flour and discard is the easiest way to get the thick batter this loaf needs.
- Parchment paper. I usually just butter and flour the pan, but if you prefer, a parchment sling lets you lift the loaf straight out without breaking the sides.
I earn a small commission from these affiliate links at no extra cost to you, which helps support the blog and keeps the recipes coming.
FAQ
These are the questions that come up most about baking pancake bread with discard.

Does sourdough discard pancake bread taste sour?
No. With 100g of discard in a sweet maple loaf, it adds depth and warmth rather than a sour flavor, and most people would never guess there is sourdough in it.
Can I use discard straight from the fridge?
Let it come to room temperature first. Cold discard stays stiff and will not whisk smoothly into the milk and yogurt, and cold ingredients make the loaf take longer to bake.
How do I know when it is done?
The center should read 200 to 205°F on an instant read thermometer. A toothpick can come out clean while the center is still underbaked, so the thermometer is the only reliable test for this loaf.
Why did my loaf sink in the middle?
The most common reason is pulling it before the center reached 200°F. Overmixing the batter or opening the oven early in the bake can also cause it.
Can I skip the glaze?
Yes. It is delicious toasted with butter and a drizzle of maple syrup, which is exactly how you would eat a pancake.
Can I freeze sourdough discard pancake bread?
Yes. Freeze the cooled loaf or slices unglazed for up to 3 months, then thaw and glaze, or toast slices straight from the freezer.
Recipe

Sourdough Discard Pancake Bread (With Maple Glaze)
Equipment
- 9×5 loaf pan
- Parchment paper (optional)
- Digital kitchen scale (this recipe was developed and tested by weight)
- Mixing bowls
- Whisk
- Rubber spatula
- Instant read thermometer
- Aluminum foil
- Small zip top bag
- Cooling rack
Ingredients
Loaf
- 370 g all purpose flour 3 cups plus 1 tbsp plus 1 tsp
- 10 g baking powder 2 1/2 tsp
- 3 g baking soda 1/2 tsp
- 4.5 g fine salt 3/4 tsp
- 100 g unfed sourdough discard 100% hydration, room temperature (about 1/3 cup plus 1 1/2 tbsp, stirred down)
- 172 g whole milk 1/2 cup plus 3 tbsp plus 3/4 tsp
- 122 g full fat plain Greek yogurt 1/2 cup
- 75 g brown sugar 1/4 cup plus 2 tbsp packed
- 75 g granulated sugar 1/4 cup plus 2 tbsp
- 105 g maple syrup 1/3 cup
- 100 g eggs room temperature (2 large)
- 6 g vanilla extract 1 1/2 tsp
- 43 g unsalted butter melted and slightly cooled (3 tbsp)
- 54 g avocado oil 4 tbsp
Butter Line (optional)
- 5 g softened unsalted butter for the butter line split optional (1 tsp)
Maple Glaze
- 85 g powdered sugar for the glaze 3/4 cup
- 30 g maple syrup for the glaze 1 1/2 tbsp
- 12 g milk for the glaze added gradually (2 1/4 tsp, plus a few drops if needed)
- Pinch of salt for the glaze
- 1 g maple extract for the glaze optional (1/4 tsp)
Instructions
Loaf
- Heat the oven to 350°F. Butter and flour a 9×5 loaf pan, or grease it and line it with a parchment sling if you prefer to lift the loaf straight out.
- Make sure the discard and eggs are at room temperature. If the discard is cold from the fridge, let it sit out until it warms up.
- Weigh the flour, then whisk it with the baking powder, baking soda, and salt in a large bowl.
- Warm the milk and yogurt together in the microwave in short bursts, stirring between each, just until they reach about 70°F, roughly 30 seconds total. Do not let them get hot, since you are only taking the chill off.
- Whisk the discard into the milk and yogurt until smooth. Whisk in the brown sugar, granulated sugar, maple syrup, eggs, and vanilla until the sugars dissolve, then whisk in the melted butter and avocado oil.
- Optional: cover the wet mixture and let it rest at room temperature for 30 minutes to 1 hour for a softer crumb.
- Pour the wet ingredients into the dry and fold only until no dry flour remains. The batter will be thick and scoopable, so stop as soon as it comes together.
- Spread the batter into the pan and smooth the top. Do not score it.
- Optional butter line: spoon the softened butter into a small zip top bag, snip a tiny corner, and pipe one pencil thick line lengthwise down the center, pressing the tip lightly against the batter so the butter settles into the surface. Stop about an inch short of each end.
- Let the batter rest in the pan for 10 minutes.
- Bake at 350°F. Tent loosely with foil at 40 minutes. Start checking at 60 minutes and expect about 70 minutes total, until the center reads 200 to 205°F on an instant read thermometer. Do not rely on a toothpick.
- Cool in the pan for 15 minutes, turn or lift the loaf out onto a rack, and cool completely before glazing or slicing.
Maple Glaze
- Whisk the powdered sugar, maple syrup, salt, and maple extract if using. Add the milk a little at a time, whisking, until the glaze is thick but pourable.
- Spoon the glaze over the completely cooled loaf and leave it uncovered to set.
Notes
More Recipes
If this loaf is your kind of breakfast, here are a few more to try next.
- Pancake Bread
- High Protein Sourdough English Muffins
- High Protein Sourdough Chocolate Chip Muffins
- The Easiest Pumpkin Swirl Sourdough Bread
- Cinnamon Roll Pull-Apart Focaccia
- High Protein Sourdough Bagels
Subscribe
Want new recipes like this one sent straight to your inbox? Subscribing is completely free, and you will be the first to know when a new loaf, discard recipe, or high protein bake goes live.





Leave a Reply