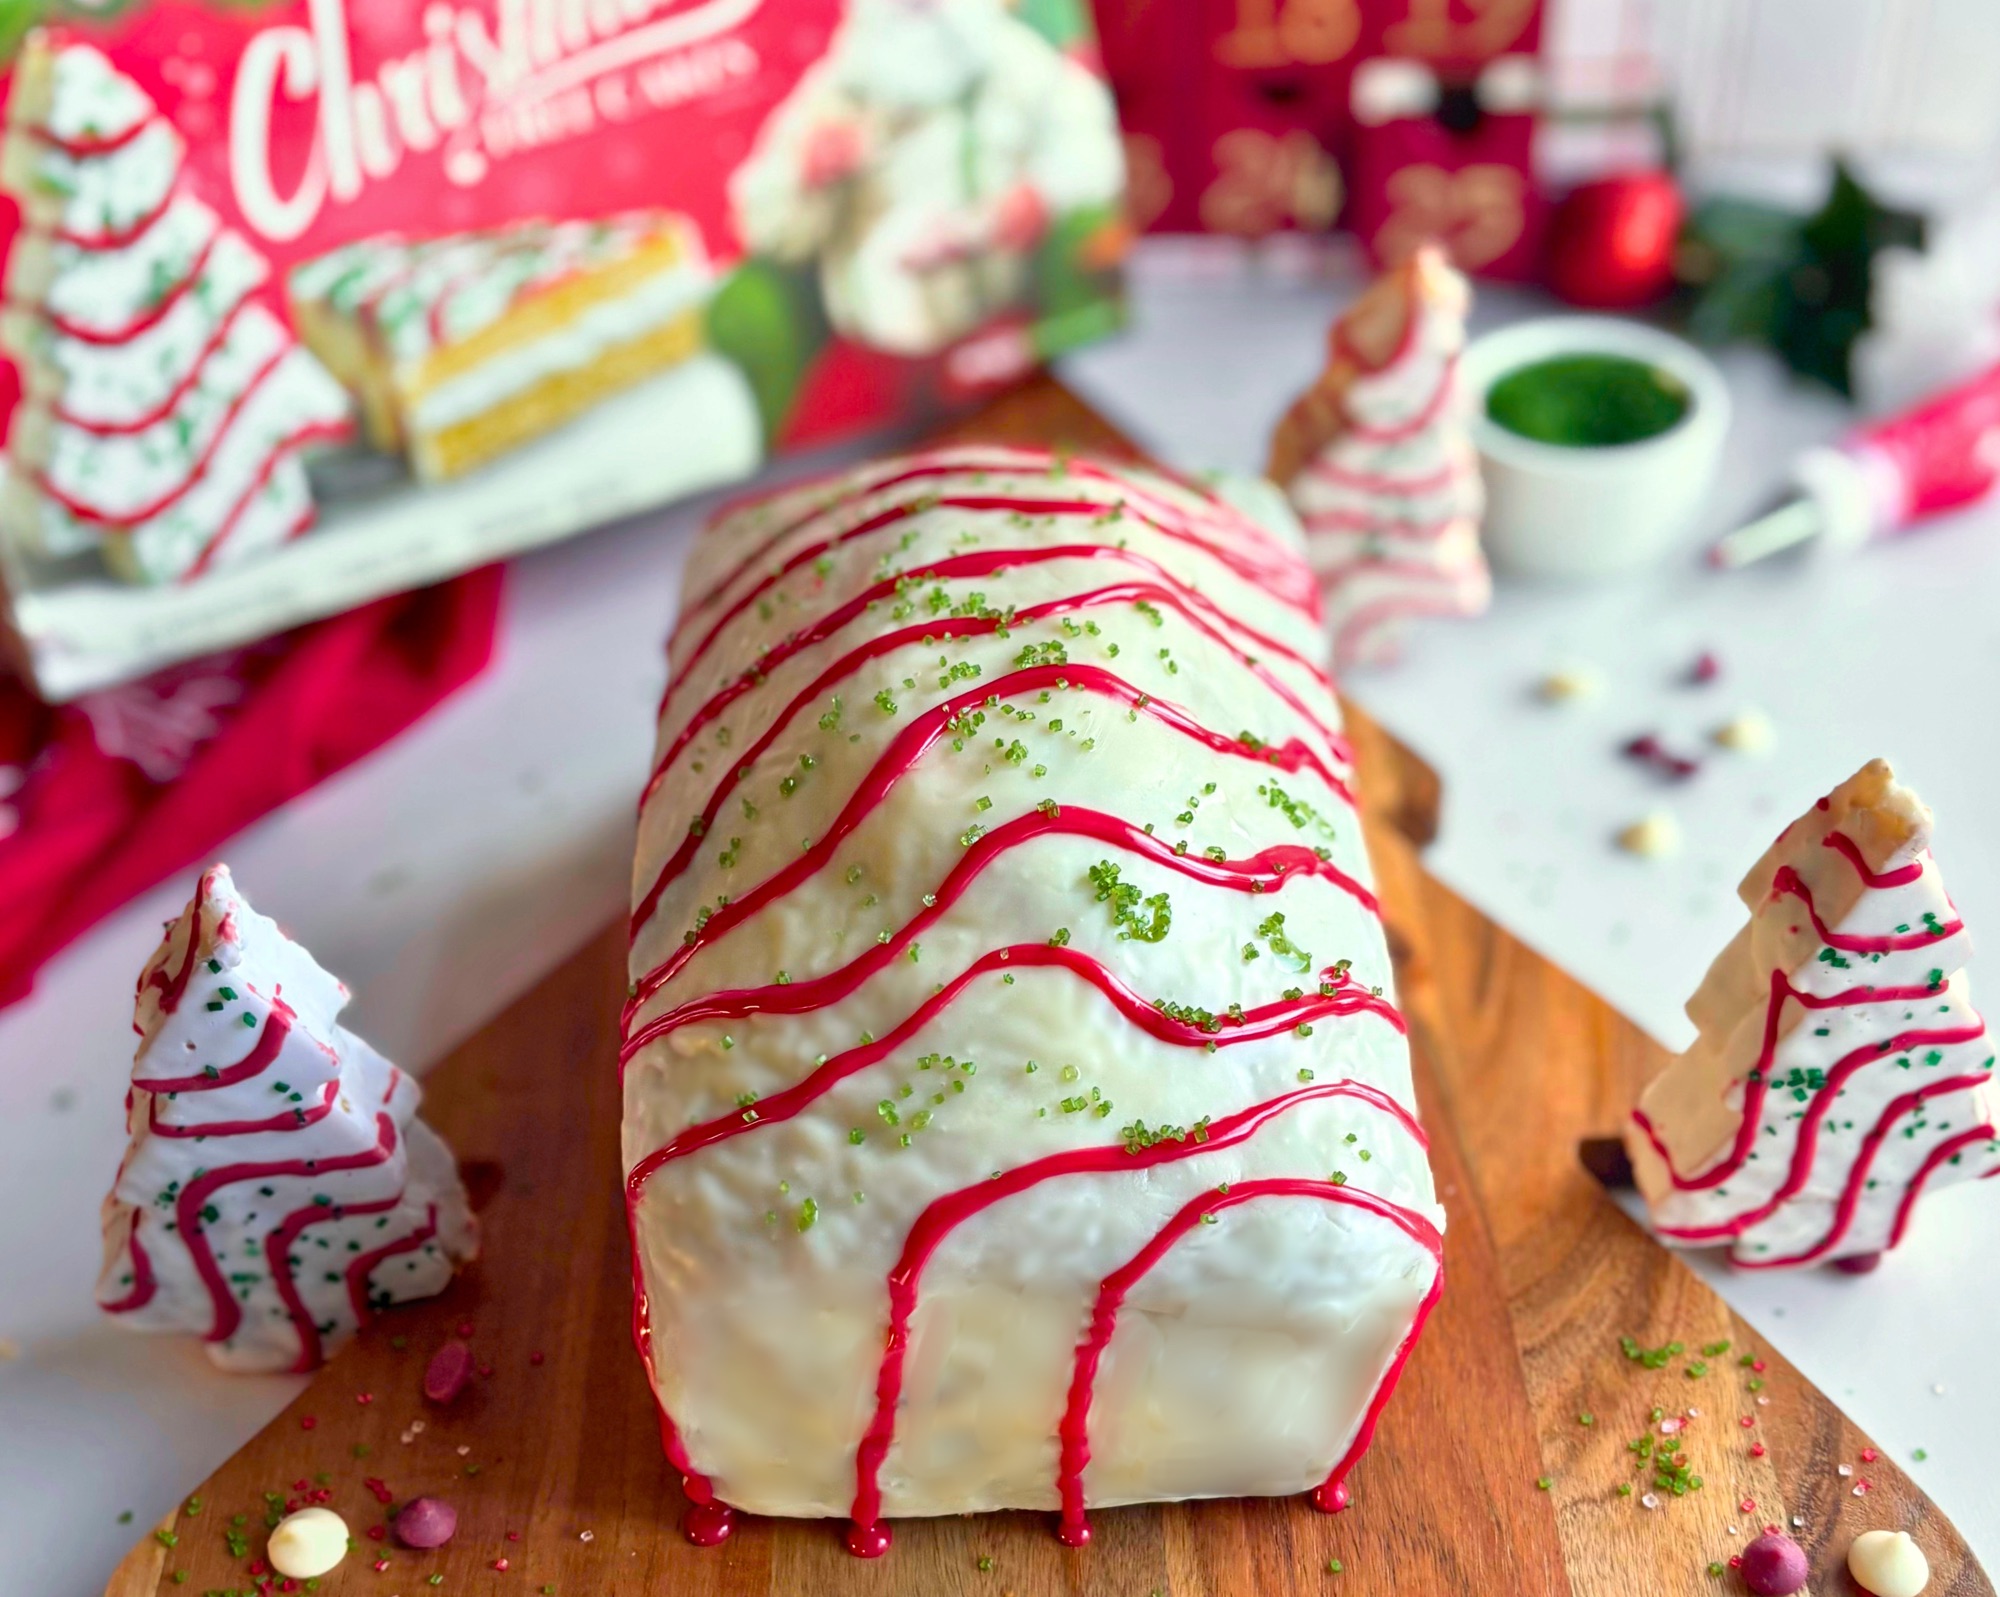
Every holiday season those little white Christmas tree cakes with the red stripes show up in the grocery store, and even though I have never actually bought a box, I love how fun and festive they look. I wanted something just as cheerful that I could make from scratch at home, with a soft vanilla cake, a sweet creme center, and a snowy white coating, without cutting out a dozen tiny trees and dipping them one at a time, so I built it in a loaf pan instead. This Little Debbie Christmas tree cake copycat loaf is one soft vanilla loaf made with sourdough discard, filled straight through the middle with marshmallow creme filling, coated in white chocolate ganache, and finished with red stripes and green sparkle so every slice looks like the real thing.
It took a lot of patience to get here, because I had a very clear picture in my head of how this loaf should look when you slice it, and getting the cake, the filling, and the coating to all cooperate was the hard part. The version below is the one that finally matched that picture, and I streamlined it so you are not stuck doing six fussy steps to get there. If you do not keep a sourdough starter, there is a full classic version with its own recipe card further down the post.
I am not affiliated with or endorsed by Little Debbie or McKee Foods. This is my own homemade loaf pan recipe inspired by their Christmas Tree Cakes.
Table of Contents
- Why You Will Love This Loaf
- Inspired by the Original Christmas Tree Cakes
- Ingredients and Why They Matter
- How to Make a Christmas Tree Cake Loaf
- The Best Tools for Filling the Loaf
- What I Learned Testing This Loaf
- Cut and Fill Option (No Tunneling)
- Red Stripe Options
- Using Bread Flour Instead of All Purpose
- No Sourdough Version
- Expert Tips
- Storing and Make Ahead
- Frequently Asked Questions
- Shop This Recipe
- Christmas Tree Cake Loaf Recipe (Sourdough Discard)
- Classic Christmas Tree Cake Loaf Recipe (No Sourdough)
- More Recipes You Will Love
- Subscribe for Free
Why You Will Love This Loaf
This is the Christmas tree cake you already love, rebuilt as one easy loaf that slices into thick, generous pieces with a ribbon of creme running through every one.

- One bowl batter. The cake mixes by hand in a single bowl with a whisk and a spatula, no mixer required.
- Real creme center. The marshmallow creme filling is piped straight through the inside of the loaf, so you get that soft white stripe without stacking layers.
- Soft, fine crumb. Oil keeps the cake tender even after the loaf comes out of the fridge, which matters here because the filling and ganache both need a chill.
- Sourdough discard or classic. Use up your discard in the main recipe, or make the classic version with no starter at all.
- A holiday showstopper. It looks like a giant version of the snack cake, which makes it a fun one to bring to a party or set out on Christmas morning.
Back to Table of Contents | Jump to Recipe
Inspired by the Original Christmas Tree Cakes
The boxed Christmas tree cakes are a soft yellow cake with a creme filling, covered in a white coating and decorated with red stripes and green sprinkles, and that is exactly what this loaf is built to taste and look like.

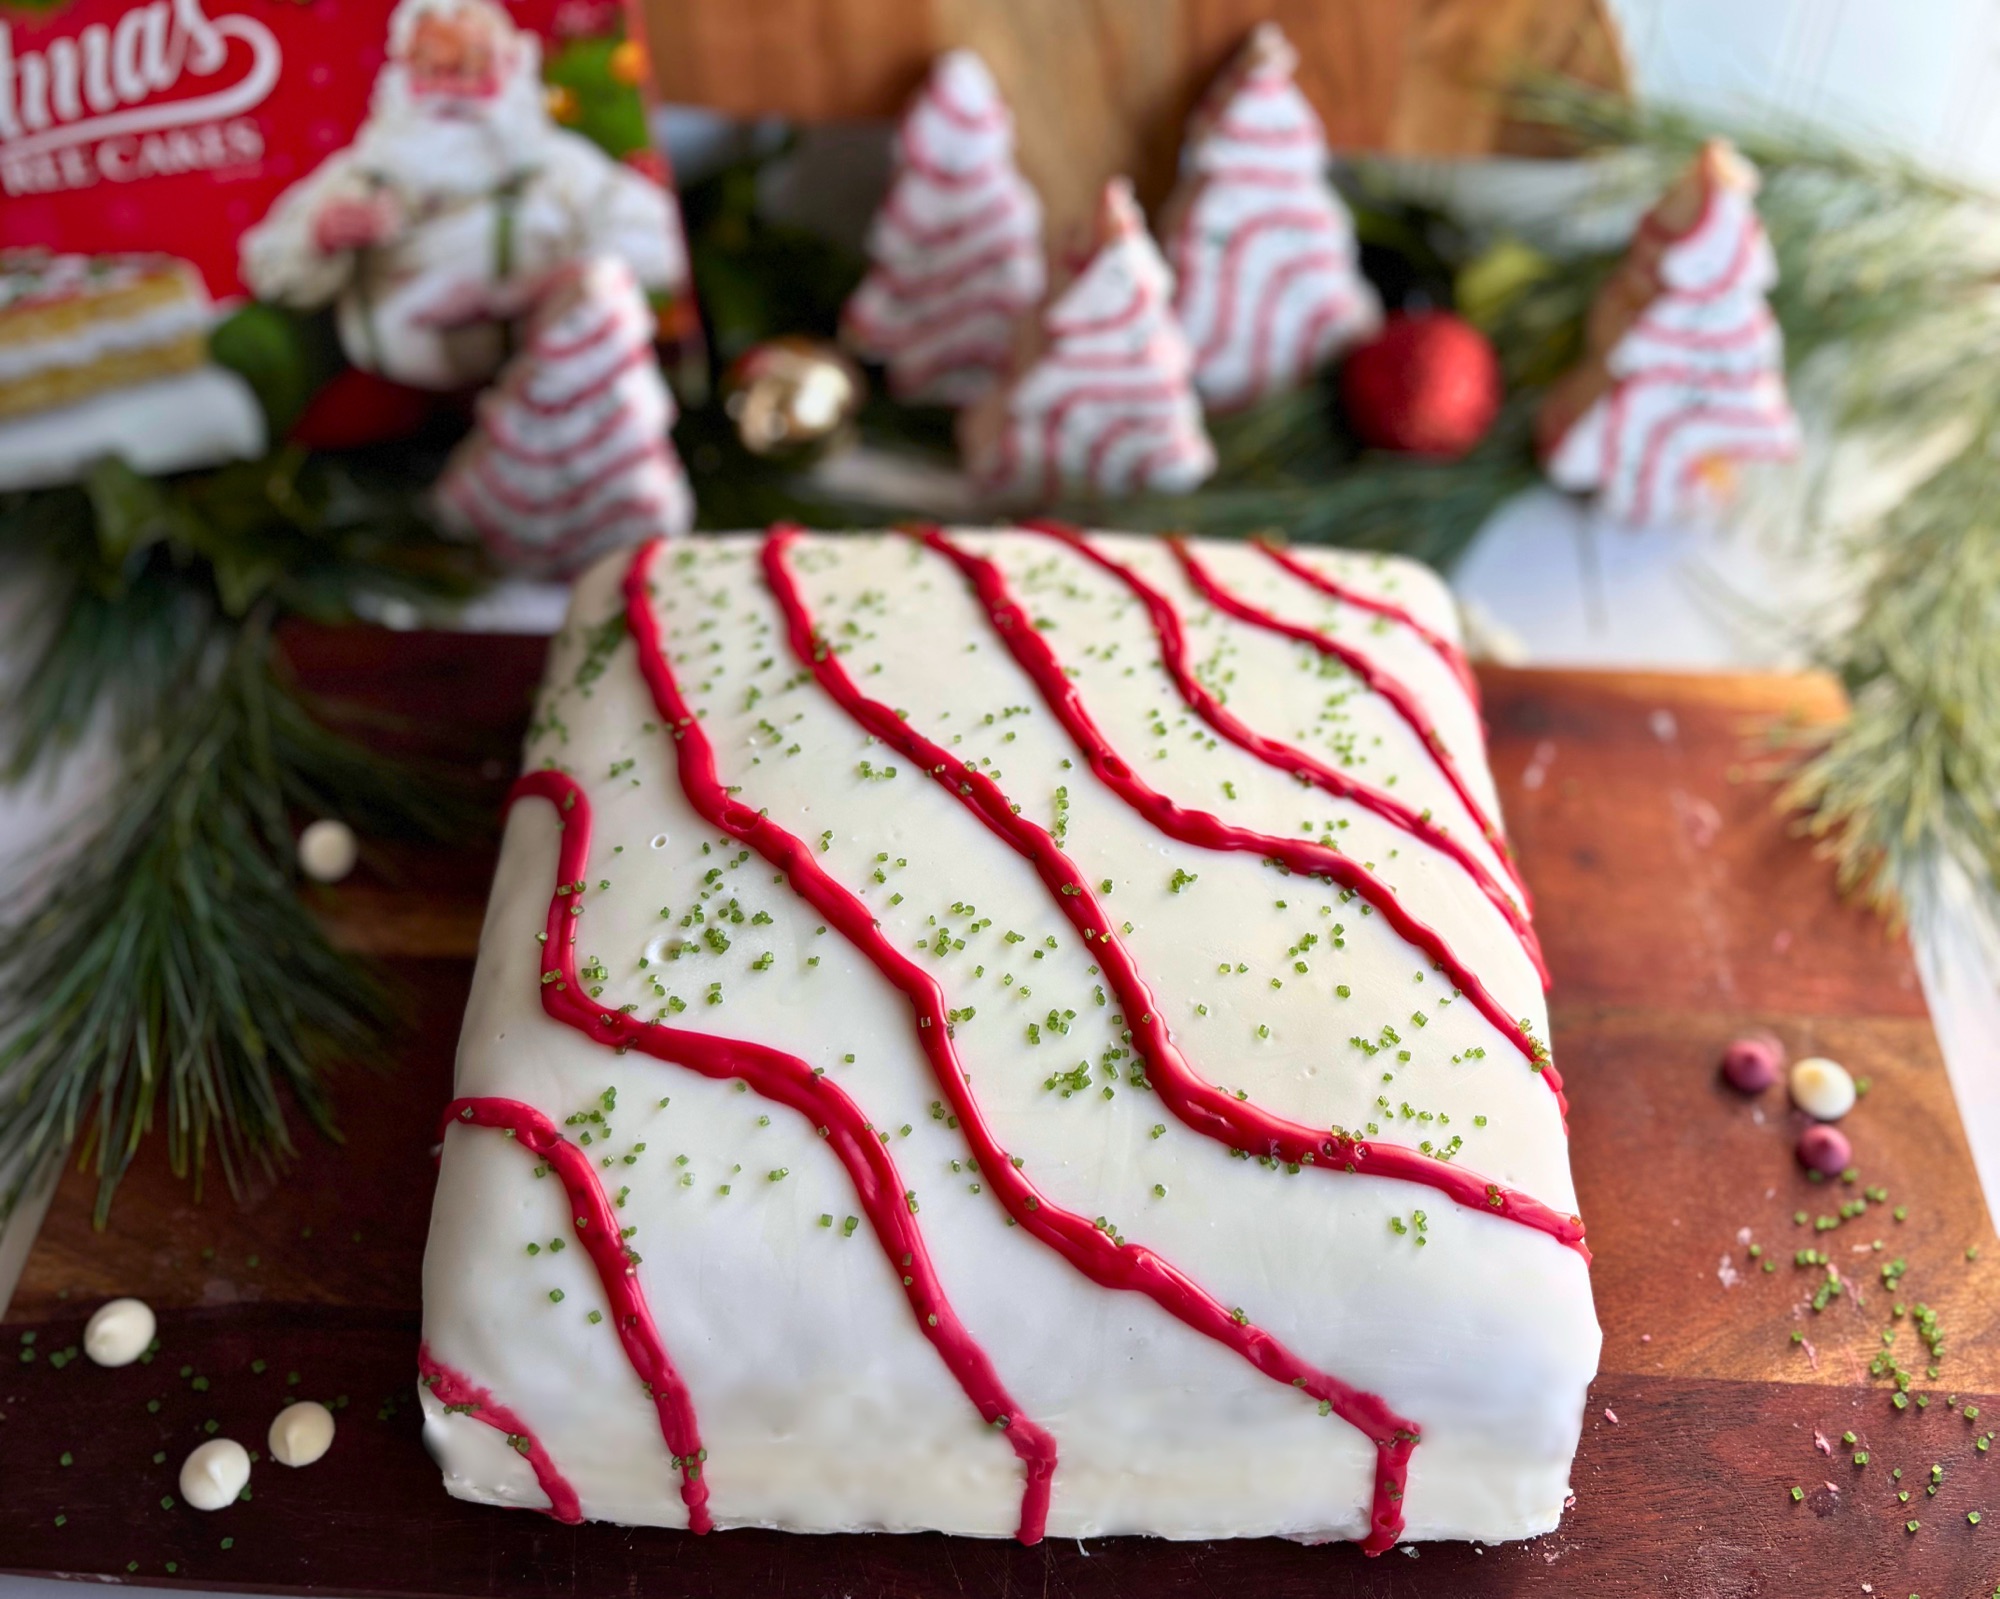
Instead of individual tree shapes, everything happens in one 9×5 loaf pan. The cake bakes in one piece, the filling goes through the inside, and the white chocolate ganache covers the outside like the coating on the snack cakes. The red stripes swoop across the top and run down the sides the same uneven, hand piped way they do on the originals, so it reads as a Christmas tree cake from across the room.
Back to Table of Contents | Jump to Recipe
Ingredients and Why They Matter
Every ingredient in this loaf has a job, and a few of them are the reason it rises evenly and stays level instead of sinking. You will find the exact amounts in the recipe card.

For the cake
- All purpose flour. Gives a soft, tender cake crumb. If bread flour is all you have, see the bread flour section below.
- Sourdough discard. Unfed discard at 100% hydration adds moisture and depth of flavor. Fresh discard works best.
- Granulated sugar. Sweetens the cake and keeps the crumb moist and tender.
- Eggs. Three whole eggs give the loaf the structure it needs to hold its center as it cools.
- Whole milk. Brings richness. Room temperature milk mixes in more smoothly, and a quick trick is to microwave it for about 15 seconds to take the chill off.
- Neutral oil. I use avocado oil. Oil keeps the cake soft when it is chilled, where butter would firm up and make the crumb feel dry.
- Vanilla extract. The main flavor of the cake, just like the snack cakes.
- Baking powder. The only leavener in this recipe. There is no baking soda on purpose, which I explain in the testing notes.
- Salt. Balances all the sweetness.
For the filling and coating

- Marshmallow creme. The base of the creme filling and the reason it tastes like the inside of the snack cakes.
- Butter and powdered sugar. Whipped with the marshmallow creme so the filling is firm enough to hold a clean stripe when you slice.
- White Chocolate Chips. The base of the ganache coating. I use 3 parts white chocolate to 1 part cream by weight, which follows King Arthur Baking’s guidance for white chocolate ganache, so the coating sets thick enough to hide the cake but stays soft enough to slice. For a brighter white coating, swap the chips for white melting wafers by the same weight and keep the cream the same.
- Heavy cream. Turns the white chocolate into a smooth, pourable ganache that sets soft enough to slice.
- Red icing and green sanding sugar. For the stripes and sparkle on top.
Back to Table of Contents | Jump to Recipe
How to Make a Christmas Tree Cake Loaf
The loaf comes together in four stages: bake and cool the cake, tunnel and fill it, coat it in ganache, then decorate. The recipe card has the full step by step with amounts and times, and here is what each stage looks like and why it matters.
Mix and bake the cake

Whisk the sugar and eggs just until smooth and a little lighter, then whisk in the wet ingredients and the baking powder and salt before folding in the flour. Mix by hand and stop as soon as the flour disappears, because whipping in a lot of air or overmixing can make the loaf rise high and then fall.

The batter should pour in a thick, smooth ribbon. Line the pan with a parchment sling across the bottom and up the long sides so you can lift the loaf out cleanly later.

Bake uncovered and keep the oven door closed for the first 45 minutes so the center does not fall. If the top is browning faster than you like, lay a loose tent of foil over it. The loaf is done when the center reads 205 to 210°F on an instant read thermometer.

A crack down the middle is completely normal for a loaf cake, and it disappears under the ganache. Let the loaf cool completely before you fill it, or the filling will melt.
Tunnel and fill

Push a long handle, like the handle of a spatula or wooden spoon, into the end of the cooled loaf at about mid height. I started with three separate holes and then worked the handle gently from side to side so the tunnels joined into one wide channel. Leave about 1/2 to 3/4 inch of cake along the long sides so the walls stay supported.

Pipe the filling into the channel from both ends so it reaches all the way through the middle. Wipe away anything that squeezes out, then chill the filled loaf for about 15 minutes. That chill is what keeps the filling in place when the ganache goes on.

Make the ganache and coat the loaf

While the loaf chills, make the ganache. Pour the hot cream over the white chocolate and let them sit covered before you whisk. If a few chips refuse to melt, microwave the bowl in short 10 second bursts at 50% power and stir between each one until it is smooth.

Scoop about 2 tablespoons of the ganache into a small bowl and chill it for about 5-8 minutes, until it is as thick as peanut butter. Keep the rest pourable by setting the bowl over a second bowl of hot tap water. You are not trying to melt it again, only keep it from setting up too much. The sweet spot is about 85 to 90°F, warm enough to drizzle but not thin and hot.

Chill the loaf in the fridge rather than the freezer, because a freezer cold cake sets the ganache before it can reach the sides. Spread the thick ganache over the top of the cold loaf like a crumb coat, filling the crack and any gaps, then chill it for about 10 minutes. Drizzle the warm ganache over the top, and as it cools, spread it over the front, back, and sides the way you would frost a cake until everything is covered and smooth. Work quickly without rushing, because the ganache firms up as it cools and gets harder to spread.

Decorate

Pipe the red stripes across the top in uneven swoops and let them trail down the sides, just like the stripes on the snack cakes. For the green sparkle, sprinkle the sanding sugar on while the ganache is still setting, or once it is set, touch a damp fingertip to a few spots between the stripes and sprinkle the sugar onto those spots so it sticks. Let the loaf rest for 30 minutes to an hour so the stripes set before slicing.
Back to Table of Contents | Jump to Recipe
The Best Tools for Filling the Loaf
The trickiest part of this whole recipe is getting the filling consistently into a tunnel that runs the length of a loaf, so the right tool makes a real difference.
- Long filling tip. A long Bismarck style piping tip is made for filling pastries and reaches deep into the loaf from each end.
- Cake injector. A large cake or cupcake injector works the same way and is easy to control.
- What I did in a pinch. My regular piping tip was too short, so I taped a straw to the end of it and piped through the straw, which worked but was not easy or pretty.
If you do not have any of these, the cut and fill option below skips the tunnel entirely.
Back to Table of Contents | Jump to Recipe
What I Learned Testing This Loaf
I tested this loaf multiple times in both the sourdough discard and classic versions before it looked and sliced the way I wanted, and a few of those lessons shaped the final recipe.

- Baking powder only. Leaving out baking soda keeps the loaf from browning too quickly, and the amount of baking powder in the card gives an even rise and a level center.
- Three whole eggs. The extra egg gives the loaf the structure to hold its shape as it cools.
- Uncovered is best. I tried baking the loaf covered to see if it would stop the crack. It rose nicely with a smaller crack, but the trapped steam left the top damp and pitted, so I went back to baking it uncovered and simply patching the crack with ganache.
- White chocolate ganache for the coating. It pours, spreads, and sets soft enough to slice, and it tastes closer to the coating on the snack cakes than a plain sugar icing.
- A 3 to 1 ganache. I also tested white melting wafers for an even whiter coating. With more cream than this they came out thin enough to see the cake through, food coloring turned the coating beige instead of brighter, and plain melted wafers with no cream set before they reached the sides of a freezer cold cake. Wafers at the same 3 to 1 ratio as the chips, poured over a cake chilled in the fridge, give the brightest white.
- A Blow Dryer. If you have any uneven spots or wonky corners. Break out the blow dryer. Set it on warm and low and gently blow over the area holding it six inches away. Use a warm off set spatula to smooth the area.
Back to Table of Contents | Jump to Recipe
Cut and Fill Option (No Tunneling)
If you would rather not tunnel through the loaf, you can slice it open and fill it instead.
Once the loaf is completely cool, slice it in half horizontally with a long serrated knife. Scoop out a shallow channel down the center of the bottom half, leaving the 1/2 inch of the edges intact, then spread the filling into it and set the top back on. Chill it for about 15 minutes, then coat and decorate it exactly the same way.
Red Stripe Options
For the stripes, I used Great Value red cookie icing from Walmart, the one made with no artificial colors, piped through a small round tip.

I also tried Supernatural melting wafers, and while they melted beautifully, they came out more of a dark pink than a true red, so I saved them for another project. If you cannot find the cookie icing, these all work well:
- Homemade red icing. Stir a small amount of powdered sugar with a few drops of milk at a time until it is thick but pipeable, then tint it with red gel food coloring. You only need about 2 tablespoons for the whole loaf. Deep red takes a good amount of gel, and the color darkens a little as it sits.
- Red candy melts. Melt them in a piping bag and pipe them on. They set firm and glossy.
- Red decorating icing or gel. Any store bought red decorating icing in a tube works for thin lines.
You may be tempted to tint melted white chocolate with red food coloring, but I decided against it. Most gel food colors are water based, and water makes melted white chocolate seize and turn grainy. White chocolate is also ivory, so the red tends to turn pink unless you use a lot of coloring.
Back to Table of Contents | Jump to Recipe
Using Bread Flour Instead of All Purpose
If you run out of all purpose flour, bread flour works with one small adjustment.
Bread flour has more protein than all purpose flour, which builds more gluten and can make a cake chewy instead of tender. To bring it back to all purpose level, replace 3 tablespoons of the flour with cornstarch, keeping the total flour weight the same. For the sourdough version, use 234g bread flour (1 3/4 cups + 3 tablespoons) plus 21g cornstarch (3 tablespoons). For the classic version, use 309g bread flour (2 1/2 cups + 1 tablespoon) plus 21g cornstarch (3 tablespoons). Whisk the cornstarch in with the baking powder and salt so it is evenly spread before you add the flour.
The batter will look a little thinner in the bowl because cornstarch does not absorb liquid until it heats up, but it sets up just like flour in the oven.
No Sourdough Version
You do not need a sourdough starter to make this loaf, because the discard converts cleanly into flour and milk.
Sourdough discard at 100% hydration is half flour and half water, so the classic version swaps it for more flour and milk. The discard version uses 255g flour, 150g discard, and 120g milk, and the classic version uses 330g flour and 210g milk with no discard. Everything else, including the bake time, stays the same. The full classic recipe has its own card below so you do not have to do any math.
If you would like to start keeping a starter, my minimal waste sourdough starter guide walks you through it.
Back to Table of Contents | Jump to Recipe
Expert Tips
These are the small details that make the biggest difference in how the loaf looks and slices.

- Use a thermometer. Pull the loaf at 205 to 210°F in the center. A toothpick can still look a little moist when the cake is done.
- Cool completely before filling. Warm cake will melt the filling and soften the walls of the tunnel.
- Keep the side walls. Leave 1/2 to 3/4 inch of cake along the long sides when you tunnel so the loaf stays sturdy.
- Chill between steps. A cold loaf keeps the filling in place and helps the ganache set on contact.
- Hold the ganache at 85 to 90°F. Too hot and it runs off thin, too cool and it gets thick and hard to spread.
- Make extra ganache for a second coat. If any golden crust shows through, rewarm the drips and add another thin layer.
- Slice it cold. A chilled loaf gives the cleanest cut and the neatest creme stripe. Let slices sit for about 10 minutes before serving.
- Chill in the fridge, not the freezer. A freezer cold loaf sets the ganache so fast it will not reach the sides.
- Skip the food coloring for a whiter coat. It turns white ganache beige. Use white melting wafers instead of chips if you want it brighter.
Back to Table of Contents | Jump to Recipe
Storing and Make Ahead
Because the filling and ganache are made with butter and cream, this loaf is best stored in the fridge.

If you are slicing ahead for a party or packing slices up to share, tuck a small square of parchment between each slice so the ganache and the creme filling do not stick to the slice next to it, and they will lift apart cleanly when it is time to serve. Cover the loaf and refrigerate it for up to 4 days. Serve slices cold for clean edges, or let them sit out for a few minutes for a softer bite. To get ahead, bake the loaf a day early, wrap it well once it has cooled completely, and fill and decorate it the next day. The unfilled, undecorated loaf can also be wrapped tightly and frozen for up to 2 months, then thawed in the wrapping before you fill and coat it.
Frequently Asked Questions
Here are the questions I get most about this loaf.

Can I make this without sourdough discard?
Yes. The classic version below replaces the discard with extra flour and milk, and it bakes the same way in the same time.
Why did my loaf crack on top?
A crack down the center is normal for a loaf cake, because the outside sets before the center finishes rising. It gets filled with the thick ganache crumb coat and disappears under the coating.
Can I use white chocolate bars instead of chips?
Yes, and they melt even more smoothly. Use the same 255g and chop them finely so they melt evenly in the hot cream.
My white chocolate will not melt all the way. What do I do?
Microwave the bowl in 10 second bursts at 50% power, stirring between each one, and stop as soon as only a few small bits are left. Stirring melts the rest.
How do I make the coating brighter white?
Swap the white chocolate chips for the same weight of white melting wafers and keep the cream the same, so it stays at 3 parts wafers to 1 part cream. Do not add food coloring, which turns it beige, and pour it over a loaf chilled in the fridge rather than the freezer.
Can I color white chocolate red for the stripes?
I do not recommend it with regular gel food coloring, because it is water based and can make the chocolate seize. Use red cookie icing, red candy melts, or the homemade red icing in the Red Stripe Options section instead.
How do I get the filling all the way through the loaf?
Use a long filling tip, a cake injector, or a turkey baster, and pipe from both ends of the tunnel. If you do not have any of those, use the cut and fill option.
Can I use bread flour?
Yes. Replace 3 tablespoons of the flour with cornstarch to bring the protein down to all purpose level. The exact amounts are in the bread flour section.
Is this the official Little Debbie recipe?
No. This is my own homemade loaf pan recipe inspired by the Christmas Tree Cakes, and I am not affiliated with Little Debbie.
Shop This Recipe
These are the tools and ingredients I used to make this loaf. I earn a small commission from these affiliate links at no extra cost to you, which helps support the blog.
- 9×5 loaf pan. I use a light metal loaf pan, which bakes evenly without over browning the sides.
- Parchment paper. For the sling that lets you lift the loaf out cleanly.
- Instant read thermometer. The most reliable way to know the center is done.
- Long Bismarck filling tip. For piping the filling deep into the loaf.
- Piping bags and small round tips. For the filling and the red stripes. This day has a Bismarck tip as well.
- Offset spatula. For spreading the ganache smooth over the top and sides.
- Green sanding sugar. For the sparkle between the red stripes.
- Red cookie icing. For the stripes, with a small tip for thin lines.
- Dye free red melts. If you’d rather do a chocolate stripe. Beware love the ingredients on this one, but is more of a dark mauve once melted.
Christmas Tree Cake Loaf Recipe (Sourdough Discard)

Christmas Tree Cake Loaf Copycat (Sourdough Discard)
Equipment
- 9×5 loaf pan
- Parchment paper
- Large mixing bowl
- Whisk
- Rubber spatula
- Instant read thermometer
- Wire cooling rack
- Long spatula or wooden spoon handle
- Piping bags
- Long filling tip or cake injector
- Small round piping tip
- Offset spatula
- Small heatproof bowls
Ingredients
Cake
- 255 g all purpose flour 2 cups + 2 tbsp
- 150 g unfed sourdough discard 100% hydration (2/3 cup)
- 250 g granulated sugar 1 1/4 cups
- 150 g eggs 3 large, room temperature
- 120 g whole milk room temperature (1/2 cup)
- 109 g neutral oil such as avocado oil (1/2 cup)
- 8 g vanilla extract for the cake 2 tsp
- 8 g baking powder 2 tsp
- 3 g fine salt 1/2 tsp
Creme Filling
- 57 g unsalted butter for the creme filling softened (4 tbsp)
- 60 g powdered sugar for the creme filling 1/2 cup
- 99 g marshmallow creme half of a 7 oz jar
- 2 g vanilla extract for the creme filling 1/2 tsp
- Pinch of salt for the creme filling
White Chocolate Ganache
- 255 g white chocolate chips for the ganache 1 1/2 cups
- 85 g heavy cream for the ganache 1/3 cup + 1 tsp
Decoration
- Red cookie icing for the stripes about 2 tbsp
- Green sanding sugar for sprinkling about 1 tbsp
Instructions
Cake
- Heat the oven to 350°F on the regular bake setting with the rack in the center. Lightly grease a 9×5 loaf pan and line it with a parchment sling across the bottom and up the long sides.
- In a bowl, whisk flour, salt and baking powder. Set aside
- In a large bowl, whisk the sugar and eggs by hand for 30 to 45 seconds, just until smooth and slightly lighter.
- Whisk in the oil, vanilla, milk, and sourdough discard until smooth.
- Fold in the flour mixture with a spatula until no dry streaks remain.
- Pour the batter into the lined pan, smooth the top, and tap the pan on the counter.
- Bake uncovered without opening the oven door for the first 45 minutes. If the top is browning quickly after that, lay a loose tent of foil over the pan.
- Start checking at 60 minutes and bake until the center reads 205 to 210°F, about 65 to 75 minutes total.
- Cool in the pan for 10 minutes, run a knife along the short ends, then lift the loaf out by the parchment and cool it completely on a wire rack.
Creme Filling
- Beat the softened butter and powdered sugar until light and fluffy, then beat in the marshmallow creme, vanilla, and salt until smooth.
- Push a long spatula or wooden spoon handle into one short end of the cooled loaf at about mid height. Make three holes, then work the handle gently from side to side to join them into one wide channel, leaving 1/2 to 3/4 inch of cake along the long sides for support.
- Transfer the filling to a piping bag fitted with a long filling tip and pipe it into the channel from both ends until it is full. Wipe away any excess and chill the loaf for 15 minutes.
White Chocolate Ganache
- Heat the cream until it just simmers, pour it over the white chocolate chips, and cover the bowl for 5 minutes. Whisk gently until smooth. If any chips remain, microwave in 10 second bursts at 50% power, stirring between each.
- Spoon about 2 tbsp of the ganache into a small bowl and chill for about 5 minutes, until it is as thick as peanut butter. Set the remaining ganache over a bowl of hot tap water to keep it fluid at about 85 to 90°F.
- Spread the thick ganache over the top of the loaf, chilled in the fridge rather than the freezer, filling the crack and any gaps, then chill for 10 minutes.
- Drizzle the warm ganache over the top, then spread it over the front, back, and sides as it cools until the loaf is covered and smooth.
Decoration
- Pipe red stripes across the top through a small round tip, letting them trail down the sides.
- Sprinkle green sanding sugar between the stripes while the ganache is still setting, or touch a damp fingertip to a few spots and sprinkle the sugar onto them.
- Let the loaf set for 30 to 60 minutes before slicing.
Notes
Classic Christmas Tree Cake Loaf Recipe (No Sourdough)

Christmas Tree Cake Loaf Copycat (Classic Recipe)
Equipment
- 9×5 loaf pan
- Parchment paper
- Large mixing bowl
- Whisk
- Rubber spatula
- Instant read thermometer
- Wire cooling rack
- Long spatula or wooden spoon handle
- Piping bags
- Long filling tip or cake injector
- Small round piping tip
- Offset spatula
- Small heatproof bowls
Ingredients
Cake
- 330 g all purpose flour 2 3/4 cups
- 250 g granulated sugar 1 1/4 cups
- 150 g eggs 3 large, room temperature
- 210 g whole milk room temperature (3/4 cup + 2 tbsp)
- 109 g neutral oil such as avocado oil (1/2 cup)
- 8 g vanilla extract for the cake 2 tsp
- 8 g baking powder 2 tsp
- 3 g fine salt 1/2 tsp
Creme Filling
- 57 g unsalted butter for the creme filling softened (4 tbsp)
- 60 g powdered sugar for the creme filling 1/2 cup
- 99 g marshmallow creme half of a 7 oz jar
- 2 g vanilla extract for the creme filling 1/2 tsp
- Pinch of salt for the creme filling
White Chocolate Ganache
- 255 g white chocolate chips for the ganache 1 1/2 cups
- 85 g heavy cream for the ganache 1/3 cup + 1 tsp
Decoration
- Red cookie icing for the stripes about 2 tbsp
- Green sanding sugar for sprinkling about 1 tbsp
Instructions
Cake
- Heat the oven to 350°F on the regular bake setting with the rack in the center. Lightly grease a 9×5 loaf pan and line it with a parchment sling across the bottom and up the long sides.
- In a bowl, mix the flour, baking powder and salt together. Set aside
- In a large bowl, whisk the sugar and eggs by hand for 30 to 45 seconds, just until smooth and slightly lighter.
- Whisk in the oil, vanilla, and milk until smooth.
- Fold in the dry ingredients with a spatula until no dry streaks remain.
- Pour the batter into the lined pan, smooth the top, and tap the pan on the counter.
- Bake uncovered without opening the oven door for the first 45 minutes. If the top is browning quickly after that, lay a loose tent of foil over the pan.
- Start checking at 60 minutes and bake until the center reads 205 to 210°F, about 65 to 75 minutes total.
- Cool in the pan for 10 minutes, run a knife along the short ends, then lift the loaf out by the parchment and cool it completely on a wire rack.
Creme Filling
- Beat the softened butter and powdered sugar until light and fluffy, then beat in the marshmallow creme, vanilla, and salt until smooth.
- Push a long spatula or wooden spoon handle into one short end of the cooled loaf at about mid height. Make three holes, then work the handle gently from side to side to join them into one wide channel, leaving 1/2 to 3/4 inch of cake along the long sides for support.
- Transfer the filling to a piping bag fitted with a long filling tip and pipe it into the channel from both ends until it is full. Wipe away any excess and chill the loaf for 15 minutes.
White Chocolate Ganache
- Heat the cream until it just simmers, pour it over the white chocolate chips, and cover the bowl for 5 minutes. Whisk gently until smooth. If any chips remain, microwave in 10 second bursts at 50% power, stirring between each.
- Spoon about 2 tbsp of the ganache into a small bowl and chill for about 5 minutes, until it is as thick as peanut butter. Set the remaining ganache over a bowl of hot tap water to keep it fluid at about 85 to 90°F.
- Spread the thick ganache over the top of the loaf, chilled in the fridge rather than the freezer, filling the crack and any gaps, then chill for 10 minutes.
- Drizzle the warm ganache over the top, then spread it over the front, back, and sides as it cools until the loaf is covered and smooth.
Decoration
- Pipe red stripes across the top through a small round tip, letting them trail down the sides.
- Sprinkle green sanding sugar between the stripes while the ganache is still setting, or touch a damp fingertip to a few spots and sprinkle the sugar onto them.
- Let the loaf set for 30 to 60 minutes before slicing.
Back to Table of Contents | Jump to Recipe
More Recipes You Will Love
If you love a fun bake that uses up your sourdough discard, these are some of my favorites.

- Pumpkin Oatmeal Cream Pie Bars (Sourdough or Classic)
- Fudgy Sourdough Brownies
- Cinnamon Roll Rice Krispie Treats
- Chocolate Swirl Sourdough Bread
- Flaky All Butter Sourdough Discard Pie Crust
Back to Table of Contents | Jump to Recipe
Subscribe for Free
If you want new recipes like this one delivered straight to your inbox, subscribe to H3art of the Home. It is completely free, and you will be the first to know when a new holiday bake goes up.



Leave a Reply