It started with scraps.
I was trimming a batch of sourdough scones, pulling off the uneven edges the way you do when you want clean cuts for a perfect rise, and my middle son walked into the kitchen. He looked at the pile of little scraps on the cutting board and said, “Mom, why don’t you just cut those into bite size pieces, instead of smooshing them back together?”
I stopped. He was right. Usually I pushed the scraps together to make a regular size scone.
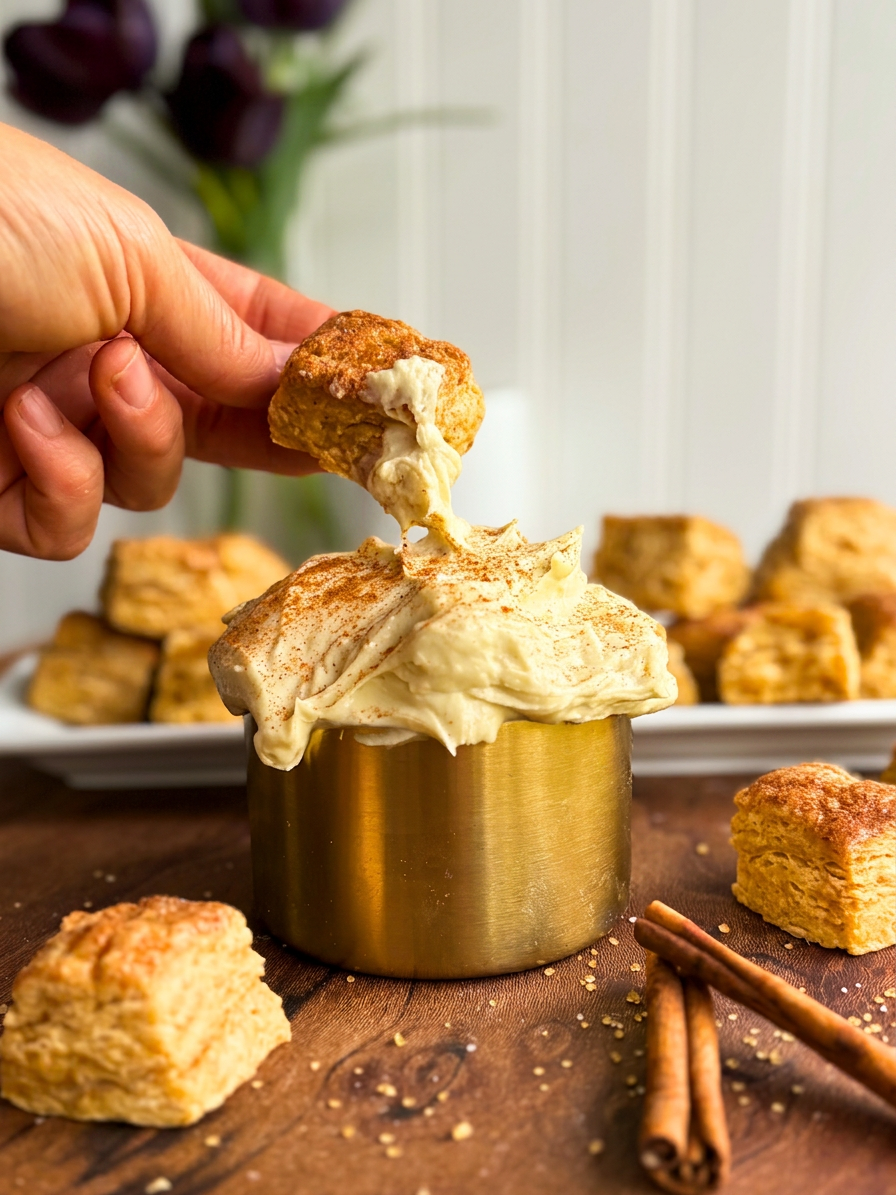
Those little irregular pieces, golden with cinnamon warmth, baked up into something better than the original. Small enough to pop in your mouth. Just the right size to drag through a cloud of vanilla cream cheese dip. The kind of thing you put on a plate and watch disappear in about four minutes flat.
That conversation is why these Cinnamon Sourdough Scone Bites exist. And honestly, they might be one of my favorite scones ideas, so big thanks to my little chicken nugget.
Table of Contents
- Why You’ll Love These Scone Bites
- Key Ingredients and What They Do
- Which Sourdough Starter to Use
- The Method That Makes These Work
- Tips for Perfect Scone Bites
- Recipe
- Substitutions and Variations
- Same-Day or Overnight
- Frequently Asked Questions
- More Scone Recipes to Try
Why You’ll Love These Scone Bites
Standard scones are pressed to about an inch thick before baking. These are pressed to half that, then cut into small squares. The result is a small rustic square with more golden surface area, a slightly crispier edge, and a soft, tender center that holds up beautifully when dipped.
The vanilla cream cheese dip is not an afterthought. It is the point. Where a traditional iced scone gives you sweetness in every bite whether you want it or not, dipping puts you in control. You get that cool, silky cream cheese against the warm cinnamon crust, and the contrast is exactly what makes this recipe feel like a special breakfast and more like something you would serve at a brunch table or bring to a party.
This is also one of the most relaxed scone recipes in terms of process. There is no rolling pin, no precise shaping, no cutting into wedges. You press the dough into an 8×8 pan using plastic wrap, let it chill, then lift it out and cut it into squares with a knife. Rustic cuts are part of the appeal.

Key Ingredients and What They Do
All-purpose flour gives these scone bites their structure. Bread flour would develop too much gluten and make them tougher. Cake flour would make them too delicate to hold up to dipping. All-purpose is the right call.
Light brown sugar is doing more work here than granulated sugar would. The molasses in brown sugar adds depth and warmth that pulls the cinnamon flavor in a direction that will remind you of a cinnamon roll filling rather than a plain spiced scone.
Cold unsalted butter is the key to the texture. Keeping the butter cold and in visible pieces means steam releases during baking, which creates those soft, flaky layers. Work quickly and do not let it soften.
Sourdough adds moisture, a mild fermented depth, and helps the scones stay tender for longer than a standard baking powder scone would. It also means you get flavor with or without a long fermentation, though the overnight option is available if you plan ahead.
Cold buttermilk works with the baking powder and the natural acidity of the discard to give these a tender, soft crumb. The combination is what separates a scone that crumbles in your hand from one that has a slight chew and holds together when you dip it.
Cinnamon appears twice, once in the dough and once in the topping. The dough cinnamon gives you background warmth throughout the bite. The topping cinnamon mixed with granulated sugar creates that caramelized, slightly crackly surface that makes these look and taste bakery worthy.

Which Sourdough Starter to Use
One of the most common questions I get about discard recipes is whether the starter has to be active and fed. For this recipe, the answer is no.
You can use active starter that is at or past peak. You can use unfed discard that has been sitting in your refrigerator for days. Because this recipe relies on baking powder for its rise rather than the natural leavening power of the starter, the fermentation activity level does not matter. What the sourdough brings is flavor, moisture, and the fermented depth that helps with easier digestion.
If you do not yet have a sourdough starter and want to make these right now, you can substitute the discard by adding an additional 80g (a little over 1/3 cup) of flour and 80g (a little over 1/3 cup) of buttermilk in its place. The result will be a more straightforward scone bite without the fermented depth, but still delicious.
Want to make a sourdough starter? Here’s my step by step guide for a minimal waste sourdough starter.

The Method That Makes These Work
The technique behind these scone bites is a little different from most scone recipes you have seen, and that difference is intentional.
Separate chilling. The wet ingredients (sourdough, buttermilk, egg, vanilla) go into the refrigerator while the dry ingredients (flour, brown sugar, baking powder, salt, cinnamon with the butter cut in) go into the freezer. Both rest for 15 minutes before combining. This keeps the butter at its coldest possible temperature right up until the moment the dough comes together, which is exactly where you want it.

The bowl scraper method. Rather than stirring the dry into the wet with a fork, I pour the dry over the wet and use a bowl scraper to pull the liquid up from the bottom and fold it over the top, then chop through the mixture with the edge of the scraper to bring everything together. I have found this leaves far fewer dry crumbs at the bottom of the bowl and gives me a more evenly combined dough without overworking it.

The pan method. Instead of shaping a freeform slab, the dough goes into an 8×8 inch square pan lined with plastic wrap. You press it to about half an inch thick using the plastic wrap overhang. This gives you a perfectly even slab every time without having to eyeball your thickness. After chilling, the cream and cinnamon sugar go on top while the dough is still in the pan, then the whole thing goes in the freezer for 30 minutes. Lift it out, cut, bake.
Going into the oven cold and solid means the edges stay sharp, the cuts are clean, and the butter has the best possible chance to do its job.

Recipe

Cinnamon Sugar Scone Bites (Sourdough)
Equipment
- 8×8 inch square baking pan
- plastic wrap
- Large mixing bowl (x2)
- Bench scraper or bowl scraper
- Pastry cutter
- Whisk
- Parchment-lined baking sheet
- Hand mixer or whisk (for dip)
Ingredients
SCONE BITES
- 333 g all-purpose flour 2 2/3 cups
- 67 g light brown sugar packed (1/4 cup + 1 tbsp)
- 9 g baking powder 2 1/4 tsp
- 4 g fine sea salt 1/2 tsp
- 8 g ground cinnamon 3 tsp
- 150 g cold unsalted butter grated (2/3 cup)
- 160 g sourdough discard 100% hydration (2/3 cup)
- 80 g cold buttermilk 1/3 cup
- 1 large egg cold
- 5 g vanilla extract 1 tsp
CINNAMON SUGAR TOPPING
- 33 g granulated sugar 2 tbsp + 1 tsp
- 5 g ground cinnamon scant 2 tsp
- 1/2 tsp all-purpose flour
- 30 g heavy cream for brushing (2 tbsp)
VANILLA CREAM CHEESE DIP
- 226 g full-fat cream cheese room temperature (1 block)
- 60 g powdered sugar sifted (1/2 cup)
- 30 g heavy cream 2 tbsp
- 5 g vanilla extract 1 tsp
- 1 pinch fine sea salt
Instructions
- Line an 8×8 inch square pan with plastic wrap, leaving enough overhang on all sides to fold over the top.
- In a bowl or measuring cup, whisk together the sourdough discard, buttermilk, egg, and vanilla extract until fully combined. Place in the refrigerator.
- Grate your cold butter. *Pro Tip: place your grated in the freezer for a few minutes before you begin for easier butter processing.
- In a large bowl, whisk together the flour, brown sugar, baking powder, salt, and cinnamon. Add the cold grated butter and use a pastry cutter, fork or your fingertips to work the butter into the flour until you have a shaggy mixture with pea-sized chunks remaining. Do not overwork. Place the bowl in the freezer.
- Let both bowls rest for 15 minutes, wet ingredients in the refrigerator and dry ingredients in the freezer.
- Pull both bowls out. Pour the dry ingredients over the wet. Using a bowl scraper, pull the liquid up from the bottom and fold it over the top, then chop through the mixture with the edge of the scraper to bring everything together. Stir until just combined and no dry flour remains. The dough will look shaggy and slightly sticky. Do not knead.
- Transfer the dough into the prepared pan. Lay the plastic wrap overhang over the top and use your hands to press into an even layer filling the pan. Refrigerate for at least 30 minutes or up to 12 hours for an overnight cold ferment.
- When ready to proceed, brush the top of the slab evenly with heavy cream directly in the pan. Mix together the Cinnamon & Sugar topping and sprinkle generously over the entire surface. Place the pan in the freezer for 30 minutes.
- Preheat your oven to 400F (205C) while the slab freezes.
- Use the plastic wrap overhang to lift the frozen slab out of the pan onto a cutting board. Peel back the plastic wrap. Using a sharp knife or bench scraper, cut the slab using a 7×8 grid into approximately 3/4 inch squares, yielding 56 bites. Transfer to a parchment-lined baking sheet spaced about 1/2 inch apart. You can adjust this recipe as needed for size of bites, just watch the baking time.
- Bake for 15 to 20 minutes until the tops are golden and the edges are set. Rotate the pan halfway through for even browning. Start checking at 14 minutes. Cool on the pan for 5 minutes before serving.
- While the scone bites bake, beat the cream cheese with a hand mixer or whisk until smooth and fluffy. Add the powdered sugar, heavy cream, vanilla extract, and salt. Mix until silky and dippable, about 1 to 2 minutes. Adjust consistency with a splash more cream if needed. Serve alongside warm scone bites.
Notes
Tips for Perfect Scone Bites
Use double acting baking powder. Most commercial baking powder sold in the US is double acting, which means it has two rise reactions, one when it hits moisture and one when it hits heat. This is exactly why the freezer step works without sacrificing lift. By the time the dough goes into the oven cold and solid, the second and more powerful heat reaction is still fully intact. You will get a proper rise even baking straight from frozen, so do not skip the freeze.
Do not overwork the dough. The moment the dry flour disappears, stop mixing. Overworked scone dough develops gluten and becomes tough rather than tender. Shaggy and slightly sticky is exactly right.
Keep everything cold. Warm butter means flat, dense scone bites. If your kitchen runs warm, put the mixing bowls back in the fridge between steps if you need to.
Brush cream over the whole slab before cutting. Trying to brush 56 individual small squares is both tedious and uneven. Apply the cream and cinnamon sugar to the full slab while it is still intact, then freeze, then cut. Every piece gets an even coat.
Make your cuts decisive. Press straight down with a or sharp knife without dragging or sawing. Dragging the cut creates uneven edges that can cause the bites to lean or spread unevenly in the oven.
Start checking at 14 minutes. These are small and they bake fast. The edges should be golden and the tops should look set. Pull them a minute early rather than a minute late.

Substitutions and Variations
No buttermilk? Whole milk works in a pinch, though the scone bites will be slightly less tender since buttermilk’s acidity helps with the crumb. Heavy cream can also be used for a richer result. If substituting either, start with the same weight and adjust if needed. Heavy cream is slightly thicker and may require slightly more.
Brown sugar vs. granulated. If you only have granulated sugar, it will work but the molasses depth will not be there. The scone bites will taste more like a classic spiced scone and less like a cinnamon roll.
Active starter vs. discard. Either works with no adjustments needed.
No sourdough starter at all. Replace the 160g discard with 80g additional flour and 80g additional buttermilk.
Cream cheese dip variations. The base dip is vanilla, which is intentionally versatile. A pinch of cinnamon stirred into the dip brings it closer to a cinnamon roll frosting profile. A teaspoon of maple syrup makes it lean in a warmer, more autumnal direction.

Same Day or Overnight
Both options work beautifully with this recipe.
Same day: After pressing the dough into the pan, refrigerate for a minimum of 30 minutes. Then apply the topping, freeze for 30 minutes, cut and bake.
Overnight cold ferment: Press the dough into the pan, cover tightly with the plastic wrap overhang, and refrigerate for up to 12 hours. The longer fermentation gives the sourdough more time to work into the dough, which can deepen the flavor and may also improve digestibility for those who find long fermented grains easier to tolerate. When ready to bake, apply the cream and cinnamon sugar, freeze for 30 minutes, then cut and bake.
The overnight method is especially useful if you are planning these for a morning gathering. Do the mixing the night before, and the next morning your only task is topping, freezing, cutting, and baking.

Frequently Asked Questions
Can I make the cream cheese dip ahead of time?
Yes. The dip keeps well in the refrigerator for up to 5 days in an airtight container. Pull it out about 15-30 minutes before serving to let it soften slightly for easier dipping.
Do I need a kitchen scale for this recipe?
I always recommend using a scale for baking, especially with scones where small differences in flour and liquid can change the dough texture. Cup measurements are provided in the recipe card as a reference, but grams will give you the most consistent result.
Why do I freeze the slab before cutting instead of just refrigerating?
Refrigerating keeps the dough cold. Freezing makes it firm enough that your cuts stay sharp and the pieces hold their shape when you transfer them to the baking sheet. It also means they go into a hot oven from their coldest possible state, which helps the butter create steam quickly and gives you a better rise and texture.
How many scone bites does this make?
Using a 7×8 grid on an 8×8 pan yields 56 bites at approximately 3/4 inch each, the perfect one to two bite size for dipping. But you can adjust them for slightly smaller or larger as needed. Just keep an eye on the bake time.
Can I freeze unbaked scone bites for later?
Yes. After cutting, freeze the individual bites on a parchment lined baking sheet until solid, then transfer to an airtight freezer bag. Bake from frozen at 205C (400F), adding 3 to 5 minutes to the bake time.
My dough is very sticky. What should I do?
Use the plastic wrap method to press it into the pan rather than trying to handle it directly with your hands. If it seems extremely wet, your discard may have been very high hydration. Add a tablespoon of flour at a time until the dough comes together and is manageable.
My dough seems too dry. What should I do?
Before adding any liquid, press the dough into the pan and refrigerate as directed. The flour will continue to hydrate as it rests, and what looks dry and crumbly at the mixing stage often comes together beautifully after chilling. If the dough is genuinely too dry to press together at all, add cold buttermilk one tablespoon at a time, gently working it into the dry areas with your bowl scraper until the dough just holds together. Stop well before it looks fully hydrated, the refrigerator chill will finish the job. An overly wet dough is harder to recover from than a slightly dry one.
Can I make these without sourdough discard?
Yes. Replace the 160g of discard with 80g of additional flour and 80g of additional buttermilk. The flavor will be more straightforward without the fermented depth, but the texture will be similar.

More Scone Recipes to Try
If you loved these scone bites, here are a few more to add to your baking rotation:
- High Protein Sourdough Cottage Cheese Scones
- High Protein Chocolate Chip Cottage Cheese Scones
- Sourdough Pizza Scones
- Sourdough Pesto Scones
- Smoked Cheddar and Onion Cottage Cheese Scones
Did You Make This Recipe?
If you made these scone bites, I want to see them. Tag me on Instagram or Facebook so I can see your creations, and leave a review in the comments below. It helps more people find this recipe and means a lot to me.
Want new recipes delivered straight to your inbox before they hit social media? Sign up for the H3art of the Home newsletter below and never miss a recipe.


Leave a Reply