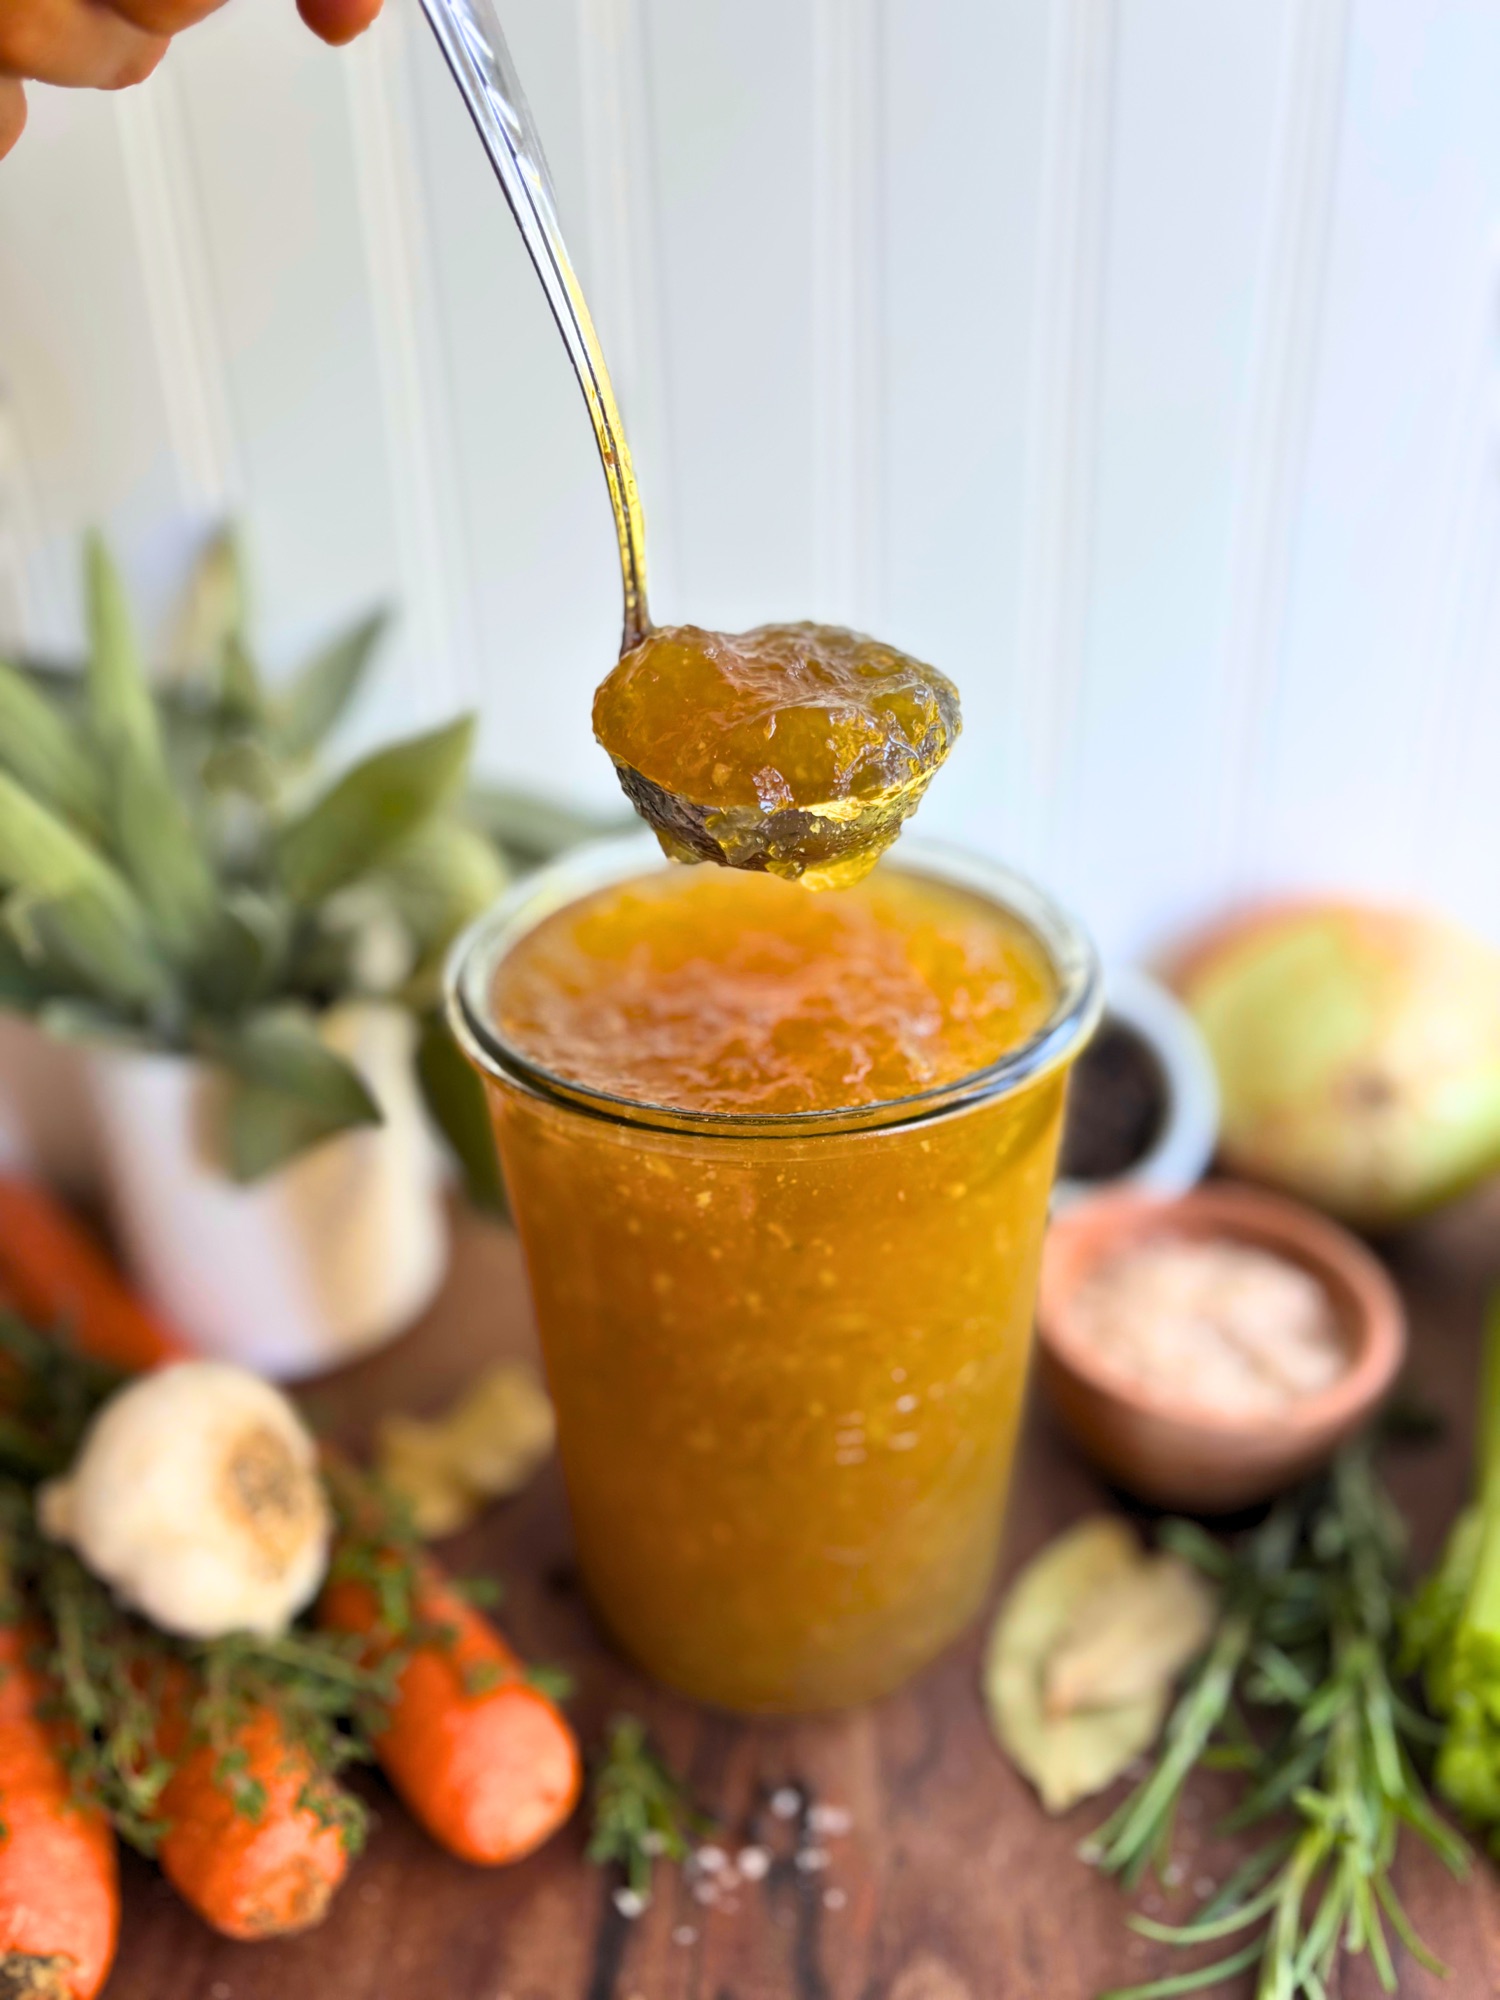
There is nothing better than a fresh, warm mug of homemade chicken bone broth, whether someone in my house is sick and needs something gentle and comforting, or I just want a slow, cozy start to my morning before the day gets going. It is the thing I reach for when nothing else sounds good, and it is also my go to any time a recipe calls for chicken broth, because it quietly adds protein from all that gelatin, along with nutrients from the bones, to whatever I am cooking. Having jars of it waiting in my refrigerator means I am always ready, whether that is for a mug of comfort or a pot of soup.
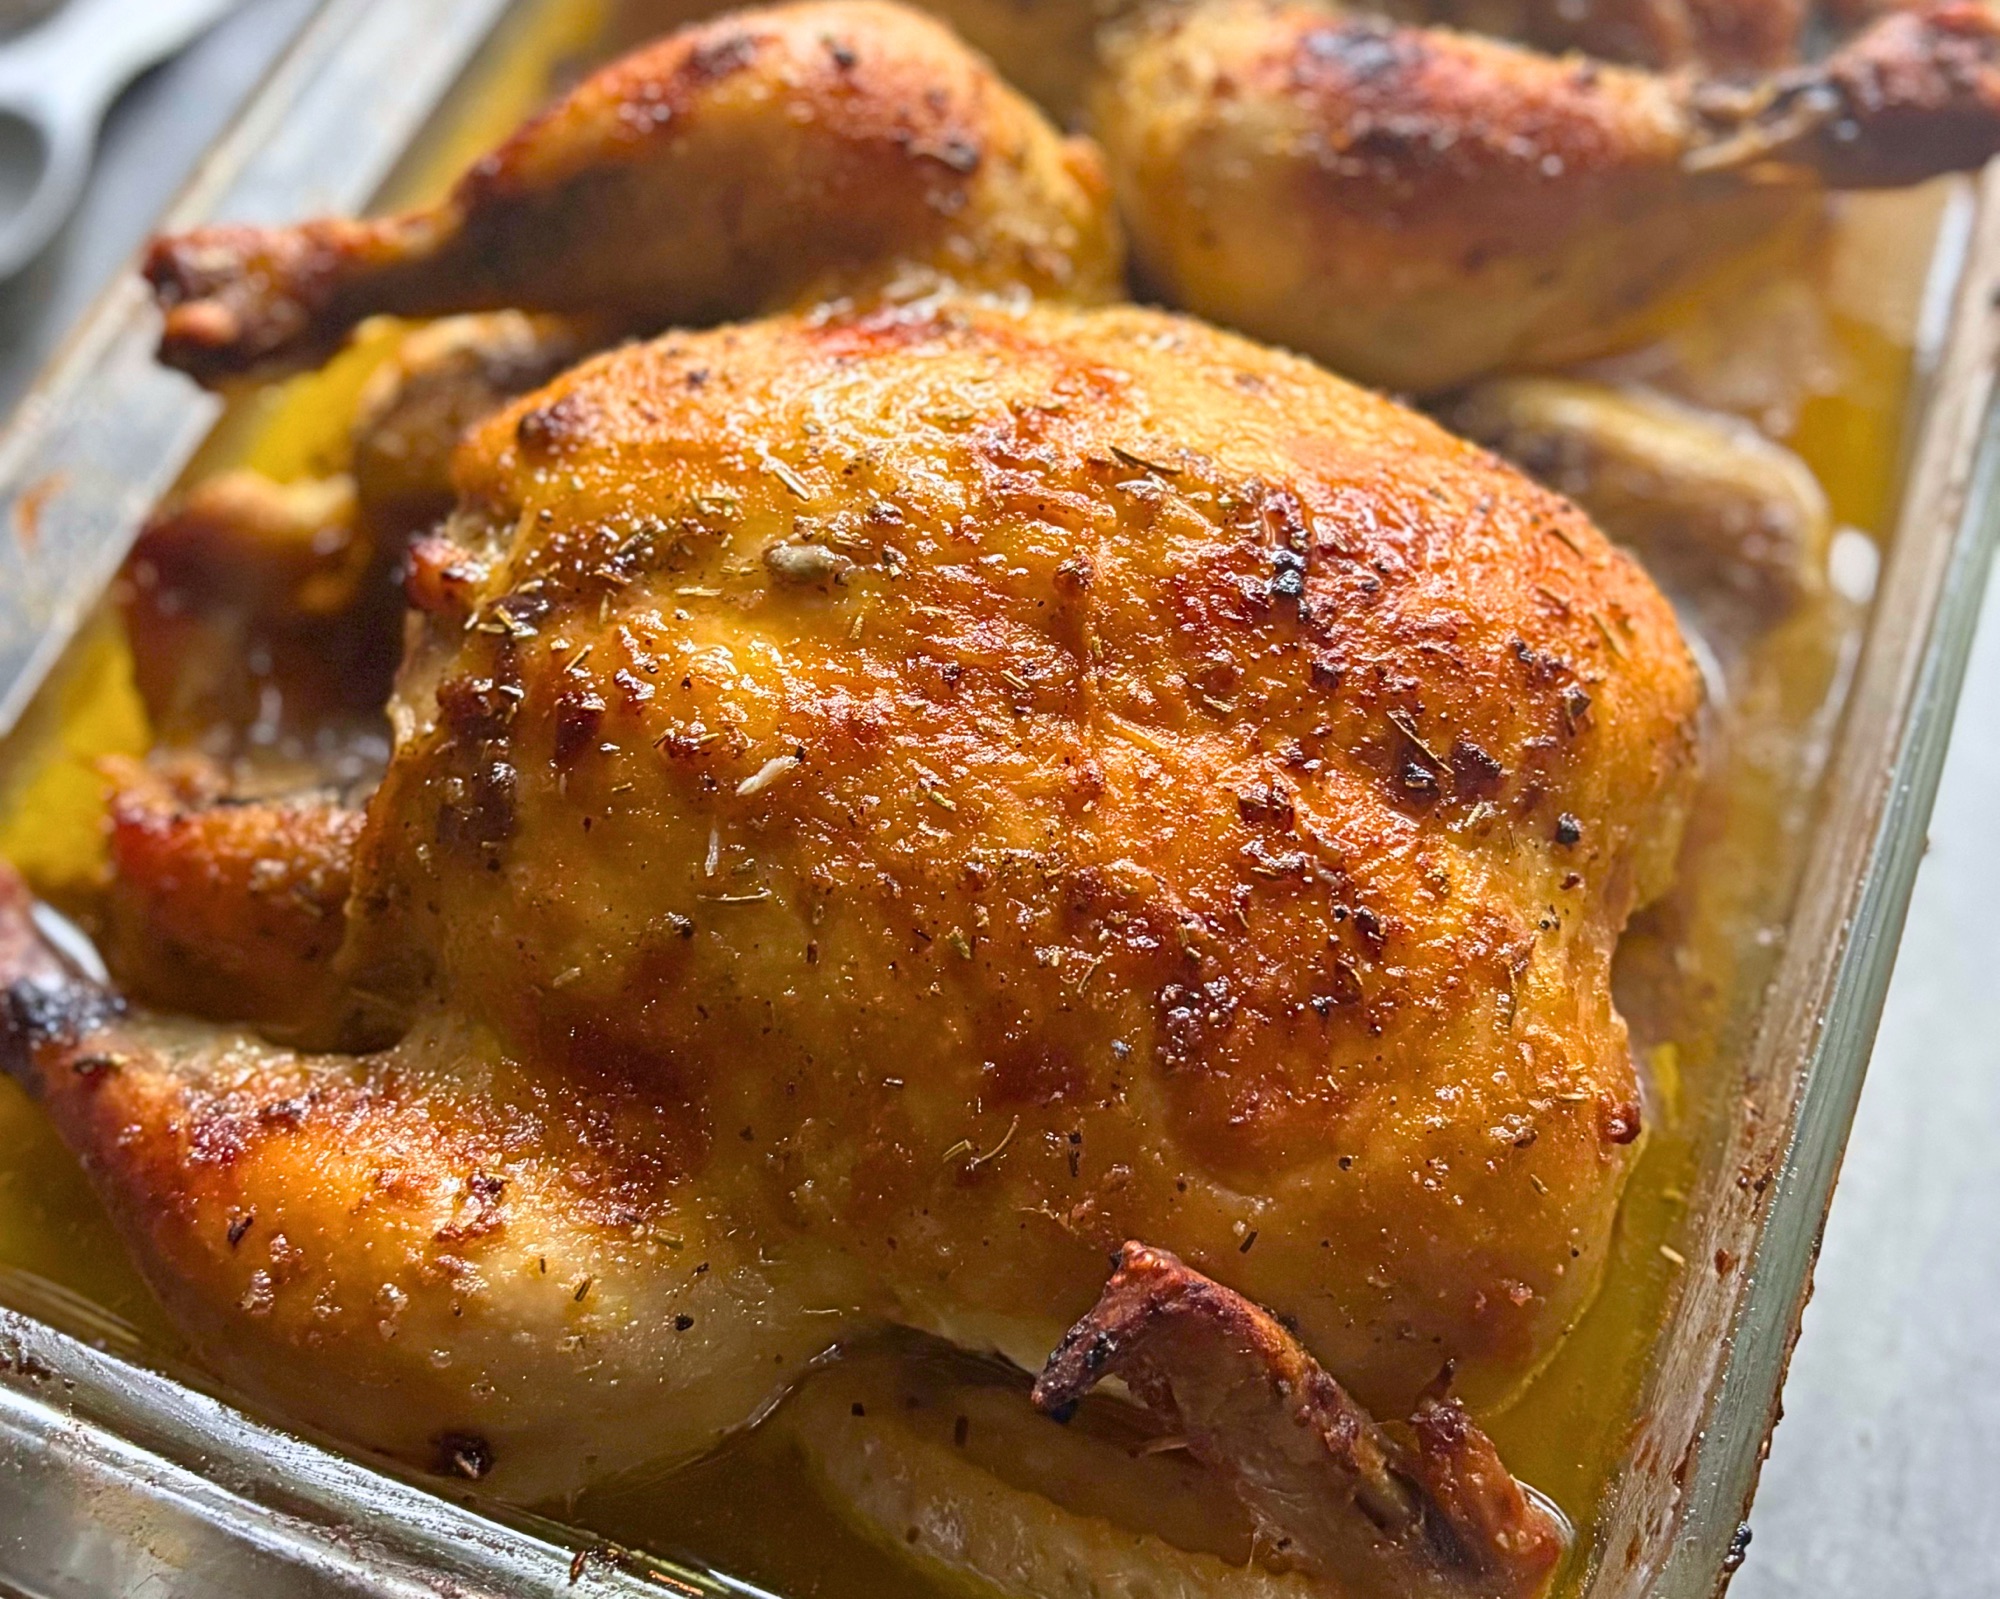
This broth is also the second half of my JUICY BRINED ROAST CHICKEN, and it is the reason I never throw away a chicken carcass. Once the meat comes off that roast chicken, the bones, the skin, the drippings, and even the giblets go back into the oven for a quick toast and then straight into my Instant Pot with a few vegetables and fresh herbs, and an hour and a half later I have a pot of rich, golden broth that sets up like jelly once it chills in the fridge.
You do not need to have made the roast chicken to make this, though. If you are starting with a bag of raw chicken bones from the butcher or the backs and wings you have been saving in the freezer, my number one tip is to roast them first, because a pot of browned bones makes a deeper, richer broth than raw bones ever will. I will walk you through both, along with my Instant Pot method, which I use almost every time, and a stovetop method for anyone who does not have one.
Most importantly, I will show you exactly how I get my broth to gel every single time, because that wobble in the jar is how you know you pulled everything you could out of those bones.
Table of Contents
- Why You Will Love This Bone Broth
- Why Make Homemade Bone Broth
- Which Bones to Use
- Ingredients
- Why I Always Roast the Bones
- The Instant Pot Method
- The Stovetop Method
- How to Get Bone Broth to Gel
- Straining, Skimming, and Seasoning
- How to Store and Freeze Bone Broth
- Ways to Use Your Bone Broth
- Expert Tips
- Shop This Recipe
- Frequently Asked Questions
- Instant Pot Chicken Bone Broth Recipe
- Stovetop Chicken Bone Broth Recipe
- More Recipes to Make With This
- Subscribe for Free
Why You Will Love This Bone Broth
Once you see how little it takes to turn leftover bones into something this good, you will never look at a store bought carton the same way again.

- It actually gels. The method is built around getting a broth that sets up like jelly in the fridge, which is the sign of a broth full of gelatin.
- Nothing goes to waste. The carcass, skin, drippings, and giblets from your roast chicken all go into the pot.
- The Instant Pot does the work. Ninety minutes under pressure, no babysitting a pot on the stove all day.
- It works with any chicken bones. Leftover roast chicken, raw bones from the butcher, or a freezer bag of saved backs and wings.
- You control the salt. Nothing gets salted until the very end, so you season it exactly how you like it.
- It tastes like real food. Roasted bones, fresh herbs, garlic, and a little turmeric give it a deep, golden flavor that a carton cannot match.
Back to Table of Contents | Jump to Recipe
Why Make Homemade Bone Broth
Chicken bones, joints, and skin are loaded with collagen, which is the protein that holds connective tissue together, and when you cook them slowly for a long time, that collagen breaks down into gelatin. Gelatin is exactly what makes a good broth set up into a jiggly jelly once it is cold, and it is what gives homemade broth that rich, silky feel in your mouth that a thin carton of broth never has.

Here is the part most people do not realize, though. When you drink bone broth, your body does not take that collagen and put it straight onto your knees or your skin. It breaks the gelatin down into amino acids, the individual building blocks, and then uses those building blocks to make its own collagen wherever it needs it.
The building blocks in bone broth are good ones, too. Glycine and proline are two of the main amino acids in collagen, and glycine has also been studied for its calming effect, which may be part of why a warm mug at night feels so good. Arginine, another amino acid in broth, plays a role in healing and in how the immune system does its job.
I can’t tell you bone broth is a magic potion, because, it is food. But i will say, it is deeply nourishing food that hands your body a pile of good building materials, and when you make it at home with real bones and see that jiggle in the jar, you know you got every bit of goodness out of them.
Back to Table of Contents | Jump to Recipe
Which Bones to Use
The easiest bones in the world are the ones left over from a roast chicken, and the carcass from my JUICY BRINED ROAST CHICKEN is what I use most of the time. Along with the bones, I add the skin, the pan drippings, and the giblets I saved before roasting. The herbs, garlic, and orange that were tucked inside the chicken go in the trash, though, because after hours in the oven they have given up most of their flavor, and fresh herbs give the broth a much cleaner, brighter taste.

If you are starting with raw bones, any chicken bones will work, but the ones with the most joints and connective tissue give you the most gelatin. Backs, necks, wings, and feet are all great choices, and many butchers sell bags of backs or feet for very little. I keep a freezer bag going and add to it whenever I have bones left over, so I always have enough for a batch.
The giblets are completely optional, and I usually just use whatever came wrapped inside the chicken. The neck, heart, and gizzard all add flavor and body to the broth, while the liver is the one some people leave out, since it can make the broth taste a little bitter and look cloudy. It is entirely up to you.
Back to Table of Contents | Jump to Recipe
Ingredients
Beyond the bones, this broth is made from simple vegetables and herbs, all of which go into the pot raw. The exact amounts are in the recipe card below.

- Chicken bones: A leftover roast chicken carcass with the skin and drippings, or about 2 pounds of raw chicken bones.
- Giblets: Optional, whatever came with your chicken.
- Carrots, celery, and onion: The classic base that gives broth its sweet, savory backbone. There is no need to peel the carrots or the onion, since the onion skin adds a deeper golden color.
- Garlic: Crushed with the side of your knife so it releases its flavor.
- Fresh herbs: Rosemary, thyme, and parsley, plus bay leaves.
- Whole peppercorns: For a gentle warmth in the background.
- Turmeric: A piece of fresh turmeric root gives the broth a beautiful golden color and a warm, earthy flavor, and ground turmeric works too. Black pepper also helps your body absorb the curcumin in turmeric, which is one more reason I always add the peppercorns.
- Apple cider vinegar: Optional. I add it sometimes, and I explain why in the FAQ.
- Water: Just enough to cover the bones by about and inch, which keeps the bone broth concentrated enough to gel.
- Salt: Added only at the end, after you taste the finished broth.
Back to Table of Contents | Jump to Recipe
Why I Always Roast the Bones
Roasting the bones before they go into the pot is the one step I will always tell you not to skip. Putting raw bones straight into the pot is fine and will still make broth, but browned, caramelized bones give you a broth with a deeper golden color and a much richer, roasted flavor that you simply cannot get any other way.
I do this a little differently than most people by putting the bones into a cold oven and setting it to 425°F, so they heat up gradually as the oven comes up to temperature instead of getting blasted with high heat all at once. Leave them in until they are browned and crisp on the outside. They do not need to be cooked through, because they are about to spend the next hour and a half in the Instant Pot.
Raw bones are where roasting matters most, so leave them in until they are deeply browned and caramelized all over. There is no set time for this, so just keep an eye on them and pull them out when the color looks right.
Bones from a roast chicken are already cooked, so roasting them again is optional. If you have the time, a quick toast crisps up the parts that were tucked inside the bird and adds a little more roasted flavor, and if you do not, they can go straight into the pot. Either way, this is the time to add the giblets to the pan, as long as they have been kept in the refrigerator. They just need some color on the outside and do not need to cook through.
Back to Table of Contents | Jump to Recipe
The Instant Pot Method
The Instant Pot is how I make bone broth almost every time, because it is faster and I do not have to babysit a pot on the stove all day. Pressure cooking also does a great job pulling gelatin out of chicken bones, and a single cycle is all it takes.

Everything goes into the pot at once, the roasted bones and giblets, the vegetables and herbs, the drippings and leftover bits from the roast chicken, and then I add just enough water to cover the bones by about an inch. More water is not better here, since a broth with too much water will taste thin and may not gel. I make mine in a 6 quart Instant Pot, but this works in any size, as long as you never fill past the max line, since the pot needs room to build pressure safely. If you roasted two chickens, both carcasses fit in a 6 quart pot filled to the max line for a double batch.

When the cooking time is up, I let it sit for a little while before releasing the pressure, which gives the boiling liquid inside a chance to settle down. A full pot of broth can sputter a bit from the valve when you release it, so I always drape a kitchen towel over the valve before I turn it, and keep my hands and face out of the way of the steam.
Back to Table of Contents | Jump to Recipe
The Stovetop Method
If you do not have an Instant Pot, you can absolutely make this on the stove, and it is the way bone broth has been made for generations. It just takes longer and needs a little more attention, and the most important thing is the temperature.
Bring the pot up to a boil, then turn the heat down right away to the gentlest simmer you can manage, where you only see a bubble break the surface every so often. That is around 180°F to 200°F if you want to check it with a thermometer. A hard, rolling boil is the enemy of a good broth, because it breaks down the gelatin you are working so hard to pull out of the bones and turns the broth cloudy.
The water will slowly cook down as it simmers, so check on it every so often and add more water to keep the bones covered. Chicken bones are smaller and thinner than beef bones, so they need far less time, and the full timing is in the stovetop recipe card further down.
You may have seen recipes that tell you to simmer bone broth for 24 or even 48 hours, and I want to steer you away from that for chicken. Cooking chicken bones that long starts to break down the very gelatin you are trying to keep, so the broth may never set up in the fridge. Longer cooking also gives the proteins more time to break down, which is why some people who are sensitive to histamine find that shorter cooked broth agrees with them better.
Back to Table of Contents | Jump to Stovetop Recipe
How to Get Bone Broth to Gel
A broth that sets up like jelly in the fridge is the sign that it is full of gelatin, and getting there every time comes down to just a few things.

- Use bones with lots of joints and skin. The carcass, wings, necks, backs, and feet are where the collagen is. A pile of plain breast bones will not give you much gel.
- Do not add too much water. This is the most common reason broth will not set. Adding just enough water to cover the bones by about an inch keeps the broth concentrated enough to gel.
- Never let it boil hard. A rolling boil breaks down gelatin. In the Instant Pot the pressure takes care of this, and on the stove you want only a gentle bubble.
- Do not cook it too long. For chicken, longer is not better, and cooking for days can break the gelatin down so far that it will not set.
- Chill it completely. Broth only gels once it is fully cold, so give it a night in the refrigerator before you decide how it turned out.
If your broth does not gel, do not throw it out. It is still full of flavor, nutrients and still makes a wonderful base for soup, it just has a little less gelatin, and next time you can add a few more wings or feet and a little less water.
Back to Table of Contents | Jump to Recipe
Straining, Skimming, and Seasoning
Once the broth is done, pour it through a fine mesh strainer into a large bowl or straight into jars and throw away the bones, vegetables, and herbs. They have given everything they have at this point.

Let the broth cool and then refrigerate it overnight. The fat will rise to the top and harden into a layer that lifts right off, and how much you take off is completely up to you. I usually lift off some of it and leave a little behind for flavor, and if you like a richer broth, you can leave it all.

I never salt my broth until it is finished, because it is so easy to over salt and impossible to take it back. This is especially true if your bones came from my brined roast chicken, since they are already seasoned, so taste the broth first and then add salt a little at a time until it tastes right to you. If you plan to cook it down into a sauce or gravy later, you may want to leave it unsalted and season the final dish instead.
Back to Table of Contents | Jump to Recipe
How to Store and Freeze Bone Broth
I store my bone broth in glass jars, keeping some in the refrigerator for the week and freezing the rest so I always have some on hand. How long it keeps in each is in the recipe card notes.

Freezing broth in glass jars works well as long as you give it room to expand. Use wide mouth jars, which are less likely to crack, leave at least an inch of space at the top, and let the broth cool completely in the refrigerator before it goes into the freezer. Leave the lids a little loose until the broth is frozen solid, then tighten them. If you would rather skip glass in the freezer, square freezer safe containers work just as well and stack neatly, and I always label mine with the date so I know which batch to use first.

To thaw, move a jar to the refrigerator the night before you need it. Never put a frozen glass jar straight into hot water or onto the stove, since the sudden temperature change can crack it.
Back to Table of Contents | Jump to Recipe
Ways to Use Your Bone Broth
Once you have a few jars of this in the refrigerator, you will find yourself reaching for it in almost everything.

- Sip it warm. Heat a mug, add a pinch of salt, and drink it on its own, especially on a cold night.
- Make soup. Chicken noodle, chicken and rice, vegetable soup, or any soup that calls for chicken stock or broth.
- Cook your grains in it. Rice, quinoa, and farro all pick up so much more flavor when you cook them in broth instead of water.
- Make gravy and pan sauces. The gelatin gives sauces a beautiful, glossy body.
- Mash your potatoes with it. A splash in place of some of the milk adds flavor without extra butter.
- Braise and deglaze. Use it any time a recipe calls for stock to deglaze a pan or braise meat and vegetables.
Back to Table of Contents | Jump to Recipe
Expert Tips
These are the small things I have learned that make the biggest difference in a pot of bone broth.

- Save bones as you go. Keep a freezer bag for chicken bones, wing tips, and backs, and make broth when it is full.
- Start the bones in a cold oven. They brown more evenly as the oven heats up.
- Salt at the very end. Especially with bones from a brined chicken, which are already seasoned.
- Respect the max line. Never fill an Instant Pot past it, since the pot needs space to build pressure safely.
- Cover the valve with a towel. A full pot of broth can sputter when you release the pressure.
- Keep the stovetop at a bare simmer. A rolling boil breaks down gelatin and clouds the broth.
- Chill before judging. Broth only gels once it is completely cold.
- Cool it quickly. Divide a big pot of hot broth into smaller containers so it cools faster before it goes into the refrigerator.
Back to Table of Contents | Jump to Recipe
Shop This Recipe
These are the tools I actually use to make my bone broth. As an Amazon Associate I earn a small commission from qualifying purchases made through these links, at no extra cost to you, and it helps support the blog so I can keep sharing recipes like this one.
- 6 Quart Instant Pot: The pressure cooker I use for almost every batch of broth.
- Rimmed Baking Sheet: For roasting the bones and giblets before they go into the pot.
- Fine Mesh Strainer: Catches every little bit of bone and herb when you strain the broth.
- Wide Mouth Glass Jars: What I store and freeze my broth in, since the wide mouth is less likely to crack in the freezer.
- Large Stockpot: For the stovetop method if you do not have an Instant Pot.
- Instant Read Thermometer: Helpful for keeping the stovetop broth at a gentle simmer.
Frequently Asked Questions
These are the questions I hear most about making chicken bone broth at home.
What is the difference between bone broth, broth, and stock?
Traditionally, broth is made mostly from meat and cooked for a shorter time, stock is made mostly from bones, and bone broth is made from bones cooked long enough to pull out as much gelatin as possible, which is why a good bone broth gels when it is cold.
Why didn’t my bone broth gel?
The most common reasons are too much water, bones without much connective tissue, a hard boil, or cooking it too long, so next time use more joints, wings, or feet, keep the water to about an inch over the bones, and keep it at a gentle simmer if you are using the stove.
Do I have to roast the bones first?
You do not have to, and raw bones will still make broth, but roasting the bones first gives you a much deeper golden color and a richer, roasted flavor, which is why I never skip it.
Can I use raw chicken bones?
Raw bones work beautifully, and I recommend roasting them in the oven first until they are deeply browned, which takes longer than bones from an already roasted chicken.
Should I add apple cider vinegar to bone broth?
It is optional, and I add it sometimes. Research on bone broth has found that a splash of vinegar helps draw more minerals like calcium and magnesium out of the bones, though it does not seem to change the amount of collagen building blocks in the finished broth, so add it if you like and skip it if you do not have it.
Should I put the giblets in bone broth?
The giblets are optional, but the neck, heart, and gizzard add flavor and body, so I usually use whatever came wrapped with my chicken, and some people leave out the liver because it can make broth taste a little bitter.
Does the type of chicken affect how well bone broth gels?
It can, though not always the way you might expect. Older birds build up more collagen as they age, which is why old stewing hens have always been prized for rich stock, but that collagen is also more tightly bound, so it takes a longer cook to break it down into gelatin. A typical grocery store chicken is much younger, so its collagen breaks down easily, but there is less of it overall. Pasture raised and heritage birds are usually older and more active, which can mean more connective tissue, although studies on how much this changes the collagen are mixed. What makes the biggest difference for a broth that gels is using plenty of joints, wings, backs, or feet and keeping the water to about an inch over the bones, and if you are using an older or pasture raised bird, giving it up to 2 hours in the Instant Pot can help pull out every bit of gelatin.
How long should chicken bone broth cook?
In the Instant Pot, one 90 minute cycle on high pressure is enough for chicken bones, and on the stovetop, chicken bones need about 6 to 12 hours at a gentle simmer, which is much less time than beef bones.
Can you cook bone broth too long?
You can, especially with chicken, since cooking it for 24 to 48 hours can break down the gelatin so far that the broth will not set, and longer cooking also allows more histamine to build up for people who are sensitive to it.
Why is there a layer of fat on my bone broth?
That is the natural fat from the chicken rising to the top as the broth cools, and you can lift off as much or as little of it as you like once it hardens in the refrigerator.
When should I salt bone broth?
Always salt it at the end, after you taste it, because bones from a brined or seasoned chicken are already salty and it is easy to over salt a broth that will cook down later in a recipe.
Can I freeze bone broth in glass jars?
You can, as long as you use wide mouth jars, leave at least an inch of space at the top for the broth to expand, and cool it completely in the refrigerator before freezing.
Is homemade bone broth better than store bought?
Homemade bone broth is usually much richer in gelatin than most store bought broth, which is why it gels when cold, and you control exactly what goes into it, including how much salt.
Back to Table of Contents | Jump to Recipe
Instant Pot Chicken Bone Broth Recipe

Instant Pot Chicken Bone Broth
Equipment
- Rimmed baking sheet
- 6 quart Instant Pot or other electric pressure cooker
- Fine-mesh strainer
- Large heatproof bowl
- Kitchen towel
- Wide mouth glass jars
Ingredients
Bones
- 1 leftover roast chicken carcass with skin and pan drippings or 907g raw chicken bones (2 pounds)
- Giblets from the chicken optional
Vegetables and Aromatics
- 122 g carrots for the broth about 2 medium or 1 large, cut into chunks
- 80 g celery for the broth about 2 stalks, cut into chunks
- 55 g onion for the broth about ½ medium, skin on
- 9 g garlic for the broth about 3 cloves, crushed
- 8.5 g whole black peppercorns for the broth 1 tbsp
- 2 sprigs fresh rosemary for the broth 1 tbsp dried
- 2 sprigs fresh thyme for the broth 1 tsp dried
- 15 g fresh parsley for the broth ¼ cup fresh packed or 1 tbsp dried
- 2 bay leaves for the broth
- 1 piece fresh turmeric root for the broth about 2 inches long and ½ inch thick, halved, or 0.8g ground turmeric (¼ tsp dried, ground)
- 15 g to 30g apple cider vinegar for the broth optional (1 to 2 tbsp)
To Finish
- 1420-1890 g Water (6-8 cups, just enough to cover the bones by about an inch. Do not go above the max fill line)
- Salt to taste added at the end
Instructions
- Spread the chicken bones and giblets on a rimmed baking sheet and place them in a cold oven. Set the oven to 425°F.
- For raw bones, roast until deeply browned and caramelized all over. For bones from a roast chicken, this step is optional, so roast just until crisp and lightly browned or skip it. Go by color rather than time. The bones and giblets do not need to cook through.
- Transfer the roasted bones, giblets, and any browned bits from the pan into the Instant Pot. If using a roast chicken, add the skin and pan drippings, and discard the herbs, garlic, and orange from the cavity.
- Add the carrots, celery, onion, garlic, peppercorns, rosemary, thyme, parsley, bay leaves, turmeric, and apple cider vinegar if using.
- Pour in cold water up to cover the bones by about an inch. Do not fill past the max fill line.
- Lock the lid, set the valve to sealing, and cook on high pressure for 90 minutes.
- When the cycle finishes, let the pot sit for 10 to 15 minutes. Drape a kitchen towel over the valve, keep your hands and face clear of the steam, and release the remaining pressure.
- Carefully remove the lid, the liquid will be very hot.
- Strain the broth through a fine mesh strainer into a large heatproof bowl or directly into jars. Discard the bones, vegetables, and herbs.
- Let the broth cool, then refrigerate overnight. Lift off as much of the hardened fat from the top as you like.
- Taste the broth and season with salt as needed before using or storing.
Notes
Stovetop Chicken Bone Broth Recipe

Stovetop Chicken Bone Broth
Equipment
- Rimmed baking sheet
- Large stockpot, at least 6 quarts
- Instant read thermometer (optional)
- Fine-mesh strainer
- Large heatproof bowl
- Wide mouth glass jars
Ingredients
Bones
- 1 leftover roast chicken carcass with skin and pan drippings or 907g raw chicken bones (2 pounds)
- Giblets from the chicken optional
Vegetables and Aromatics
- 122 g carrots for the broth about 2 medium or 1 large, cut into chunks
- 80 g celery for the broth about 2 stalks, cut into chunks
- 55 g onion for the broth about ½ medium, skin on
- 9 g garlic for the broth about 3 cloves, crushed
- 8.5 g whole black peppercorns for the broth 1 tbsp
- 2 sprigs fresh rosemary for the broth or 2.4g dried rosemary (2 tsp)
- 2 sprigs fresh thyme for the broth or 0.75g dried thyme (¾ tsp)
- 15 g fresh parsley for the broth ¼ cup, or 1.6g dried parsley (1 tbsp)
- 2 bay leaves for the broth
- 1 piece fresh turmeric root for the broth about 2 inches long and ½ inch thick, halved, or 0.8g ground turmeric (¼ tsp)
- 15 g to 30g apple cider vinegar for the broth optional (1 to 2 tbsp)
To Finish
- Cold water to cover the bones by about 2 inches roughly 946g (4 cups) for every pound of bones
- Salt to taste added at the end
Instructions
- Spread the chicken bones and giblets on a rimmed baking sheet and place them in a cold oven. Set the oven to 425°F.
- For raw bones, roast until deeply browned and caramelized all over. For bones from a roast chicken, this step is optional, so roast just until crisp and lightly browned or skip it. Go by color rather than time. The bones and giblets do not need to cook through.
- Transfer the roasted bones, giblets, and any browned bits from the pan into a large stockpot. If using a roast chicken, add the skin and pan drippings, and discard the herbs, garlic, and orange from the cavity.
- Add the carrots, celery, onion, garlic, peppercorns, rosemary, thyme, parsley, bay leaves, turmeric, and apple cider vinegar if using.
- Pour in cold water to cover the bones by about 2 inches.
- Bring to a boil over medium high heat, then immediately reduce the heat to the lowest gentle simmer, where only an occasional bubble breaks the surface, about 180°F to 200°F. Skim off any foam that rises in the first 30 minutes.
- Simmer uncovered or partially covered for 6 to 12 hours, checking every hour or two and adding water as needed to keep the bones covered. Do not let it boil hard.
- Strain the broth through a fine mesh strainer into a large heatproof bowl or directly into jars. Discard the bones, vegetables, and herbs.
- Let the broth cool, then refrigerate overnight. Lift off as much of the hardened fat from the top as you like.
- Taste the broth and season with salt as needed before using or storing.
Notes
Back to Table of Contents | Jump to Instant Pot Recipe
More Recipes to Make With This
If you have a pot of bone broth going, these are the recipes I would pair with it.
- JUICY BRINED ROAST CHICKEN: The roast chicken this broth starts from, with an overnight maple herb brine and butter under the skin.
- Easy No Knead Sourdough Baguettes: Crusty bread for dunking into a bowl of soup made with your broth.
- Chick-fil-A Pull-Apart Focaccia: A fun, cozy bread to serve alongside a big pot of chicken soup.
Subscribe for Free
If you want more from scratch recipes like this one, along with the sourdough and high protein bakes I am working on in my kitchen, join my email list. It is completely free, and you will get every new recipe delivered straight to your inbox so you never miss one.



Leave a Reply