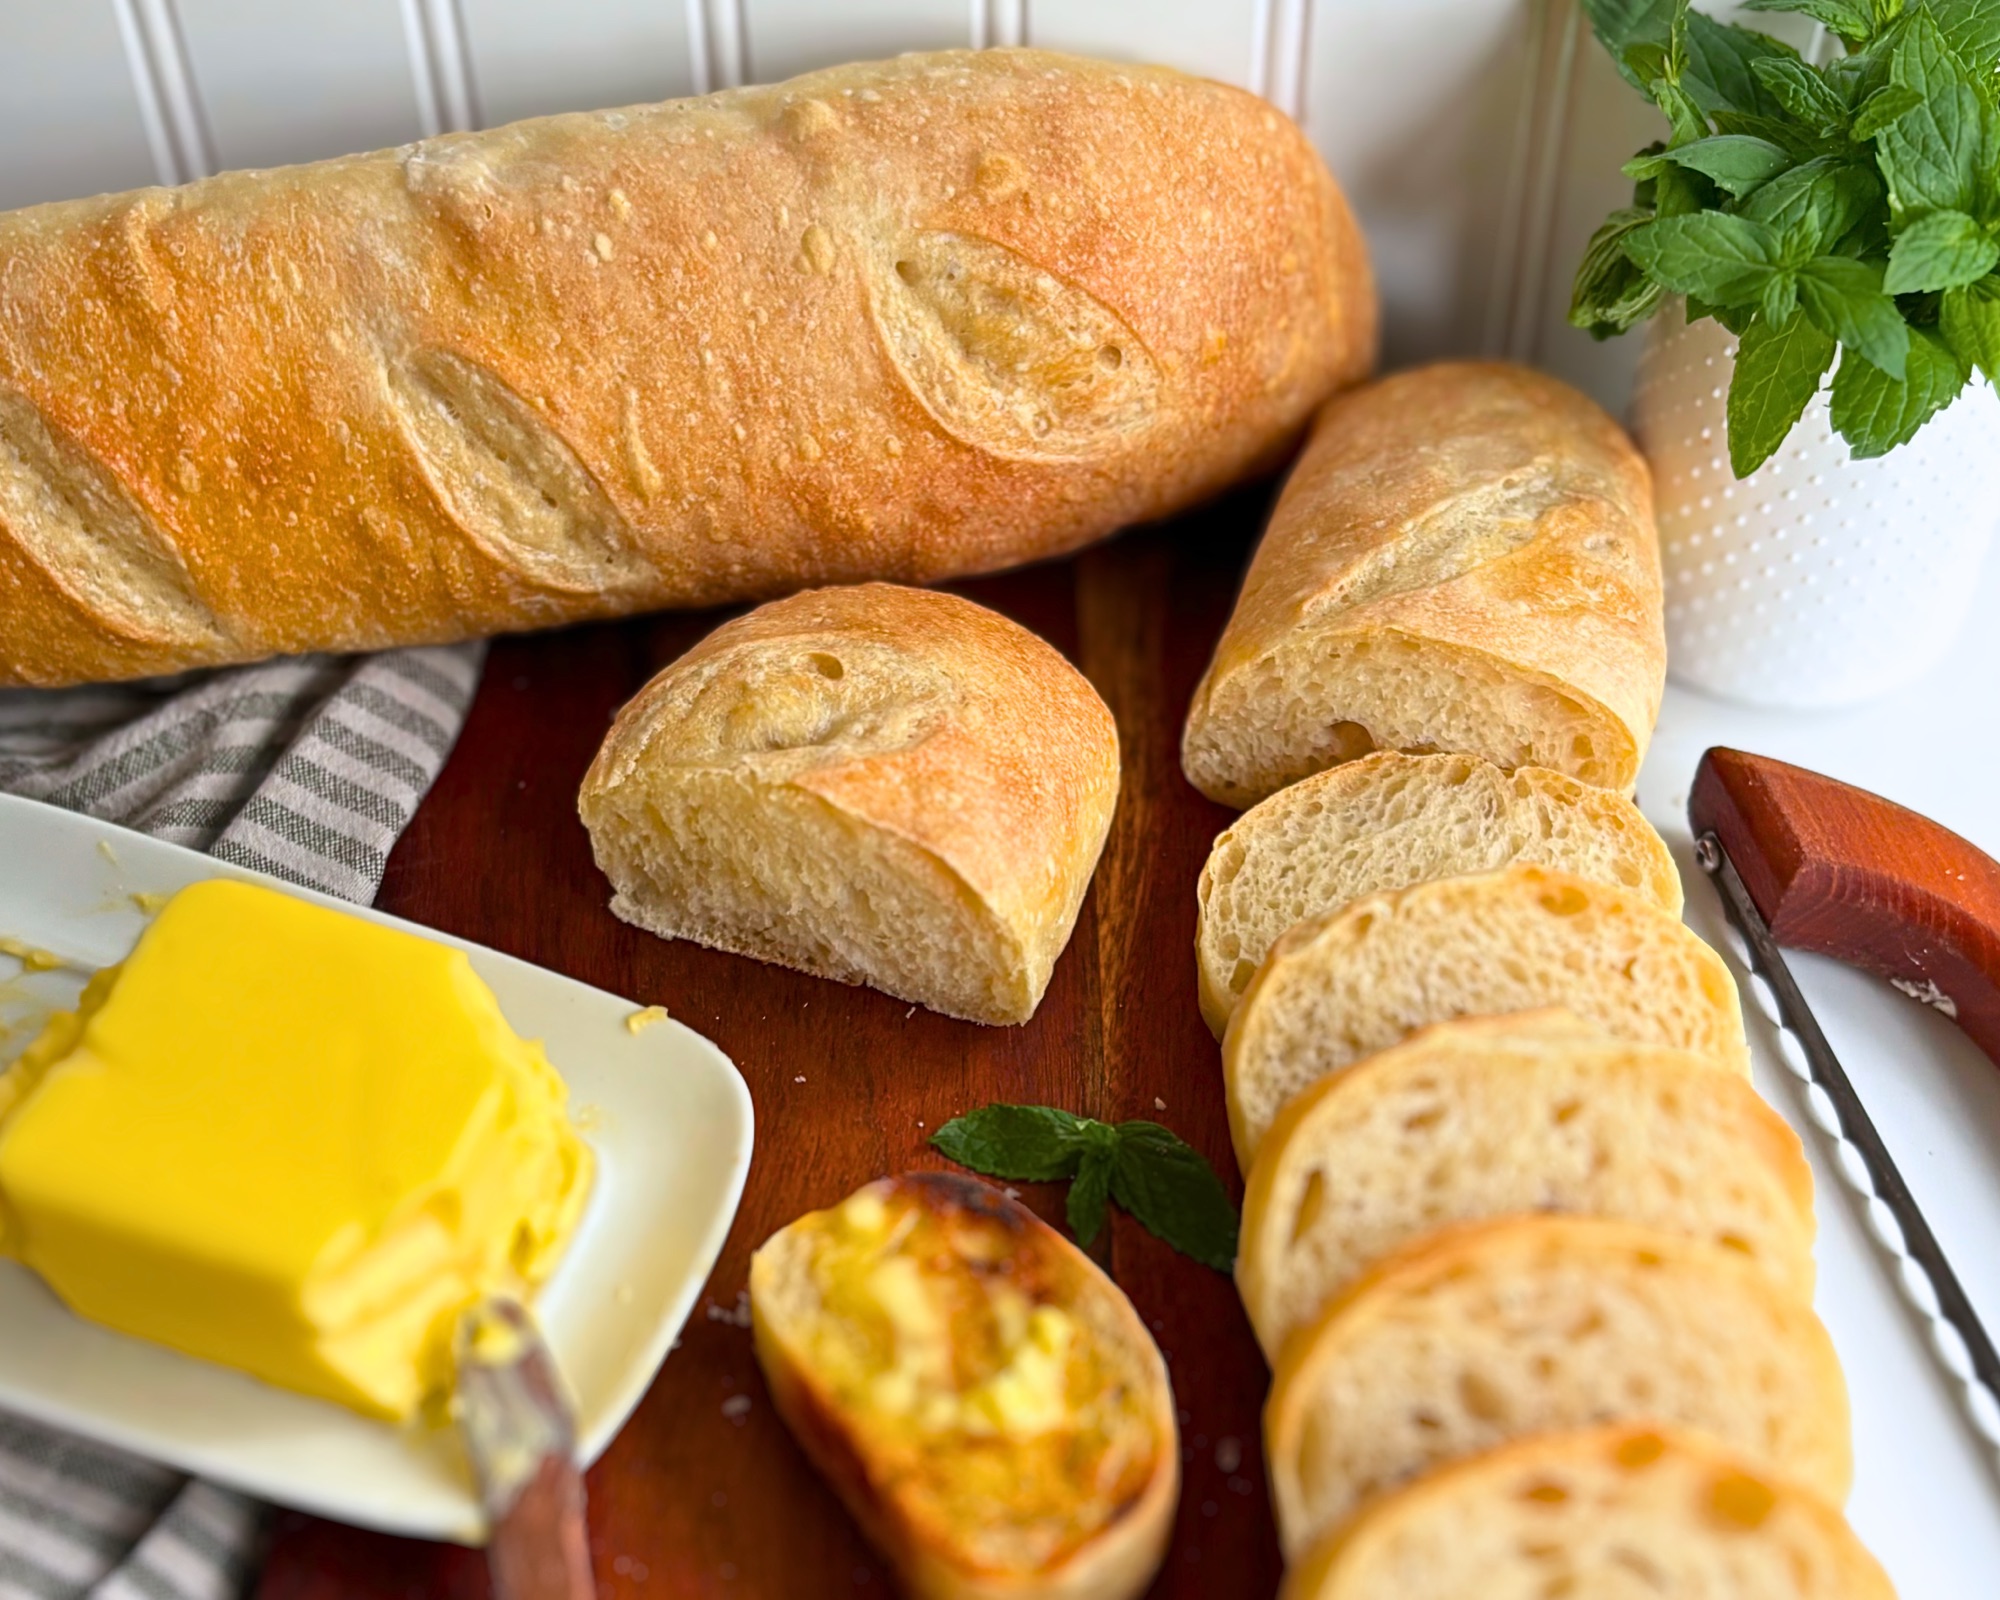
My sourdough focaccia is the dough behind every pull-apart focaccia on this blog and one of the easiest breads you can work with. There is almost always a bowl of it rising somewhere in my kitchen. One morning I was standing over a fully risen bowl and wondered whether that same dough could become something other than focaccia. What I wanted was a crusty loaf I could slice for bruschetta, tear apart at the dinner table, or butter while it was still warm, and I wanted it without starting a separate recipe, pulling out a mixer, or buying a baguette pan I would use twice a year.
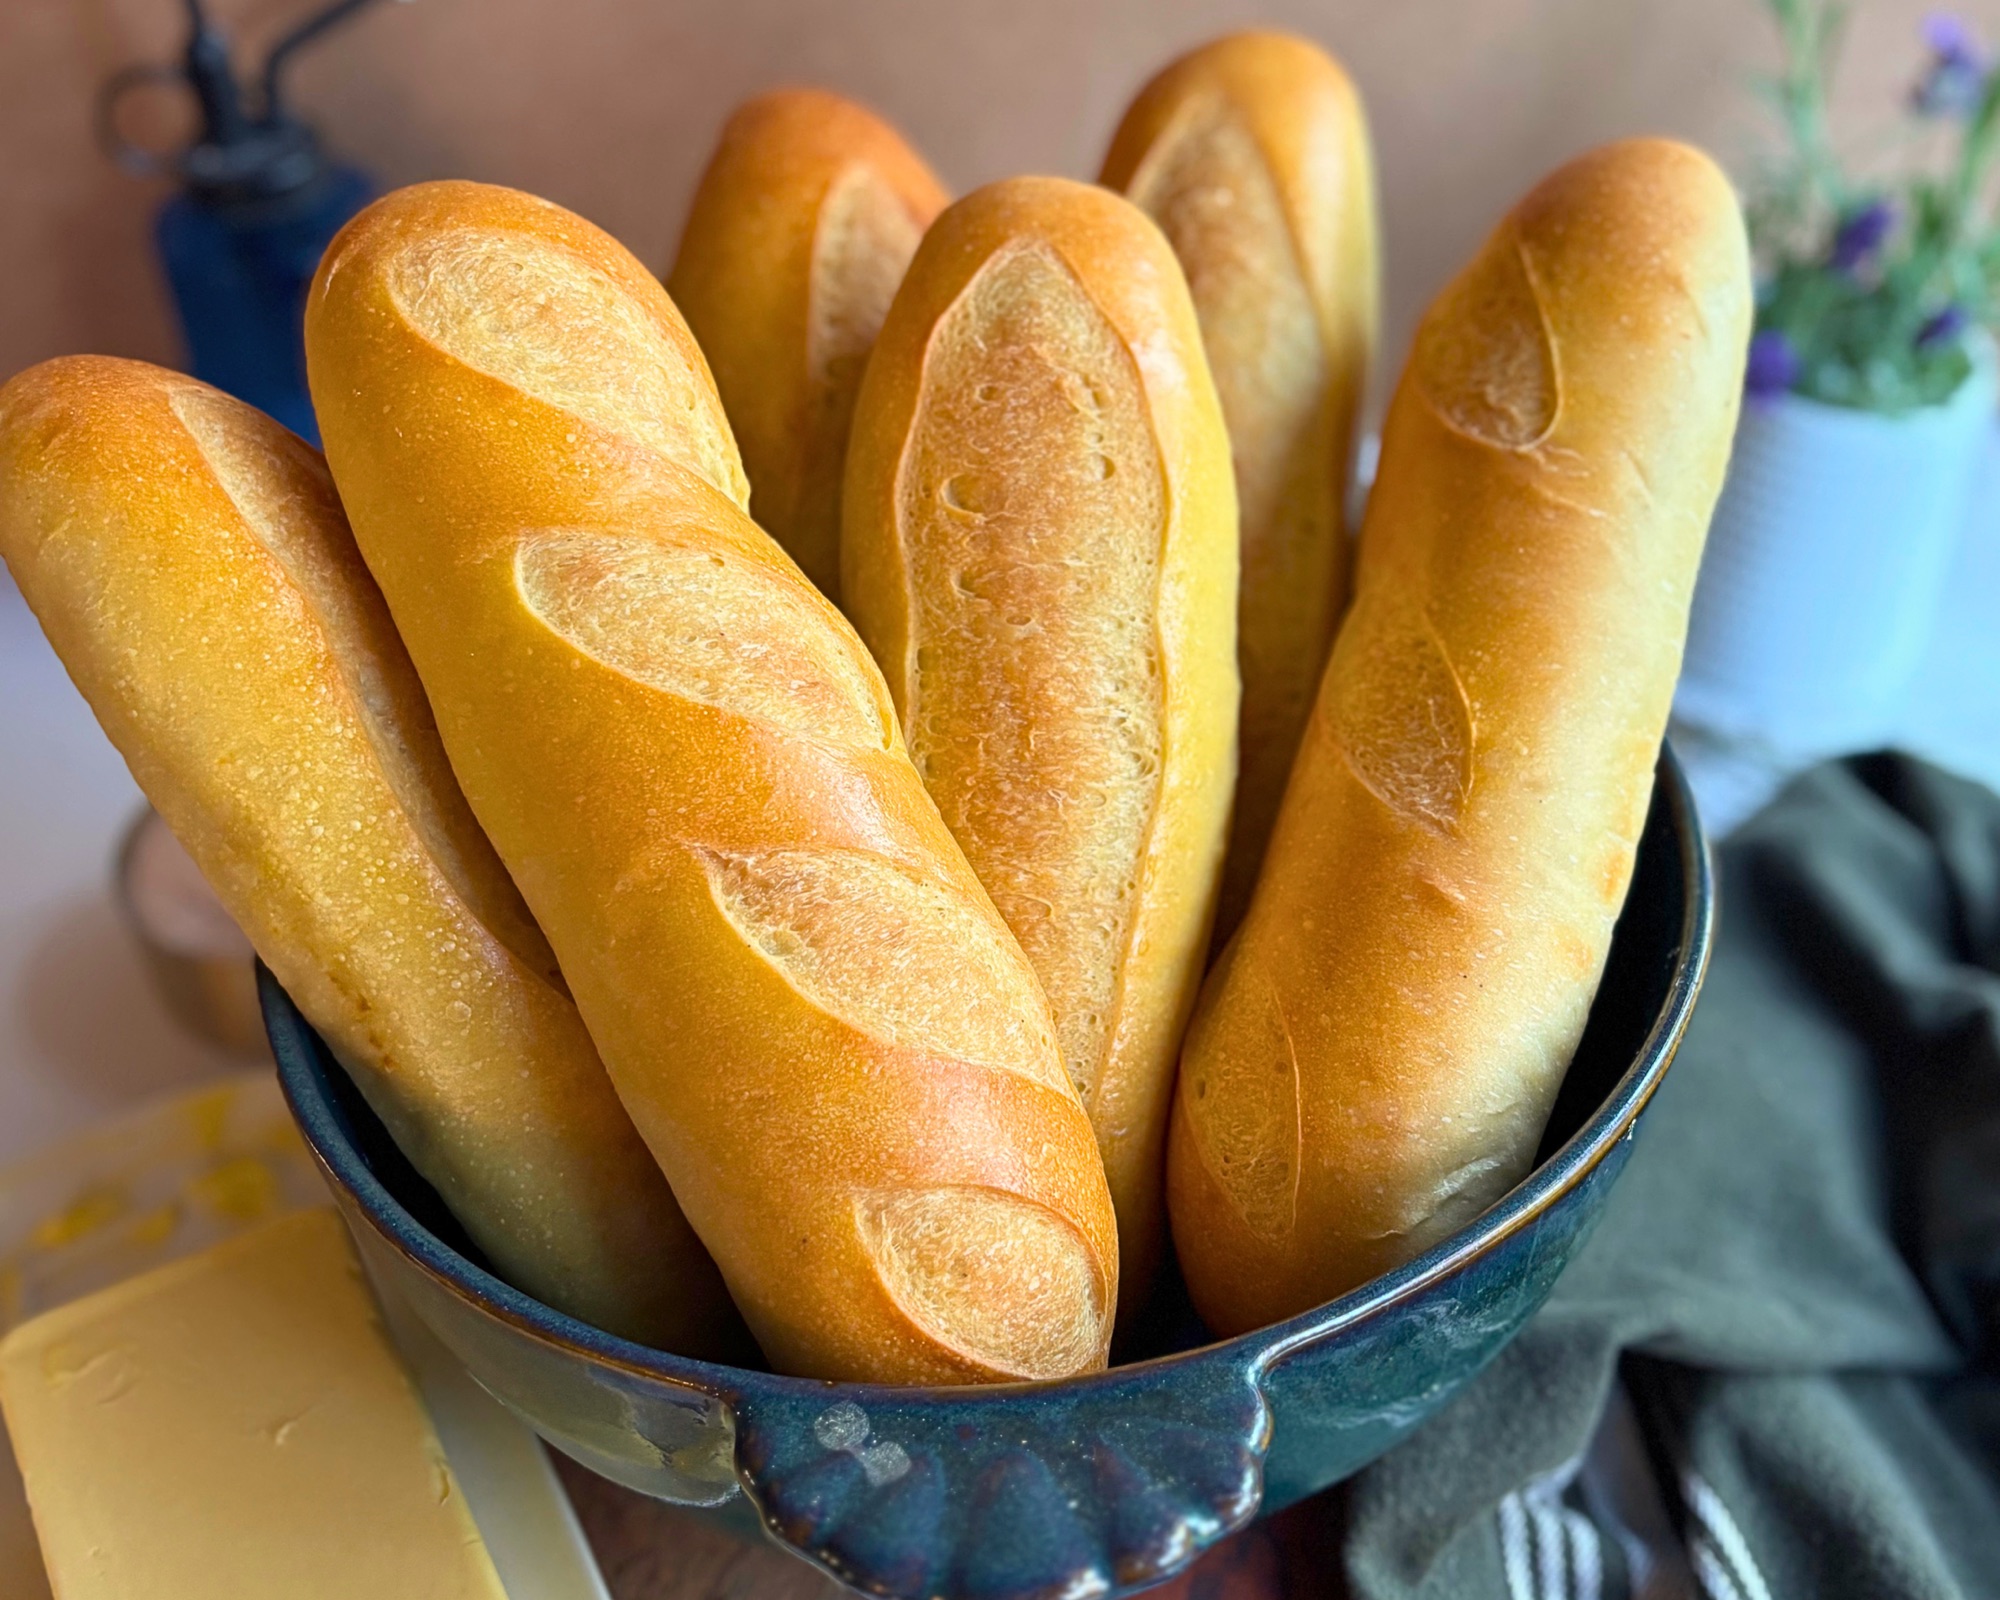
These easy no knead sourdough baguettes are the answer. They are made from the same four ingredients as my Sourdough Focaccia, just flour, water, salt, and active starter, with a little less water so the dough holds a long shape, mixed by hand, strengthened with a single round of stretch and folds, and left to rise overnight. Instead of pressing it into a pan, you divide it in two, shape it the same way I shape my hoagie rolls, and bake it in a homemade sling made from aluminum foil and parchment paper. The result is a golden, crackly crust with an open, glossy crumb, and it comes out of a regular oven with no steam, no Dutch oven, and no special pan.
This is a simple bread, but it is a high hydration dough, which means it asks for a gentle hand, damp hands, and a lightly oiled counter, and I walk you through every one of those details below with photos and videos of each stage. These also took me a few rounds to get right. My first loaves spread flat on the sheet pan, one batch baked up with a line running straight through the middle of the crumb, and I learned the hard way that more scores is not better on a dough this soft. Every one of those lessons is written into this post so your first batch looks like my last one.
Table of Contents
- Why You Will Love These Baguettes
- Baguette or French Bread
- Ingredients You Will Need
- Is Your Starter Ready
- Making the Focaccia Dough
- How to Tell the Bulk Ferment Is Done
- How to Handle High Hydration Dough
- How to Preshape the Dough
- How to Shape the Baguettes
- Shaping on Parchment (The Hammock Method)
- My Baguette Pan Hack
- The Final Proof
- How to Score with Scissors
- Baking Without Steam
- What I Learned Testing These
- Troubleshooting
- Tips for the Best Baguettes
- How to Store and Freeze
- Ways to Serve Them
- Want a Yeast Version
- Shop This Recipe
- More Focaccia and Sourdough Recipes
- Frequently Asked Questions
- Recipe
- Subscribe
Why You Will Love These Baguettes
If you already make sourdough focaccia, you already know how to make most of this recipe, and if you have never baked a baguette before, this is the gentlest way in I have found.

- One dough, two breads. This is my focaccia dough with just a little less water, so if you already make my focaccia, you already know how to make these.
- Truly no knead. One round of stretch and folds and a long overnight rise build all the structure the dough needs, so there is no mixer and no kneading at any point.
- Four ingredients. Flour, water, salt, and starter. There is no oil, sugar, or butter in the dough, which is exactly what gives you that crackly crust.
- No steam and no Dutch oven. They bake uncovered on a regular sheet pan, which means no water pans, no ice cubes, and no burns.
- No baguette pan. A few ropes of foil and a sheet of parchment do the same job and cost nothing.
- A crumb worth showing off. High hydration dough gives you that open, glossy, irregular crumb that looks like it came from a bakery.
Baguette or French Bread
I went back and forth on what to call these, and I landed on baguettes for a specific reason. In most American kitchens, French bread means the soft grocery store loaf, which is usually made with a little sugar and fat to keep it tender, while a baguette is a lean bread made from nothing more than flour, water, salt, and leavening. My focaccia dough is a lean dough with no oil in it at all, so it belongs on the baguette side of that line.

That said, a traditional Parisian baguette is skinnier and longer than what I make here, with more crust in every bite. Mine bake up a little wider, which gives you a rustic loaf with more of that soft open crumb, and they are the right size for slicing into rounds or splitting for a sandwich. If you want them skinnier, divide the dough into three pieces instead of two and roll them longer, and everything else in the method stays the same.
Ingredients You Will Need
Full amounts are in the recipe card at the bottom of the post, and here is what each ingredient is actually doing in the dough.

- Bread flour. The higher protein in bread flour is what lets a wet dough hold a long shape instead of slumping into a puddle, so it is worth using here.
- Water. I use a little less water here than in my focaccia, which puts this dough at 75 percent hydration. That is still wet enough to give you an open, glossy crumb, but it holds a long shape and handles more easily during shaping than the softer focaccia dough does. If you are comfortable working with a higher hydration dough, go ahead and use 400 grams of water, the same as my focaccia, for an even more open crumb.
- Active sourdough starter. Use starter that has been fed and is at its peak, not discard. If you do not have one yet, my Minimal Waste Sourdough Starter guide walks you through building one from scratch.
- Fine sea salt. For flavor, and because salt tightens the gluten and keeps the long overnight ferment in check.
- A little olive oil and water for shaping. Neither one goes into the dough. A thin film of oil on the counter keeps the dough from sticking, and damp hands let you handle it without tearing it.
Is Your Starter Ready
Everything about this bread, from the overnight rise to the final proof to the oven spring, depends on starting with a strong starter, so this is worth checking before you mix anything.
Your starter is ready when it has at least doubled since its last feeding, looks bubbly all the way through rather than just on top, and smells pleasantly sour and yeasty. If you are not sure, drop a small spoonful into a glass of water, and if it floats, it is ready to use. A starter that is sluggish or past its peak will still raise the dough eventually, but the bulk ferment will take longer, the loaves will proof more slowly, and you will lose some of that open crumb.
Making the Focaccia Dough
The dough is made the same way I make my Sourdough Focaccia, and it only needs a little over an hour of mostly hands off time before you cover the bowl and leave it overnight.
Start by putting the flour, water, active starter, and salt into a large bowl and mixing well until there is no dry flour left anywhere. The dough will be very wet and sticky at this point, and that is exactly right, so resist the urge to add more flour. Cover the bowl and let it rest for an hour, which gives the flour time to fully absorb the water and the gluten time to start forming on its own.
After the rest, do one round of stretch and folds. With damp hands, grab one side of the dough, stretch it up as far as it will go without tearing, and fold it over the center, then rotate the bowl a quarter turn and repeat. Keep going around the bowl, stretching and folding, until the dough comes together and starts to feel taut in your hands, which usually takes a few trips around. That is the only round you need. It will never feel like a stiff bread dough, and it is not supposed to, because the long overnight ferment does the rest of the work that kneading would normally do.
Once the dough feels taut, finish with one slap and fold. Lift the dough out, slap it down onto the counter, fold it over itself, and set it back in the bowl with the same side facing down. Cover the bowl and leave it at room temperature overnight.
How to Tell the Bulk Ferment Is Done
This is the one stage of the recipe where the clock will steer you wrong, because how long it takes depends on your kitchen temperature and the strength of your starter, so it is worth learning to read the dough itself.

The dough is ready when it has doubled or even tripled in size, the top is domed and bubbly, and the whole mass is very jiggly when you give the bowl a gentle shake. When you run a spatula or a damp hand around the edge of the bowl, the dough should pull away from the sides easily. In a warm kitchen that can happen in about 8 hours, while a cool kitchen can take up to 14.
When you turn it out, it should feel airy, loose, and full of gas, like the dough in the photo above. If it still feels dense and tight, or the top is flat instead of domed, give it more time before you move on, since an under fermented dough will not proof well in the slings and bakes up tighter in the crumb.

How to Handle High Hydration Dough
The shaping in this recipe is simple, but because the dough is so wet, how you touch it matters more than what you do with it. These are the habits that make the difference between a dough that cooperates and one that sticks to everything.
- Keep your hands damp, not dripping. Run your hands under the tap and flick the water off before you touch the dough, and do it again any time the dough starts to grab at your fingers. Dripping wet hands add too much water to the surface and make it slippery and harder to seal.
- Use only a thin film of oil on the counter. Just enough to keep the dough from sticking. This is the most important detail in the whole recipe, because too much oil keeps the layers from sealing during shaping and leaves a line running through the baked crumb.
- Use a gentle hand. Lift and fold the dough rather than pulling or tugging it, and keep your movements light and quick. The gas trapped in the dough overnight is what gives you an open crumb, so every rough touch costs you a little of it.
- Let your bench scraper do the heavy lifting. It divides the dough cleanly, gets underneath it without tearing, and moves the shaped loaves into the slings without stretching them out of shape.
- Work from the top surface. Fold the dough over itself and press the seams with your fingertips, rather than squeezing it in your hands or rolling it hard against the counter.
How to Preshape the Dough
The preshape is where you take a loose, bubbly mass of focaccia dough and give it a direction, so that by the time you do the final shaping, the dough is already organized into a log instead of fighting you.
Gently fold each piece of dough into a log with damp hands on a lightly oiled counter, then let it rest for 15 minutes so the gluten can relax before shaping.
Watch how little pressure goes into this step. The goal is simply to fold the dough into a log, so the movements stay light and the bubbles stay inside.

- Turn out and divide. Spread a thin film of olive oil across a clean counter, then tip the bowl over and let the dough fall out on its own, helping it along with a damp hand or a bench scraper rather than pulling it. Divide it into two equal pieces with the bench scraper, and weigh them if you want two loaves that bake evenly. Each piece will be about 490 grams.
- Ease into a rectangle. With damp hands, gently coax one piece into a rough rectangle with the long side running away from you, about as long as you want your finished baguette. Slide your fingers underneath the edges and ease them outward rather than pressing down on the top.
- Fold the long sides in like a letter. Lift one long side, stretch it gently, and lay it over the center of the dough, then lift the other long side and lay it over the top so it overlaps the first fold.
- Roll it over. Roll the log over so the seam sits underneath on the counter, and repeat with the second piece.
Then leave both pieces alone, uncovered, for about 15 minutes. That rest lets the gluten relax after the folding, and it is the difference between a dough that rolls up smoothly in the final shape and one that keeps springing back while you work.

How to Shape the Baguettes
If you have made my Sourdough Hoagie Rolls, this is the same idea, which is to roll the dough up on itself one small turn at a time and seal it as you go, so the loaf has tension along its whole length.
Fold a narrow strip of dough over at a time and press each seam down firmly with your fingertips, then pinch the final seam closed and gently push the log together until it is even from end to end.
Pay attention to the fingertips in this video. Every fold gets pressed down into the dough beneath it before the next fold begins, and that pressing is what keeps the layers from separating in the oven.

- Flip seam side up. Dampen your hands again, then flip the rested log over so the seam from the preshape faces up. Gently even out the shape with your fingertips if one end is thicker than the other.
- Make the first fold. Starting at the far long edge, lift a narrow strip of dough, about an inch wide, and fold it over onto itself along the full length of the log.
- Seal it with your fingertips. Press that fold down firmly into the dough beneath it, working from one end to the other with the pads of your fingers.
- Keep folding and sealing toward you. Fold another narrow strip over, press it down into the one before it, and keep going a little at a time. Small folds give you a tighter, more even loaf than one or two big ones.
- Pinch the final seam. When you reach the near edge, pinch the seam closed along the entire length of the loaf, including right at the two ends.
- Even out the log. A dough this soft will not roll back and forth under your palms, so instead, cup your hands around the loaf and gently push it together from the sides and ends until it is an even log from one end to the other.
How much you press while you shape is up to you, and it decides the crumb you end up with. A light touch that leaves most of the bubbles alone gives you a more open, airy baguette with big irregular holes, while pressing out more of the bubbles gives you a denser, more even crumb that holds up better for sandwiches and garlic bread. Neither is wrong, so shape for the bread you want to eat.
To move the loaf onto the pan, scoop it up with a bench scraper, or slide your hands under the ends and tuck them underneath as you lift. Either way, it goes into the parchment sling seam side down, and both methods work fine, so use whichever feels steadier in your hands.
Shaping on Parchment (The Hammock Method)
If moving a soft, freshly shaped baguette into the pan makes you nervous, this is the trick for you. Instead of shaping on the counter and then trying to lift the loaf, you do the final shaping right on a strip of parchment paper, then pick the paper up by its long edges like a little hammock and lower the whole thing into the pan. The dough never leaves the paper, so it never gets stretched, dented, or deflated on the way.

I came up with this while filming a bake, and it has quickly become my favorite way to make these. Misting the parchment with water keeps the dough from sticking to the paper while you shape, and it gives you a little more control when you fold and roll a dough this soft. It works with either size of loaf and needs nothing more than the foil ropes from the pan hack and a spray bottle of water.


- Set up the foil ropes. Lay the foil ropes on the sheet pan exactly as described in the pan hack, but skip the large sheet of parchment, since each loaf will bring its own.
- Cut a strip of parchment for each loaf. Make each strip a few inches longer than your finished baguette and wide enough that you can hold both long edges with the loaf sitting in the middle.
- Mist the parchment well. Spray the strip generously with water so it is evenly damp from end to end, without leaving puddles.
- Dampen your hands. Wet your hands with water, or rub on a very light film of oil if you prefer. Keep any oil light, since too much keeps the folds from sealing and leaves a line through the crumb.
- Shape right on the paper. Set a rested preshaped log on the parchment. A tip to begin with it closer to the edge you’re going to be rolling the dough away from. The goal is to have it end up in the middle of the parchment once done. Shape it exactly as described in the shaping section, folding over a narrow strip at a time and pressing each seam down firmly, then pinching the final seam closed and gently pushing the log together until it is even from end to end. Finish with the loaf seam side down in the center of the strip.
- Use a Bench Scraper. I like to take a oiled or damp bench scraper. If the dough needs to be pushed into the middle of the parchment paper all you have to do is place it at the base of the edge and push and just work your way up till it’s where it needs to be.
- Lift it like a hammock. Grab both long edges of the parchment, lift the loaf straight up, and lower it between the foil ropes on the pan. The paper settles around the loaf and the edges stand up along the foil, giving it a wall on each side.

From here, everything is exactly the same as the rest of the recipe. The loaves proof, get scored, and bake right in their parchment hammocks, and the paper peels away cleanly once they come out of the oven. Both methods give you the same baguette, so use the single large sheet if you are comfortable moving the loaves by hand, and use the hammock if you would rather not touch the shaped dough again at all.

My Baguette Pan Hack
My first two loaves went onto a flat sheet pan with no support, and they spread outward instead of rising up, which left me with something closer to a long ciabatta than a baguette. A dough this wet needs walls, and that is exactly what a baguette pan provides, but you can build the same thing in about two minutes with what is already in your kitchen. Set this up before you start shaping so the loaves can go straight into it.

- Tear off three long sheets of aluminum foil and roll or squeeze each one into a firm rope about as long as your sheet pan. Pack them tight, since a loose rope will flatten under the weight of the dough.
- Lay the ropes lengthwise down the sheet pan, one along each long side and one down the middle, so the pan is divided into two equal channels.
- Lay one sheet of parchment paper over the top and let it drape loosely, without pressing it down into the channels.
- Set each shaped baguette seam side down into a channel. The weight of the dough settles the parchment into the valley on its own, and the foil becomes the walls that push the loaf up instead of out.

The dough never touches the foil, the parchment peels away cleanly after baking, and you can space the ropes closer together or farther apart for skinnier or wider loaves. The difference between my unsupported loaves and the ones baked in the slings was enough that I would not make these without it. If you do bake them freeform, keep your scoring light, which I cover in the scoring section below.

The Final Proof
After shaping, the loaves need time in their slings to puff back up before they go into the oven, and getting this stage right is what gives you a fluffy, open baguette.

Cover the pan loosely and let the loaves proof at room temperature until they look fluffy, puffy, and visibly fuller, with the sides rounding out to fill more of each channel, like the after photo above. A gentle press with a floured fingertip should leave a dent that fills back in slowly.
The timing in the recipe card is a guide rather than a rule, because sourdough runs on wild yeast instead of the predictable commercial yeast in a packet. A warm kitchen will speed the proof up, a cool one will slow it down, and the strength of your starter and how far your dough fermented overnight both play a part as well. Let the loaves get fluffy and full, but do not let them sit much past that point, since an overproofed loaf spends the gas it needs for oven spring and can sag when you score it. Start preheating your oven toward the end of the proof so it is ready when they are.
How to Score with Scissors
I score these with kitchen scissors instead of a blade, and it has been the most forgiving way I have found to cut a dough this soft.

A razor tends to drag on a high hydration surface, while scissors make a clean snip every time. Hold them at a low angle almost parallel to the loaf, snip a diagonal cut about half an inch deep, and space your cuts evenly down the length of the baguette. Work quickly and score right before the pan goes into the oven, so the loaves do not sit and spread with their cuts open.
The bigger lesson was how many cuts to make. When I put six or seven short scores on a loaf, each one opened only a little and the loaf looked busy, but when I cut it back to four, each score opened into a wide, clean oval with a pale center, which is the look you see in these photos. Fewer, longer cuts give each opening more room to spread, so four per loaf is where I have landed.
If you skip the pan hack and bake your baguettes freeform on a flat sheet pan, scoring matters even more. Without walls to hold them, every cut is another place for the loaf to relax and spread, so keep it to three or four cuts at most. You can also skip scoring entirely, which helps a freeform loaf hold more of its shape and gives you a rustic, naturally split crust instead.
Baking Without Steam
Most baguette recipes call for steam in the first part of the bake, usually from a pan of boiling water or a handful of ice cubes thrown into a hot oven. I wanted to skip that entirely, and these bake beautifully without it.

I also tested baking them covered for the first several minutes, which traps the dough’s own moisture as a kind of built in steam. The uncovered loaves came out with nicer color and a better crust, so that is how I make them now. They go into a hot oven at a single steady temperature from start to finish, and the times and temperatures are all in the recipe card.
They are done when the crust is a deep, even golden brown and an instant read thermometer in the center reads between 205 and 210 degrees. If they are fully baked but you want more color, give them a few extra minutes in the oven rather than turning on the broiler. I tried the broiler once, forgot about them for a minute, and came back to a very dark stripe down the top of both loaves.
Once they are out of the oven, lift them out of the parchment and onto a wire rack right away so the bottoms stay crisp, and give them at least half an hour before you slice, since the crumb is still setting as the loaves cool.
What I Learned Testing These
These went through several bakes before I was happy with them, and the mistakes along the way are the most useful part of this recipe, so here is what happened.

- Skip the broiler. Like the picture above. I wanted to get a little more color on the top, but lost track of time and ended up with a toasted loaf. This is the way I prefer my color on my loaf. But adjust as needed. A few extra minutes of baking gives more even color than a broiler, with no risk of scorching.
- The line through the middle. I used about two tablespoons of oil on the counter, and when I rolled the dough up, the oiled surface ended up on the inside, where it could not fuse to itself. Cutting the oil down to a thin film fixed it completely, which you can see in every other crumb shot in this post.
- Freeform loaves spread. Without the foil and parchment sling, a dough this wet can spreads sideways and bakes up wider. The sling is what gave me height.
- More scores is not better. Four cuts per loaf opened far more dramatically than six or seven.
- Uncovered beat covered. Baking them covered for part of the time did not improve anything, and the uncovered loaves had better color.
Troubleshooting
If something did not go the way you hoped, the cause is almost always one of these, and every one of them is easy to fix on the next batch.

- The dough is too sticky to shape. Dampen your hands more often, lean on your bench scraper, and make sure the bulk ferment was truly finished, since an under fermented dough is stickier and weaker. If wet doughs are new to you, keep at it, since it gets easier with every batch.
- The dough tears while shaping. It needs more rest. Give the preshaped logs another 5 to 10 minutes and try again with a lighter touch.
- The loaves spread flat. Either they were not supported or they overproofed. Use the foil and parchment sling, pack the foil ropes tight, and bake the loaves while they still have some spring left.
- There is a line through the crumb. Too much oil on the counter kept the layers from sealing. Use a thin film of oil, keep your hands damp with water instead, and press each fold down firmly as you shape.
- The scores did not open. Too many cuts, cuts that were too shallow, or an overproofed loaf. Make four cuts about half an inch deep and score right before baking.
- The crust is pale. Leave them in the oven a few minutes longer and make sure your oven is fully preheated before they go in.
- The center is gummy. They were underbaked or sliced too soon. Bake to 205 to 210 degrees inside and let them cool at least 30 minutes.
- The crumb is tight and dense. The bulk ferment or the final proof was cut short, or too much gas was pressed out during shaping. Watch the dough for the signs above rather than the clock, and use a lighter hand when you shape.
Tips for the Best Baguettes
These are the small things that make the biggest difference, most of which I learned by getting them wrong first.
- Start with a starter at its peak. Doubled, bubbly, and floating in water is what you want.
- Do not add flour to the sticky dough. The stickiness is part of what gives you an open crumb, and the stretch and folds and long ferment take care of the strength.
- Use a thin film of oil on the counter, not a pour. Heavy oil is the cause of that line through the crumb, so spread just enough to stop sticking and no more.
- Keep your hands damp, not dripping. Water lets you handle a wet dough without it gluing itself to your fingers, and it does not interfere with the layers sealing the way oil does.
- Do not skip the 15 minute rest. It is what lets the dough roll up smoothly instead of springing back.
- Seal every fold as you shape. Pressing each fold into the one before it is what holds the loaf together in the oven.
- Weigh your two pieces. Even loaves bake evenly, and uneven ones leave you with one overbaked and one underdone.
- Take the internal temperature. A high hydration loaf can look done on the outside and still be gummy in the center, so 205 to 210 degrees is the number to trust.
- Let them cool before slicing. The crumb is still setting for a good half hour out of the oven, and slicing too soon smears it.
How to Store and Freeze
These keep just like a loaf of sourdough, so there is no rush to eat them the day you bake them.

Store them at room temperature in a bread bag for several days, the same way you would store any sourdough loaf, and keep them out of the refrigerator, which dries bread out. Whenever you want that fresh baked crunch again, warm a whole baguette in a 350 degree oven for 5 to 8 minutes, or simply slice and toast it.
For longer storage, let the baguettes cool completely, wrap them tightly, and freeze for up to 1 month. I like to slice one before freezing so I can pull out exactly what I need and toast it straight from the freezer.
Ways to Serve Them
My favorite way is the simplest one, which is a thick slice, toasted in a skillet, with good butter and a pinch of flaky salt.

- Butter and flaky salt. Toast the slices in a hot skillet first so the crumb gets crisp and the butter melts into every hole.
- Bruschetta. Toasted rounds topped with chopped tomatoes, basil, garlic, and a drizzle of olive oil.
- Garlic bread. Split a baguette lengthwise, spread it with garlic butter, and bake until golden.
- Crostini. Thin slices brushed with olive oil and baked until crisp, for dips, cheese boards, and soup.
- Sandwiches. Split a loaf lengthwise for a classic ham and butter or a caprese sandwich.
- French toast. Thick slices soak up custard beautifully without falling apart.
- Dipping. Tear off a piece and drag it through olive oil and balsamic.
Want a Yeast Version
You do not need a sourdough starter to make these. The shaping, the pan hack, the scoring, and the bake all carry over to a commercial yeast dough exactly as written, because none of those steps depend on how the dough was leavened.

What changes is the dough and the timing. My Same Day Focaccia is the yeasted version of this exact dough, and it goes from bowl to ready in a few hours instead of overnight. Make that dough, and once it has finished its rise, pick up this recipe at the preshape step. Because a yeasted dough rises faster, keep a closer eye on the final proof, since it may be ready sooner than the sourdough version.
If you would rather build a starter, my Minimal Waste Sourdough Starter guide will get you there with almost nothing thrown away.
Shop This Recipe
These are the tools I actually reach for when I make these. As an Amazon Associate I earn from qualifying purchases at no extra cost to you, which helps support the blog.
- Kitchen scale. For weighing the ingredients and dividing the dough into two even loaves.
- Danish dough whisk. Mixes a wet, shaggy dough in seconds without anything sticking to it.
- Bench scraper. For dividing the dough and scooping the shaped loaves into their slings.
- Half sheet pan. The base for the foil and parchment pan hack.
- Heavy duty aluminum foil. Rolls into firm ropes that hold their shape under the dough.
- Parchment paper. Forms the slings and peels cleanly off the baked loaves.
- Kitchen scissors. My favorite way to score a soft, wet dough.
- Instant read thermometer. The only reliable way to know a high hydration loaf is baked through.
- Wire cooling rack. Keeps the bottoms crisp while the loaves cool.
- Bread knife. A long serrated blade cuts through the crust without crushing the crumb.
- Bread flour. The strength that lets a wet dough hold a long shape.
More Focaccia and Sourdough Recipes
If you have a bowl of focaccia dough rising, here are more ways to use it, plus a few of my favorite sourdough breads.
- Sourdough Focaccia: The Easiest No Knead Bread
- Focaccia Pizza Squares
- Cinnamon Roll Pull-Apart Focaccia
- Sticky Bun Pull-Apart Focaccia
- Pumpkin Spice Pull-Apart Focaccia with Brown Butter Maple Glaze
- High Protein Sourdough Hoagie Rolls
- The Easiest Cinnamon Swirl Sourdough Bread
Frequently Asked Questions
These are the questions that came up most while I was testing these and sharing them.

Can I really make baguettes from focaccia dough?
Yes. My focaccia dough is a lean, high hydration dough made from flour, water, salt, and starter, which is the same basic makeup as a baguette dough. The difference is entirely in the shaping and the bake, so the same bowl can become either one.
Will this work with a focaccia dough that has olive oil mixed in?
It will still bake into a loaf, but expect a softer crust and faster browning, since oil in the dough tenderizes the crumb and colors quickly. My dough has no oil in it, which is part of why these come out crackly.
Why is my dough so sticky?
Because it is a 75 percent hydration dough, and that is normal. Do not add flour. Keep your hands damp, use a bench scraper, and use a thin film of oil on the counter, and it will become much easier to handle after the overnight ferment.
Why is there a line through the middle of my baguette?
That line is a seam that never fused, almost always because there was too much oil on the counter during shaping. The oiled surface ends up rolled inside the loaf, where it cannot stick to itself. Use only a thin film of oil, and keep your hands damp with water instead.
Do I need steam to bake baguettes?
Not for these. They bake uncovered at a single steady temperature with no steam, and they still come out with a golden, crackly crust and good oven spring.
Do I need a baguette pan?
No. Three ropes of aluminum foil under a sheet of parchment paper make two channels that support the loaves exactly the way a baguette pan does. The full method is in the pan hack section. You can also bake them freeform on a parchment lined sheet pan, but keep the scoring to three or four cuts, or skip scoring altogether, so they hold their shape better.
How long should the final proof take?
Usually about 1 1/2 to 2 hours, but watch the loaves rather than the clock. Your kitchen temperature, the strength of your starter, and how far the dough fermented overnight all change the timing. They are ready when they look fluffy and full and a gentle fingertip press fills back in slowly.
Can I use all purpose flour?
You can, but the dough will be slacker and harder to hold in a long shape, and the loaves may spread more. If you use all purpose flour, the sling becomes even more important for keeping the shape.
Why did my scores not open?
The two most common reasons are too many cuts and cuts that are too shallow. Four scores per loaf, about half an inch deep, gives each one room to open wide. An overproofed loaf will also hold its scores shut, so bake them while they still have some spring left.
How do I know when they are done?
The crust should be a deep, even golden brown, the bottom should sound hollow when you tap it, and an instant read thermometer in the center should read 205 to 210 degrees.
Can I make these with yeast instead of sourdough?
Yes. Make my Same Day Focaccia dough, then follow this recipe from the preshape on. The full explanation is in the yeast version section.
How long do these baguettes keep?
They keep for several days at room temperature in a bread bag, just like any sourdough loaf. Warm them in the oven or slice and toast them to bring back that crackly crust, and freeze them if you want to keep them longer.
Recipe

Easy No Knead Sourdough Baguettes (Using Focaccia Dough)
Equipment
- Large mixing bowl
- Digital Kitchen Scale
- Danish dough whisk or stiff spatula
- bench scraper
- Half sheet pan
- Aluminum foil
- Parchment paper
- Kitchen scissors or bread lame
- Instant read thermometer
- Wire cooling rack
Ingredients
- 500 grams bread flour 4 cups plus 3 tablespoons
- 375 grams water room temperature (1 1/2 cups plus 1 tablespoon and 1 teaspoon)
- 75 grams active sourdough starter fed and at its peak (1/4 cup plus 1 tablespoon)
- 10 grams fine sea salt 1 2/3 teaspoons
- Olive oil for the counter just enough for a thin film
- Water for dampening your hands while shaping
Instructions
- Make sure your starter is active and at its peak before you begin. It should have at least doubled since its last feeding and be bubbly throughout, and a small spoonful should float in a glass of water.
MIX
- In a large bowl, combine the bread flour, water, active sourdough starter, and salt. Mix well with a Danish dough whisk or stiff spatula until no dry flour remains. The dough will be very wet and sticky, which is exactly right, so do not add more flour. Cover and let rest for 1 hour.
STRETCH & FOLD
- With damp hands, do one round of stretch and folds. Grab one side of the dough, stretch it up as far as it will go without tearing, and fold it over the center, then rotate the bowl a quarter turn and repeat. Keep working around the bowl until the dough comes together and feels taut, which usually takes a few trips around. This is the only round of stretch and folds. The dough will not feel like a stiff bread dough, and that is normal.
- Once the dough feels taut, finish with one slap and fold. Lift the dough, slap it down onto the counter, fold it over itself, and return it to the bowl with the same side facing down. Cover the bowl.
BULK PROOF
- Leave the covered bowl at room temperature for 8 to 14 hours, depending on your kitchen temperature. The dough is ready when it has doubled or even tripled in size, is domed and bubbly on top, is very jiggly when you gently shake the bowl, and pulls away easily from the sides when you run a damp hand or spatula around the edge. Watch the dough rather than the clock.
- While the dough finishes, build the pan hack. Roll three long sheets of aluminum foil into firm ropes about as long as your half sheet pan. Lay them lengthwise down the pan, one along each long side and one down the middle, so the pan is divided into two equal channels. Lay one sheet of parchment paper loosely over the top without pressing it into the channels.
SHAPE
- Spread a thin film of olive oil over a clean counter, just enough to keep the dough from sticking, and keep your hands damp, not dripping, for every step from here on by running them under the tap and flicking the water off. Do not use more than that, since excess oil prevents the dough from sealing to itself during shaping and leaves a line through the baked crumb. Tip the bowl over and let the dough fall out onto the counter on its own, helping it with a damp hand or bench scraper rather than pulling it, and handle it gently from here on so you keep the gas trapped inside.
- Divide the dough into two equal pieces with a bench scraper.
- With damp hands, ease one piece into a rough rectangle with the long side running away from you. Fold one long side into the center, fold the other long side over the top like a letter, and roll the log over so the seam sits underneath. Repeat with the second piece. Let both rest uncovered for 15 minutes. (Shaping video in the pre-shaping section of the blog)

- If you are nervous about moving a soft, shaped loaf, see the Parchment Hammock Method in the notes before you start shaping, since it lets you final shape right on parchment and lift the loaf into the pan without handling it.
- Flip one rested log seam side up. Starting at the far long edge, fold a narrow strip of dough over onto itself and press it down firmly with your fingertips along the full length. Keep folding and pressing toward yourself a little at a time, sealing each new fold into the one before it. For a more open, airy crumb, use a light touch and leave most of the bubbles alone. For a denser, more even crumb, press out more of the bubbles as you go. (Shaping video in the shaping section of the blog)

- When you reach the near edge, pinch the final seam closed along the full length of the loaf, including the ends. Then cup your hands around the loaf and gently push it together from the sides and ends until it is an even log, since a dough this soft will not roll back and forth under your palms.
- Scoop the loaf up with a bench scraper, or slide your hands under the ends and tuck them underneath as you lift, and set it seam side down into one of the parchment channels. Repeat the shaping with the second log and set it in the other channel.
- Cover loosely and let the loaves proof at room temperature for 1 1/2 to 2 hours, until they look fluffy, puffy, and visibly fuller, with the sides rounding out into the channels. A warm kitchen will speed this up and a cool one will slow it down, and the strength of your starter and how far the bulk ferment went both change the timing too, so watch the loaves rather than the clock. Do not let them go much past this point, since an overproofed loaf loses its oven spring. A gentle press with a floured fingertip should leave a dent that fills back in slowly. Preheat the oven to 430 degrees Fahrenheit for the last 30 to 45 minutes of the proof.
SCORE
- Using kitchen scissors held at a low angle, almost parallel to the loaf, make four diagonal snips down the length of each baguette, each about 1/2 inch deep and evenly spaced. Four cuts open wider and cleaner than more.
BAKE
- Bake uncovered with no steam at 430 degrees Fahrenheit for 20 to 25 minutes, until the crust is a deep, even golden brown and an instant read thermometer in the center reads 205 to 210 degrees Fahrenheit. If they are baked through but you want more color, give them a few extra minutes in the oven rather than using the broiler.
- Lift the baguettes out of the parchment and cool on a wire rack for at least 30 minutes before slicing, since the crumb is still setting as it cools.
Notes
Subscribe
Want recipes like this one first? Subscribe for free and I will send new sourdough, focaccia, and high protein recipes straight to your inbox, along with the notes and troubleshooting that do not always make it into the post. It costs nothing, and you can unsubscribe any time.




Leave a Reply