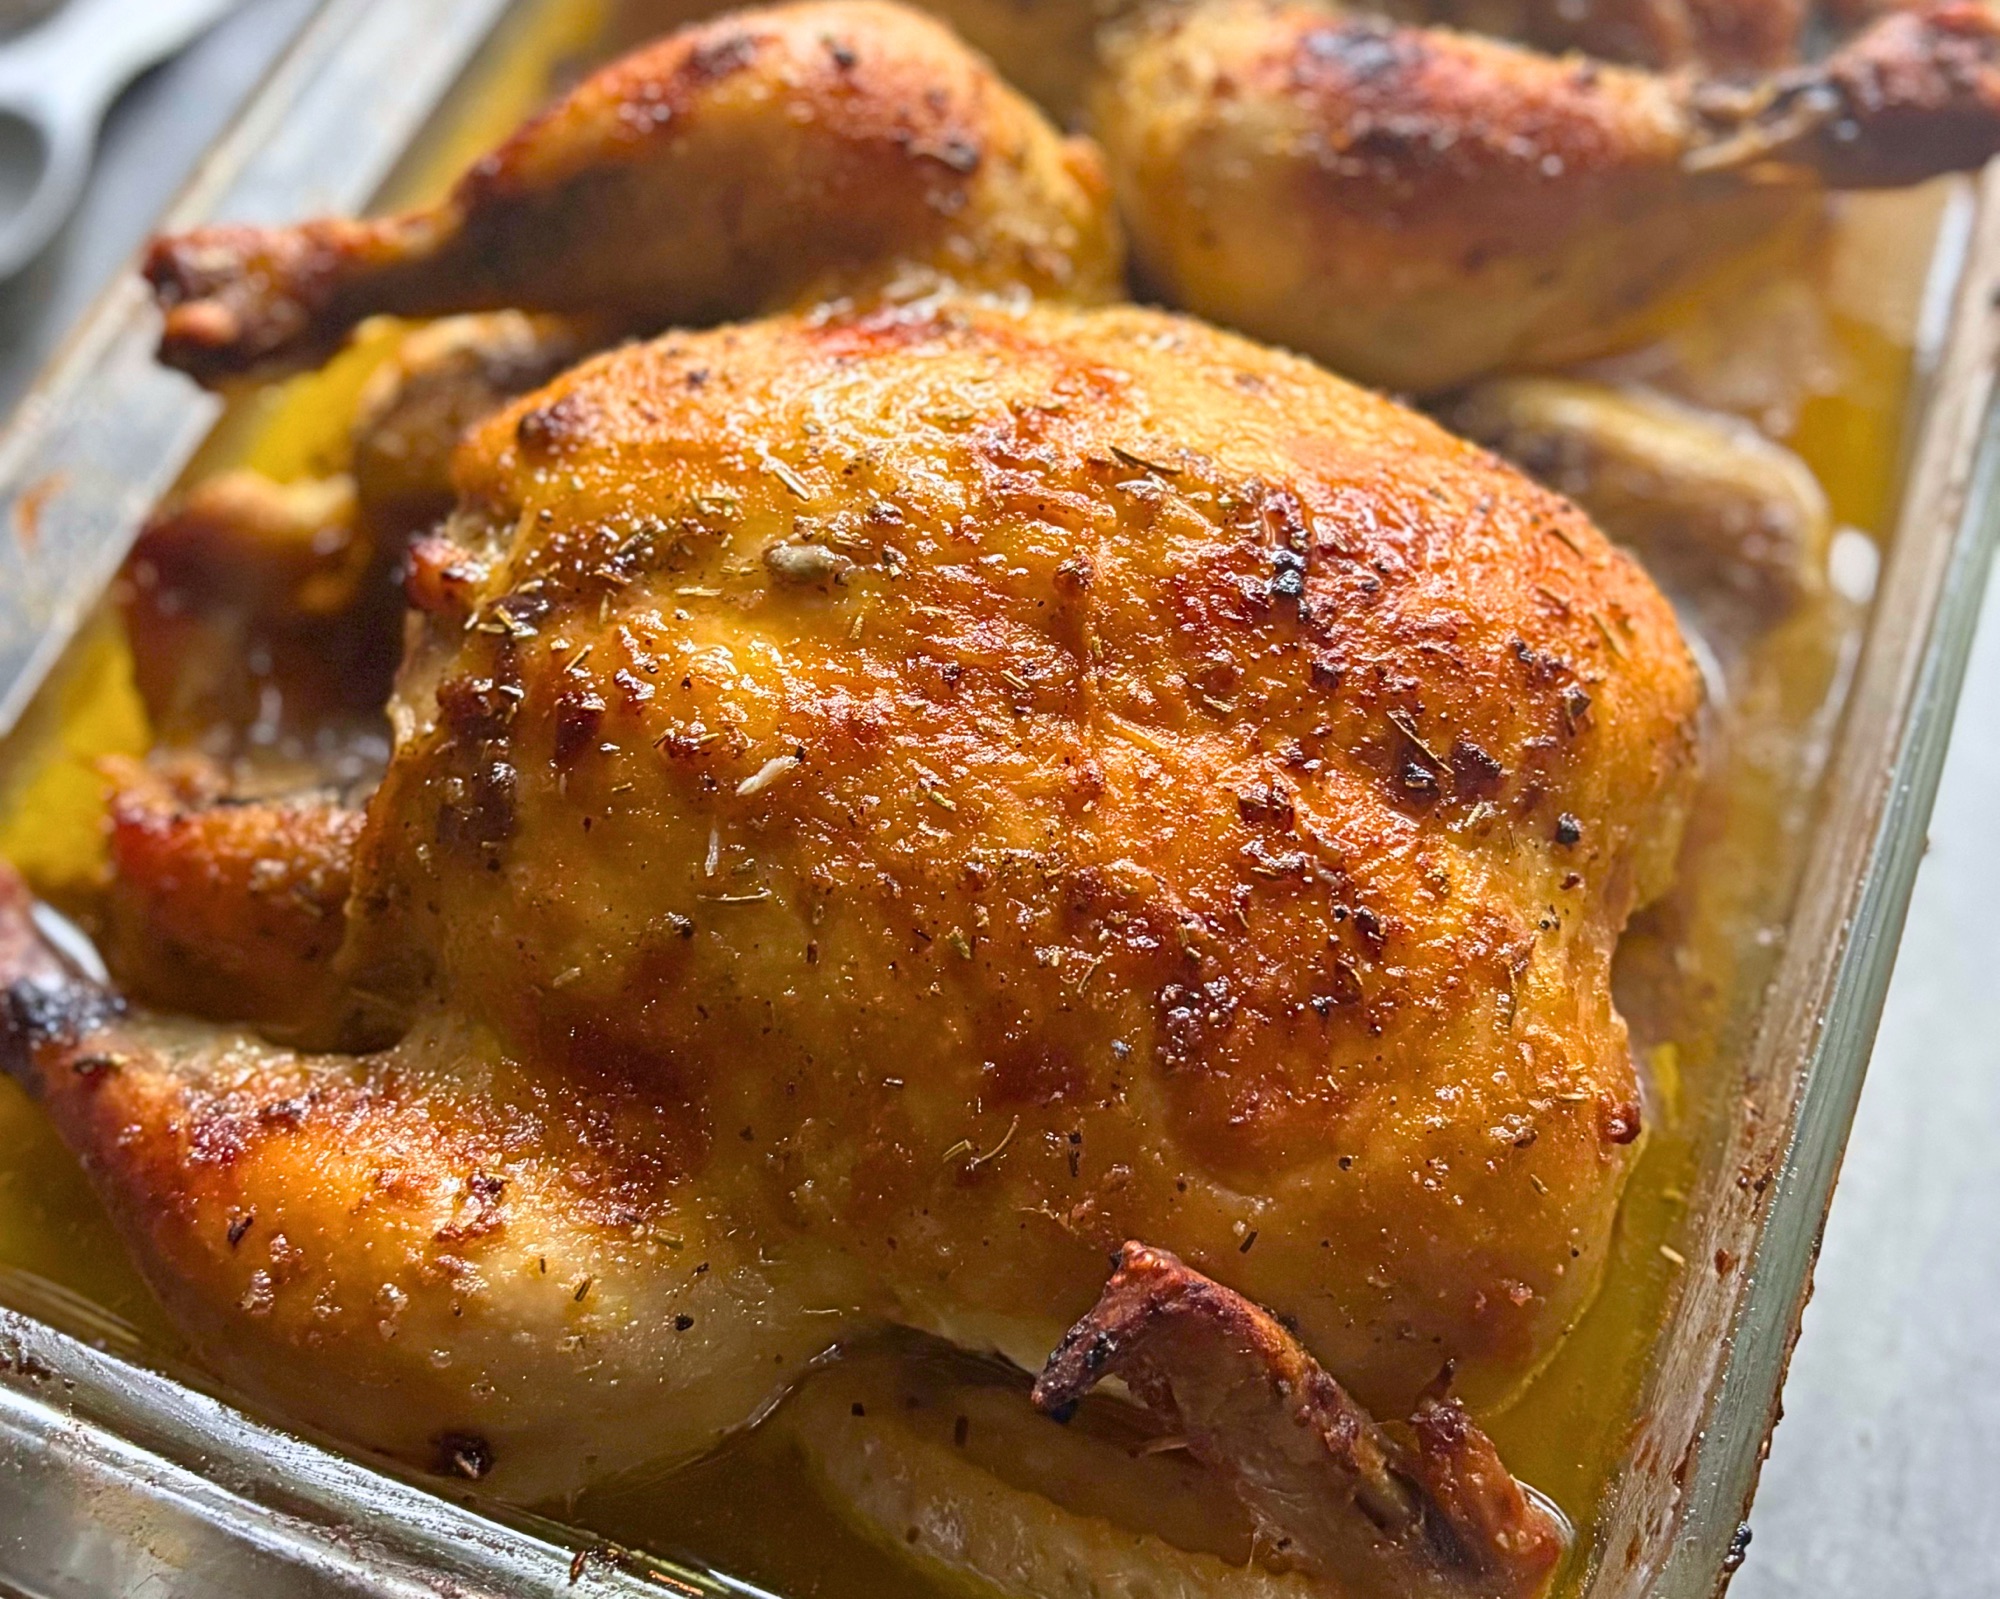
I have been making this brined roast chicken for over 15 years, and it started because I was tired of dry roast chicken and wanted one I could actually look forward to eating, with tender breast meat and juicy dark meat every single time. Buying the whole bird was part of it too, because a whole chicken costs far less than buying the same amount of meat as individual cuts, and you get the bones for broth on top of it.
The thing that finally made it work was a simple overnight brine. A quick mix of salt, maple syrup, citrus, fresh herbs, garlic, and peppercorns goes into a bowl, the chicken sits in it in the refrigerator overnight, and the next day you pull it out whenever you are ready and have dinner on the table in about two to two and a half hours depending on the size of your bird.
From there I tuck butter right up under the skin of the breast, rub the outside with a simple garlic and herb seasoning, and roast it hot to brown the top before covering it to finish low and slow, which keeps every bit of that moisture right where it belongs. The breast meat stays tender, the dark meat falls off the bone, and you end up with a dish full of golden drippings that I would never dream of throwing away.
This is also the first half of a two part project, because once the meat comes off, the bones, the drippings, and even the giblets go straight into my CHICKEN BONE BROTH, so one afternoon of work turns into dinner, a week of easy meals, and a pot of broth that sets up like jelly in the fridge.
Table of Contents
- Why You Will Love This Roast Chicken
- Why Brine a Chicken
- Choosing Your Chicken
- Ingredients
- How to Make the Brine
- How to Brine a Whole Chicken
- Getting the Chicken Ready for the Oven
- Butter Under the Skin
- The Seasoning Rub
- How to Roast a Juicy Whole Chicken
- How Long to Roast a Whole Chicken
- Want Crispy Skin?
- Save the Bones for Bone Broth
- Expert Tips
- Storing and Freezing Leftover Chicken
- Shop This Recipe
- Frequently Asked Questions
- Brined Roast Chicken Recipe
- More Recipes to Make With This
- Subscribe for Free
Why You Will Love This Roast Chicken
This is the roast chicken I make when I want something that feels special without asking much of me on the day I actually cook it, because almost all of the work happens the night before when the chicken goes into the brine.

- It is juicy all the way through. The brine seasons the meat from the inside and helps it hold on to moisture, so even the breast stays tender.
- The work is mostly hands off. Ten minutes to mix the brine, a few minutes with butter and seasoning the next day, and the oven does the rest.
- It works on your schedule. The chicken can sit in the brine anywhere from four hours to a full day, so you roast it when it suits you.
- One pan, easy cleanup. Two glass baking dishes do the job of a roasting pan and lid, and they go right into the dishwasher.
- Nothing goes to waste. The drippings, bones, and giblets become a rich homemade bone broth.
- It is built for meal prep. I almost always brine two at once, since the work is the same and the second chicken feeds us all week.
Back to Table of Contents | Jump to Recipe
Why Brine a Chicken
Brining is the single most important step in this recipe, and it is the reason I can promise you a juicy roast chicken instead of just hoping for one. When the chicken sits in salted water, the salt slowly works its way into the meat and loosens up the muscle proteins so they can hold on to more water, which means the meat goes into the oven better hydrated and loses less of that moisture as it cooks.

The salt also seasons the chicken all the way through rather than just on the surface, which is why a brined chicken tastes fully seasoned even in the thickest part of the breast. The maple syrup balances the salt and gives the skin a little help browning in the oven, while the citrus, herbs, garlic, and peppercorns perfume the brine so the outer layer of the meat picks up a gentle, savory flavor.
I want to be honest about the aromatics, though, because they flavor the surface far more than the center of the meat. That is exactly why I pull them out of the brine the next day and tuck them into the cavity of the chicken, so they keep working on the bird while it roasts and end up flavoring the drippings that go into the bone broth.
Back to Table of Contents | Jump to Recipe
Choosing Your Chicken
I personally buy air chilled chickens whenever I can, because they are cooled with cold air after processing instead of being dunked in chlorinated ice water baths. Water chilled birds can soak up some of that water along the way, while an air chilled chicken has nothing extra in it, so you are paying for chicken rather than water and the skin browns more easily in the oven.

My favorite brand is Bell and Evans organic unless I am buying from a local farm, and the chickens I usually bring home weigh somewhere around four to five pounds with the giblets still inside. The recipe card is written for a chicken in that range, and if yours is smaller or larger, the roasting time guide further down in this post will help you adjust.
I will also gently push you toward making two at a time, because if I am already doing the work of brining one chicken, it honestly makes sense to add a second one to the bowl. It is barely any extra effort, the two fit side by side in a 9×13 dish, and you end up with enough cooked chicken to freeze or to turn into easy meals for the rest of the week, plus twice the bones for broth. The recipe card lets you scale up to two chickens with one click.
Back to Table of Contents | Jump to Recipe
Ingredients
Everything for the brine is a pantry staple or something you can grab in the produce section, and the exact amounts are all in the recipe card below.

For the brine
- Salt: I use Redmond Real Salt, which is a fine salt, and I have also used fine pink Himalayan salt from Costco. Salt is the one ingredient where you really want to go by weight, because a cup of fine salt weighs nearly twice as much as a cup of flaky kosher salt, so the card gives you grams and the notes give you the kosher salt equivalents.
- Maple syrup: Pure maple syrup balances the salt and helps the skin brown. Brown sugar works just as well, and apple cider is a fun option that brings a gentle fall flavor.
- Orange: Half an orange squeezed right into the brine with the rind tossed in, or one whole mandarin or clementine, which is what you see in my photos.
- Fresh rosemary and thyme: Fresh sprigs are my preference since they go into the cavity afterward, but dried herbs work in the brine if that is what you have.
- Bay leaves, whole peppercorns, and garlic: These build the savory backbone of the brine. Crush the garlic cloves with the side of your knife so they release their flavor.
For roasting
- Butter: Softened butter goes under the skin of the breast to baste the meat from the inside as it melts, and salted or unsalted both work, so use whatever you have on hand.
- Seasoning rub: Garlic powder, onion powder, crushed dried rosemary, ground sage, and black pepper. There is no salt in the rub because the brine already took care of that.
How to Make the Brine
I like to keep this simple, so instead of simmering the brine on the stove, I put everything into a heatproof bowl, pour boiling water right over the top, and stir for a few minutes until the salt dissolves.

The hot water wakes up the herbs, citrus, and garlic and gets the salt and maple syrup fully dissolved, which matters because undissolved salt sitting at the bottom of the bowl will not do anything for your chicken. You can also mix it all in a pot on the stove if you prefer, and it works just the same.
The one rule here is that the brine has to come down to room temperature before it touches the chicken, since pouring hot brine over raw chicken starts cooking the outside and brings the meat into an unsafe temperature range. If you have time, let it sit and cool on its own, and if you want to brine right away, stir in a few handfuls of ice once the salt has dissolved and it will be ready in minutes.
Back to Table of Contents | Jump to Recipe
How to Brine a Whole Chicken
Pull the giblets out of the cavity first, then set the chicken in a bowl or stockpot that will actually fit in your refrigerator, because it is easy to forget that part until you are standing at the fridge with a full bowl of brine. I use about a 4 quart bowl for one chicken, and something closer to 8 quarts when I brine two.

If your chicken came with giblets, I highly recommend adding them right into the brine alongside the bird. They are completely optional, but the organ meats add real depth and extra nutrients to the bone broth we make from this chicken, so I always save them.
Pour the cooled brine over the chicken, then add cold water until the chicken is just covered. The brine is concentrated on purpose so that the extra water brings it to the right strength, and topping it off with cold water also helps keep everything chilled. Cover the bowl and slide it into the refrigerator for anywhere from 4 to 24 hours, and overnight is my sweet spot.
When I brine two chickens together, I set them back to back so the backs are touching and the breasts face out toward the sides of the bowl. The breast is the leanest part of the bird and the part that benefits most from the brine, so turning it out into the open liquid makes sure it gets the full effect instead of being pressed against the other chicken.
Back to Table of Contents | Jump to Recipe
Getting the Chicken Ready for the Oven
When you are ready to cook, start preheating your oven, lift the chicken out of the brine, and pat it dry inside and out with paper towels. You do not need to rinse it, since all the salt that needs to be in the meat is already there, and a dry surface is what lets the skin brown instead of steam.

Fish the rosemary, thyme, orange, garlic, and bay leaves out of the brine and tuck them into the cavity of the chicken, where they will keep flavoring the bird from the inside while it roasts. The peppercorns and the brine itself can be discarded.
Pat the giblets dry too, seal them in a zip top bag, and put them back in the refrigerator to wait for the bone broth. Plan to make the broth within a day or two so the giblets stay fresh, or freeze them with the carcass if your week gets away from you.
Back to Table of Contents | Jump to Recipe
Butter Under the Skin
This is the step that takes a good roast chicken and makes it unforgettable, so slide your fingers under the skin at the bottom of the breast and gently work it loose from the meat, being careful not to tear it, until you have a pocket over each side of the breast.

Push half of the softened butter into the pocket on each side, then press and smooth it from the outside of the skin so it spreads across the breast. It does not have to be perfect, because gravity will take that butter right where it needs to go once it starts melting in the oven.

As it melts, the butter bastes the breast from the inside, which is the leanest part of the bird and the part most likely to dry out. Soft butter is the key to making this easy, so leave it out on the counter while the chicken brines or for at least an hour before you start.
Back to Table of Contents | Jump to Recipe
The Seasoning Rub
Once the butter is in and the skin is dry, mix the garlic powder, onion powder, crushed rosemary, sage, and black pepper together and sprinkle it evenly over the top of the chicken, then rub it in with your hands so it clings to the skin.

Crushing the dried rosemary between your fingers before it goes on releases its oils and keeps you from biting into a whole needle, and it only takes a few seconds. There is no salt in this rub on purpose, since a brined chicken is already seasoned all the way through and extra salt on the skin would push it over the edge.

Back to Table of Contents | Jump to Recipe
How to Roast a Juicy Whole Chicken
I roast my chickens in a 9×13 glass baking dish and use a second 9×13 dish turned upside down as the lid, and it fits perfectly. A roasting pan works too, but two chickens fit side by side in a 9×13 and the cleanup is so much easier than scrubbing a roasting pan, so this is how I do it every time.
A little water goes into the bottom of the dish before it goes into the oven, which keeps the first drippings from scorching and gives you a head start on the pan juices. The chicken roasts uncovered in a hot oven first, until the top is nicely browned, and then the second dish goes on top and the temperature drops for a long, gentle finish.
That combination is what makes this chicken so juicy. The hot start gives you the color and flavor on the outside, and once it is covered, the steam from the drippings keeps the meat moist while the lower temperature cooks it through evenly without drying out the breast before the thighs are done. If you do not have a second dish, a tight layer of foil does the same job. The exact temperatures and times are in the recipe card.
Back to Table of Contents | Jump to Recipe
How Long to Roast a Whole Chicken
The times in the recipe card are written for the four to five pound chickens I usually buy, but roasting time really does depend on the size of your bird, so I put a guide for smaller and larger chickens in the recipe notes. Only the covered part of the bake changes with size, since the uncovered browning time at the start stays the same no matter how big your chicken is.
Those times line up with the USDA roasting guidelines for whole chicken, but treat them as a starting point rather than a promise, because ovens run differently, two chickens sharing one covered dish can take a little longer than one, and fridge cold chickens take longer than birds that sat out for a bit while you buttered and seasoned them.
The only way to know for sure that your whole chicken is done is an instant read thermometer, checked in the thickest part of the breast, the innermost part of the thigh, and the wing, with the safe temperature listed in the recipe card. I like to let the thighs run a little higher than the breast, because dark meat gets more tender the longer it cooks and is very forgiving.
Back to Table of Contents | Jump to Recipe
Want Crispy Skin?
Because the chicken finishes covered, the skin comes out golden and full of flavor but on the softer side, which is how my family likes it since we use so much of the meat in other meals. If you are someone who wants to eat that skin crispy, it only takes a few extra minutes at the end.
Pull the top dish off for the last five minutes of the bake and switch your oven to broil, keeping the chicken on the middle rack, and watch it closely since the skin goes from golden to dark quickly under the broiler. I have done this in my glass dish without any problems, but glass bakeware makers generally advise against using it under the broiler, so if that makes you nervous, move the chicken to a metal pan for those few minutes.
Back to Table of Contents | Jump to Recipe
Save the Bones for Bone Broth
Before you clean up, look at what is left in that dish, because the bones, the skin, the drippings, and the giblets waiting in your refrigerator are everything you need for a rich homemade bone broth.

Pour the pan juice/drippings into a jar and refrigerate them, save the carcass and any skin or bits you did not eat, and keep it all together with the giblets. The aromatics from the cavity can go into the broth too, since they have already done half their work flavoring the chicken.
The full method, including how I get my broth to set up like jelly every single time, is in my CHICKEN BONE BROTH
Back to Table of Contents | Jump to Recipe
Expert Tips
A few small things make a big difference with this recipe, and most of them come down to temperature and patience.
- Weigh your salt. Different salts measure very differently by the cup, so the weight in the recipe card is the most reliable way to get the brine right with whatever salt you have.
- Cool the brine completely. Never pour warm brine over raw chicken, so let it cool to room temperature or use ice to speed it up.
- Keep it covered and cold. The chicken needs to stay in the refrigerator the entire time it brines, so make sure your bowl fits before you start.
- Do not brine longer than a day. After about 24 hours the meat can start to taste too salty and the texture can turn soft.
- Dry the skin well. A wet chicken steams instead of browns, so take your time with the paper towels.
- Use soft butter. Cold butter tears the skin and will not spread, so let it sit out until it is easy to smoosh.
- Trust the thermometer, not the clock. Every chicken is a little different, and the thermometer tells you exactly when it is done.
- Let it rest. Give the chicken about 15 minutes before you carve so the juices settle back into the meat instead of running all over your cutting board.
Back to Table of Contents | Jump to Recipe
Storing and Freezing Leftover Chicken
Leftover roast chicken is one of the best things you can have in your refrigerator, and it is the whole reason I make two at a time.
Pull the meat off the bones while it is still warm, because it comes off so much more easily than it does once it is cold, and get it into the refrigerator in an airtight container soon after dinner. The recipe notes have exactly how long it keeps in the refrigerator and the freezer.
For the freezer, portion the meat into freezer bags in the amounts you usually cook with and press out as much air as you can, and add a splash of the pan drippings to each bag so the meat does not dry out. Thaw it overnight in the refrigerator and use it in soups, casseroles, wraps, salads, or chicken sandwiches.
Back to Table of Contents | Jump to Recipe
Shop This Recipe
These are the tools and ingredients I actually use for this roast chicken. As an Amazon Associate I earn a small commission from qualifying purchases made through these links, at no extra cost to you, and it helps support the blog so I can keep sharing recipes like this one.
- 9×13 Glass Baking Dishes: I use two, one to roast the chicken in and one flipped on top as the lid, and two chickens fit side by side. Don’t want to use glass? Use an actual chicken roasting pan
- Large Stainless Steel Mixing Bowl: Big enough to hold two chickens and the brine while still fitting on a refrigerator shelf.
- Electric Kettle: The fastest way to get boiling water for the brine without pulling out a pot.
- Instant Read Thermometer: The only way to know your chicken is done without guessing.
- Redmond Real Salt (Fine): The fine salt I use for my brine.
- Organic Garlic Powder: The garlic powder in my seasoning rub.
Frequently Asked Questions
These are the questions I get most about brining and roasting a whole chicken.
Do I need to rinse the chicken after brining?
You do not need to rinse it at all, just pat it very dry inside and out with paper towels, since the salt that matters is already inside the meat and rinsing only adds water to the skin and splashes raw chicken juices around your sink.
Is this better than a Costco rotisserie chicken?
A Costco rotisserie chicken is hard to beat on price and convenience, and I will never pretend otherwise, but when it comes to taste and ingredients, I think this brined roast chicken is just as good, if not better. The Kirkland seasoned rotisserie chicken includes additives like carrageenan and sodium phosphate in its seasoning, while this one is simply a whole chicken, salt, maple syrup, citrus, fresh herbs, garlic, and butter, so you know exactly what is in it. You also get to keep everything a store bought chicken leaves behind, including the giblets, the drippings, and a whole carcass for a rich pot of homemade bone broth.
How long should I brine a whole chicken?
Anywhere from 4 to 24 hours in the refrigerator works, and overnight is my favorite, but going past a full day can make the meat taste too salty and turn the texture soft.
What kind of salt should I use for a chicken brine?
Any salt works as long as you measure it by weight, so I use fine Redmond Real Salt and fine pink Himalayan salt works at the same weight, while kosher salt is much lighter by volume and has its own cup equivalents in the recipe notes.
Can I brine a frozen chicken?
Thaw the chicken completely in the refrigerator first, because a frozen chicken will not absorb the brine evenly and thawing it in the brine on the counter is not safe.
Can I reuse the brine?
Once raw chicken has been in it, the brine needs to be thrown out, and the only things that get a second life are the herbs, citrus, garlic, and bay leaves, which go into the cavity before roasting.
Can I use a roasting pan instead of two glass dishes?
A roasting pan works perfectly well, either with its own lid or uncovered for the browning step and then covered tightly with foil for the rest of the bake.
What temperature should roast chicken be when it is done?
It needs to reach at least 165°F in the thickest part of the breast, the innermost part of the thigh, and the wing, and I like the thighs closer to 175°F for the most tender dark meat.
Why is my roast chicken skin soft?
Covering the chicken for the second half of the bake keeps the meat juicy but softens the skin, so uncover it and broil it for the last few minutes if you want it crispy.
Can I brine two chickens at once?
I recommend it, since the work is the same, so double the brine, use a bowl or stockpot big enough to hold both, and add enough cold water to cover them, and the two will fit side by side in a 9×13 dish for roasting.
What can I do with the leftover bones?
Turn them into bone broth, because the carcass, skin, drippings, and giblets from this chicken make a rich, golden broth, and you can find my method in my CHICKEN BONE BROTH. And you can use that in my Bone Broth Sourdough Loaf!
Brined Roast Chicken Recipe

Juicy Brined Roast Chicken
Equipment
- Large heatproof bowl
- 4 quart bowl or stockpot that fits in your refrigerator
- Kettle
- Two 9×13 glass baking dishes
- Instant read thermometer
- Paper towels
- Gallon zip top bag
Ingredients
Brine
- 67 g fine sea salt for the brine such as Redmond Real Salt (¼ cup)
- 78 g pure maple syrup for the brine ¼ cup
- ½ orange for the brine or 1 whole mandarin or clementine
- 3 sprigs fresh rosemary for the brine
- 3 sprigs fresh thyme for the brine
- 2 bay leaves for the brine
- 17 g whole black peppercorns for the brine about a palmful (2 tbsp)
- 3 garlic cloves for the brine crushed
- 946 g boiling water for the brine 4 cups
- Cold water to cover the chicken
- Ice optional, to cool the brine quickly
Chicken
- 1 whole chicken 4 to 5 pounds, giblets removed and saved
- Butter and Seasoning Rub
- 85 g salted or unsalted butter softened, for under the skin (6 tbsp)
- 1.6 g garlic powder for the rub ½ tsp
- 1.2 g onion powder for the rub ½ tsp
- 0.6 g dried rosemary for the rub crushed (½ tsp)
- 0.2 g ground sage for the rub ¼ tsp
- 0.6 g ground black pepper for the rub ¼ tsp
- 59 g water for the bottom of the baking dish ¼ cup
Instructions
- Add the salt, maple syrup, rosemary, thyme, bay leaves, peppercorns, and crushed garlic to a large heatproof bowl. Squeeze the juice from the orange half into the bowl and drop the rind in too, or halve a whole mandarin and add both halves.
- Pour the boiling water over everything and stir for a few minutes until the salt and maple syrup are completely dissolved.
- Let the brine cool to room temperature, or stir in a few handfuls of ice to cool it right away. Never pour warm brine over raw chicken.
- Remove the giblets from the chicken. Place the chicken in a 4 quart bowl or stockpot that fits in your refrigerator, and add the giblets if you are saving them for bone broth.
- Pour the cooled brine over the chicken, then add cold water until the chicken is just covered.
- Cover the bowl and refrigerate for 4 to 24 hours, ideally overnight.
- When you are ready to roast, preheat the oven to 425°F.
- Lift the chicken out of the brine and pat it very dry inside and out with paper towels. There is no need to rinse it.
- Pull the rosemary, thyme, orange, garlic, and bay leaves out of the brine and tuck them into the cavity of the chicken. Discard the brine and peppercorns.
- Pat the giblets dry, seal them in a zip top bag, and refrigerate them for bone broth.
- Set the chicken breast side up in a 9×13 glass baking dish. Gently loosen the skin over each side of the breast with your fingers, then push 43g (3 tbsp) of the softened butter under the skin on each side and press it out to spread it across the breast.
- Stir together the garlic powder, onion powder, crushed rosemary, sage, and black pepper. Sprinkle it evenly over the dry skin and rub it in.
- Pour the water into the bottom of the baking dish.
- Roast uncovered at 425°F for 30 minutes, until the top is browned.
- Turn the second 9×13 baking dish upside down over the top of the first as a lid, or cover tightly with foil. Reduce the oven to 325°F and roast for 1½ hours more, until an instant read thermometer reads at least 165°F in the thickest part of the breast and the innermost part of the thigh.
- For crispier skin, remove the top dish for the last 5 minutes, switch the oven to broil, and watch closely so the skin does not burn.
- Let the chicken rest for 15 minutes before carving. Save the drippings, carcass, skin, and cavity aromatics with the giblets for bone broth.
Notes
More Recipes to Make With This
If this chicken is on your table, these are the recipes I would reach for next.
- CHICKEN BONE BROTH: Turn the bones, drippings, and giblets from this chicken into a rich homemade broth.
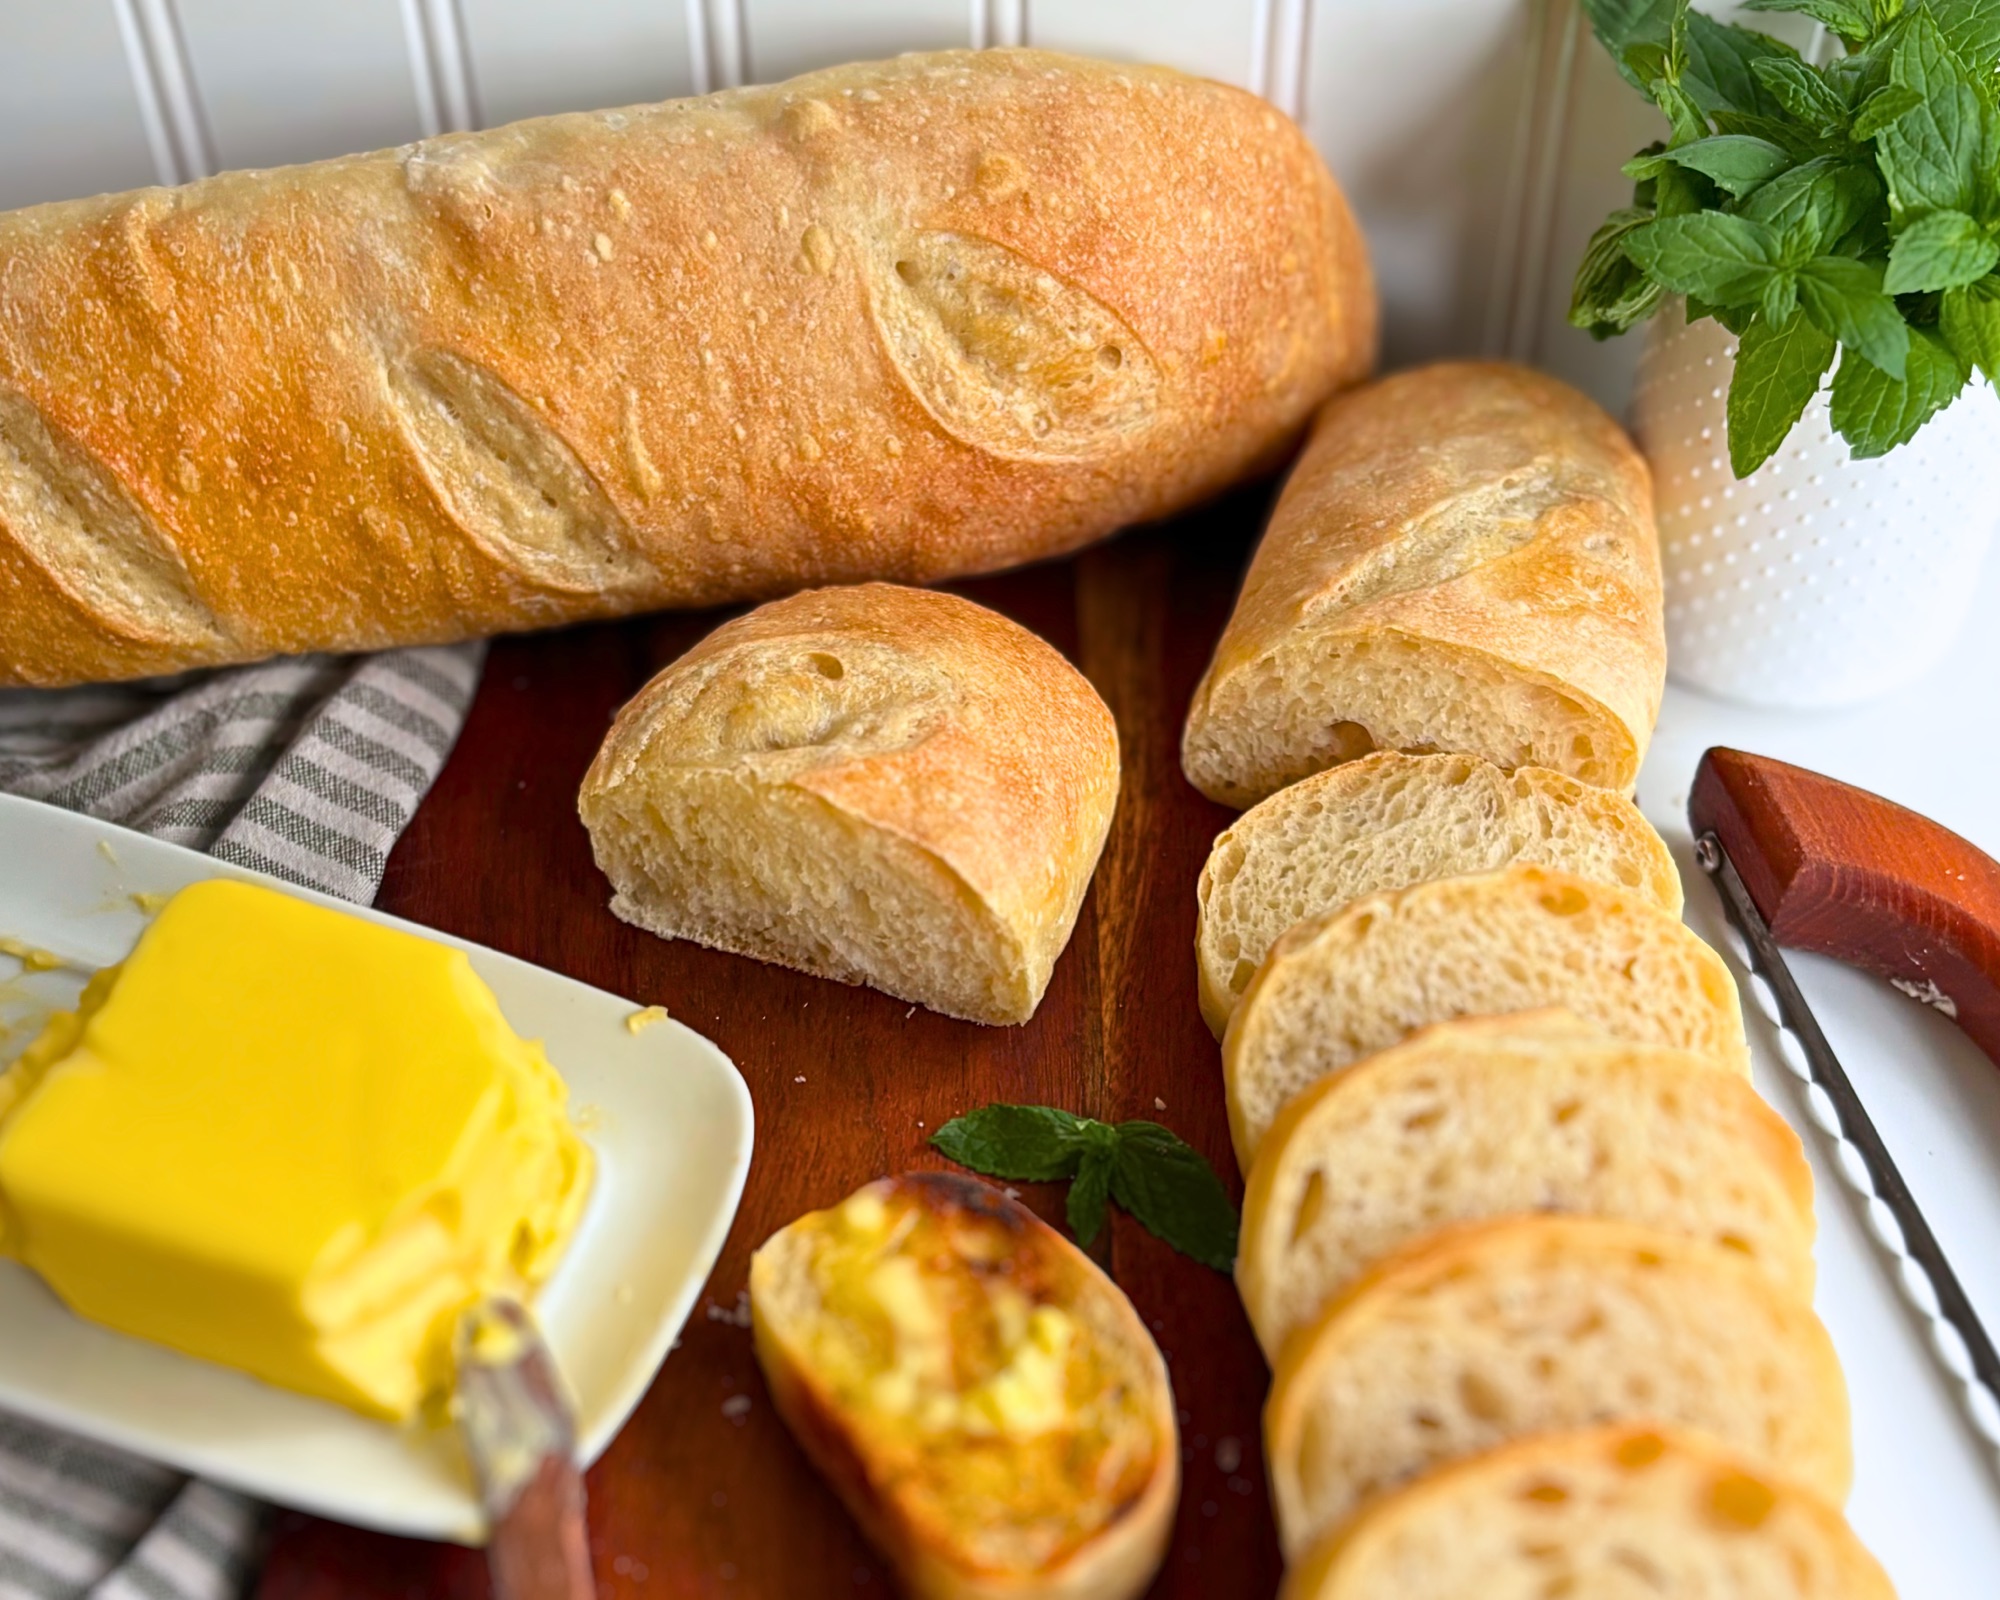
- Easy No Knead Sourdough Baguettes: Crusty bread to soak up every drop of those pan juices.
- High Protein Sourdough Hamburger Buns: Soft buns made for leftover roast chicken sandwiches.
- High Protein Hamburger Buns (Yeast Version): The same soft buns made the same day with commercial yeast.
- Chick-fil-A Pull-Apart Focaccia: A fun way to put chicken on the table when you want something a little different.
Back to Table of Contents | Jump to Recipe
Subscribe for Free
If you want more from scratch recipes like this one, along with the sourdough and high protein bakes I am working on in my kitchen, join my email list. It is completely free, and you will get every new recipe delivered straight to your inbox so you never miss one.
Back to Table of Contents | Jump to Recipe



Leave a Reply