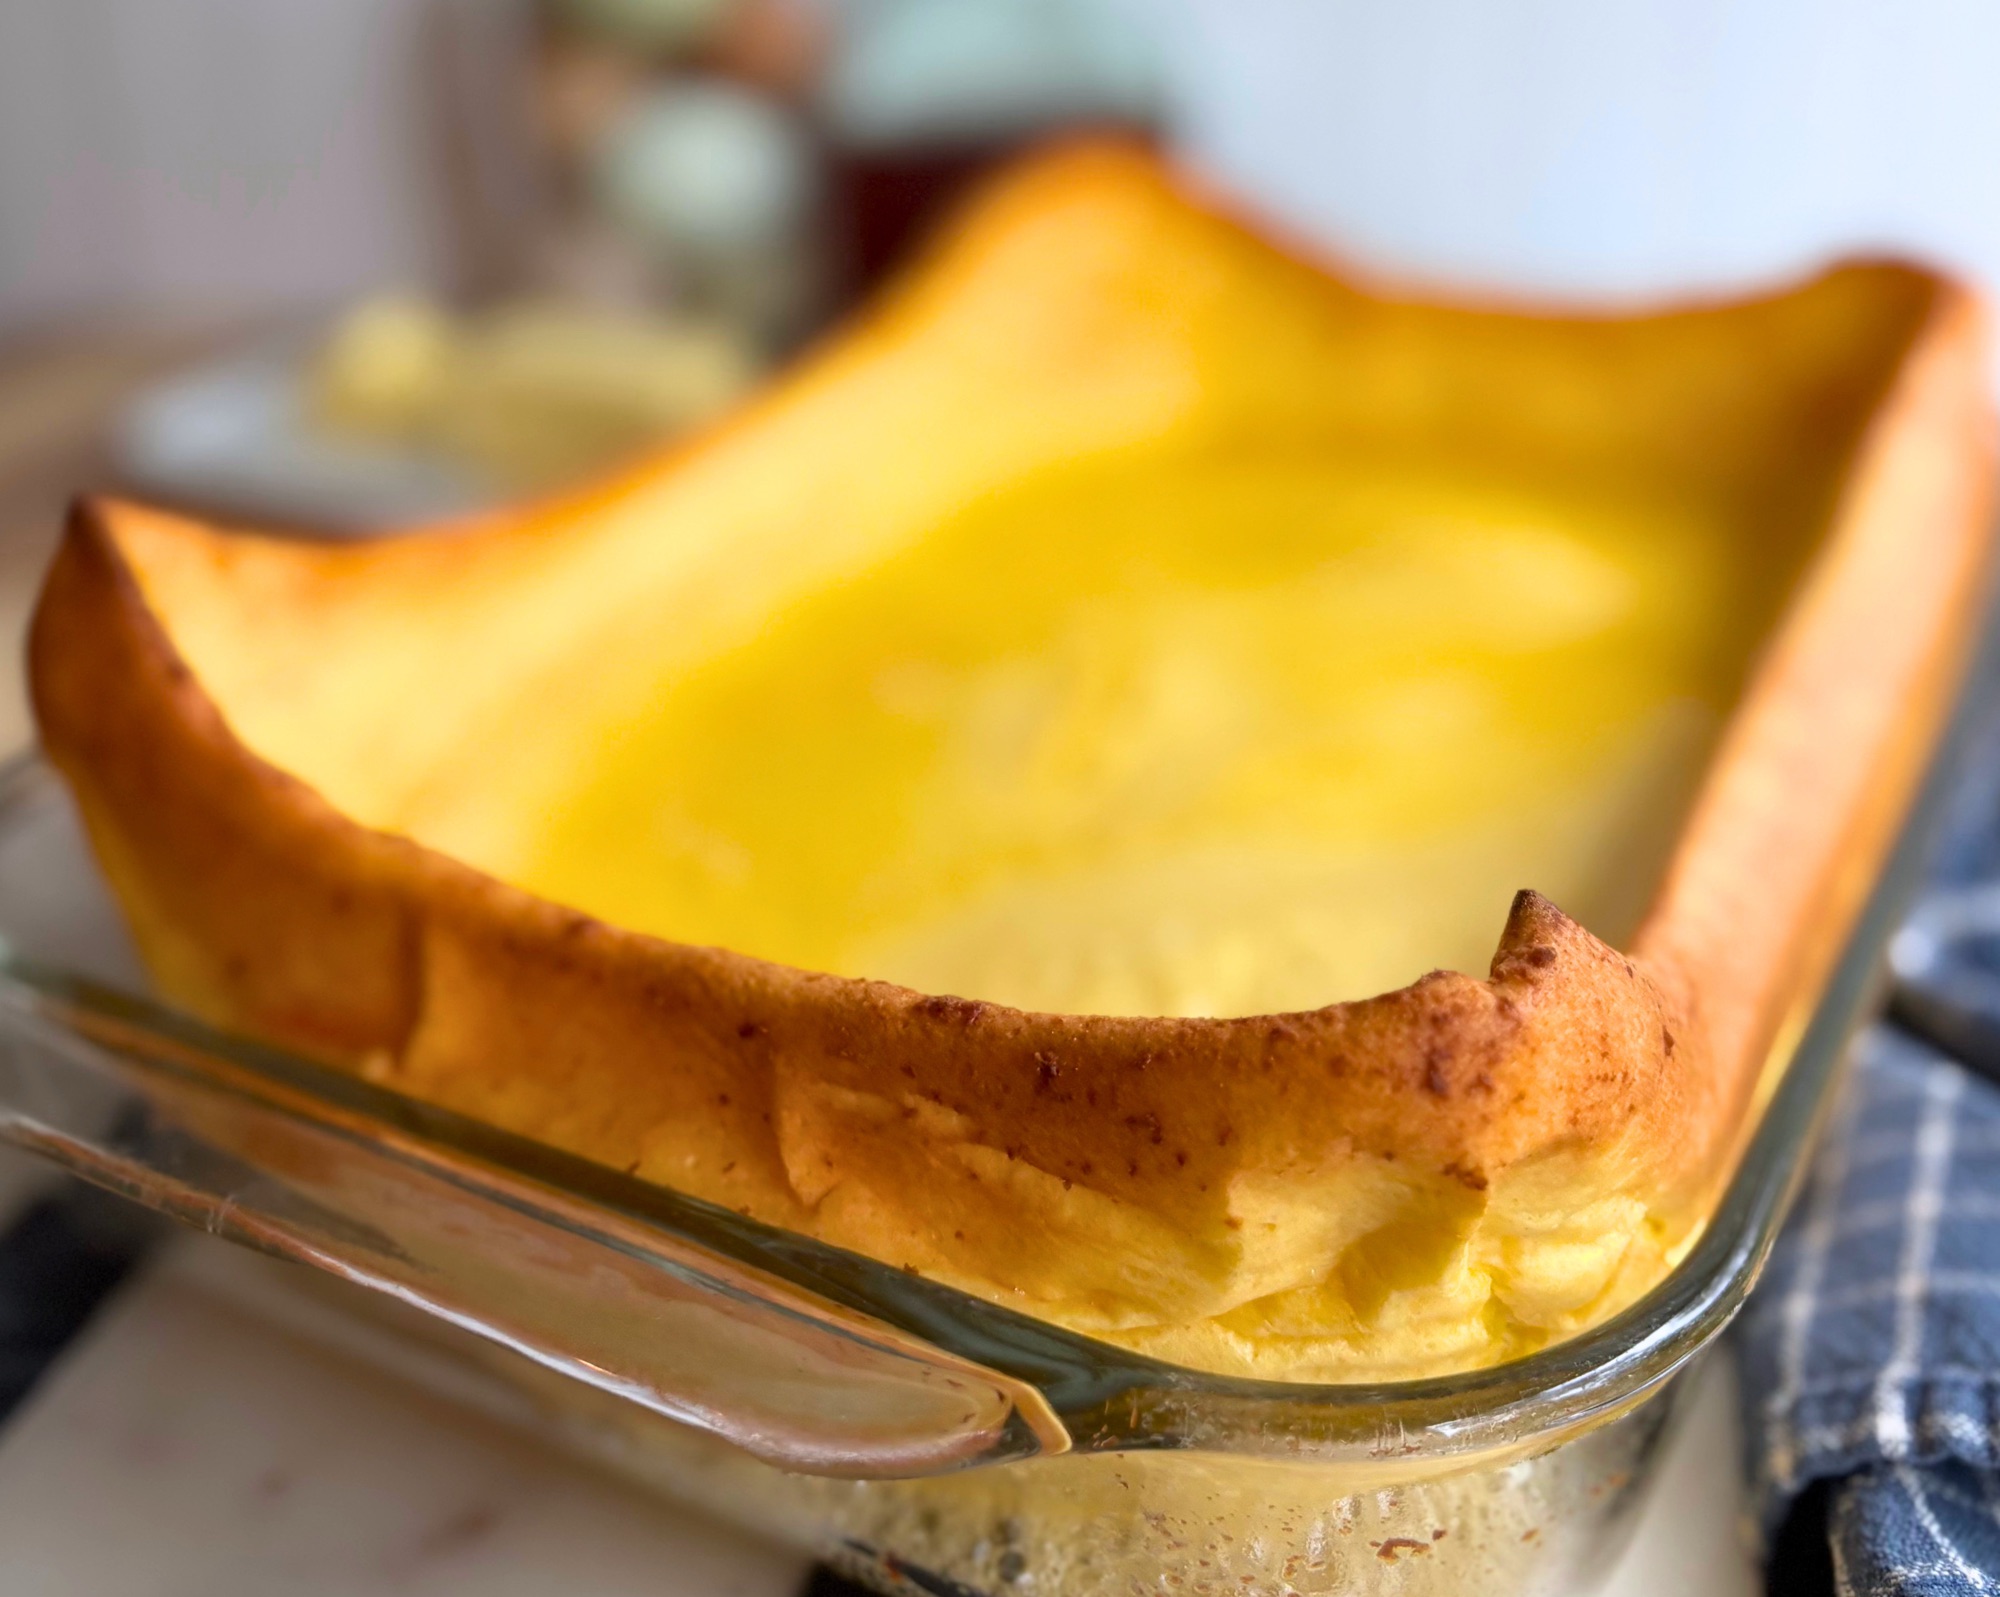
I wanted a breakfast that would feed the whole table at once without me standing over a griddle flipping pancakes in batches while everyone else ate, and I wanted it to actually keep people full until lunch instead of leaving them raiding the pantry an hour later. A Dutch baby already solved the first problem, since you blend the batter, pour it into a hot buttered pan, and sit down with your coffee while the oven does the work, so the only thing left to fix was the protein, which is how this high protein Dutch baby came together.
It gets a full cup of Greek yogurt blended right into the batter, which adds about 25 grams of protein to the pan before the eggs even come into it, and there is no protein powder anywhere in this recipe. It bakes in a 9×13 glass dish, so you get one big golden pancake with edges that climb the sides of the pan, a custardy center that holds a pool of maple syrup beautifully, and about 12 grams of protein in every slice.
Table of Contents
- Why You Will Love This High Protein Dutch Baby
- Ingredient Breakdown
- The Pan and Equipment
- How to Make a High Protein Dutch Baby
- High Protein Dutch Baby Recipe
- Why Is It Called a Dutch Baby?
- Tips for the Best Puff
- How to Serve It
- Want a Sourdough Dutch Baby?
- Storage and Reheating
- Frequently Asked Questions
- Shop This Recipe
- More High Protein Recipes
- Made This Recipe?
- Subscribe for Free
Why You Will Love This High Protein Dutch Baby
This is the breakfast that bakes itself, because once the batter goes into the oven there is nothing left for you to do for the next twenty minutes except set the table and pour the coffee.

- It feeds a crowd in one pan. The 9×13 dish turns out six generous slices at once, so everyone sits down and eats together instead of waiting their turn at the stove.
- The protein comes from real food. Greek yogurt and eggs carry the protein here, so you get about 12 grams a slice without protein powder or any chalky aftertaste.
- It tastes like a treat. Browned butter in the pan and maple syrup in the batter give it a warm, toasty flavor that reads as a weekend breakfast even on a school morning.
- It is ready in about 35 minutes. The batter blends in under a minute, and most of the remaining time is hands off while it bakes.
- The texture has range. You get crisp, puffed edges, a tender middle, and a custardy center that soaks up whatever you pour over it.
Ingredient Breakdown
The ingredient list is short and lives mostly in your fridge already, and the exact amounts are waiting for you in the recipe card below, so here is why each one earns its place in the batter.

Greek yogurt is the hero of this recipe and the reason it stands apart from a classic Dutch baby. A full cup of nonfat Greek yogurt goes into the batter, which adds a big boost of protein and gives the center a rich, custardy texture without making the batter too heavy to rise. Nonfat keeps the calories down, though 2% works if that is what you keep on hand.
Eggs are the only leavening in a Dutch baby, since there is no baking powder or baking soda doing the work here. As the batter hits the hot pan, the water in the eggs and dairy turns to steam and the egg proteins set around it, which is what pushes the edges up the sides of the dish. This recipe uses five large eggs, which puts it right in the range most 9×13 Dutch babies use, and that matters even more here because the yogurt is extra weight the eggs have to lift.
Whole milk thins the batter to the pourable consistency a Dutch baby needs so it can spread across the pan and climb the sides.
Bread flour gives the pancake its structure, and I use it here instead of all purpose because its higher protein builds a stronger batter that holds up to the weight of the Greek yogurt as the edges climb the sides of the pan. It also adds a little more protein to every slice. All purpose flour works as a direct swap at the same weight if that is what you have, though you can expect slightly less height.
Maple syrup sweetens the batter gently in place of granulated sugar and pairs perfectly with the syrup you will pour over the top.
Butter coats the hot dish so nothing sticks, and I let it go all the way to browned in the oven before the batter goes in, which gives the whole pancake a nutty, toasty flavor.
Vanilla and salt round out the flavor so the batter tastes like a finished breakfast rather than sweet scrambled eggs.
The Pan and Equipment
This recipe is built and tested in a 9×13 glass baking dish (you might know it as a 13 x 9), which is the pan most of us already own, and the batter is sized so it spreads in a thin, even layer with plenty of room left for the sides to puff up the 2 inch walls.
You will also need a food processor or blender, since blending is the fastest way to get the Greek yogurt completely smooth with no lumps, along with a kitchen scale for accurate measuring and a microwave safe bowl for warming the dairy.
How to Make a High Protein Dutch Baby
The full step by step method with every temperature and time is in the recipe card below, so this section walks through the why behind each step, which is what makes the difference between a Dutch baby that puffs and one that sits flat in the pan.

Warm the dairy first, and start as soon as the oven turns on. Greek yogurt and milk straight from the fridge are cold enough to slow down the steam that lifts the pancake, so a quick 30 seconds in the microwave with the maple syrup takes the chill off. The real trick is timing, because if you warm the dairy and blend the batter right when you start preheating, it has the whole preheat and butter browning time to sit on the counter and lose any leftover chill. That matters most with a glass dish, since glass does not like a sudden swing from very hot to very cold, and in my kitchen a batter that has warmed up this way pours into the hot Pyrex without any trouble.
Blend until completely smooth. Everything goes into the food processor or blender together, and you want a batter with no streaks of flour or bits of yogurt left in it, because lumps bake up as dense spots in an otherwise tender pancake.
Brown the butter in the dish. Once the oven is fully preheated, the butter goes into the glass dish and back into the oven, where it melts, foams, and then the milk solids turn golden brown. Watch it closely toward the end, since it goes from browned to burnt quickly in a 425°F oven.

Pour slowly into the center. The batter goes straight into the hot browned butter, and pouring it slowly into the middle of the dish rather than dumping it in or pouring against the hot sides lets it spread out on its own while giving the glass a little extra protection.

Keep the oven door closed. The puff depends on steam and heat, so opening the door early lets both escape and can deflate the edges before they set. Wait until the edges are deeply golden and climbing the sides before you check it.
High Protein Dutch Baby Recipe

High Protein Dutch Baby with Greek Yogurt
Equipment
- 9×13 glass baking dish 12" cast iron pan
- Food processor or blender
- kitchen scale
- – Microwave-safe bowl
Ingredients
- 250 g eggs room temperature (5 large)
- 245 g nonfat Greek yogurt 1 cup plus 1 heaping tablespoon
- 120 g whole milk 1/2 cup
- 120 g bread flour 1 cup
- 30 g pure maple syrup 1 1/2 tablespoons
- 4 g vanilla extract 1 teaspoon
- 3 g fine salt 1/2 teaspoon
- 57 g butter for the pan (4 tablespoons)
Instructions
- Preheat the oven to 425°F (220°C) and let it come fully up to temperature before the glass dish goes in.
- As soon as the oven starts preheating, warm the Greek yogurt, milk, and maple syrup together in a microwave safe bowl for 30 seconds, then stir until smooth.
- Add the warm yogurt mixture to a food processor or blender along with the eggs, flour, vanilla, and salt, and blend for about 30 seconds until completely smooth with no streaks of flour, scraping down the sides once if needed. Let the batter sit on the counter while the oven finishes preheating and the butter browns.
- Cut the butter into pieces, place them in the 9×13 glass baking dish, and set the dish in the hot oven until the butter melts and the milk solids turn golden brown, about 8 to 10 minutes, watching closely near the end so it browns without burning.
- Carefully pull out the oven rack and slowly pour the batter into the center of the dish, letting it spread toward the edges on its own rather than pouring it against the hot sides.
- Bake for 20 to 25 minutes without opening the oven door, until the edges are deeply golden and puffed up the sides of the dish and the center is set.
- Set the hot dish on a dry towel or trivet, never a wet or cold surface, then drizzle with maple syrup, slice into 6 pieces, and serve right away while it is still puffed.
Notes
Why Is It Called a Dutch Baby?
Despite the name, a Dutch baby is not from the Netherlands at all. It traces back to Manca’s Cafe in Seattle in the early 1900s, where the family served a puffed oven pancake inspired by German pancakes, and the name is widely believed to come from an Americanized take on the word “Deutsch,” meaning German. You will also see it called a German pancake, a Dutch puff, or a hootenanny, and every one of those names describes the same big, golden pancake that rises in a hot pan.
Tips for the Best Puff
A Dutch baby only has a few ingredients, so the small details in how you handle them are what decide how high it climbs and how evenly it bakes.

- Make sure the oven is fully preheated before the dish goes in, since a hot pan and a hot oven are what create the burst of steam that lifts the edges.
- Use large eggs and weigh them if you can, because eggs vary a lot in size and they are the only thing lifting this pancake.
- Do not skip warming the dairy, and make the batter right when you start preheating so it has time to lose its chill, since cold batter slows the rise and is hard on a hot glass dish.
- Blend until there are no lumps, scraping down the sides once if any yogurt clings to the bowl.
- Let the butter brown but not burn, pulling the dish as soon as the milk solids turn a toasty golden color.
- Serve it right away. Every Dutch baby starts to fall a few minutes out of the oven as the steam escapes, so bring it straight to the table for the best look.
How to Serve It
The custardy center of this Dutch baby is made for soaking up whatever you pour over it, and my favorite way to serve it is with a generous drizzle of pure maple syrup straight over the top while it is still hot.

Fresh berries, sliced bananas, or a spoonful of extra Greek yogurt on top add even more protein and a little freshness, and a dusting of powdered sugar with a squeeze of lemon is the classic way to finish one. If you want to round out the meal, serve it alongside breakfast sausage or bacon for an even more filling breakfast.
Want a Sourdough Dutch Baby?
This version is a same morning recipe with no starter needed, but if you keep a sourdough starter and love the flavor that a long ferment brings, I also make a long fermented sourdough Dutch baby with cheese and sausage that you mix the night before and bake in the same 9×13 dish or a 12″ cast iron pan. You can find it here: SAVORY SOURDOUGH DUTCH BABY.
Or check out my Sourdough High Protein Dutch Baby recipe.
If you do not have a starter yet and want to begin, my Minimal Waste Sourdough Starter guide walks you through it from day one.
Storage and Reheating
A Dutch baby is at its best fresh from the oven, but leftovers keep well and still make a great high protein breakfast later in the week. Let any leftover slices cool, then store them in an airtight container in the refrigerator for up to 3 days.

To reheat, warm slices in a 350°F oven for about 5 to 8 minutes, which brings back some of the crisp at the edges, or microwave a single slice for 30 to 45 seconds when you need breakfast in a hurry. The edges will not puff back up the way they were fresh out of the oven, but the flavor and texture of the center hold up well.
Frequently Asked Questions

How much protein is in this Dutch baby?
Each of the six slices has about 12 grams of protein, which comes from the Greek yogurt and eggs rather than any protein powder. The exact number depends on the brand of yogurt and flour you use.
Why did my Dutch baby deflate?
Every Dutch baby falls a bit once it comes out of the oven, because the puff is held up by steam that escapes as it cools. If yours deflated before it ever finished baking, the oven door was likely opened too early, the oven was not fully preheated, or the batter was too cold going into the pan.
Can I use full fat or 2% Greek yogurt?
Yes, 2% or full fat Greek yogurt both work and make the center a little richer. Nonfat keeps the calories lowest while holding the protein right where it should be, and that is what the nutrition in the recipe card is based on.
Can I use all purpose flour instead of bread flour?
Yes, all purpose flour works at the same weight. Bread flour has more protein, which gives the batter a little more structure for a taller puff and adds a bit more protein per slice, so an all purpose version may sit slightly lower in the pan, but it will still bake up golden and custardy.
Why is there butter pooled in the center?
Some of the browned butter can collect in the middle of the pancake as the edges climb the sides, and it soaks back in as the Dutch baby sits for a minute or two. It is completely normal and adds to that rich, toasty flavor.
Is it safe to pour batter into a hot glass dish?
Glass baking dishes do not like sudden temperature changes, so this recipe is written to be gentle on them. Make sure the oven is fully preheated before the dish goes in, warm the dairy and make the batter as soon as you start preheating so it is not fridge cold, pour slowly into the center rather than against the hot sides, and always set the hot dish on a dry towel or trivet rather than a wet or cold surface.
Can I make a Dutch baby in a cast iron skillet?
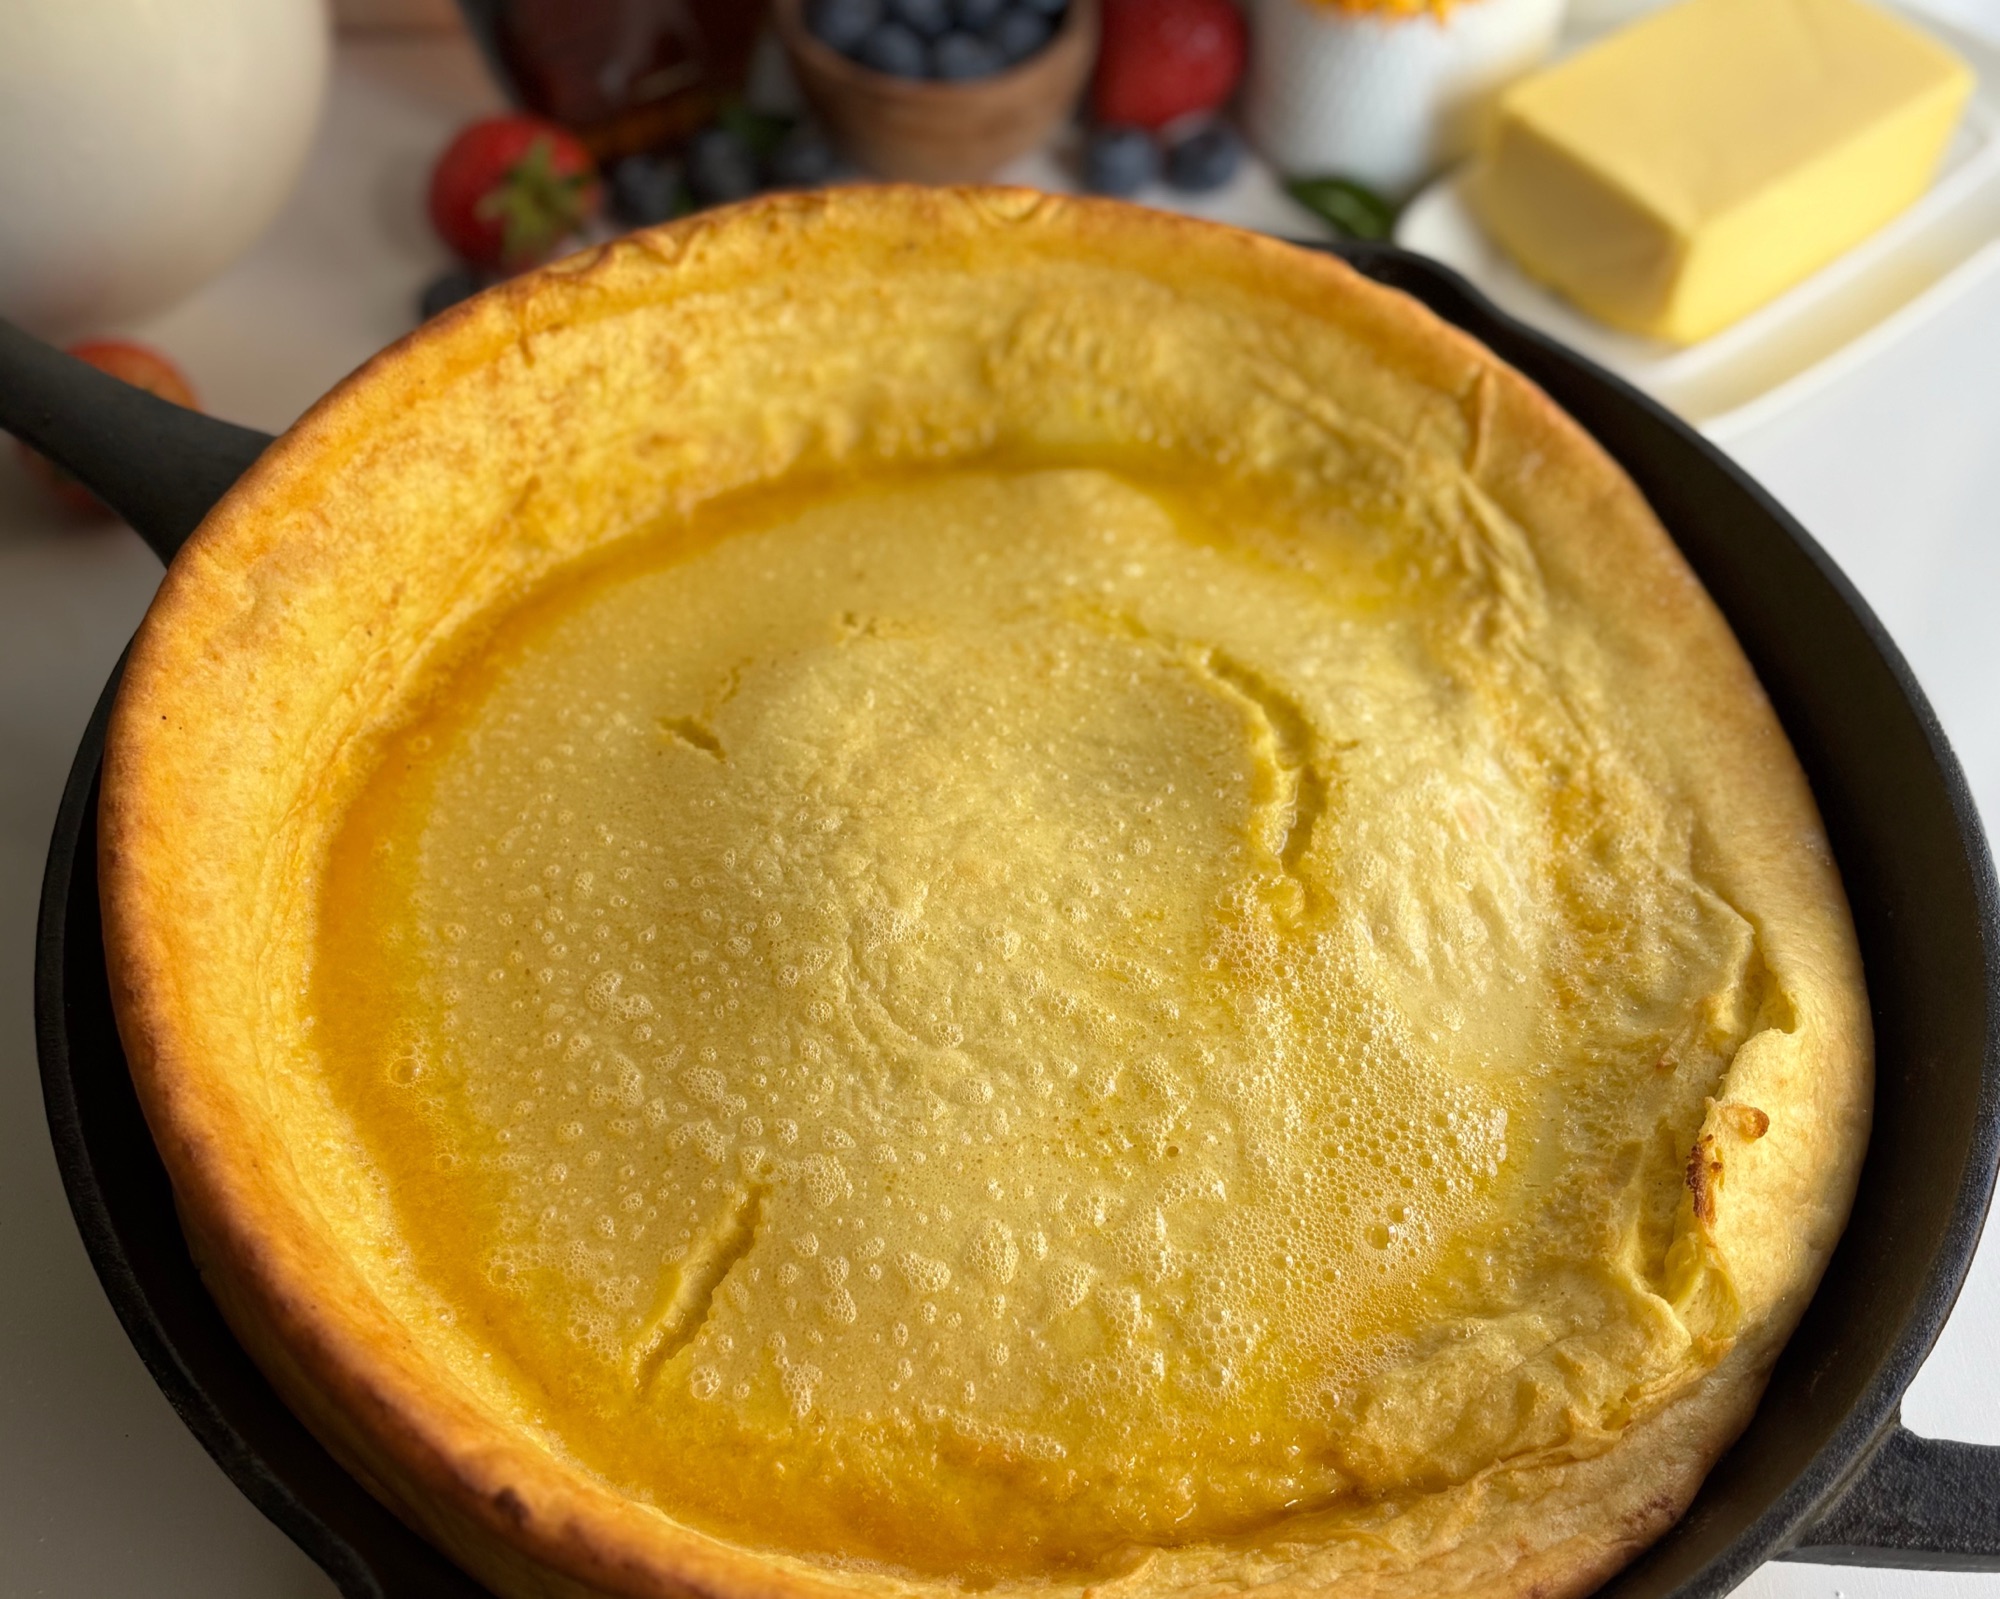
Yes, this high protein Greek yogurt Dutch baby works in a 12 inch cast iron skillet using the same amounts in the recipe card, and it is the pan I choose when I want the tallest rim and the crispiest golden edges, because cast iron heats quickly and holds that heat so the batter begins to steam the moment it hits the butter. The skillet and the 13×9 glass baking dish have nearly the same surface area, so you can switch between them without changing anything in the recipe.What size cast iron skillet should I use for a Dutch baby?
Use a 12 inch cast iron skillet, which has about 113 square inches of surface, so the full amount of batter (772 grams) sits at about 6.8 grams per square inch, almost the same depth as the 13×9 dish at about 6.6 grams per square inch. A 10 inch skillet has only about 78 square inches, which would put roughly 40 percent more batter on every square inch and tends to leave a doughy center or batter climbing past the rim, so I would choose the 12 inch skillet or the glass dish instead. A 14 inch skillet also works, but the batter spreads thinner at about 5 grams per square inch, so the Dutch baby comes out flatter with less custard in the middle and finishes a few minutes sooner.How do I preheat the skillet and bake a Dutch baby in cast iron?
Preheat the oven to 425°F with the rack in the center, warm the Greek yogurt, milk, and maple syrup for 30 seconds while the oven heats, blend the batter until smooth, and let it rest on the counter. Put the butter pieces in the skillet and set it in the hot oven for about 6 to 8 minutes, until the butter melts and the milk solids turn foamy and golden brown, then pull the rack out partway, pour the batter slowly into the center of the skillet, and slide it back in. Bake for 20 to 25 minutes without opening the oven door, until the edges are deeply golden and puffed up the sides and the center is set.
Shop This Recipe
These are the tools I reach for every time I make this Dutch baby. Some of the links below are affiliate links, which means I earn a small commission at no extra cost to you, and it helps support the blog so I can keep sharing recipes like this one.
- 9×13 Glass Baking Dish: The pan this recipe is built and tested in, and the clear sides let you watch the edges puff and brown.
- 12″ Cast Iron Pan: Another pan to make this recipe, equally delicious.
- Blender: Blends the Greek yogurt batter completely smooth in under a minute.
- Digital Kitchen Scale: Weighing the eggs and yogurt keeps every batch consistent.
- Metal Spatula: A thin metal turner slides right under each slice for clean servings.
More High Protein Recipes
If you love getting more protein into breakfast without protein powder, these are a few more favorites from the High Protein series.
Made This Recipe?
If you make this high protein Dutch baby, I would love to hear how it turned out, so leave a comment and a star rating below to help other readers find it. Tag me @h3artofthehome on Instagram so I can see your puffed edges, and save this recipe so it is ready the next time you need a breakfast that feeds everyone at once.
Subscribe for Free
Want new recipes like this one sent straight to your inbox? Subscribing to H3art of the Home is completely free, and you will be the first to know when a new high protein bake or sourdough recipe goes live on the blog.





Leave a Reply