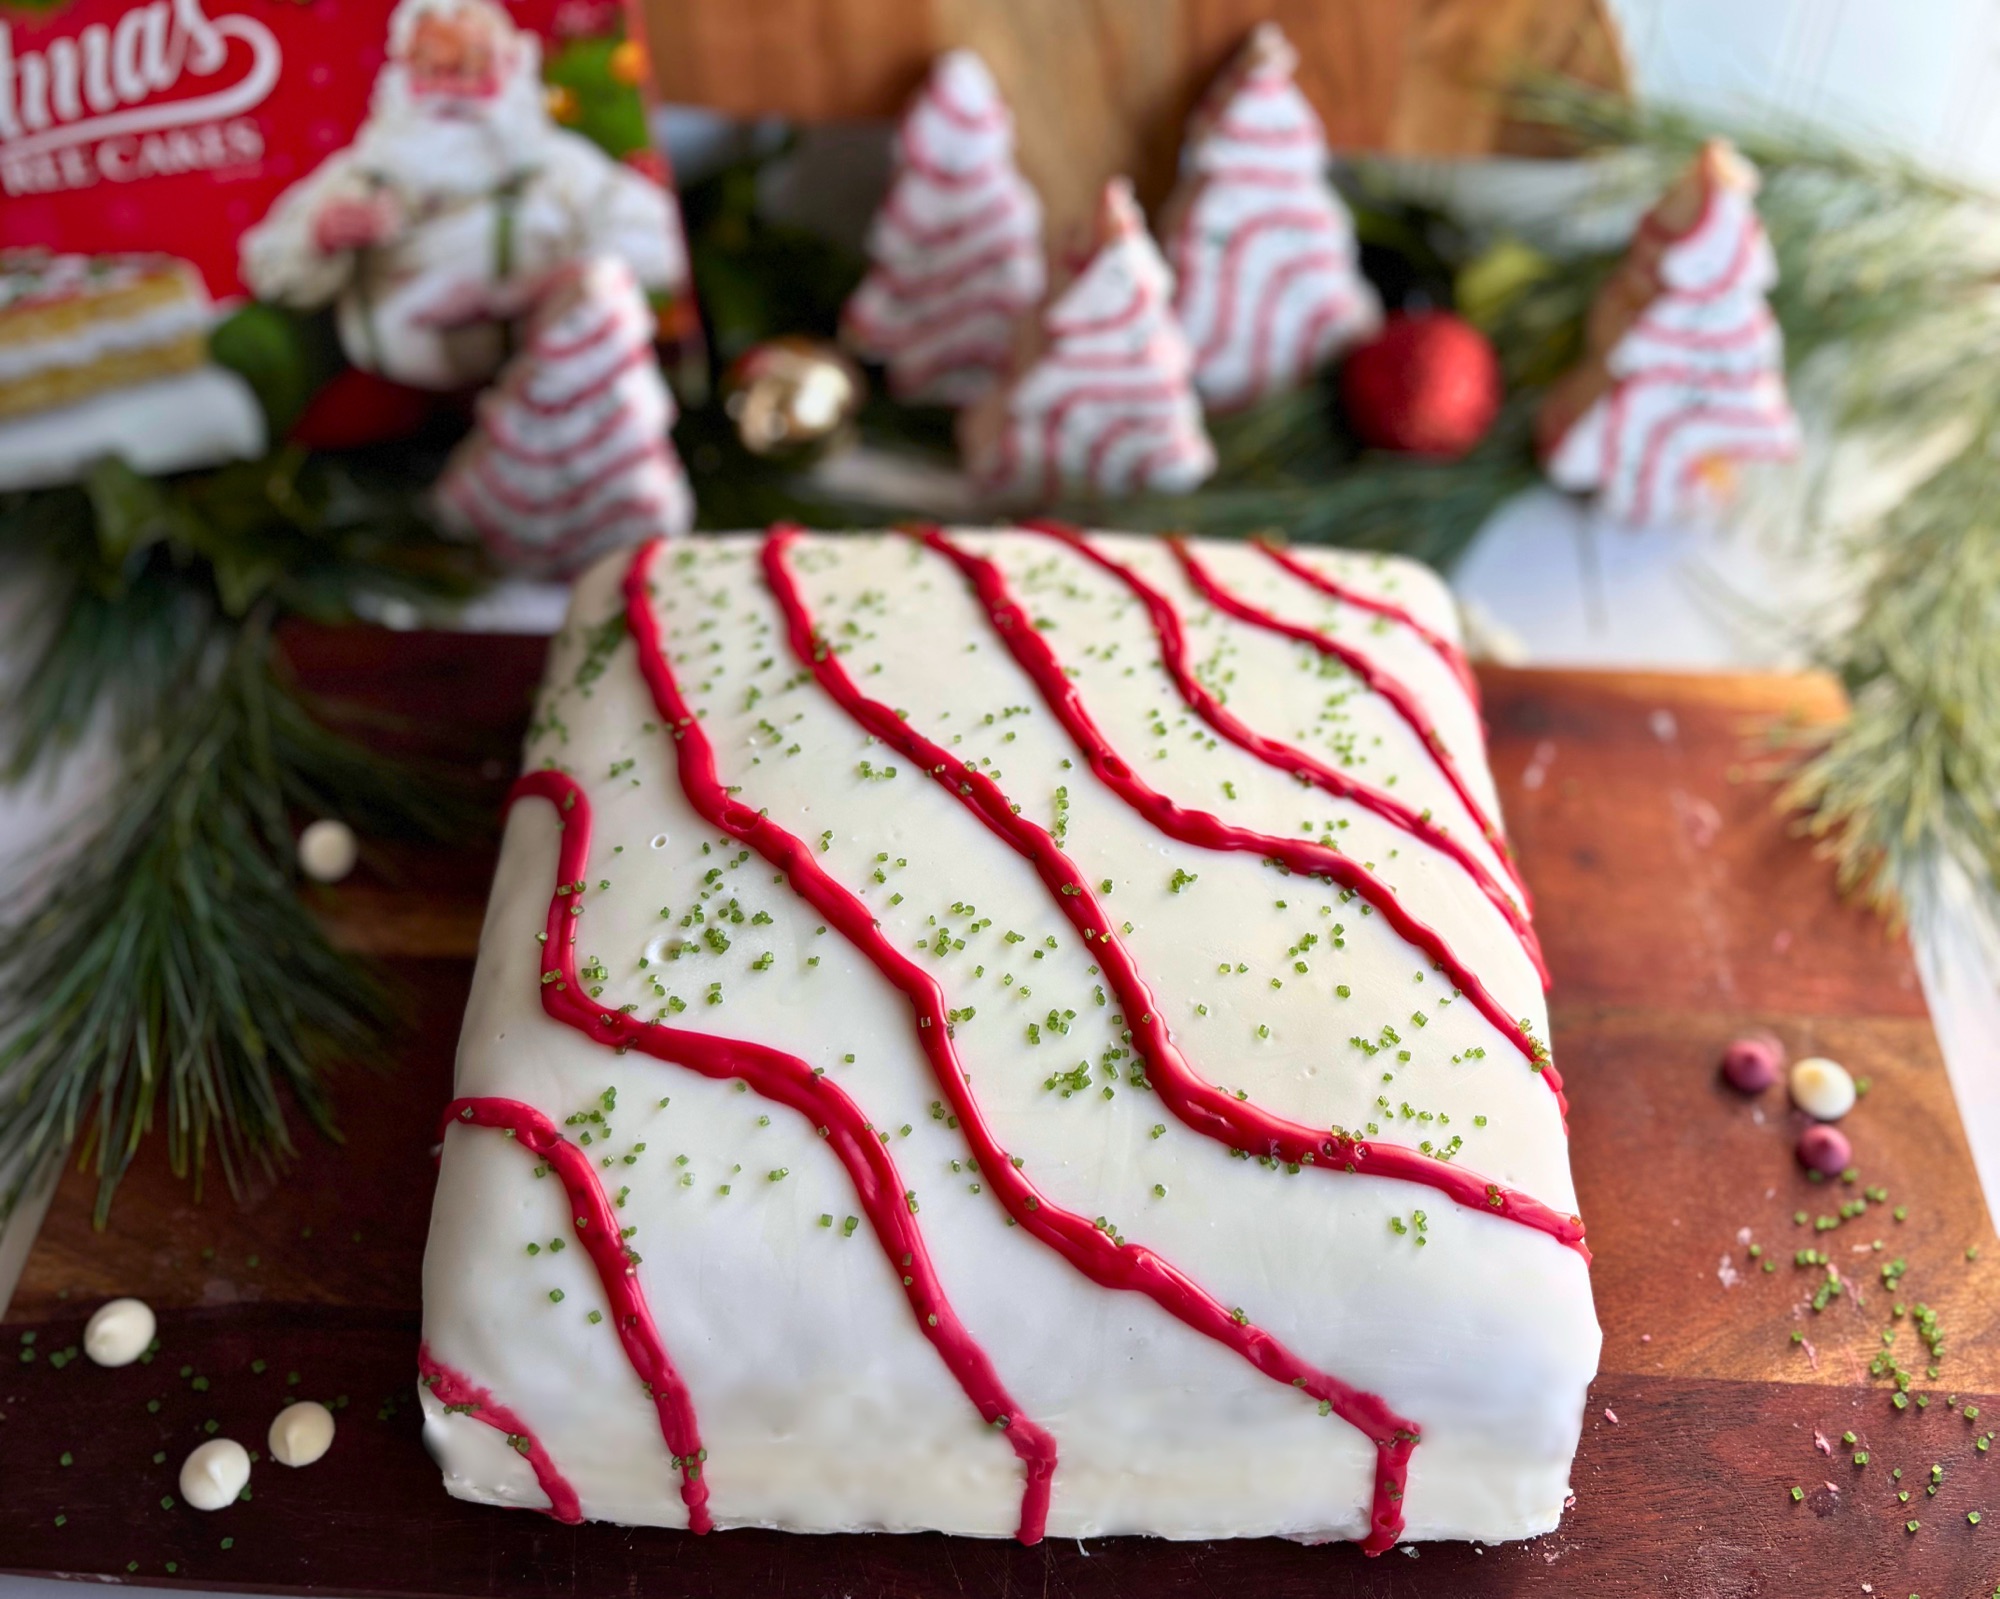
These Little Debbie Christmas tree cake squares give you everything you love about the boxed holiday snack cakes, from the soft vanilla cake and the marshmallow creme center to the bright white coating with red stripes and green sparkle, all baked in one 8×8 pan and cut into squares with no cookie cutter in sight.

I wanted that nostalgic Christmas tree cake flavor without baking two thin sheet cakes and stamping out trees one at a time, which is how most homemade versions go. So I built it the way I actually like to bake during the holidays: one bowl, one pan, a quick split through the middle, a thick layer of creme, and a coating that pours on and sets up on its own. You can make it with sourdough discard or go with the classic version that needs no starter at all, and both recipe cards are below.
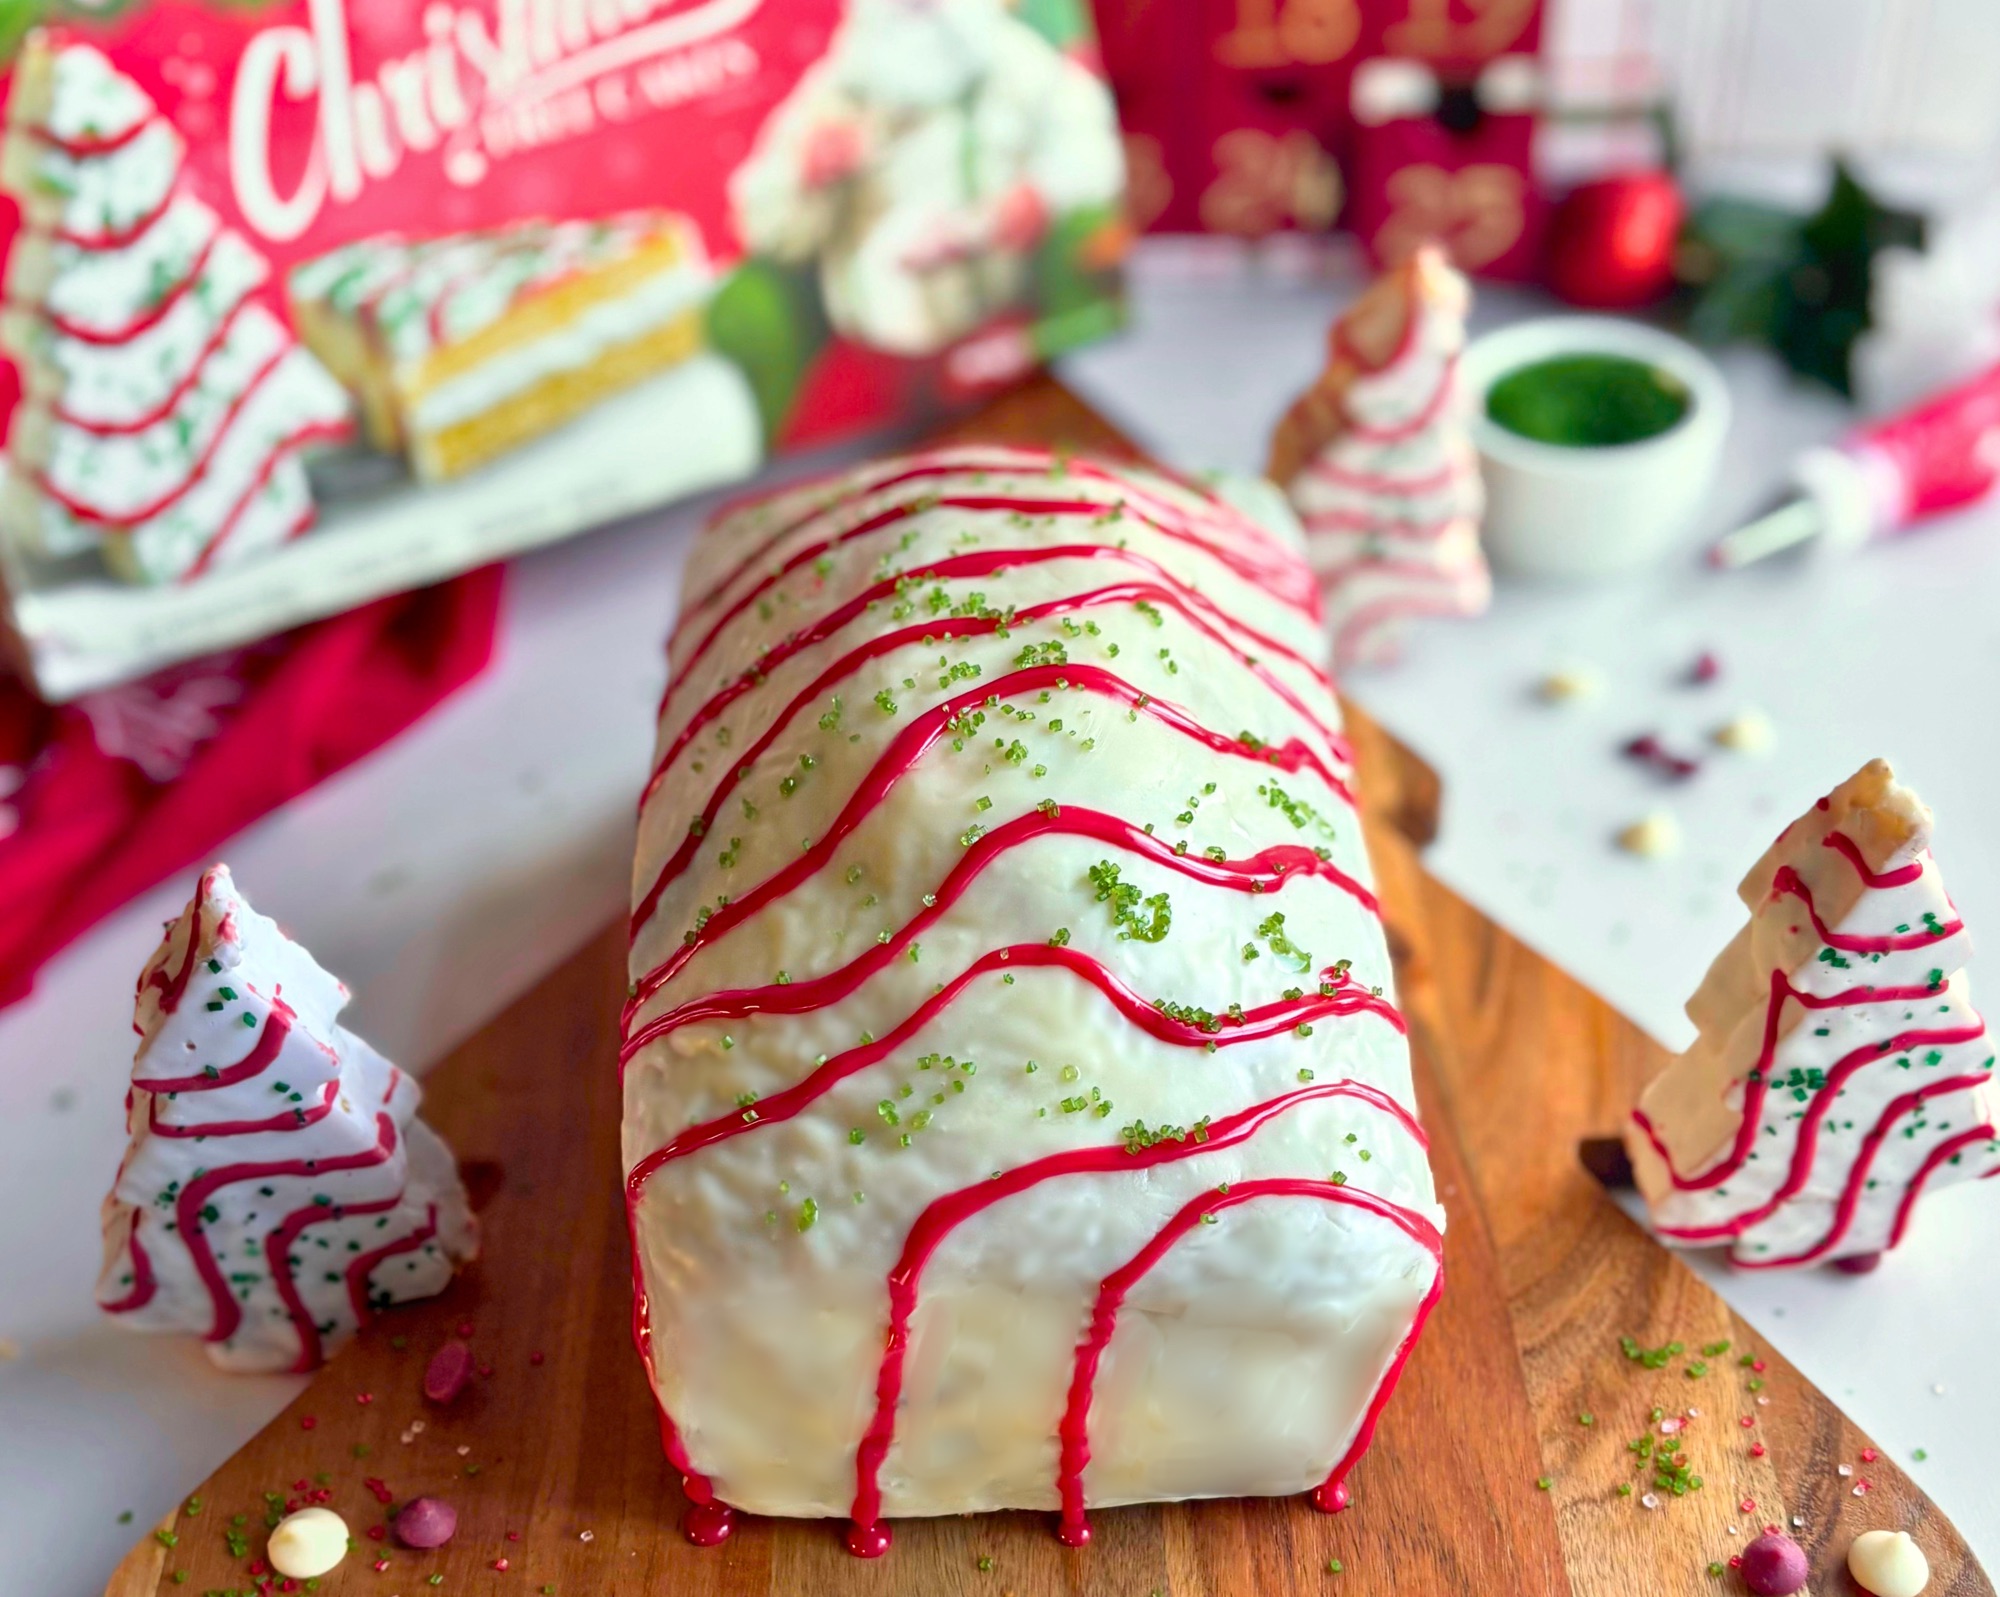
If you want something even simpler, my Christmas tree cake loaf, uses the same tested batter in a loaf pan with the filling piped right through the middle.
H3art of the Home is not affiliated with or endorsed by Little Debbie. This recipe is my own homemade take, inspired by the classic Christmas tree snack cakes so many of us grew up with.
Table of Contents
- Why You Will Love These Christmas Tree Cake Squares
- How I Tested This Copycat
- Ingredients and Why They Matter
- Shop This Recipe
- How to Make Christmas Tree Cake Squares
- Melting Wafers or White Chocolate Chips
- Expert Tips
- Variations
- Storage, Make Ahead, and Freezing
- No Sourdough Version
- Frequently Asked Questions
- Christmas Tree Cake Squares Recipe (Sourdough Discard)
- Classic Christmas Tree Cake Squares Recipe
- More Recipes You Will Love
- Subscribe for Free
Why You Will Love These Christmas Tree Cake Squares
These squares taste like the snack cakes you remember, but they are baked from scratch in your own kitchen, they make a full pan instead of a handful of little trees, and the whole thing comes together without any special tools.

- One pan, no cookie cutter. The cake bakes in a single 8×8 pan, gets split through the middle, and is sliced into squares, so there are no scraps and no fiddly tree shapes to coat one by one.
- A real creme stripe in every bite. The marshmallow creme filling is whipped with butter and powdered sugar so it holds a clean white line through the center of every square.
- That bright white coating. White melting wafers set into the smooth, snowy coating that makes the original look the way it does.
- Sourdough discard or classic. Use up some of your discard, or skip the starter completely with the classic card, which uses the same method.
- Made for sharing. One pan cuts into 12 generous squares, which is perfect for a cookie tray, a classroom party, or a holiday dessert table.
Back to Table of Contents | Jump to Recipe
How I Tested This Copycat
I tested this batter several times in both a loaf pan and an 8×8 pan, with sourdough discard and without it, and I tried both white chocolate chips and white melting wafers for the coating before settling on the version you see here.

The cake that worked best is leavened with baking powder alone, uses three whole eggs for structure, and mixes by hand so the crumb stays soft and fine like the original. In the 8×8 pan I bumped the baking powder up from my loaf version, because a shallow cake does not need the extra structure a tall loaf does, and the result is a lighter, more open crumb that still splits cleanly. For the coating, melting wafers gave me the brightest white, which is the look I was after, and I worked out a cream ratio that keeps them fluid long enough to run down the sides.
When I cut one of my squares next to a store bought snack cake, the layers, the creme, and the white coating lined up the way I hoped, just taller and softer, which is exactly what I want from a homemade version.
Back to Table of Contents | Jump to Recipe
Ingredients and Why They Matter
Every ingredient in this recipe is doing a specific job, so here is what each one brings and where you have room to swap. You will find the exact amounts in the recipe cards below.

- All purpose flour. It gives the cake a tender, fine crumb that still holds up to being split. If bread flour is what you keep on hand, the card notes show how to cut it with cornstarch so it bakes up just as soft.
- Sourdough discard. Unfed discard straight from the fridge adds moisture and a soft, slightly richer crumb. It is not here for flavor, so the cake still tastes like a classic vanilla snack cake.
- Eggs. Three whole eggs give the cake enough structure to rise evenly and split without crumbling.
- Neutral oil. Oil keeps the cake moist for days in the fridge, which matters since these are stored cold.
- Baking powder. This is the only leavener, with no baking soda, so the cake rises evenly without a bitter edge or an overly dark crust.
- Marshmallow creme, butter, and powdered sugar. Together they make a fluffy cream that tastes like the original filling but is firm enough to hold a clean stripe when sliced.
- White melting wafers and heavy cream. A small amount of cream keeps the wafers pourable, then they set into a bright white coating that slices neatly.
- Red cookie icing and green sanding sugar. These give you the red stripes and green sparkle that make it instantly recognizable.
Back to Table of Contents | Jump to Recipe
Shop This Recipe
These are the tools and ingredients I reach for when I make these squares. Some of the links below are affiliate links, which means I earn a small commission at no cost to you, and it helps support the blog so I can keep sharing free recipes.

- Metal 8×8 baking pan. A metal pan at least 2 inches deep bakes the cake evenly and gives you straight sides to rebuild the cake in after splitting.
- Parchment paper and clips. A parchment sling with clips holding it to the pan makes it easy to lift the cake out, and it does double duty when you assemble the layers.
- Instant read thermometer. Baking to temperature is the most reliable way to know the center is done without overbaking the edges.
- Long serrated knife. A long blade lets you split the cake in smooth, even strokes.
- Offset spatula. I use it to spread the cream filling and to guide the coating down the sides.
- White melting wafers. These give you the brightest white coating with no food coloring.
- Green sanding sugar. Coarse sanding sugar keeps its sparkle on the coating.
- Red cookie icing. A squeeze bottle or piping bag of red cookie icing makes the stripes quick and neat.
- Piping bags and small round tips. For thin, even stripes if you make your own icing.
Back to Table of Contents | Jump to Recipe
How to Make Christmas Tree Cake Squares
The full step by step with every amount, temperature, and time is in the recipe card, so this section walks you through what each stage should look like and why it matters.
Mix the Batter by Hand
A whisk and a spatula are all you need, and I recommend skipping the stand mixer here, because a mixer can whip too much air into the eggs and overwork the flour, which leaves you with a coarse, dry crumb instead of the soft one you want.

Whisk the sugar and eggs just until they look smooth and slightly lighter, whisk in the wet ingredients, and fold the dry ingredients in only until the dry streaks disappear. The batter will be pourable and glossy.
Bake It to Temperature
Pour the batter into the lined pan as soon as it is mixed, since baking powder starts working the moment it gets wet and you want that lift in the oven rather than in the bowl.

The cake is ready when the center reads 205 to 210°F on an instant read thermometer. A few cracks across the top are completely normal, and they will end up hidden in the middle of the cake once you assemble it.

Wrap It Warm and Chill
This is a tip and it makes a real difference. Instead of letting the cake cool all the way on the counter, wrap it in plastic while it is still warm, then chill it.

Wrapping traps the steam so the moisture goes back into the crumb instead of escaping, and chilling firms the cake so it splits cleanly without tearing. Let it rest for a few minutes after it comes out of the pan first, so it is warm but no longer steaming when you wrap it. While it chills, whip up the creme filling.
Split the Cake
A cold cake is the secret to two even layers. Push toothpicks into the sides at the halfway point all the way around, then saw through with a long serrated knife, turning the cake as you go and following the toothpicks as your guide.


If the top domed, you can trim it flat before you split so the layers stack neatly.
Fill It Right in the Pan
This step is what makes the squares look so clean. Set the parchment sling back in the pan, lay the top half in with the trimmed side down, and spread the creme filling edge to edge, then set the bottom half on top with its flat side facing up.

The pan acts like a mold, so the layers stay lined up, the filling cannot squeeze out the sides, and the flat bottom of the cake becomes a perfectly smooth top for the coating. Chill it in the fridge rather than the freezer, because a freezer cold cake sets the coating before it can reach the sides.
Pour On the White Coating
Lift the chilled cake out by the parchment and set it on a rack over a rimmed sheet pan to catch the drips. Pour the coating onto the center of the top, then use an offset spatula to push it out to the edges and down the sides while it is still fluid.


Work quickly, because melting wafers start to set within a minute or two on a cold cake. Any drips that collect on the sheet pan can be scraped up, rewarmed, and used to patch thin spots.
Decorate and Slice
Sprinkle the green sanding sugar over the top while the coating is still tacky so it sticks, then give the coating time to firm up before you pipe the red stripes.

I like my stripes loose and wavy, running corner to corner and trailing down the sides just like the snack cakes, so do not worry about making them perfect.

Once the icing has set, slice the cake with a sharp knife warmed under hot water and wiped dry between cuts, which keeps the coating from cracking and gives you those clean layered sides.

Melting Wafers or White Chocolate Chips
Both work, but they behave differently, and the one you choose changes how the finished cake looks.

White melting wafers are what I use in the recipe card. They stay the brightest white, they need only a small amount of cream to pour smoothly, and they set firm enough to slice neatly while still staying soft enough to bite through. Because they set fast, they reward working quickly and pouring onto a cake chilled in the fridge rather than the freezer. Keep every drop of water and food coloring out of the bowl, since melted wafers can seize.
White chocolate chips give you a creamier ganache with a warm ivory color rather than a stark white. They make a thinner coating, so I spread a thin first layer over the cake, chill it for a few minutes, and then pour the rest, which keeps the cake from showing through. The chip amounts are in the recipe card notes.

Whichever you use, the ratio is what keeps it from going thin and see through. Both use about 3 parts white chocolate to 1 part cream by weight, which is why the card measures the cream so precisely. I also do not recommend trying to whiten the coating with a drop of blue or purple food coloring, because it dulls the color toward gray instead of making it whiter.
Back to Table of Contents | Jump to Recipe
Expert Tips
These are the small details that make the biggest difference between a good homemade copycat and one that looks and slices like the real thing.

- Weigh your ingredients. A kitchen scale keeps the batter, the creme, and especially the coating ratio exactly where they should be.
- Use room temperature eggs and milk. Cold dairy can make the oil firm up in spots, and taking the chill off the milk for a few seconds in the microwave keeps the batter smooth.
- Bake to temperature, not just time. Ovens and pans vary, so the thermometer reading is your real signal that the cake is done.
- Chill before every cut. A cold cake splits evenly, and cold squares slice with clean sides and a crisp creme stripe.
- Rebuild the cake in the pan. The straight pan walls keep the layers aligned and give you neat edges for the coating.
- Fridge, not freezer, before coating. A very cold cake sets the coating on contact, which leaves ridges on the sides.
- Use a warm, dry knife. Run it under hot water and wipe it dry between cuts so the coating does not crack.
Variations
Once you have made these once, it is easy to make them your own.

- Thinner, snack size squares. For layers closer to the thin original, trim a little more off the top before you split the cake, then cut the finished cake into smaller squares.
- Homemade red icing. If you cannot find red cookie icing, the card notes include a quick powdered sugar icing you can tint with red gel coloring.
- White chocolate chip coating. Swap the wafers for chips for a creamier ivory coating, using the amounts in the card notes.
- A 9 or 10 inch square pan. This recipe works beautifully in a larger square pan too. The cake bakes up a little flatter, which gives you thinner layers that are even closer to the original snack cakes, and it bakes a little quicker, so start checking at about 30 minutes in a 9 inch pan and about 25 minutes in a 10 inch pan, then pull it at the same center temperature. The filling and coating amounts stay the same, and a good chill before splitting keeps the thinner layers easy to cut.
- A loaf pan. If you would rather bake it in a loaf pan with the filling piped through the center, my Christmas tree cake loaf walks you through it.
Storage, Make Ahead, and Freezing
Because of the butter and marshmallow creme filling, these squares belong in the fridge, and they actually slice best cold.

- Refrigerator. Store the squares covered in the fridge for up to 1 week.
- Serving. Slice them cold for the cleanest layers, then let the squares sit for about 10 minutes before serving so the cake softens.
- Make ahead. You can bake, wrap, and chill the cake a day ahead, then fill, coat, and decorate the next day.
- Freezer. These freeze really well. Wrap the squares tightly and freeze for up to 2 months, then thaw them in the fridge overnight.
No Sourdough Version
You do not need a sourdough starter to make these, because the classic recipe card below converts this exact recipe for you.

Sourdough discard is half flour and half water by weight, so the classic version simply puts that flour and liquid back. It uses all purpose flour in place of the flour the discard was bringing, and a little more milk in place of its water. The batter weight, the hydration, and the leavening all stay nearly the same, so the classic cake mixes, bakes, and splits exactly like the sourdough version. Everything else, from the creme filling to the coating and the decoration, is identical.
Head straight to the classic recipe card for the full amounts.
Frequently Asked Questions
Here are the questions I get most about making Christmas tree cake squares at home.

Are these the same as Little Debbie Christmas Tree Cakes?
They are a homemade copycat inspired by them, with soft vanilla cake, a marshmallow creme filling, a white coating, red stripes, and green sanding sugar. They are baked as one pan and cut into squares rather than shaped like trees, and they are taller and softer than the boxed version. H3art of the Home is not affiliated with Little Debbie.
Do I need a Christmas tree cookie cutter?
No. That is the whole point of this version. The cake is cut into squares, so there are no scraps and no individual trees to coat.
Can I make these without sourdough discard?
Yes. Use the classic recipe card, which swaps the discard for all purpose flour and extra milk and keeps everything else the same.
Can I use white chocolate chips instead of melting wafers?
Yes. Chips give you a creamier, ivory coating. They make a thinner coating, so spread a thin first layer, chill it briefly, then pour the rest. The amounts are in the card notes.
Why is my white coating see through?
The usual cause is too much cream for the amount of white chocolate, which thins the coating so the cake shows through. Weigh the cream and keep the ratio at about 3 parts white chocolate to 1 part cream. A thin first coat that you chill before pouring the rest also helps.
Why did my coating set before it reached the sides?
The cake was likely too cold. A cake straight from the freezer sets melting wafers on contact. Chill the filled cake in the fridge instead, and use an offset spatula to guide the coating down the sides while it is still fluid.
Can I use a glass 8×8 pan?
A metal pan is best. Glass heats more slowly in the center and can brown the edges before the middle is done, so if glass is all you have, plan on a few extra minutes and go by the center temperature.
Can I use a 9 inch or 10 inch pan?
Yes, and it is a great option. A 9 or 10 inch square pan gives you a slightly flatter cake with thinner layers, and it bakes a little quicker, so start checking at about 30 minutes for a 9 inch pan and about 25 minutes for a 10 inch pan, and go by the center temperature of 205 to 210°F. Everything else in the recipe stays the same.
How many squares does one pan make?
One 8×8 pan cuts into 12 generous squares. For smaller, snack size pieces, cut it into 16.
How long do these last, and can I freeze them?
They keep covered in the fridge for up to 1 week, and they freeze really well for up to 2 months wrapped tightly. Thaw them in the fridge overnight.
Christmas Tree Cake Squares Recipe (Sourdough Discard)

Little Debbie Christmas Tree Cake Squares (Sourdough Discard)
Equipment
- Metal 8×8 baking pan, at least 2 inches deep 9 or 10 inch
- Parchment paper
- Large mixing bowl
- Whisk
- Rubber spatula
- Instant read thermometer
- Wire cooling rack
- plastic wrap
- Toothpicks
- Long serrated knife
- Hand mixer or stand mixer-
- Offset spatula
- Rimmed sheet pan
- Piping bag with a small round tip
Ingredients
Cake
- 255 g all purpose flour 2 cups + 2 tbsp
- 150 g unfed sourdough discard 100% hydration (2/3 cup)
- 250 g granulated sugar 1 1/4 cups
- 150 g eggs 3 large, room temperature
- 120 g whole milk room temperature (1/2 cup)
- 109 g neutral oil such as avocado oil (1/2 cup)
- 8 g vanilla extract for the cake 2 tsp
- 11 g baking powder 2 3/4 tsp
- 3 g fine salt 1/2 tsp
Creme Filling
- 85 g unsalted butter for the creme filling softened (6 tbsp)
- 90 g powdered sugar for the creme filling 3/4 cup
- 149 g marshmallow creme 3/4 of a 7 oz jar
- 3 g vanilla extract for the creme filling 3/4 tsp
- Pinch of salt for the creme filling
White Coating
- 284 g white melting wafers for the coating such as Ghirardelli (one 10 oz bag)
- 95 g heavy cream for the coating 1/3 cup + 1 tbsp
- Decoration
- Red cookie icing for the stripes about 3 tbsp
- Green sanding sugar for sprinkling about 2 tsp
Instructions
Cake
- Heat the oven to 350°F on the regular bake setting with the rack in the center. Grease the 8×8 pan and line it with a parchment sling that comes up two sides.
- In a medium bowl, whisk the flour, baking powder, and salt together and set it aside.
- In a large bowl, whisk the sugar and eggs by hand for 30 to 45 seconds, just until smooth and slightly lighter.
- Whisk in the oil, vanilla, milk, and sourdough discard until smooth.
- Add the dry ingredients to the wet and fold them in with a spatula just until no dry streaks remain.
- Pour the batter into the pan right away, smooth the top, and tap the pan on the counter.
- Bake for 40 to 50 minutes. Start checking at 38 minutes and pull the cake when the center reads 205 to 210°F.
- Cool in the pan for 10 minutes, lift the cake out by the parchment, and let it sit on a wire rack for another 10 to 15 minutes, until it is warm but no longer steaming.
- Wrap the cake snugly in plastic wrap and chill for at least 2 hours, or freeze for 45 to 60 minutes.
Creme Filling
- Beat the softened butter and powdered sugar until light and fluffy, then beat in the marshmallow creme, vanilla, and salt until smooth.
Assembly
- Unwrap the cold cake and trim the top flat if it domed. Push toothpicks into the sides at the halfway point all the way around, then split the cake horizontally with a long serrated knife, turning the cake as you saw.
- Lay the parchment sling back in the pan and set the top half in, trimmed side down. Spread all of the filling over it edge to edge, then set the bottom half on top, cut side down, so the flat bottom of the cake faces up.
- Chill in the fridge for 20 to 30 minutes, not the freezer, so the filling firms up without the cake getting so cold that the coating sets before it reaches the sides.
White Coating
- Heat the cream until it just simmers, pour it over the melting wafers, and cover the bowl for 5 minutes. Whisk gently until smooth. If any wafers remain, microwave in 10 second bursts at 50% power, stirring between each. Let it cool to 85 to 90°F.
- Lift the cake out of the pan by the parchment and set it on a wire rack over a rimmed sheet pan. Pour the coating onto the center of the top and work it out to the edges and down the sides with an offset spatula before it sets. Keep water and food coloring out of the bowl.
Decoration
- Sprinkle the green sanding sugar over the top while the coating is still tacky.
- Let the coating set for about 30 minutes, then pipe red icing stripes across the top through a small round tip, letting them trail down the sides.
- Let the icing set for 30 to 60 minutes, then cut into 12 squares with a sharp knife warmed under hot water and wiped dry between cuts.
Notes
Classic Christmas Tree Cake Squares Recipe

Little Debbie Christmas Tree Cake Squares (Classic Recipe)
Equipment
- Metal 8×8 baking pan, at least 2 inches deep 9 or 10 inch
- Parchment paper
- Large mixing bowl
- Whisk
- Rubber spatula
- Instant read thermometer
- Wire cooling rack
- plastic wrap
- Toothpicks
- Long serrated knife
- Hand mixer or stand mixer-
- Offset spatula
- Rimmed sheet pan
- Piping bag with a small round tip
Ingredients
Cake
- 330 g all purpose flour 2 3/4 cups
- 250 g granulated sugar 1 1/4 cups
- 150 g eggs 3 large, room temperature
- 210 g whole milk room temperature (3/4 cup + 2 tbsp)
- 109 g neutral oil such as avocado oil (1/2 cup)
- 8 g vanilla extract for the cake 2 tsp
- 11 g baking powder 2 3/4 tsp
- 3 g fine salt 1/2 tsp
Creme Filling
- 85 g unsalted butter for the creme filling softened (6 tbsp)
- 90 g powdered sugar for the creme filling 3/4 cup
- 149 g marshmallow creme 3/4 of a 7 oz jar
- 3 g vanilla extract for the creme filling 3/4 tsp
- Pinch of salt for the creme filling
White Coating
- 284 g white melting wafers for the coating such as Ghirardelli (one 10 oz bag)
- 95 g heavy cream for the coating 1/3 cup + 1 tbsp
Decoration
- Red cookie icing for the stripes about 3 tbsp
- Green sanding sugar for sprinkling about 2 tsp
Instructions
Cake
- Heat the oven to 350°F on the regular bake setting with the rack in the center. Grease the 8×8 pan and line it with a parchment sling that comes up two sides.
- In a medium bowl, whisk the flour, baking powder, and salt together and set it aside.
- In a large bowl, whisk the sugar and eggs by hand for 30 to 45 seconds, just until smooth and slightly lighter.
- Whisk in the oil, vanilla, and milk until smooth.
- Add the dry ingredients to the wet and fold them in with a spatula just until no dry streaks remain.
- Pour the batter into the pan right away, smooth the top, and tap the pan on the counter.
- Bake for 40 to 50 minutes. Start checking at 38 minutes and pull the cake when the center reads 205 to 210°F.
- Cool in the pan for 10 minutes, lift the cake out by the parchment, and let it sit on a wire rack for another 10 to 15 minutes, until it is warm but no longer steaming.
- Wrap the cake snugly in plastic wrap and chill for at least 2 hours, or freeze for 45 to 60 minutes.
Creme Filling
- Beat the softened butter and powdered sugar until light and fluffy, then beat in the marshmallow creme, vanilla, and salt until smooth.
Assembly
- Unwrap the cold cake and trim the top flat if it domed. Push toothpicks into the sides at the halfway point all the way around, then split the cake horizontally with a long serrated knife, turning the cake as you saw.
- Lay the parchment sling back in the pan and set the top half in, trimmed side down. Spread all of the filling over it edge to edge, then set the bottom half on top, cut side down, so the flat bottom of the cake faces up.
- Chill in the fridge for 20 to 30 minutes, not the freezer, so the filling firms up without the cake getting so cold that the coating sets before it reaches the sides.
White Coating
- Heat the cream until it just simmers, pour it over the melting wafers, and cover the bowl for 5 minutes. Whisk gently until smooth. If any wafers remain, microwave in 10 second bursts at 50% power, stirring between each. Let it cool to 85 to 90°F.
- Lift the cake out of the pan by the parchment and set it on a wire rack over a rimmed sheet pan. Pour the coating onto the center of the top and work it out to the edges and down the sides with an offset spatula before it sets. Keep water and food coloring out of the bowl.
Decoration
- Sprinkle the green sanding sugar over the top while the coating is still tacky.
- Let the coating set for about 30 minutes, then pipe red icing stripes across the top through a small round tip, letting them trail down the sides.
- Let the icing set for 30 to 60 minutes, then cut into 12 squares with a sharp knife warmed under hot water and wiped dry between cuts.
Notes
Back to Table of Contents | Jump to Recipe
More Recipes You Will Love
If you love a nostalgic holiday bake that is easier than it looks, these are some of my favorites to make next.
Subscribe for Free
If you want new recipes like this one delivered straight to your inbox, subscribe to H3art of the Home. It is completely free, and you will be the first to know when a new holiday bake goes up.
Back to Table of Contents | Jump to Recipe



Leave a Reply