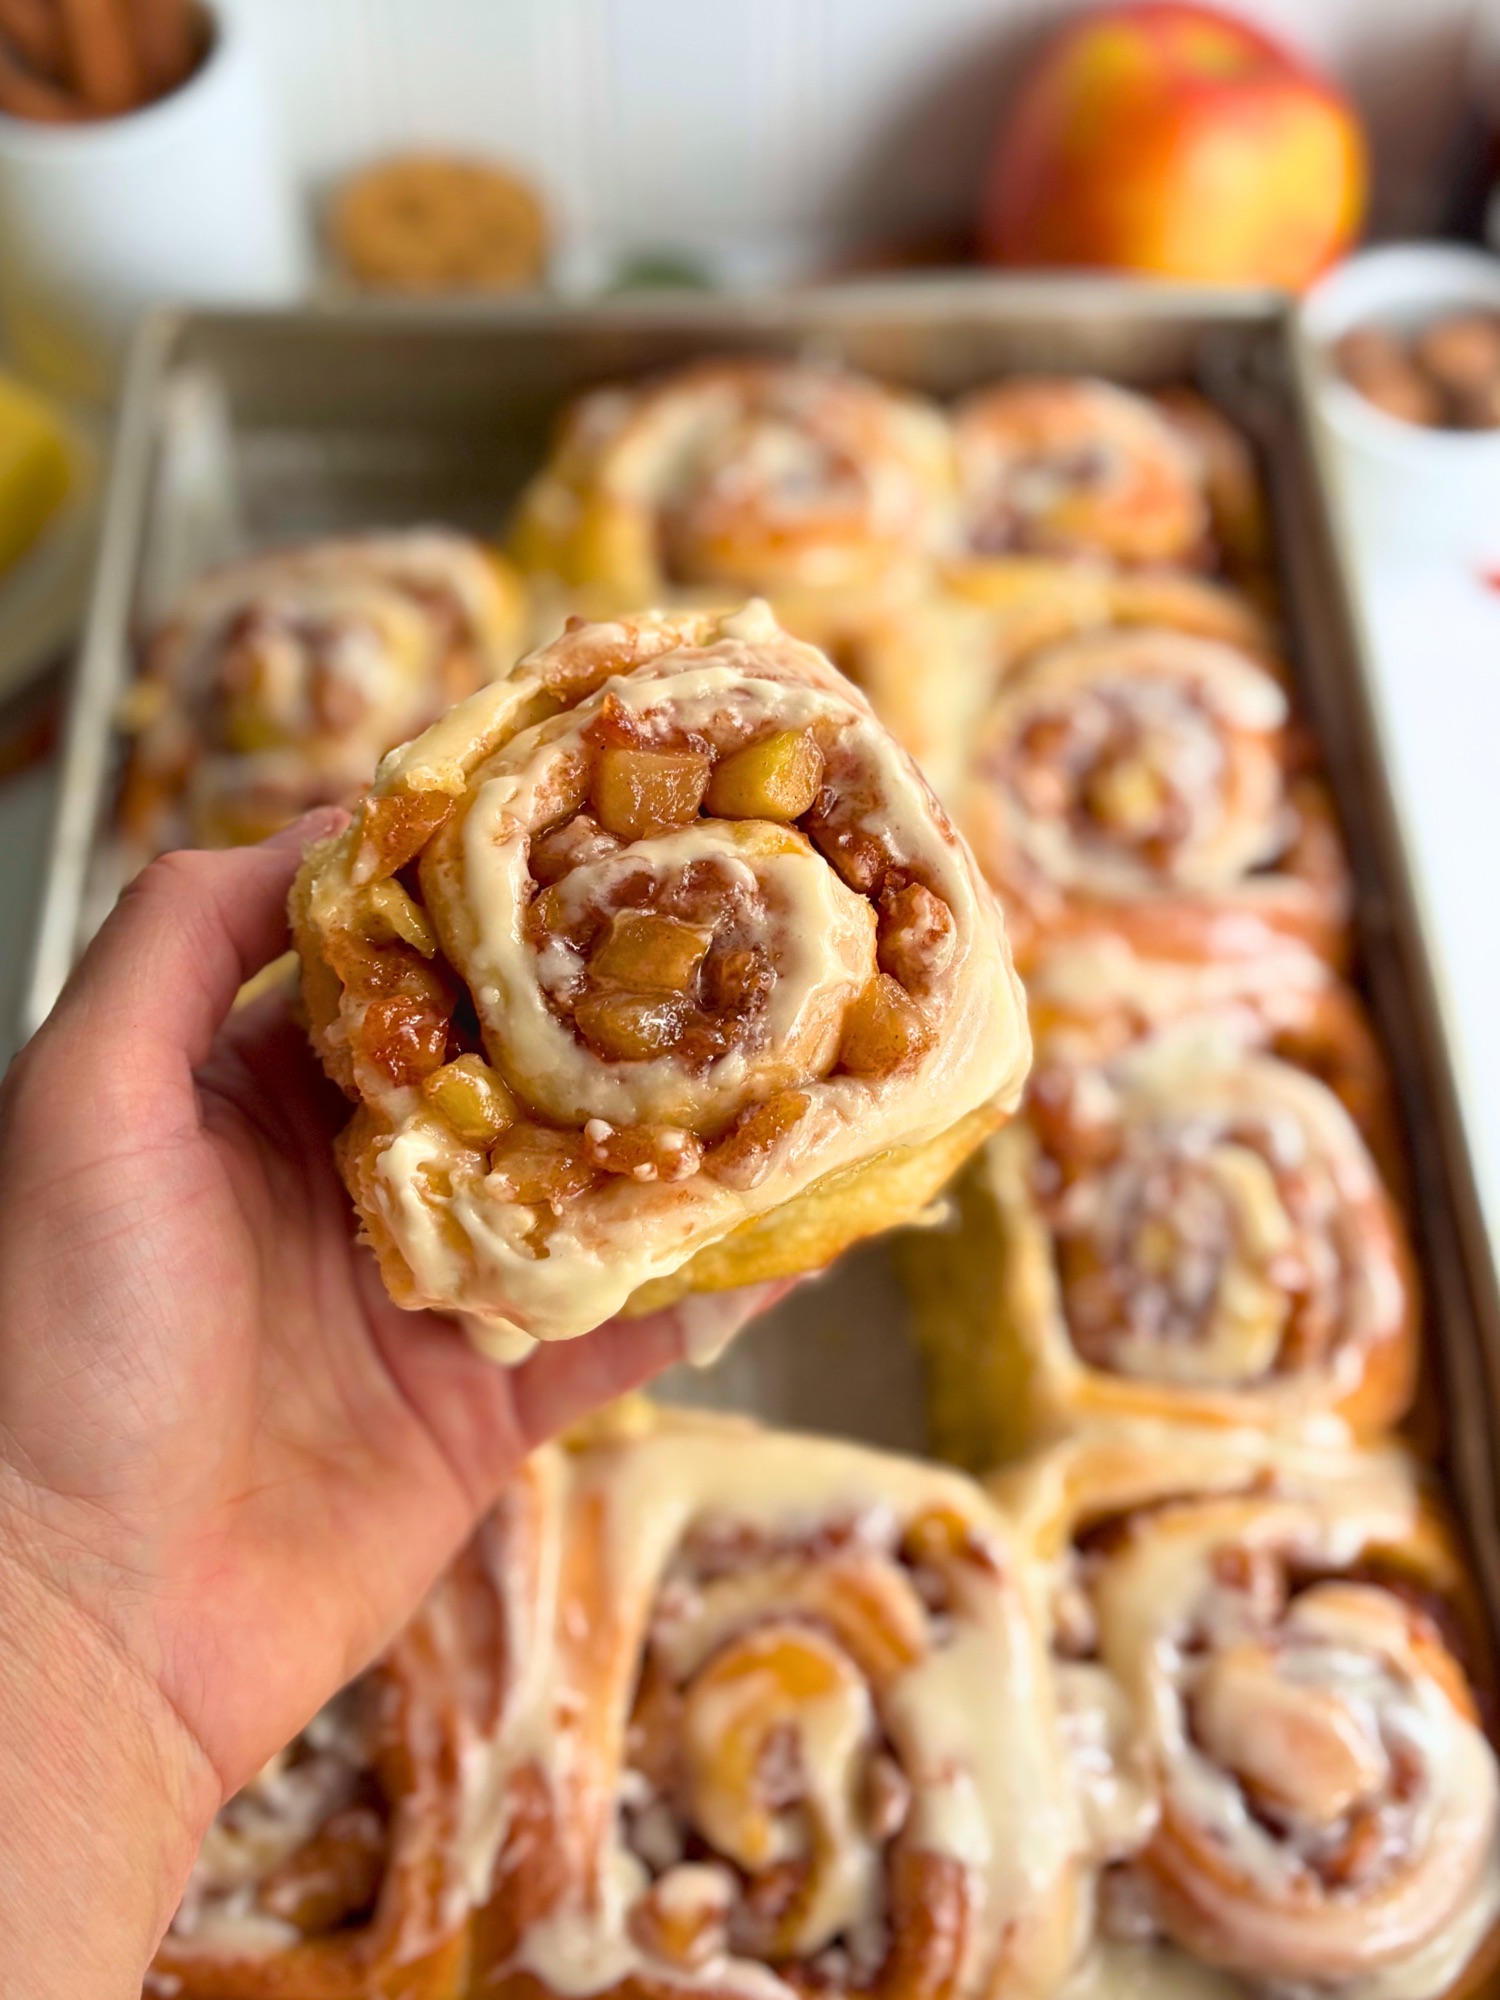
You cannot have fall without making these. The whole house smells like an apple orchard and a cinnamon roll shop had a very good idea together, they taste even better than they smell, and honestly they are simple to make. There is no protein powder anywhere in the ingredient list and my method makes sure you end up with a beautiful roll.
You get a soft, enriched high protein sourdough brioche wound around real spiced apples, with a caramel glaze poured over the top while the pan is still warm. Every roll carries around 12 grams of protein, and all of it comes from nonfat skyr, Greek yogurt or cottage cheese worked into the dough itself rather than from a scoop of powder that leaves baked goods dry and chalky.
The dough is the same high protein base from my High Protein Sourdough Cinnamon Rolls with Greek Yogurt, and this recipe is built exactly the way my Blueberry Lemon Sourdough Sweet Rolls were built, using the three layer filling method that solves the problem every fruit filled roll runs into. If you have ever cut into a beautiful brioche roll only to find the apples slid out the side and the bottom went mushy, that is the exact failure this method exists to prevent, and I explain why it happens below.
Table of Contents
- Why You Will Love These
- What High Protein Actually Means Here
- Why Fruit Filling Falls Out of Sweet Rolls
- Ingredient Notes
- Choosing Your Apples
- Can I Use Cottage Cheese Instead of Greek Yogurt
- Making the Apple Filling
- Fermenting the Dough
- How to Roll a Proper Rectangle
- Building the Three Layers
- Shaping and Cutting
- Baking
- Choosing Your Glaze
- Expert Tips
- Storage and Freezing
- Frequently Asked Questions
- More Recipes You Will Love
- Recipe
- Never Miss a Recipe
Why You Will Love These
Around 12 grams of protein per roll and no protein powder. Nonfat skyr or cottage cheese goes into the dough itself, so you are not compensating for chalky protein powder with extra fat and sugar somewhere else in the recipe. This is the same approach behind every recipe in my high protein sourdough series.
The apple filling is not a sugar bomb. Most apple sweet rolls taste like caramel with a rumor of apple somewhere in the middle. This filling is deliberately restrained so that you can taste the fruit and the spice, which leaves room for the caramel to be the star it wants to be.
The filling stays exactly where you put it. Fruit in a rolled dough almost always slides out, soaks the bottom, and leaves hollow gaps where the filling used to be. The three layer method is built specifically to stop that, and the section below explains why it works rather than just telling you to do it.
Fermentation does the work while you are doing something else. Mix it and walk away, then come back and shape when it is ready.

What High Protein Actually Means Here
Let me be clear about what these are and what they are not, because the phrase high protein gets stretched a long way on the internet and I would rather you know exactly what you are getting.
These are not a health food. They are not going to replace your protein shake, and they are certainly not standing in for the six eggs you had this morning.
What I am doing is different from that, and it is smaller and more useful. I am taking something we already love and getting more mileage out of it. The skyr, Greek yogurt or the cottage cheese is not there as a gimmick, it is there because it genuinely improves the dough while quietly adding twelve grams of protein to a thing that would otherwise have almost none. Enriched doughs want moisture and fat and a little acidity, and cultured dairy brings all three. The rolls come out softer than the version without it, not drier.
That is the part that matters most to me. I am not willing to trade texture or flavor for a number on a nutrition label. If a substitution makes the crumb chalky, or the flavor flat, or the roll dense, it does not go in the recipe no matter how good the macros look afterward.
The sweetness is the other piece of it. I have been pulling sugar down across my recipes lately, and this one in particular is built around a filling that tastes like apples and cinnamon. When the filling underneath is not fighting the caramel for attention.
The glaze is always optional, and it is the easiest place to steer these in whichever direction you want. Leave it off entirely and you have a lightly sweet apple roll that eats more like a breakfast pastry. Pour on the caramel glaze and you have dessert. Or use the Greek yogurt version described in choosing your glaze, which swaps most of the fat for nonfat skyr/greek yogurt. Three different rolls, one recipe, and none of them ask you to eat something you do not actually want.
Why Fruit Filling Falls Out of Sweet Rolls
You have seen the failure. Somebody makes a beautiful brioche roll with fruit in it, cuts into one, and the filling has abandoned the spiral entirely. The apples have slid down and out the side, there is a syrupy puddle welded to the bottom of the pan, the bottom inch of every roll is wet and gummy, and where the fruit used to be there are now hollow gaps between bare dough layers.
That happens for a specific reason and it is worth understanding, because once you know the mechanism the fix stops looking like a trick and starts looking obvious.
Wet fruit and rolled dough are natural enemies. Fruit is mostly water held inside cell walls, and heat ruptures those walls. In an open bake like a crumble or a pie, that released liquid has somewhere to go, either evaporating off the top or getting caught by a thickener sitting right there in the fruit. Inside a rolled dough it has neither option. It is trapped between tight spirals with no airflow, so it runs downhill along the path of least resistance, which is the slick between dough layers. Gravity does the rest. The liquid carries the fruit with it, both end up in the bottom of the pan or over flowing out the top, and the dough it passed through on the way is left sad.
The final proof makes it worse before the oven even gets involved. Those rolls sit at room temperature for the second proof, with a wet filling pressing outward, so a lot of the sliding has already happened by the time you turn the oven on.

The three layer method
The solution is to stop treating the filling as one thing you spread on dough and start treating it as three separate layers, each with exactly one job. Nothing gets stirred together, and the order is the whole recipe.
Layer one, whipped butter. This is the grip. Fat is what everything above it holds onto, and without it the sugar layer simply will not stay put while you roll.
Layer two, sugar whisked with cornstarch and cinnamon. This is the moisture barrier and it is the layer doing the real work. It sits between the fat and the fruit as a dry, thirsty bed. As the apples release liquid during the bake, that liquid hits cornstarch and sugar before it can ever reach the dough, gets absorbed, and then gels in place. Instead of running downhill it thickens where it stands.
Layer three, the cold apple filling. Already thickened, already cold, and spread thin over the dry layer.
That third point is the other half of why this works. Cold means the butter underneath stays solid through rolling rather than melting into a slick, and thickened means most of the apples’ water is already locked into a starch gel before the roll ever sees heat. The dry layer is catching what escapes, not doing the whole job alone.
Look at the photo above and you can see all of it holding. The filling sits in clean defined bands between dough layers, the apple pieces are still recognizably apple pieces rather than mush, there is no gapping anywhere in the spiral, and the bottom of the roll is bread rather than pudding.
This is the same method I built for my Blueberry Lemon Sourdough Sweet Rolls, and apples are the harder test of the two. Blueberries burst on the stove and hand over everything they have at once, so what you see in the pot is what you get. Apples hold water inside intact cell walls right through the stovetop cook and keep giving it up in the oven, which means a filling that looked perfectly set going in can still release during the bake. That is exactly the liquid layer two is there to catch.
Ingredient Notes
Full amounts are in the recipe card at the bottom. These are the notes behind them.
Bread flour is the right choice and not an upgrade you can skip. The higher protein builds the gluten structure that holds a tall soft roll together under the weight of a wet filling. All purpose will give you a shorter, softer roll that squats in the pan.
Active sourdough starter needs to be fed, bubbly, and at its peak when it goes in. A sluggish starter means a long slow rise and a dense result, and there is no shortcut around this one.
Nonfat skyr or thick Greek yogurt is where the protein comes from. I use Siggi’s plain nonfat because it is thick and dry, which keeps the hydration predictable. Kirkland Signature organic is the tested alternative, and FAGE or Stonyfield both work. Runny yogurt will slack the dough.
Eggs and butter are what make this a brioche rather than a bread, and both need to be at room temperature so the butter incorporates smoothly instead of sitting in cold lumps.
Cornstarch appears in two places and does two entirely different jobs. In the apple filling it gels the liquid the apples release on the stove. In layer two it stays dry and powdery so it can absorb whatever the apples give off during the bake.
Granulated sugar in layer two, not brown sugar. This one surprises people. Brown sugar carries molasses, which brings water and hygroscopic invert sugars along with it, so it liquefies earlier and at a lower temperature than granulated does. A cinnamon roll can run all brown sugar in that layer because the dry layer is the only moisture in the filling. Set a wet fruit layer on top of it and you get brown sugar going to syrup at the same moment the apples start releasing, which is exactly the sliding the layers exist to prevent.

Choosing Your Apples
This matters more than it does in a pie, because a roll gives the filling nowhere to go if the apples collapse.
Granny Smith is the workhorse. It holds its shape through both the stovetop cook and the oven, and the tartness gives the caramel something to push against instead of disappearing into it.
Honeycrisp brings better flavor but softens more, so it belongs in a blend rather than on its own.
My preferred mix is two Granny Smith to one Honeycrisp, which gets you structure plus flavor.
Avoid McIntosh and Red Delicious entirely. They break down into applesauce, and applesauce inside a rolled dough is a wet smear rather than a filling.
Dice everything to a quarter inch and treat the rule rather than a suggestion. Larger pieces do not soften evenly on the stove, they create bulges that distort the swirl as you roll, and they tear the dough when you go to cut the log. Smaller pieces are the more common mistake and the more damaging one, because a smaller dice means far more cut surface for the same weight of apple, and cut surface is where liquid escapes. Go too fine and the apples give up their water almost immediately, break down before they have finished cooking, and leave you with something closer to a loose sauce than a filling with fruit in it.
Can I Use Cottage Cheese Instead of Greek Yogurt
Yes, and it works beautifully here. Cottage cheese is more neutral in flavor than skyr, which in a caramel apple roll is arguably an advantage, since nothing competes with the fruit and the caramel.
The swap follows the same convention I use in my High Protein Sourdough Hamburger Buns and High Protein Sourdough Dinner Rolls, where the cottage cheese and its blending milk together equal the weight of the yogurt they replace, so your total hydration never moves. The exact swap is in the notes on the recipe card.
Three things make the difference between this working and this being a lumpy disappointment.
Puree it completely smooth with no visible curds at all. This crumb is tight enough that lumps will show, unlike a pizza dough where they disappear into the texture.
Warm the pureed mixture briefly before it goes into the dough, the same as you would with the yogurt.
Use a thick brand and never a runny one. Good Culture and Nancy’s both run dry enough. If your cottage cheese is watery the dough will feel slack when you go to roll it out, and a short chill before rolling will serve you far better than adding extra flour.
I tested these rolls both ways. The cottage cheese version is every bit as soft, and the finished protein comes out effectively identical.
Making the Apple Filling
Make this first, and make it the day before if you can. It has to be completely cold before it touches the dough, because warm filling softens the butter layer underneath it and the whole assembly slides during rolling.
Why you macerate the apples first. This is the step most people skip and it is the one that determines whether you have a filling or a pan of dry apple pieces. Sugar draws water out of the apple cells through osmosis, and letting that happen in a bowl before the pan means the juice is already there when the heat starts. Skip it and you are asking the pan to pull the water out and evaporate it in the same ten minutes, which it cannot do, and you end up short on liquid.
Why the sugar amount is what it is. This filling is lightly sweetened on purpose, but not as lightly as you might be tempted to make it. Sugar in a fruit filling is doing three jobs at once, and only one of them is sweetness. It creates the liquid through osmosis, it holds that liquid against evaporation because it is hygroscopic, and it softens the finished gel because it competes with starch for water and raises the temperature at which the granules swell. Cut it too far and you do not just lose sweetness, you lose the liquid and you get a tight gluey gel clinging to dry apple pieces. I learned that the hard way on the first test batch.
Why the pan stays uncovered. The filling cooks uncovered from start to finish, and this is worth being stubborn about. A lid traps the steam coming off the apples and condenses it straight back into the pan, so nothing ever leaves and you finish the cook with more liquid than you had when you started. That extra water does not simply disappear later. It becomes liquid the cornstarch has to thicken, which either means a filling that never fully sets or a filling that needs so much starch it turns dull and pasty. Leaving the lid off lets the moisture reduce as the apples soften, which is what you actually want, and it also keeps the mixture hot enough for the slurry to gel properly when it goes in, since a slurry stirred into something that is not truly at a simmer will thicken unevenly and then loosen again as it sits.
When to pull the pan, and why it never boils hard. Two things matter enormously once the pan is on the heat, and neither of them is the clock. The first is that the apples come off while they still hold their shape and still have some bite left. Apples do not stop at soft, they keep going, and every extra minute past that point releases more liquid and breaks down more structure, so what started as a filling with fruit in it turns into a loose sauce with fragments floating in it. The second is that the pan never goes to a hard boil. A rolling boil drives off the juice you spent thirty minutes drawing out of the fruit, which leaves you thickening a smaller and smaller amount of liquid, and it agitates the apples enough to knock the softened edges off them. A steady gentle simmer does everything a boil does without any of that.
Why the full cook time after the slurry matters. Undercooked starch is what causes weeping later, not insufficient starch. Give it the time even if it looks thick early.
Why the vanilla goes in off the heat. Vanilla extract is mostly alcohol and the aromatics ride along with it, so anything you add to a bubbling pan steams straight off.
Why you cool it flat on a sheet pan. A mound holds heat and keeps cooking itself in the middle, which gives you two different textures in one batch.
When it is properly cold, a spoonful should hold its shape on a plate without a ring of liquid seeping out around it, and it should still look glossy and spreadable rather than sliceable.
Fermenting the Dough
Why the dough rests before the butter goes in. Skyr and Greek yogurt hydrate flour more slowly than water or milk does. Skip that rest and you will be fighting a dough that feels far stickier than it actually is, and you will be tempted to add flour it does not need. Cottage cheese wants a few extra minutes on top of that.
Why the butter goes in a piece at a time. Fat coats gluten strands and interferes with their development. Adding it all at once means the dough never builds the structure it needs to carry a wet filling. Adding it gradually, after the gluten is already partly built, gets you both richness and strength.
What you are looking for at the end of the knead. Smooth, elastic, pulling away from the sides of the bowl, still slightly tacky to the touch. Tacky is correct. Sticky is not. It’ll continue to come together after that one stretch and fold after an hour rest.
What a finished bulk ferment looks like. Risen noticeably and feeling airy and alive when you press it, not merely bigger. The photo above shows the same bowl at the start and at the end, which is the visual to calibrate against.
Watch the dough, not the clock. The range on the recipe card is wide because bulk fermentation is governed by temperature far more than by time. Mine finished in about 6/7 hours in a 73 degree kitchen. A cooler house will stretch that considerably, and a warm one will get there sooner. A few degrees on your counter matters more than an hour on the timer, so read the dough rather than trusting the number.

How to Roll a Proper Rectangle
Everyone struggles with this and almost nobody talks about it. It is the same technique I teach in my croissant guide, and once you have it you will never fight a lopsided oval again.
Roll top to bottom, never side to side. Start with the pin in the center of the dough and roll away from you, then bring it back to the center and roll toward you. Rolling side to side is what turns a rectangle into a circle.
Then work the corners at 45 degrees. Set the pin in the middle of the dough on a diagonal and roll out toward each corner in turn. That is what squares the shape up rather than letting it round off, and it is what the angled arrows in the photo are showing.
Measure rather than eyeball. Keep a ruler on the counter and check as you go. The dimensions in the recipe card are not arbitrary.
Here is why they matter. The width of the edge you roll from determines the length of your log, which determines how many rolls you get and how thick each one is. The depth determines how many times the dough wraps around itself, which sets both the swirl count and the finished diameter. Four to five wraps is the number that actually reads as a spiral when you look at the roll. Fewer than four looks like a folded roll, and more than six compresses the layers into a single dark band. The depth also has to leave you a log narrow enough that three rolls fit side by side in a 9 by 13 pan with room to grow into each other during the proof.

Building the Three Layers
The mechanism is explained above. These are the technique details that decide whether it works in your kitchen.
Whip the butter, do not merely soften it. Butter that is only soft drags and tears the dough as you push it around. Whipped butter glides. This is a thirty second step with an outsized effect.
Leave a bare inch along the far edge. That gives you clean dough to seal the seam against. Filling in the seam means a seam that opens during the proof.
Do not stir the sugar layer in or spread it around. It has to sit on top of the butter dry and loose. The moment you press it into the fat you have made a paste, and paste cannot absorb anything.
Spread the apples gently. An offset spatula and a light hand, so you are not dragging the sugar layer around underneath as you go.


Your filling should cover the sheet comfortably with no bare patches and no careful rationing to reach the corners. If it looks sparse, that is the sign you needed more of it, and the amounts on the card have already been increased from my first test bake for exactly that reason.
Shaping and Cutting

Build tension as you roll. Pull back toward yourself every few inches rather than simply rolling forward. Tension is what keeps the swirl layers defined instead of loose and floppy, and it is also what stops the rolls from unwinding in the pan as they proof.
Pinch the seam closed along its whole length, not just at the ends.

Cut with dental floss. Slide it under the log, cross the ends over the top, and pull. Even a very sharp serrated knife compresses the spiral as it goes through and squeezes filling out the sides, which is exactly what you spent all this effort preventing.
Know when the proof is done. Puffy, grown into each other, and jiggling slightly when you shake the pan. Underproofed rolls bake up tight, and overproofed ones collapse and let the filling loose.
To bake in the morning, refrigerate the shaped pan overnight and let it finish proofing at room temperature before baking. There is a limit on how long, and it is on the recipe card, because this dough overproofs past it.
Baking

These bake uncovered. No tenting from the start. The three layer method is already handling moisture from the inside, so there is nothing to gain by trapping steam on the outside, and covering the pan early only costs you color and keeps the sugar layer from caramelizing at the edges.
Foil is a rescue, not a step. If the tops are getting darker than you want in the last 5 to 10 minutes, lay a sheet of foil loosely over the pan. Do not seal it around the edges or crimp it down, because a sealed tent traps steam and softens the crust you just spent half an hour building. Laid on loosely it shades the tops while still letting moisture escape.
Why you take a temperature. This is the one that saves you. Enriched doughs with a wet filling look done well before they are, and a golden top over a doughy center is the most common way these go wrong. Mine needed the full stretch of the window on the card to reach 190 degrees in the middle, which was longer than the tops suggested. Start checking early and keep going until the center rolls read temperature, because the outer ones will always run ahead of them.

Choosing Your Glaze

There are three finishes on the recipe card and they turn these into three fairly different things. This is how to pick.
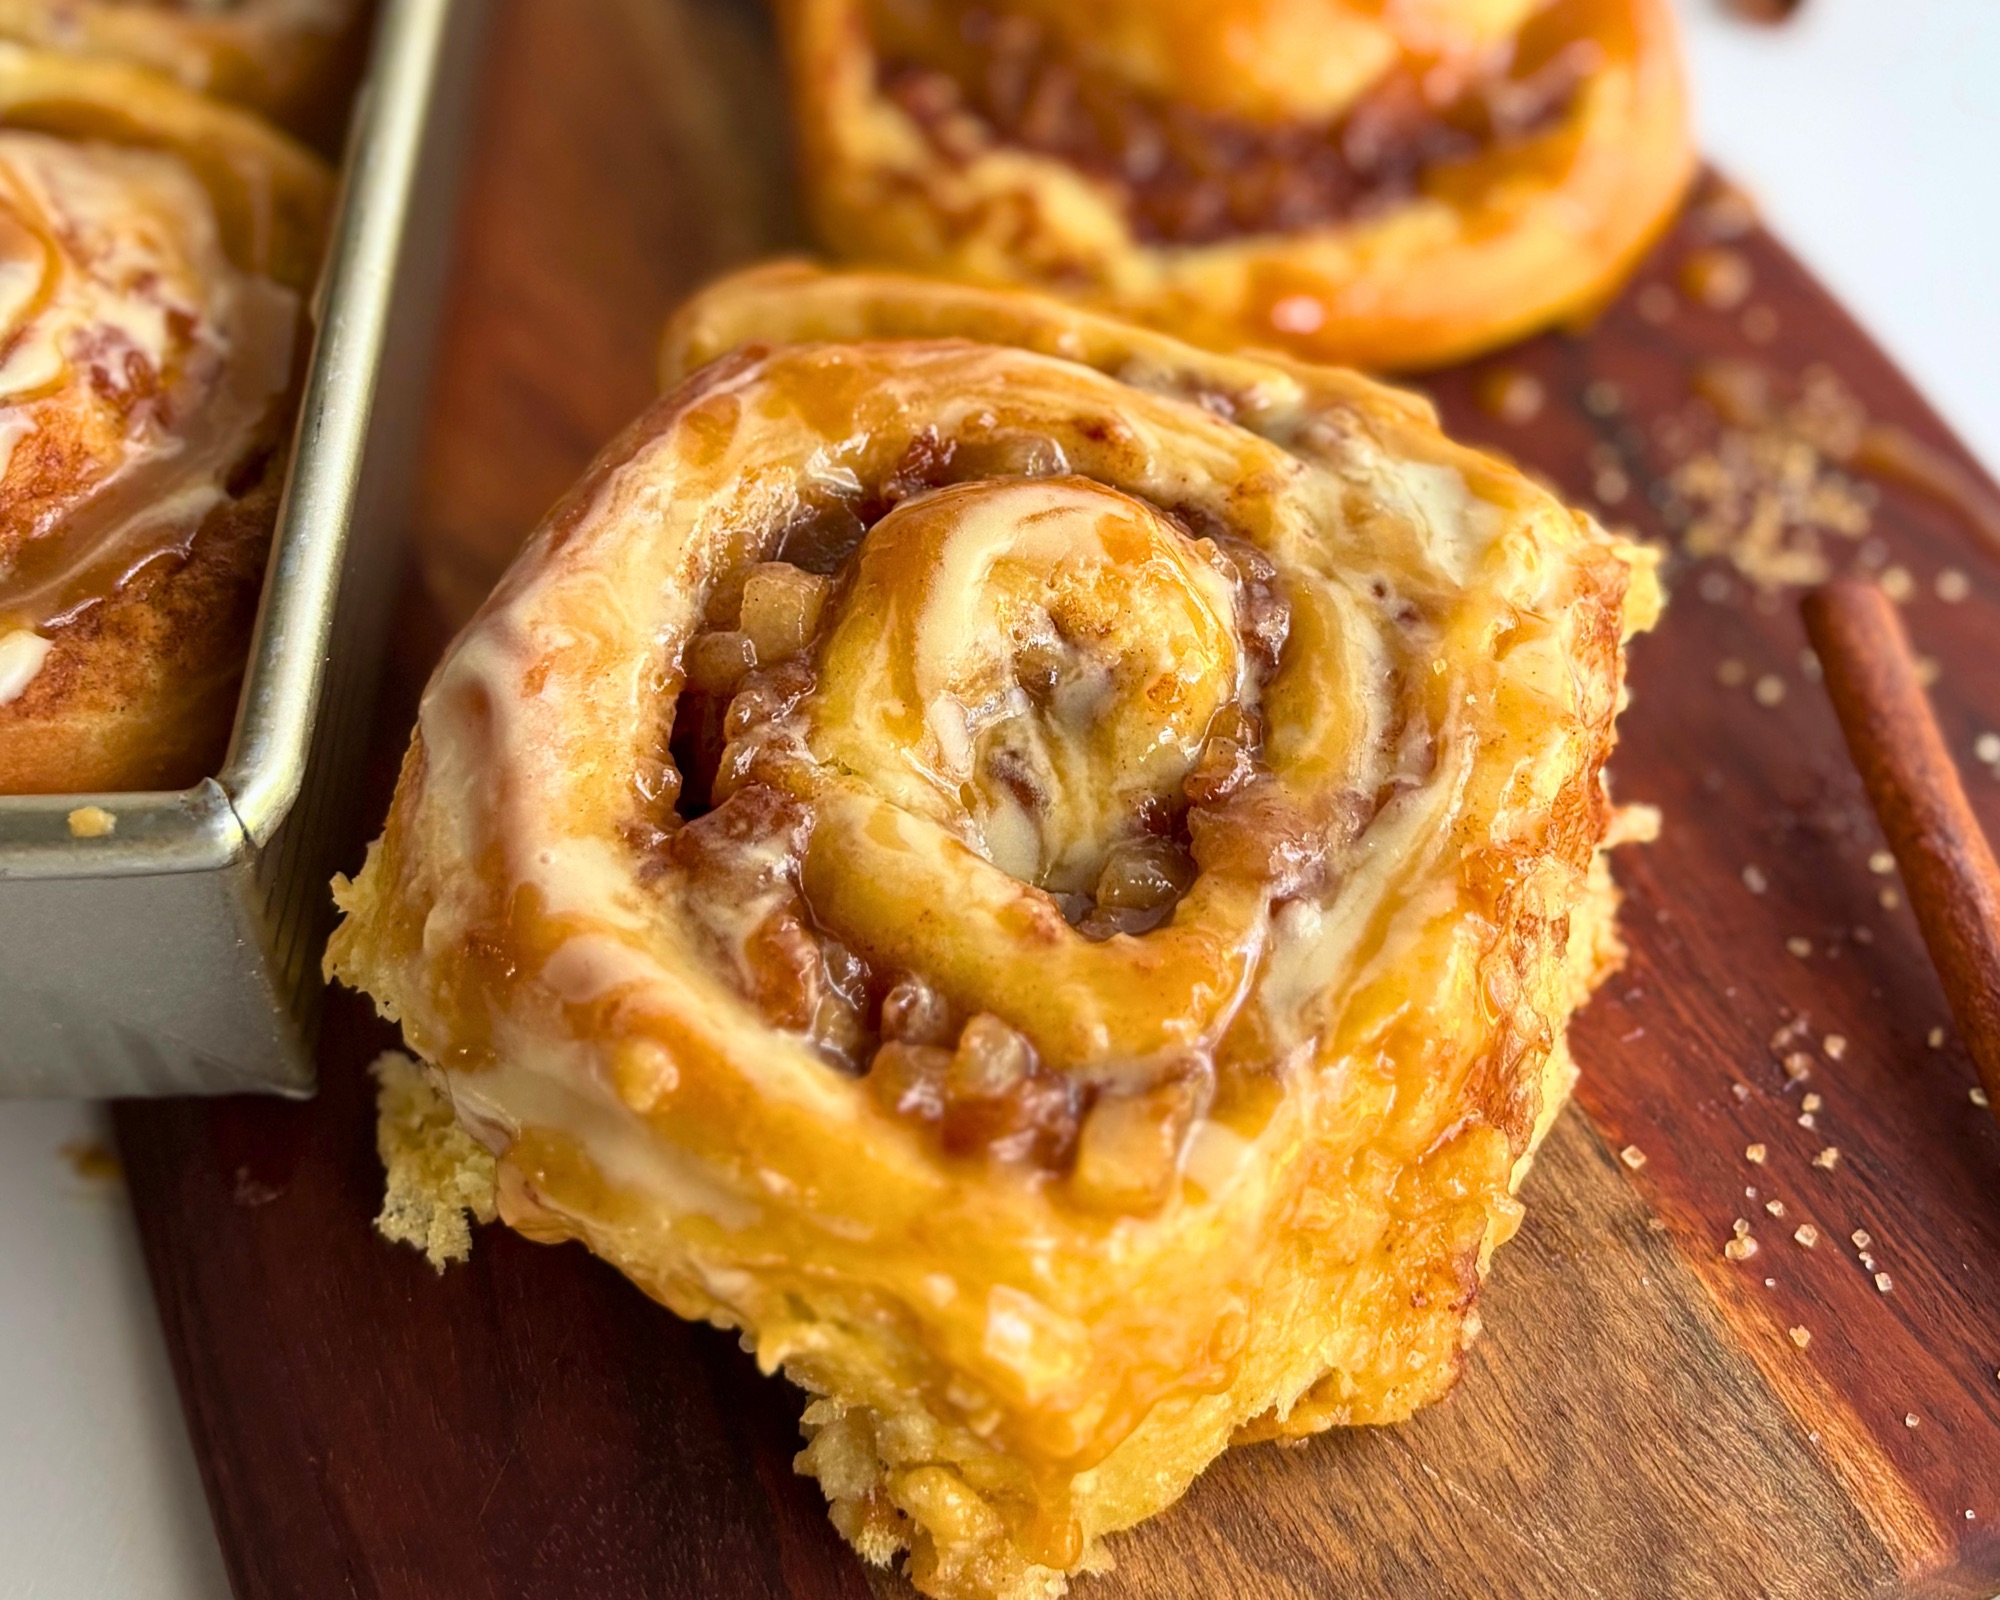
The caramel glaze is the standard and the one pictured throughout this post. Caramel goes into the glaze itself and more gets drizzled over the top, so the caramel reads as caramel rather than as a vaguely sweet coating. It tints the glaze a soft tan, which costs you a little contrast against the drizzle. This is the dessert version.
The simple vanilla glaze leaves the caramel out and lets all of it be the drizzle on top. You get the whitest finish and the strongest contrast against the amber filling, which is the version I would choose if I were photographing these.
The Greek yogurt caramel glaze swaps most of the fat for nonfat skyr, the same approach I use on my Blueberry Lemon Sourdough Sweet Rolls. It drizzles almost identically to the standard version, it brings the sugar down noticeably, and it adds a little protein to the top of a roll that already has plenty in the crumb. If you are making these for a weekday breakfast rather than a dessert, this is the one.
Two things apply no matter which you choose.
Everything goes on warm, not hot. A glaze poured over a hot roll soaks straight in and vanishes instead of setting on the surface, and your caramel needs to be at room temperature or barely warm when it goes into the glaze, because warm caramel thins it and then stiffens as it cools.

And the whole thing is optional. These are genuinely good bare, and that is the version I reach for on a weekday.
Expert Tips

Cold filling is not a suggestion. Warm Room temperature filling melts the butter layer underneath it, and once that happens the whole assembly slides during rolling and you lose the spiral.
Dice small and dice evenly. A 1/4 inch dice distributes. A 1/2 inch chunk creates a lump that pushes the dough layers apart and can condense them
Do not let the filling reduce too far. The apples spend a while in an uncovered pan, and everything that evaporates concentrates the same amount of starch into less liquid. Cook to the look rather than the clock, and pull it when it is glossy and coating the spoon with the apples still holding their shape.
Weigh everything. This is an enriched dough with a wet filling and there is very little margin in it. A scale is the single biggest upgrade you can make to your baking.
If the dough fights you at rolling, chill it. Fifteen minutes in the refrigerator relaxes the gluten and firms the butter, and it will do far more for you than dusting on extra flour ever will.
Storage and Freezing

Room temperature. Covered on the counter for up to 2 days. These are best the day they are baked, which is true of every enriched roll and not a flaw in this one.
Refrigerator. Up to 5 days in an airtight container. Warm individual rolls briefly before serving, because cold butter in the crumb makes them taste dense.
Freezing baked rolls. Wrap individually and freeze for up to 3 months. Thaw at room temperature and warm briefly in the oven. Would recommended keeping the icing until defrosting
Freezing before baking. Shape the rolls, arrange them in the pan, cover tightly, and freeze before the final proof. When you want them, let the pan thaw and proof at room temperature for 4 to 8 hours before baking. Glaze fresh either way, since glaze does not freeze well.
Frequently Asked Questions
Can I use all purpose flour instead of bread flour?
You can, but the rolls will be shorter and softer and they will not hold the wet filling as well. If all purpose is what you have it will still work, it just will not give you the same structure. You may need to add extra. Start with 1 Tablespoon at a time.
Why is my filling running out during the final proof?
Almost always one of two things. Either the filling was not completely cold when it went onto the dough, or the apples were diced too large and created gaps the liquid could travel through. The sugar and cornstarch layer is what catches this, so make sure it went on dry and unstirred.
Can I skip the cornstarch in the sugar layer?
I would not. That is the moisture barrier and it is doing the actual work of this method. Without it you have a butter layer and a wet filling and nothing in between them. You can replace the cornstarch with arrowroot powder. I have not physically tested it, but it has worked for others.
Can I assemble these the night before?
Yes. Shape and cut the rolls, arrange them in the pan, cover, and refrigerate overnight within the window on the recipe card. Pull the pan out in the morning and let it finish proofing at room temperature before baking.
How much protein is in each roll?
Right around 12 grams, the same neighborhood as the cinnamon rolls that share this dough. The full breakdown is on the recipe card.
What are the macros for these rolls?
Each roll on its own, before any glaze, comes in around 426 calories with 11- 12 grams of protein, about 13 grams of fat, and about 20 grams of sugar.
With the caramel glaze poured over and the caramel drizzled on top, a roll lands around 545 calories with about 16 grams of fat and about 44 grams of sugar. The protein does not change, since it all comes from the dough.
The reason I give you both numbers is that toppings are personal. Plenty of people will skip the glaze entirely, some will use the lighter vanilla version, and some will use the Greek yogurt version, so a single figure would be misleading no matter which one I picked.
For context, this is not a low calorie recipe and I would not sell it as one. Where these genuinely differ from a standard apple cinnamon roll is gram for gram, where they run roughly a third lower in both sugar and fat. That is not a substitute or a swap doing the work. There is more than twice the real fruit in these than most other recipes call for, and less of everything else. Calorie for calorie there is also about 25 percent more protein.
That protein sits at about 12 grams a roll and all of it comes from the dough itself. No protein powder, no sugar substitute, and no baking powder standing in for fermentation.
If you are deciding between this version and the same day yeast version, the two are nutritionally the same recipe, so choose on your schedule rather than on the numbers. This one ferments overnight, which some people find sits easier and has the benefit of natural fermentation, and the yeast version gets you there in an afternoon.
Can I make these without a sourdough starter?
Yes, and a same day yeast version is coming to the blog as its own post with its own photos. Check out the yeast variation of this HERE!
Can I make these without the caramel?
Absolutely, and the glaze is always optional anyway. There is a simple vanilla glaze and a higher protein Greek yogurt version on the recipe card, and these are genuinely good with nothing on top at all if you want them to eat more like a breakfast pastry.
What can I do with leftover apple filling?
Spoon it over ice cream or yogurt, stir it into oatmeal, or use it the way I did in my Apple Pie Sourdough Cookies.
More Recipes You Will Love

High Protein Sourdough Cinnamon Rolls with Greek Yogurt uses this exact dough with a classic cinnamon sugar filling, and it is the place to start if you have not made this base before.
Blueberry Lemon Sourdough Sweet Rolls is where the three layer filling method was developed, built around a jammy blueberry compote and a lemon cream cheese glaze. There is a same day yeast version of that one as well.
Caramel Apple Pie Pull-Apart Focaccia is the viral one from my Idle Hands series, with the same apple and caramel pairing in a completely different format.
Sourdough Apple Pie Brioche Swirl takes spiced apple filling into a loaf shape rather than individual rolls, using a classic brioche rather than the high protein base.
High Protein Sourdough Dinner Rolls and High Protein Sourdough Hamburger Buns are the savory side of this same yogurt and cottage cheese base.
Apple Pie Sourdough Cookies uses a close cousin of this apple filling under a buttery sourdough cookie.
Recipe

Caramel Apple Sweet Rolls High Protein Sourdough
Equipment
- – Stand mixer with dough hook
- 9×13 inch baking pan
- Digital Kitchen Scale
- Instant read thermometer
- Rolling Pin
- Offset spatula
- Unflavored dental floss
Ingredients
For the Apple Filling
- 540 grams apples peeled and diced into 1/4 inch pieces (about 4 medium apples, 4 1/3 cups diced)
- 55 grams light brown sugar packed (1/4 cup)
- 12 grams fresh lemon juice 2 1/2 teaspoons
- 60 grams water 1/4 cup
- 18 grams unsalted butter 1 1/4 tablespoons
- 2.5 grams ground cinnamon 1 teaspoon
- 1 gram fine salt 1/4 teaspoon
- 0.6 grams ground nutmeg 1/4 teaspoon
- 0.5 grams ground ginger 1/4 teaspoon
- 17 grams cornstarch 2 tablespoons
- 30 grams cold water for the slurry (2 tablespoons)
- 6 grams vanilla extract 1 1/4 teaspoons
For the High Protein Sourdough Dough
- 560 grams bread flour 4 2/3 cups
- 140 grams active sourdough starter fed and at peak (generous 1/2 cup)
- 265 grams nonfat plain skyr or thick Greek yogurt slightly warmed (1 cup plus 1 1/2 tablespoons)
- 40 grams whole milk slightly warmed (2 tablespoons plus 2 teaspoons)
- 45 grams granulated sugar 3 1/2 tablespoons
- 2 large eggs room temperature
- 5 grams vanilla extract 1 teaspoon
- 9 grams fine salt 1 1/2 teaspoons
- 4 grams baking powder 1 teaspoon
- 75 grams unsalted butter softened (5 tablespoons plus 1 teaspoon)
For Layer One, the Whipped Butter
- 85 grams unsalted butter softened (6 tablespoons)
- For Layer Two the Sugar and Cornstarch
- 75 grams granulated sugar 6 tablespoons
- 14 grams cornstarch 1 3/4 tablespoons
- 5 grams ground cinnamon 2 teaspoons
- 1 gram fine salt 1/4 teaspoon
For the Caramel
- 100 grams granulated sugar 1/2 cup
- 30 grams water 2 tablespoons
- 45 grams heavy cream warmed (3 tablespoons)
- 22 grams unsalted butter 1 1/2 tablespoons
- 4 grams vanilla extract 1 teaspoon
- 1.5 grams fine salt 1/4 teaspoon
For the Caramel Glaze
- 180 grams powdered sugar 1 1/2 cups
- 70 grams cooled caramel from above (3 1/2 tablespoons)
- 30 grams whole milk or heavy cream 2 tablespoons
- 3 grams vanilla extract 3/4 teaspoon
- 1 gram fine salt 1/4 teaspoon
For the Simple Vanilla Glaze (variation)
- 180 grams powdered sugar 1 1/2 cups
- 50 grams whole milk or heavy cream 3 1/4 tablespoons
- 5 grams vanilla extract 1 teaspoon
- 1 gram fine salt 1/4 teaspoon
For the Higher Protein Greek Yogurt Caramel Glaze (variation)
- 113 grams full fat cream cheese room temperature (4 ounces)
- 60 grams nonfat plain skyr or thick Greek yogurt room temperature (1/4 cup)
- 70 grams cooled caramel from above (3 1/2 tablespoons)
- 90 grams powdered sugar sifted (3/4 cup)
- 5 grams vanilla extract 1 teaspoon
- 1 gram fine salt 1/4 teaspoon
- 15 to 30 grams heavy cream to consistency (1 to 2 tablespoons)optional
Instructions
Make the Apple Filling
- Toss the diced apples with the brown sugar and lemon juice in a bowl and let them sit for 30 minutes at room temperature. The sugar draws liquid out of the apples during this rest, and that liquid is what becomes the filling.
- Scrape the apples and all of their accumulated juice into a saucepan. Add the water, butter, cinnamon, salt, nutmeg, and ginger.
- Cook uncovered over medium low heat for 6 to 8 minutes, stirring occasionally, until the apples have just begun to soften but still hold their shape and still have some bite. Keep it at a gentle simmer rather than a hard boil, and do not put a lid on it at any point. Apples that are cooked past this point keep releasing liquid and start breaking down, and a hard boil drives off the juice you are trying to keep.
- Whisk the cornstarch into the cold water until completely smooth. Bring the apples up to a steady simmer, still short of a rolling boil, then stir in the slurry.
- Cook for 3 minutes, stirring, until the mixture is thick and glossy and the starch has lost any raw edge. Do not stop as soon as it thickens, and do not let it boil hard while it finishes.
- Remove from the heat and stir in the vanilla. Spread the filling out on a sheet pan to cool quickly, then refrigerate until completely cold and firm. This can be made a full day ahead and it must be cold before it touches the dough.
Mix the Dough
- Combine the bread flour, starter, skyr, milk, sugar, eggs, and vanilla in the bowl of a stand mixer and mix on low until no dry flour remains. Cover and rest for 15 to 30 minutes.
- Add the salt and baking powder and knead on medium low for about 5 minutes.
- Add the softened butter a piece at a time, waiting until each addition disappears before adding the next. Continue kneading for 8 to 10 minutes until the dough is smooth, elastic, and pulls away from the sides of the bowl while still feeling slightly tacky.
- Cover and bulk ferment at room temperature for 6 to 10 hours, until the dough has risen noticeably and feels airy and alive when pressed. In a 73 degree kitchen this takes about 6 to 7 hours. Cooler rooms take considerably longer, so watch the dough rather than the clock.
Roll and Fill
- Turn the dough out onto a lightly floured surface and roll it into a rectangle roughly 12 inches wide by 18 inches deep, with the 12 inch edge closest to you. Roll away from you and toward you from the center rather than side to side, then roll from the center out to each corner on a diagonal to square up the shape.
- Whip the softened butter until light and spreadable, then spread it across the entire surface of the dough, leaving a bare inch along the far edge.
- Whisk the granulated sugar, cornstarch, cinnamon, and salt together, then sprinkle the mixture evenly over the butter. Do not stir it in and do not spread it. It needs to sit on top of the butter dry.
- Dot the chilled apple filling across the surface with an offset spatula and spread it thin and even, working gently so you do not drag the sugar layer underneath. Take it to the edges on three sides and stop at the bare inch at the top.
Shape and Proof
- Roll the dough up from the long edge closest to you, pulling back toward yourself every few inches to build tension. Pinch the seam closed along its whole length.
- Cut the log into 12 rolls at roughly 1 inch each using unflavored dental floss. Slide the floss under the log, cross the ends over the top, and pull.
- Arrange the rolls in a parchment lined 9×13 pan, three across and four down. Cover and proof at room temperature for 1 1/2 to 3 hours, until puffy, grown into each other, and jiggling slightly when the pan is shaken.
Bake
- Bake uncovered at 375 degrees Fahrenheit for 30 to 35 minutes, until deep golden on top and 190 degrees internal in the center rolls. Start checking the temperature at 30 minutes and keep going until the center rolls reach 190, since the outer ones always run ahead. If the tops are darkening faster than you want in the last 5 to 10 minutes, lay a sheet of foil loosely over the pan without sealing it around the edges.
Make the Caramel
- Combine the granulated sugar and water in a microwave safe bowl and microwave for 3 to 3 1/2 minutes, watching closely, until the mixture turns amber.
- Carefully stir in the warmed heavy cream, which will bubble aggressively. Once the bubbling settles, stir in the butter, vanilla, and salt. Let it cool to room temperature or barely warm.
Glaze and Finish
- Whisk the powdered sugar and salt together, then whisk in 70 grams of the cooled caramel until completely smooth. Add the vanilla, then thin with the milk a few grams at a time until it pours in a steady ribbon rather than sitting in a lump.
- For the simple vanilla glaze variation, whisk the powdered sugar, milk, vanilla, and salt together until smooth and leave the caramel out entirely so all of it becomes the drizzle.
- For the higher protein Greek yogurt glaze variation, beat the cream cheese and skyr together until completely smooth, about 2 minutes, since any lumps left at this stage will still be there at the end. Beat in the caramel, then the sifted powdered sugar, vanilla, and salt. Add the heavy cream a tablespoon at a time until it drizzles rather than spreads.
- Let the rolls cool until warm rather than hot, then pour the glaze over the pan. Drizzle the remaining caramel over the top in ribbons and finish with a pinch of flaky salt if you like.
Notes
Never Miss a Recipe
If you made these, leave a comment below and tell me how they turned out, and how your apples behaved. I read every one.
Subscribe to get new sourdough and high protein recipes straight to your inbox, and come find me over on Instagram and Pinterest where I share the process shots that do not make it onto the blog.



Leave a Reply